iPhone Photography Tutorial – How To Create Awesome Abstract Art With iPhone Photography
Our new mobile photography tutorial section is in full swing and we’ve received much acclaim from the mobile photography community, thanks to all. If you’ve missed our previous tutorials you can read them here. My A Day In The Life article was published by Joanne yesterday and if you missed that you can read it here.
I wanted to create a tutorial on this image that I have titled ‘A Boy With His Head in the Clouds #2’. It has proven to be a very popular image. It was featured in the LACDA show on April 12, in downtown LA at the Los Angeles Center for Digital Art, as organised by Mobile P1XELS and of course Knox Bronson.
The final image is made up of several images and I have detailed the processes below. Read this easy to follow tutorial and see if you too can create a similarly wonderful shot. Links to apps used in this tutorial is at the end of this article.
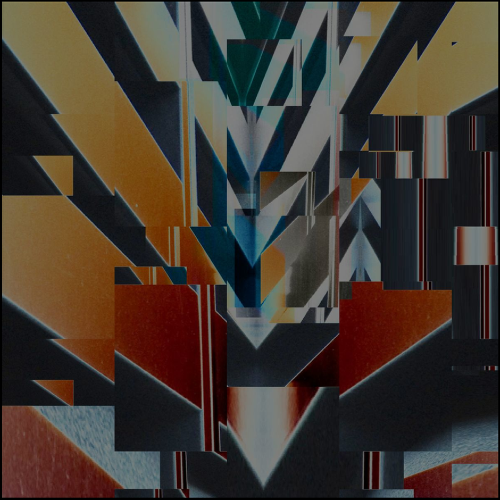
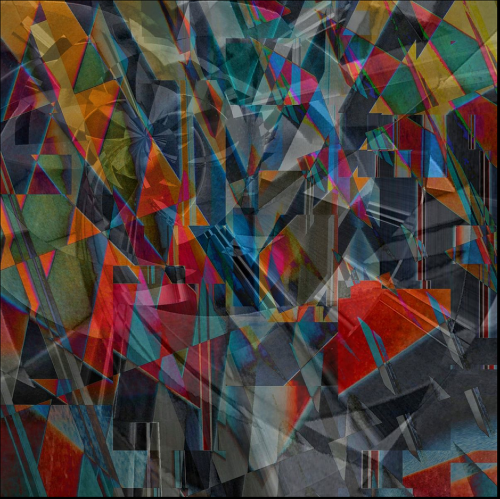
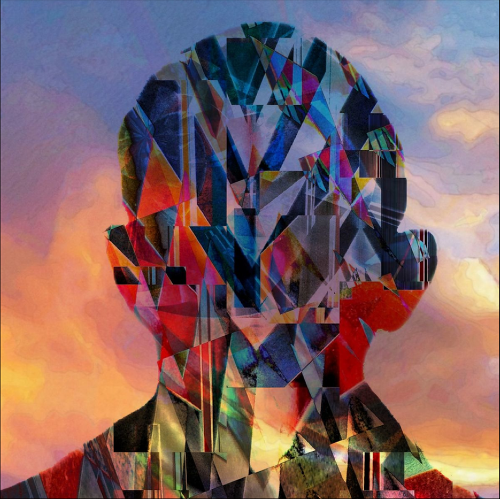
Final Image
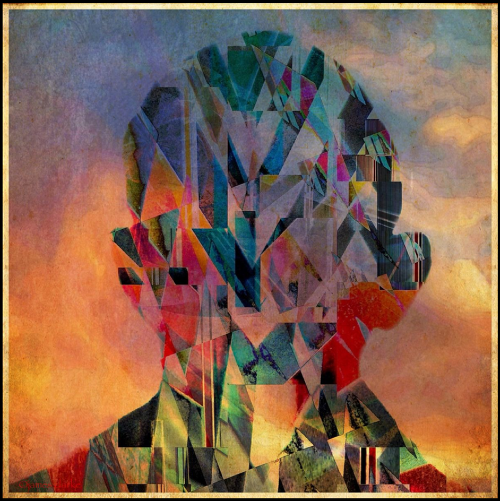
This is the final image, the one that I am going to show you how to create.
Step 1

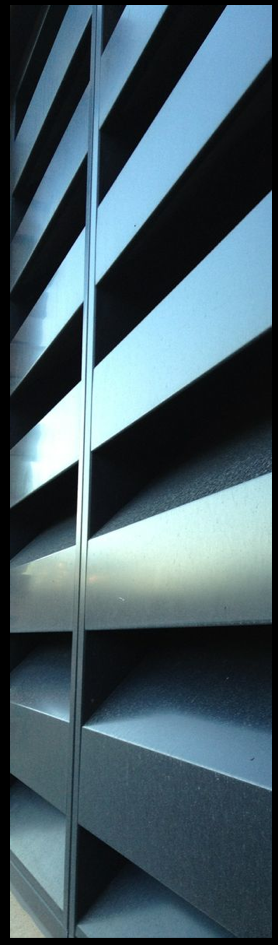
This is a shot I took of a vent from a hotel here in Boulder, CO. I was walking to the parking ramp & stopped to shoot this just because it looked interesting at the time.
Step 2
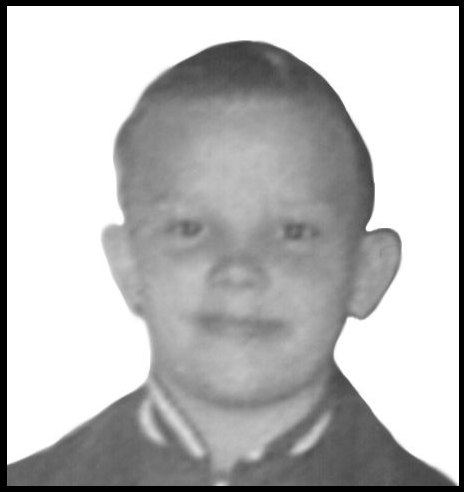
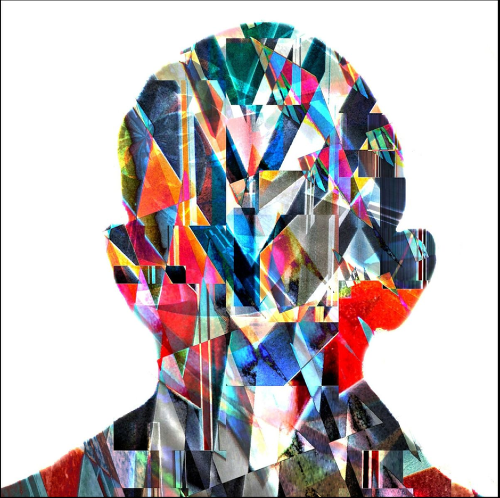
This is me at about 8-years old. I took a shot of an old print (with my iPhone) that I found in a box of stuff I got from my mother.
Step 3
I liked the metal part better than the stone, so I cropped it (pretty much any app with cropping capabilities will do here…
Step 4
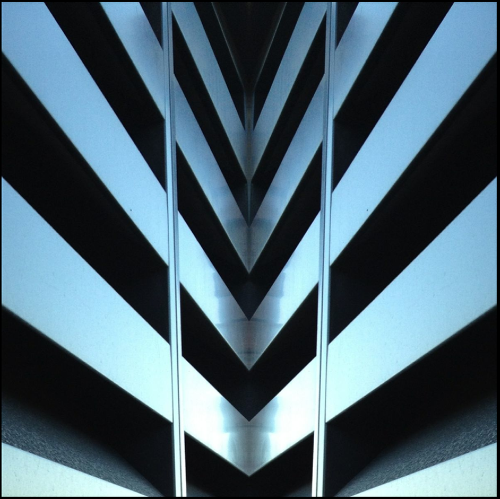
I opened the image in Diptic to create a little “mirror image” magic.
Step 5
I then put the Step 4 image through some more Decim8 magic. Since I don’t know your security clearance, I can’t divulge the specific Decim8 filters, plus I’m not sure I remember.
Step 6
This is the original step 4 image put through some more Decim8 magic…I then saved the image.
Step 7
I then opened Image Blender and added Images from Step 5 and Step 6. While in Blender, the image from Step 6 was tilted using the arrange function. I saved the image.
Step 8
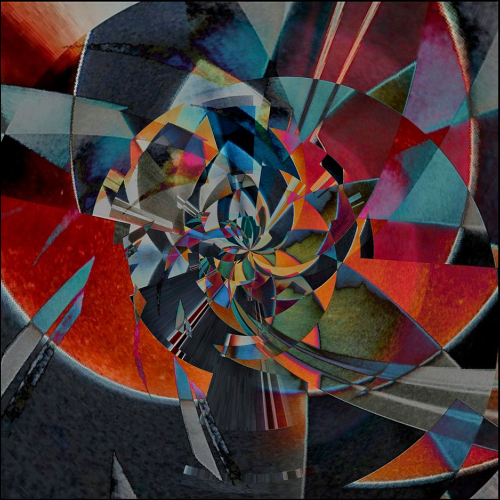
Next, I opened the Image from Step 5 and ran it through “Tiny Planets”. Then I saved it.
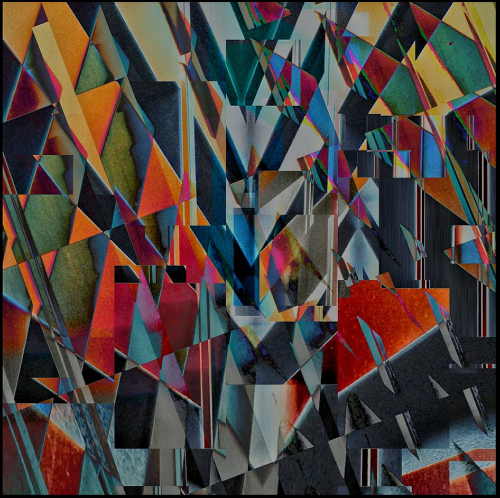
Step 9
Next, I selected Images from Steps 7 and 8 and combined them using “Image Blender”. I saved the image.
Step 10
I then opened the Image from Step 9 and tweaked a bit with “Snapseed” using the “Tune Image” and “Details” filters. I saved the image.
Step 11

Then I combined Images from Steps 10 and 11 “Image Blender” using the “Color Dodge” blending mode and saved the image.
Step 12
I then cleaned up image using the cloning function in “TouchRetouch”. I could have used a Paint app here, but I wanted to keep the resolution the same as the original.
Step 13
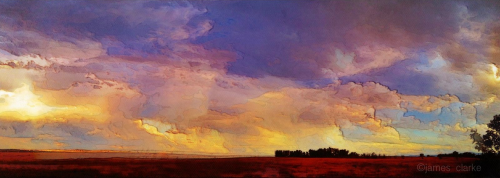
This is “Clouds #14” from my series of Cloudscapes (currently up to Clouds #142). I combined this shot with the image from Step 12 using Image Blender. The trick here is to load the larger clouds image on the bottom right “load position” in Blender so you can adjust the size and position. I did this until I found the right area to act as the background.
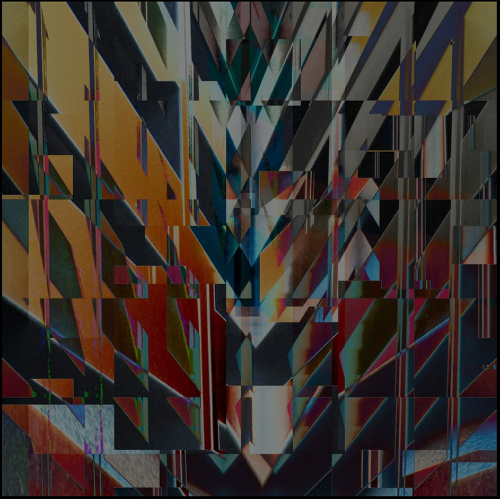
Step 14
This is the result of combining Step images 12 and 13 using Image Blender.
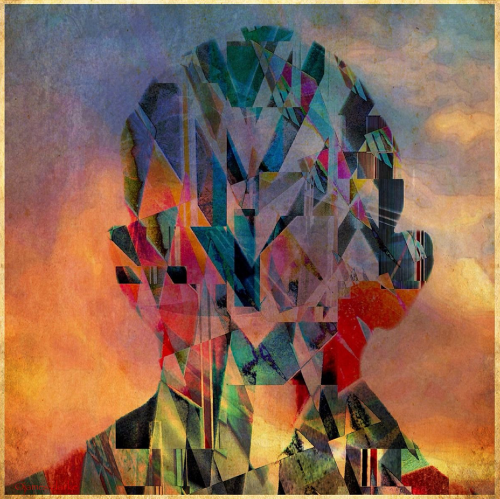
Step 15
With square-format images, I often like to have a minimal border, so I added a thin white border using Camera+. I used Camera+ for this because it adds the border to the outside of the existing image. Most other apps will place the border over the existing image which will effectively “crop” the image a bit.
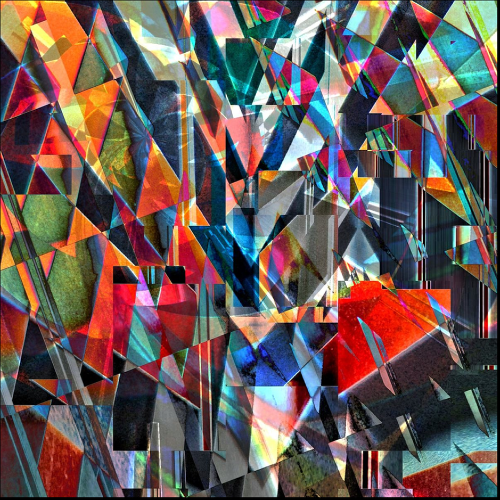
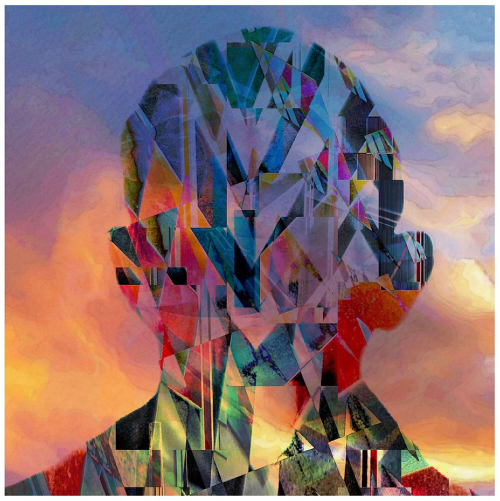
Final Image
A white border is somewhat harsh here, so I ran the image through Pic Grunger with the strength setting all the way down to zero to grunge up the border. A final run through ScratchCam for the final look I wanted and I decided to call it a day…
Here is that awesome final image again, quite an improvement from the original 😉
Links to All Apps Used In This Article
James Clarke
James Clarke received his Bachelor of Science (BS) and Master of Fine Arts (MFA) degrees from the University of Wisconsin/Madison. He taught Art in the Cheyenne, Wyoming and Madison Wisconsin Public School Systems prior to establishing himself as a professional Artist founding the James Clarke Glass Studio. James produced a line of blown glass perfume vials, vessels, and sculptures until the late 1990′s (see www.jamesclarke.com). After a brief detour out of the Art business, James returned to the creative arts with the establishment of the online business PopArtMagic.com, where he transforms client’s favorite photographs into pop art renditions printed on canvas via large format screen printers. During this time, he was introduced to iPhone photography. In the relatively short time this Art form has existed, James has had national and international recognition for his work. His iPhonography has been included in several photographic competitions including iWorld at the Colorado Photographic Arts Center, the 1st annual iPhoneography Miami 2012 Show in Miami, FL, the Phone-ography show at the Arts Eye Gallery in Tucson, "Mobile P1XELS" - The Fine Art of the iPhone at the Los Angeles Center for Digital Arts, and "Diverging Mediums" at the Torpedo Factory in Alexandria, VA.

3 Comments
Carol
Bravo & applause James!!! This is indeed quite a unique and beautiful work of art. Sincere thanks to you and Joanne for the “How To…”
Pingback:
Andy (Molzography)
Stunning! Already noticed this at Flickr a while ago. I had no idea how you pulled this of, glad you shared it with us! 😀