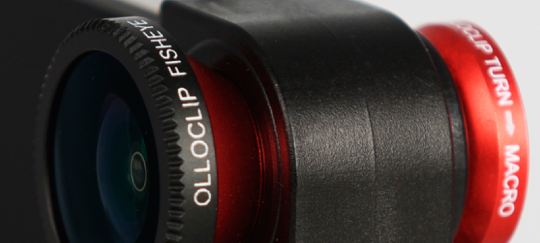
Olloclip – Tutorial And Excellent Tips Using The Fisheye Lens
The Olloclip lens system consists of three lenses. A wide-angle, fish-eye and a macro lens. The Fisheye lens captures approximately a 180 Degree field-of-view and produces some striking images.
When shooting interior shots, the primary concern is almost always light – usually will there be enough of it. The second consideration is the size and scope of the interior that you are trying to capture. Whether it is the inside of a cathedral with beautiful high ceilings or a room that you like, you will often find that with the standard iPhone camera, you aren’t always able to capture the full scope or the place that you’re in, without taking multiple images of it and then stitching them together, which may not always work out.
This is a situation where a fisheye lens can come in handy, as it will allow you to capture a much wider area than the standard camera and allow you to do it with just one shot, so if pressed for time or taking a picture in a public place where time and people passing through the environment can influence the image, you may only have chance to do one shot, so getting the most out of that is your best opportunity.
You can of course use a fisheye to create interior panoramas but I have found that due to the distortion that the lens adds and the amount of straight lines in a building, stitching the images together again afterwards can at times be problematic.
For the purpose of this tutorial, I decided to capture the inside of a beautiful old church located in the centre of Prague.
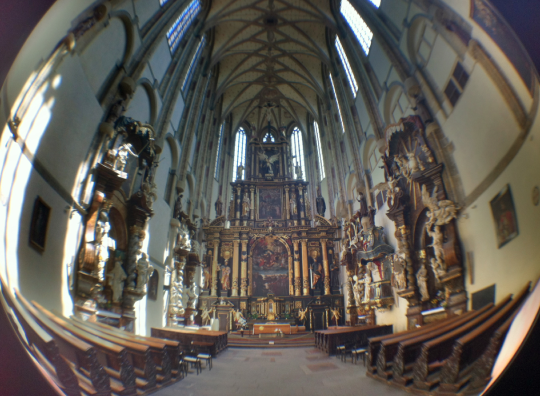
Final Image
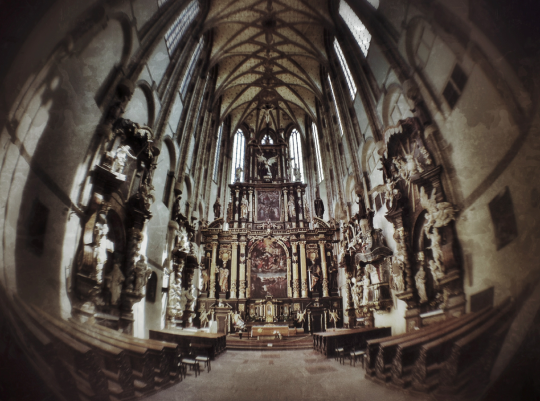
Copyright image – Andrew Proudlove – ‘Church `interior – final – Fisheye’
This Is My Final Image Of The Interior Of The Church With The Olloclip Fisheye Lens
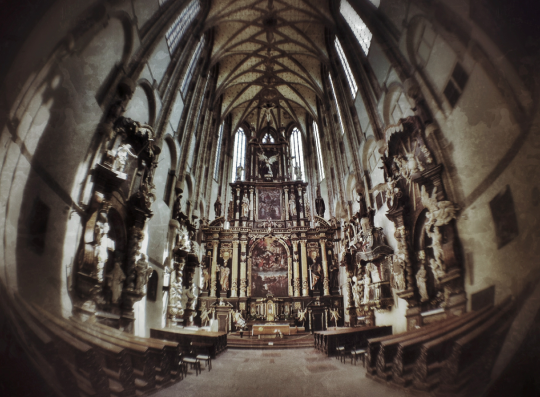
Set-Up
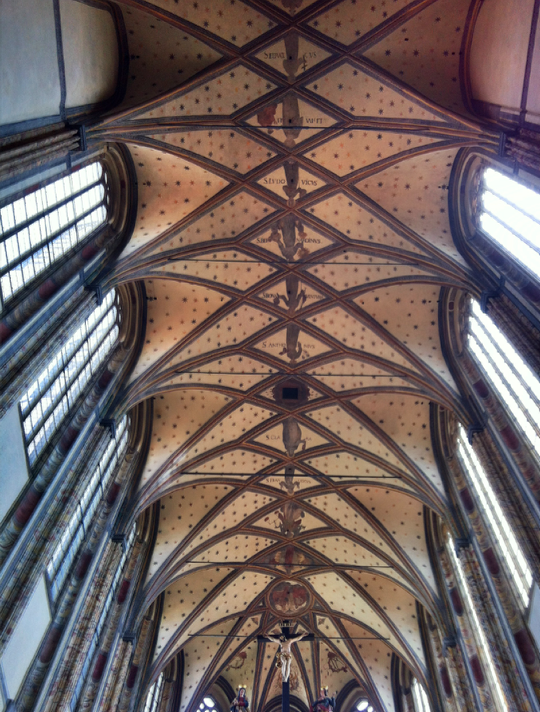
Copyright image – Andrew Proudlove – ‘Church Interior Without – Fisheye’
First things first, if at all possible try to scout your locations. I had been to this church a couple of times before and so I knew to expect tourists passing through, I also knew that there was a guard who wasn’t too keen on people taking photographs and that the best light was actually around midday when there would be enough light getting in through the windows to make things a little easier. It also meant that the guard would be at lunch 🙂
Capturing The Image – Tips
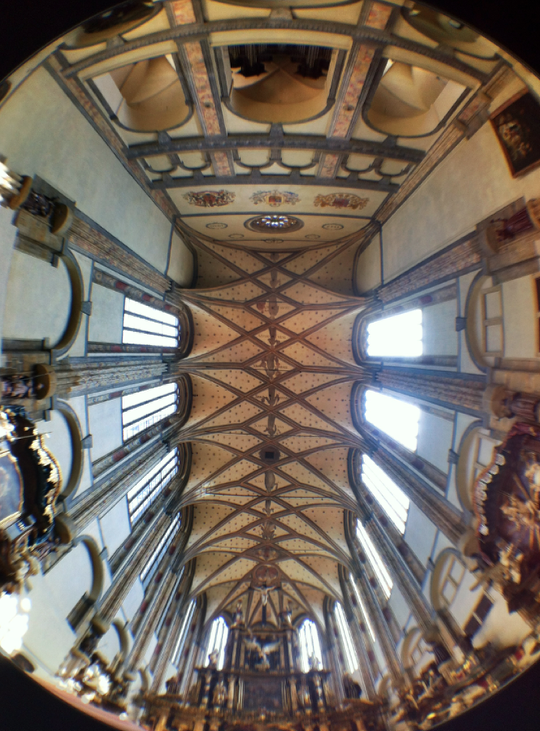
Copyright image – Andrew Proudlove – ‘Church Ceiling Fisheye’
Again in situations like this, especially where the lack of light is against you, you will want to make yourself as steady as possible to avoid blur. However on this particular occasion due to the number of tourists and the space available in the church, I wasn’t able to use a tripod. There are some things that you can do to make the most of things though;
1) I set my phone to airplane mode, I didn’t need the ringing or vibrating either drawing attention to me or the vibration ruining the shot.
2) The next thing to do, is to either use a camera app such as Camera+ or Pro Camera, that allows you to control focus and exposure or something that will allow you to capture the light and shadow, such as an HDR app like Pro HDR. In my case I used a combination of Bracket Mode and Pro Camera.
3) Next if you have something solid to brace yourself against or to put your iPhone on, consider using the self-timer and set it to something like 3 seconds (if the app has it). This way when you press the shutter release, your iPhone has chance to stop vibrating before it takes the picture resulting in a sharper image.
4) If you don’t have a support of some kind, use the stabilizer option of your camera app, both Camera+ and Pro Camera have this, as it will ensure that you get the sharpest picture that you can.
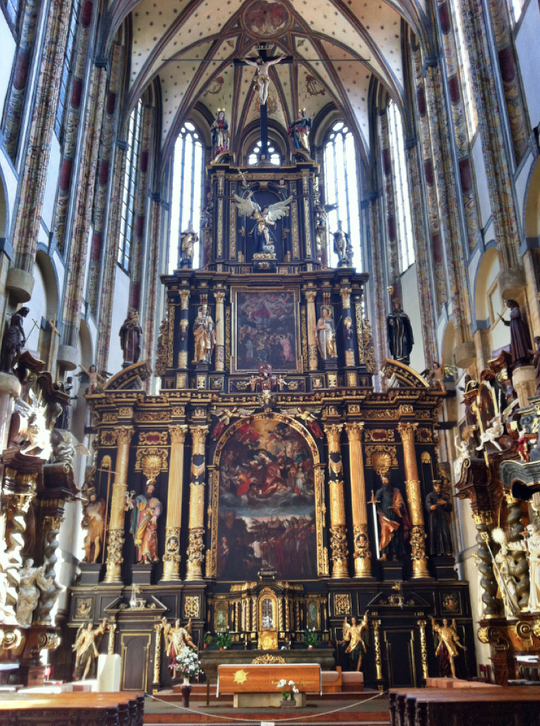
Copyright image – Andrew Proudlove – ‘Church Ceiling Without Fisheye’
5) In large places, such as church interiors, the space is too large for the iPhone flash to make a difference, so turn it off if you have it set to automatic.
6) Remember to aim your camera slightly up as due to the fisheye attached to it, you will capture your feet too, if you aim directly ahead. Also bear in mind the walls if your are photographing something in the foreground as the lens will cause the side walls to fall inwards, so position your camera accordingly to take best advantage of this.
7) If taking a picture of a ceiling, try and get as close to the centre of the ceiling (or the area of the ceiling that you want to capture as you can. This will ensure that the walls slope in symmetrically to your subject and guide the eye towards it. Otherwise the image will just look lop-sided.
8) Once you press your shutter release and keep as still as you can for a second more than you think you need. Ive found in the past that I have sometimes moved a split second after pressing the shutter and ended up with a blurry image as the app wasn’t done with the capture.
9)Once you’ve taken the image, take another, better safe than sorry.
10) Always make sure to look around you carefully, especially in these old buildings, often there are other details besides the focal point in the room, such as the ceilings, so remember to look up too 🙂
My Process
Copyright image – Andrew Proudlove – ‘Church Interior Fisheye’
For this particular image, these were my steps.
1. I put the Olloclip fisheye lens onto my iPhone and launched Bracket Mode, the reason I wanted to use this app to start with was because it does two exposures, one light and one dark that can be combined later into an HDR app and it does them very quickly.
2. I pointed my iPhone at the altar and raised it’s elevation slightly to avoid capturing my feet in the image and to allow the columns, church walls to taper towards the top centre and hit the capture button.
3. Next I moved the iPhone up some more until the ceiling was visible and a repeated the process.
4. Glancing around I saw that I still had some time, i.e. no tourists or personal, so I closed Bracket Mode, removed the fisheye and launched Pro Camera, to do some comparison photos of the image without the fisheye lens.
5. Using Pro Camera’s expert mode, I tapped to focus on the altar and then moved the exposure around until I got a look that I was happy with, in this case I was trying to get some good shadows but still keep some of the highlights. Once I had captured the altar, I repeated the process with the ceiling.
6. From there I launched ProHDR and choose its HDR from Library option and combined the images into a HDR shot.
7. Next I took the image into Snapseed and added a slight drama filter to it and saved.
8. Although the resulting the image looked good, it still didn’t look finished, as it looked a little brighter than what I had saw and I wanted to add a little more shadow and tone to the image overall.
9. So I went back into Snapseed and into Tune Image and reduced the brightness of the image and then saved.
10. Then I went into Image Blender and blended that image with the lighter one. This looked better but the blur on the edge of the image caused by the fisheye was too distracting in this case. However I didn’t want to lose the light from the windows by cropping it, so I went back into Snapseed.
11. Once there I added a vignette to the image and a very slight grunge texture (by reducing the strength), to get the final image.
Copyright image – Andrew Proudlove – ‘Church `interior – final – Fisheye’
Here is my final stunning image once more.
The Olloclip Lens System
If you are interested in purchasing an Olloclip and we would highly recommend it, Apple sell them in their online stores, you can go here to view or order.
Andrew Proudlove
Andrew Proudlove is an enthusiastic and very talented mobile photographer based in beautiful Prague, in the Czech Republic. Andrew studied Software Engineering at university in England and practiced sketching and computer art in his spare time. After living and working in America he returned to Europe, delivering IT support in a newsroom for a TV station in the Czech republic before moving to an IT manager’s role at a law firm. Andrew has had his work featured in P1xels, as part of the Mobile Photography Awards weekly review and on other websites and has been voted Artist of the day at iPhoneArt.com

4 Comments
David
Great images Andrew!!! Love the tutorial! I haven’t put the fisheye lens thru its paces yet…I’ll have to do so now!!
sara McCracken
nice tutorial!
Pingback:
Pingback: