Olloclip Tutorial – Creating Abstract Images With The Olloclip Macro Lens
The Olloclip lens system consists of three lenses. A wide-angle, fish-eye and a macro lens. The macro lens magnifies your image roughly around ten times. It allows you to get close to focus on your subjects with your iPhone, usually within 12 to 15 mm of your subject.
My instructions for this tutorial sounded like something from Mission Impossible….. “Mr. Hayes, should you accept this assignment you must create abstract images using only the Olloclip macro lens. Your images must show what is possible with this lens and not rely on your skills with apps….” (sorry about that David, actually sounds a bit like a James Bond assignment, J).
Okay…I’m up for the challenge! The way I see it, I could create abstracts using this great lens two ways…one by getting fabulous close-up images…the other using not only the Olloclip macro lens but also by doing a little app magic. (So maybe this isn’t within the mission’s parameters…but sometimes one just has to go outside the box!).
This tutorial isn’t really a “how-to” in the traditional sense. I’m going to show you what I came up with…and I’ll give you the names of the apps I used, but not how I used them. (I think you’ll be able to figure that part out yourself.)
You’ll need an Olloclip maco lens…and a tripod set-up of some sort…and you don’t really need to use the same apps I used. You do need a sense of fun and adventure ‘cause with macro photography, you never know…
Part 1 Using the Olloclip Macro lens…all by itself!
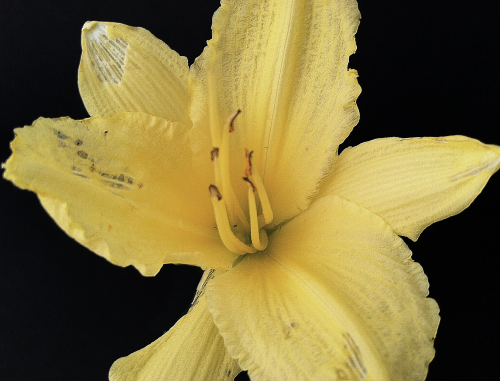
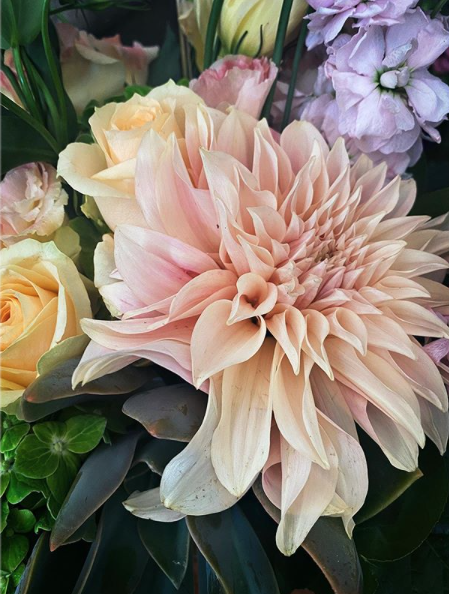
Let’s start with an overall image of a daylily I used for this demo. I cut this fresh from my garden and brought it into my studio. My iPhone4 is attached to my tripod and I’m using basic lighting. Nothing fancy. This image is taken as close as I can get it without using my Olloclip lens. (A side note here. All the images in this part have had only basic editing done to them: cropped square…adjustments for contrast and brightness…that sort of thing.)
Step 2
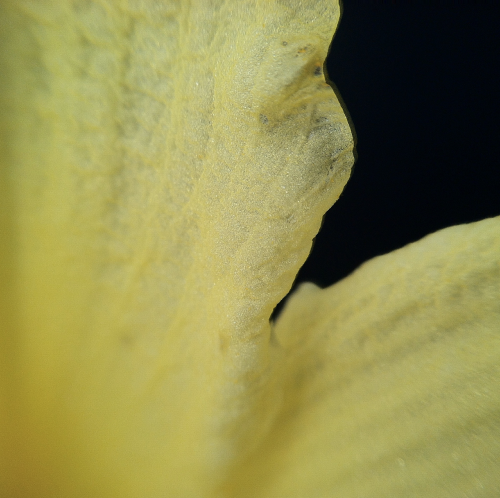
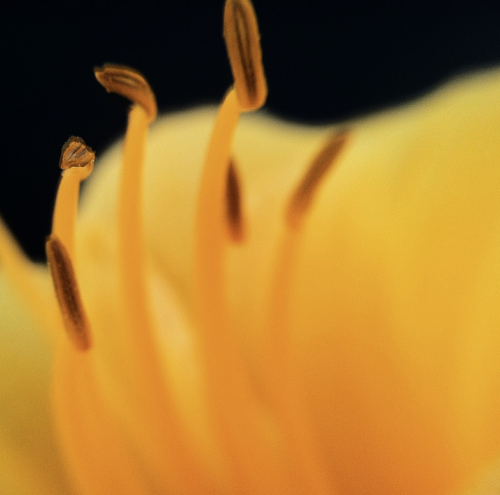
Now the fun begins! I slid on the Olloclip lens assembly, made sure I had the macro lens on the right side and moved in…close! I really liked the contrasts and composition this gave me.
Step 3
Yes, this is the same flower! I loved how the color changed as I moved in for this shot…as well as the way the lines formed from the center to the upper right corner. Composition, composition, composition….
Step 4
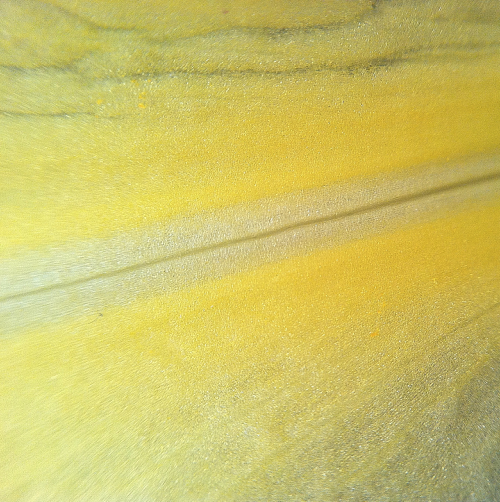
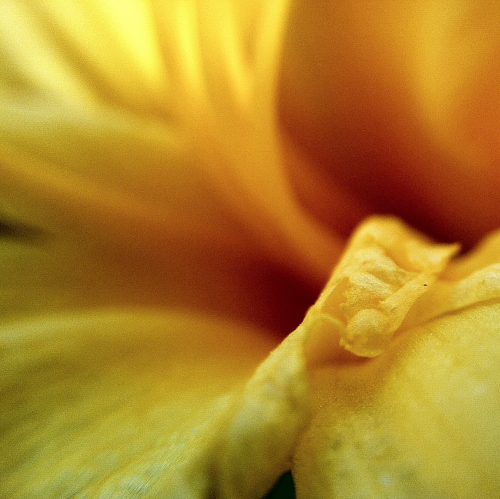
Isn’t this a fun pattern? I did do a little adjusting with sharpening to make this one pop a bit more…but that’s it! Honest!!
Step 5
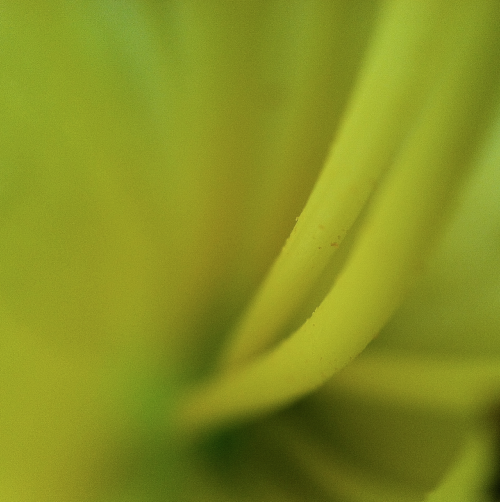
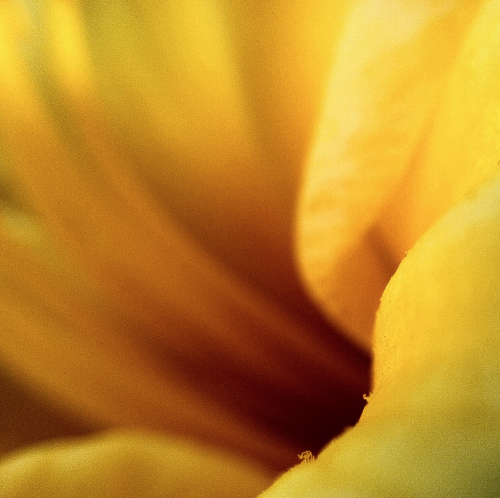
I have to confess that this isn’t from the same flower. I took a short break and when I came back, I found that my original subject had wilted and closed up on me!! They don’t call these daylilies for nothing!! Again, I liked the color, the contrasts between light and dark as well as the “abstract” shapes.
Step 6
The folds and the light-into-dark gives this image a bit of mystery.
Step 7
As it does for this image. (There was an ant running around the inside of the flower as I shot these images. I kept waiting for it to stand still for a moment so I could include it in a shot…but it was too shy….)
Step 8
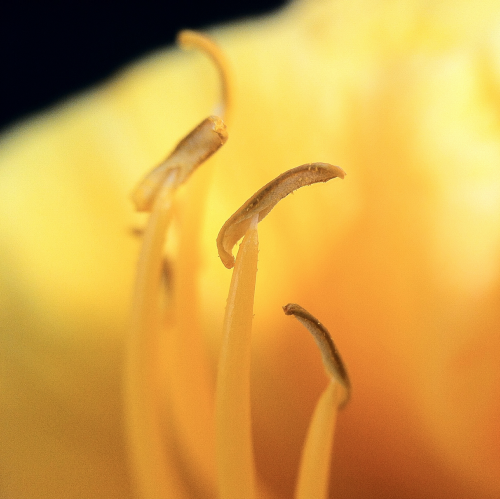
One final image from this series. Again, all of these where created using just the Olloclip macro lens. Slide this lens on your iphone and move in close!
Part 2 Using the Olloclip macro lens…with a little help from my “friends”!
In this part, I used the same set-up as above: my iPhone4, the Olloclip maco lens, and a tripod set-up. This time, I did use some apps…but nothing really fancy. (Well…maybe for the last image I’ll show. Come on…a guy has to show off once in awhile!)
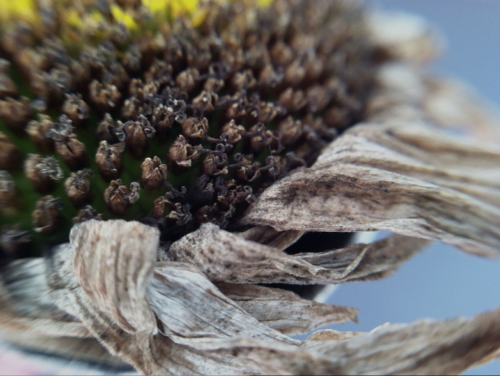
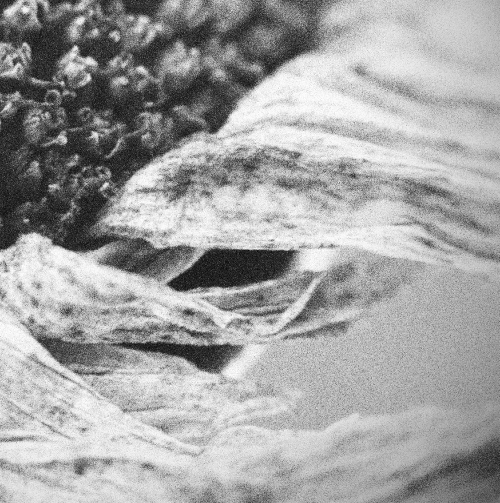
This opening shot was taken of a dead, dried daisy from my garden. As with the daylily, I cut it and brought it into my studio for this shoot. This image is “straight-up”…no apps, no adjustments…just the way it went into my camera roll.
Step 2
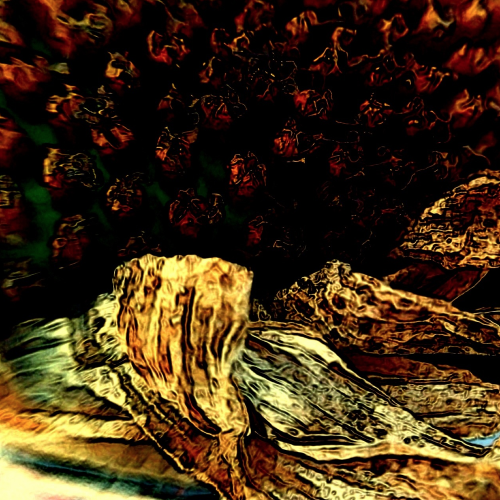
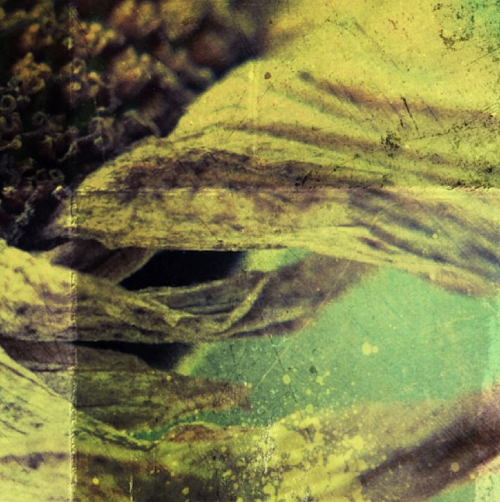
Time to turn the apps loose! Each of the following versions utilizes a different app and/or different filter combinations. I’ve also did some selective cropping to help bring out the abstract nature of each image. This first version uses FX Photo Studio’s Pencil Paint2 and Hippie filters.
Step 3
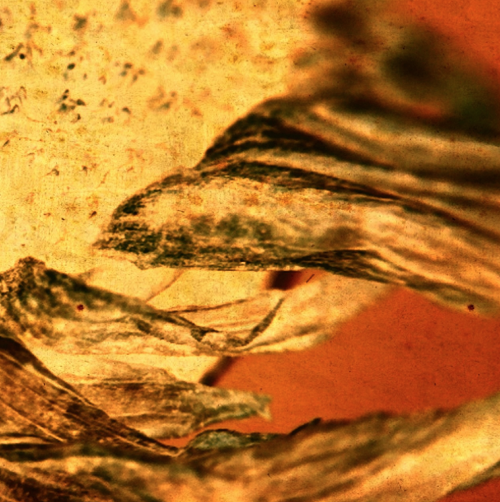
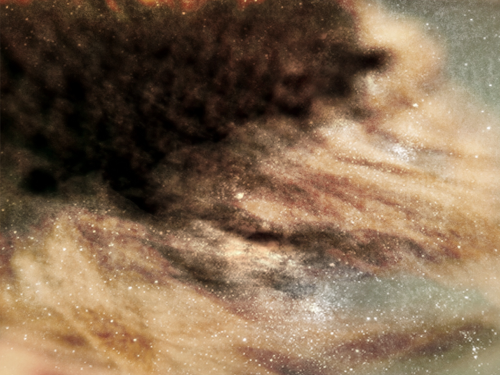
The second version also utilizes FX Photo Studio, but this time I used it’s Invert and Ancient Canvas filters.
Step 7
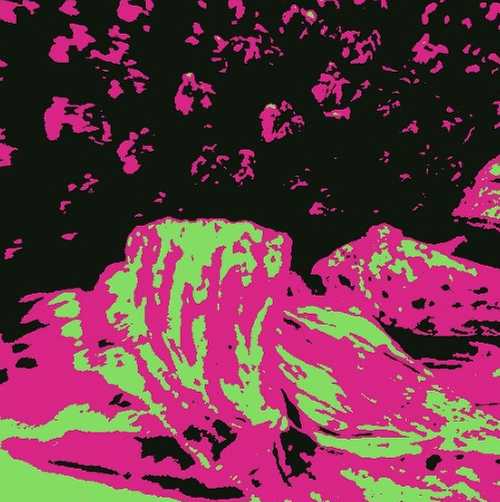
Okay…this image wasn’t created using only one app. I couldn’t help myself!! All I’ll say is that I used Slow Shutter Cam and Iris. Several layers…blending…filters…the whole cookbook! (Let me know if you’d like the full “recipe” for this and I’ll put that together as a separate tutorial!)
As I hope all these images show, using the Olloclip macro lens lets you move in close to grab that perspective that you couldn’t get otherwise. From there…use your own magic to create something fantastic.
I hope you enjoyed my little show-and-tell. Please don’t be shy about leaving comments and even questions. Thanks!!!
If you are interested in purchasing an Olloclip and we would highly recommend it, Apple sell them in their online stores, you can go here to view or order.
David Hayes
David is Head of Technical Tutorials here at theappwhisperer.com and this role adds to the many things David has done in his life…some of which he considers more significant than others. Yet, he feels all have made him the artist he is today. He’s been a cook at a truck stop, a janitor at a military base, worked in advertising, been a banker managing other people’s money, and an elementary school teacher. Trained as a photographer as an undergrad, he’s recently returned to these roots and now considers himself foremost a photographer and secondly a mixed media artist. You can find David’s work on many other popular websites including his own: http://www.clearerreflections.com.
6 Comments
Robert Lancaster
Awesome series!!!
Flowers are always such willing, and amazing, subject matter.
David
Thanks, Robert! I agree with you totally! Everytime I think I’m going to use a different subject, another flower beckons me!! I suppose I should take advantage of them now….winter is not far off!
Carol
Part 2, Step 2: I just love that photo. You make Olloclip look very desirable, Dave. Thanks for another interesting tute.
David
Thanks Carol! I’m glad you like this one. Just think what you could do with an Olloclip!!
Mark Hampton
Hi David, you will probably like the OlloCorrect app – it removes distortion form images taken with the Olloclip. It is on the App Store for free at the moment.
David
Mark ~ thanks for the tip! I didn’t know about this app until now…I will check it out!!