Olloclip Tutorial – How To Create An Incredible Macro Still Life Image Using An Olloclip
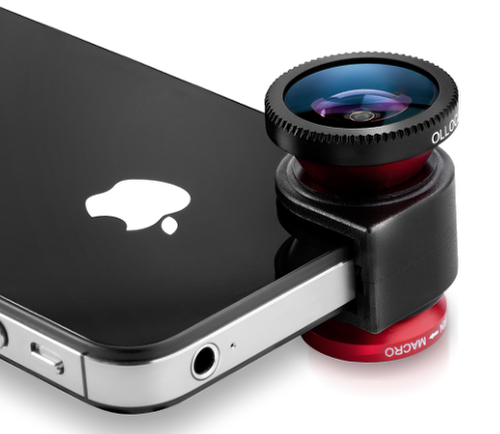
The Olloclip lens system consists of three lenses. A wide-angle, fish-eye and a macro lens. The macro lens magnifies your image roughly around ten times. It allows you to get close to focus on your subjects with your iPhone, usually within 12 to 15 mm of your subject.
With the Olloclip macro lens I had to learn how close to get to my subject in practice and when to back up. Initially, I tended to get in very close to my subject and then have to back up to get some kind of focus. It does help to have your iPhone on some kind of tripod/support to keep your hand steady. It also helps to determine what area you want in focus beforehand. The rest will blur out. With some practice and patience the Olloclip macro can give you some wonderful images.
In this tutorial I take you through the steps to create a wonderful macro still life image.
Step 1
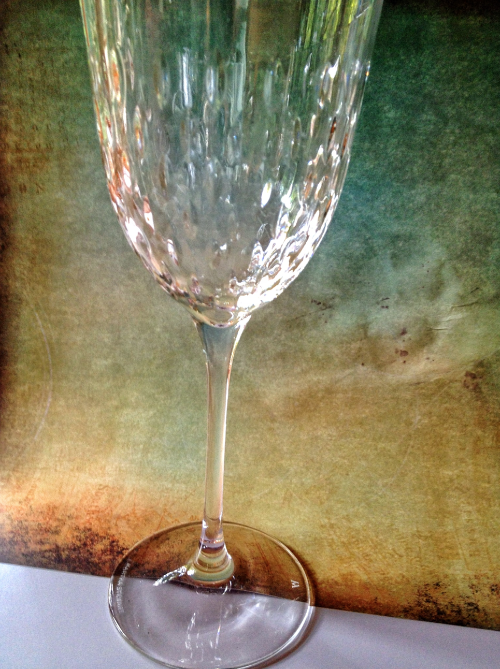
This is how I set up my shot. A beveled wine glass, against colored art paper. When I took the shot I filled the glass with sparkling water.
Step 2
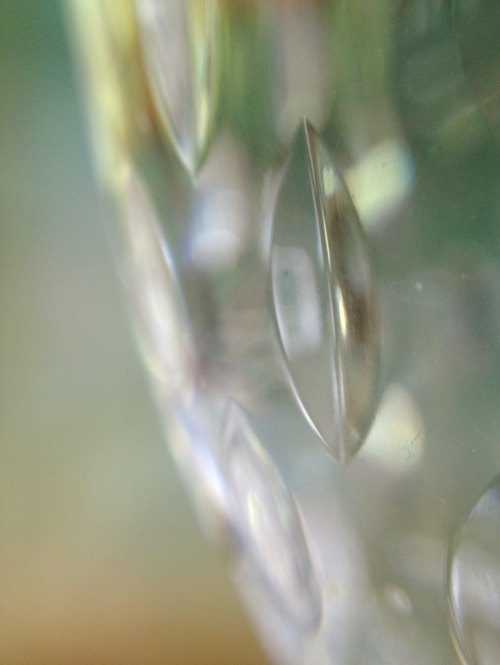
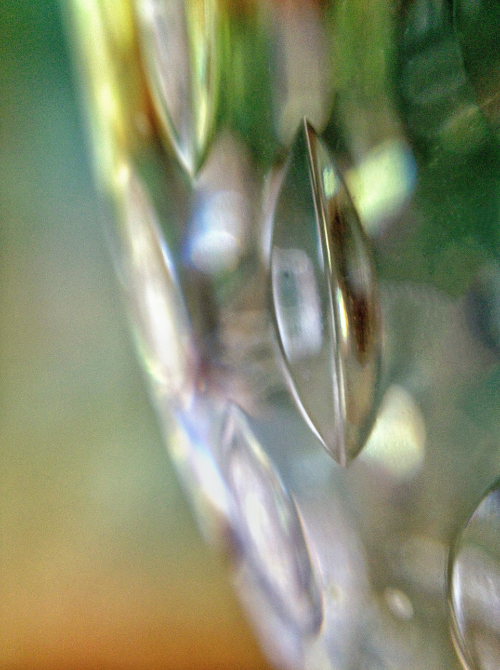
This is my original macro image. To achieve this I moved in very close to the subject and found the area I wanted to bring into focus. In order to do this I moved the iPhone around to see what would look best on the screen. Notice how the rest of the image is out of focus, blurred from shallow depth of field.
Step 3
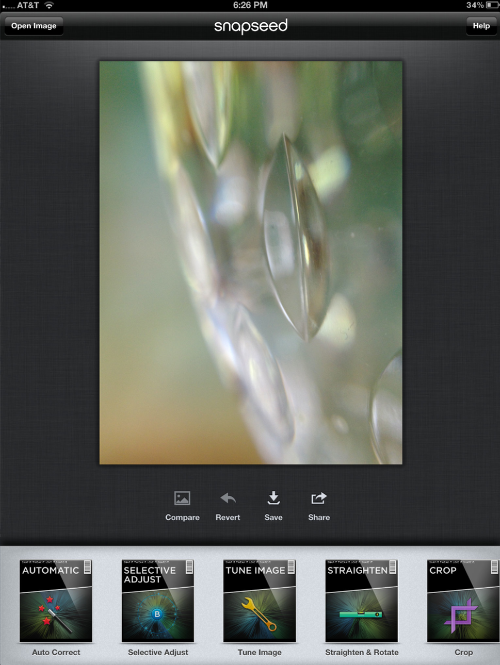
I then took this image into Snapseed. For me, Snapseed is where I normally start my app process. On the bottom of the image is where you can find the various areas to process in.
Step 4
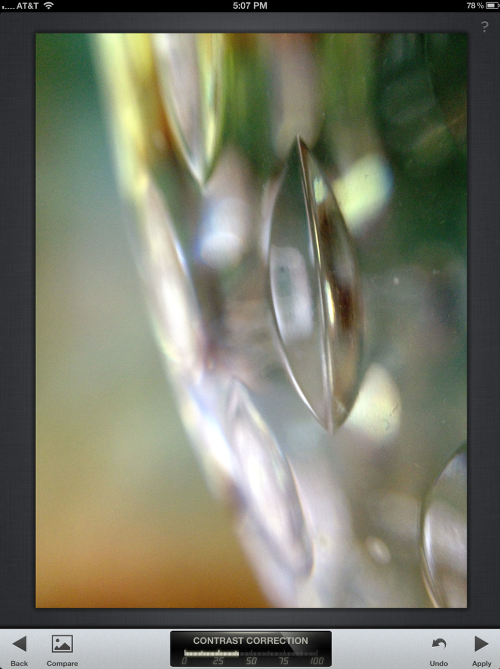
Next, I opened the “Automatic” icon (on the bottom) to add some contrast correction, here I used about 40. In Snapseed you use your finger or stylus to slide from left or right on the images area to see what amount will work best for your image.
Step 5

Next, I opened “Selective Adjust”. In Selective Adjust, if you touch the + sign at the bottom you can put points on your image that you want to modify. Again using your finger or stylus swipe up or down on your point and you get the option to change brightness B, contrast C, saturation S. Swipe left or right to change the amounts.
The area the points cover can be changed by pinching with your fingers, in or out. When you first put a point on your image a pop up will show you what area your point is in, a great feature if you want to narrowly select an area.
Step 6
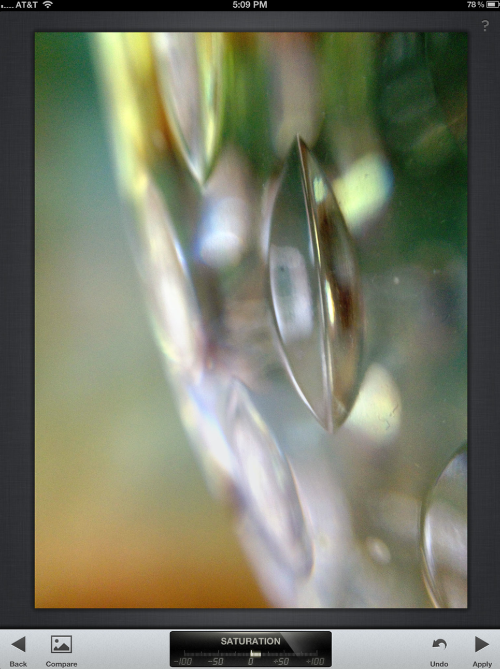
I then selected “Tune Image” (still in Snapseed). In the options I chose to add more saturation and change to Ambiance. It’s the same principal in Tune Image as with the above steps. Swiping with finger or stylus.
Step 7

The Ambiance option brings out some of the shadows and gives the image a slight warmth.
Step 8
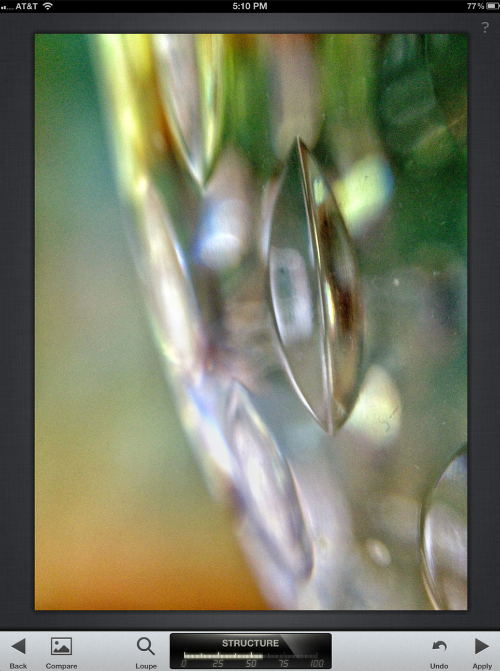
I then opened “Details” (Snapseed) and here I selected “Structure”. Structure pops out an images details, which I felt were needed.
Step 9

I also used a small amount of the Sharpening option as seen above.
Step 10
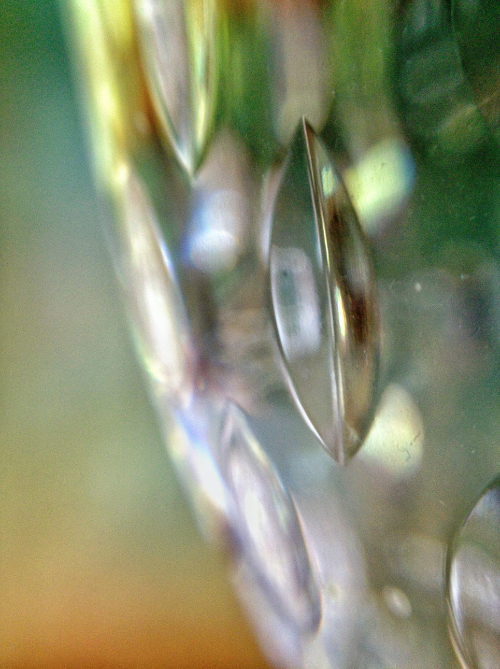
This is the result after I saved all my edits in Snapseed.
Step 11
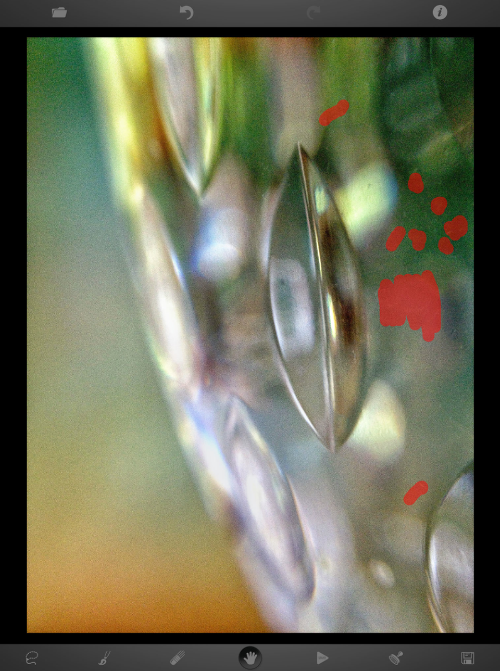
I then took my Olloclip/Snapseed edited image over to TouchRetouch. There were a few areas that I did not like, the glass had dust spots, lint and finger marks but TouchRetouch did a good job of removing them.
Step 12
At the bottom of the app there is a brush symbol and when you pick the brush you can adjust the brush size and opacity with the sliders. Paint away and then press the Triangle to start the process. Magic!
Step 13
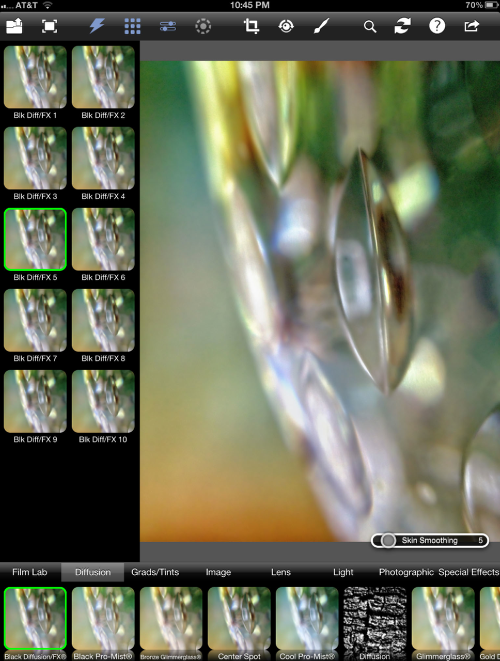
I still wanted to achieve a more diffused look in the out of focus areas. So I took the image into Photo fx Ultra and selected -Diffusion- Black Diffusion. There are various effects to choose from and I selected the #5. I like this look but I did not want to effect the sharp area. In Photo fx Ultra you can erase the effect by clicking on the brush icon (top).
Step 14
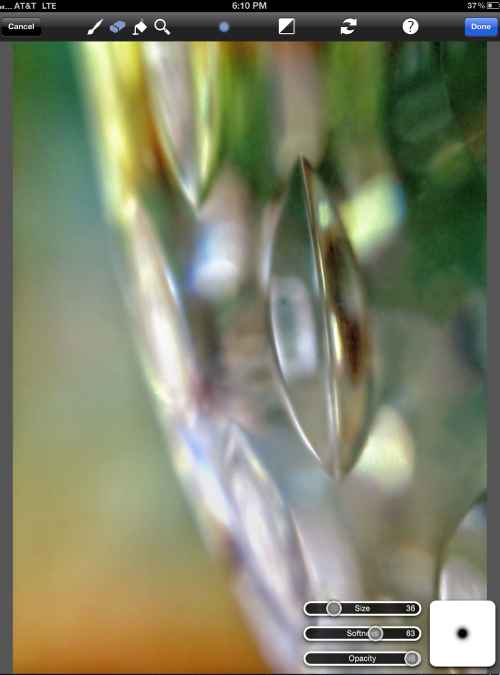
The above image shows the interface. Choose the eraser (top) and on the bottom sliders choose the brush size and opacity. Paint, click done and then save.
Final Image
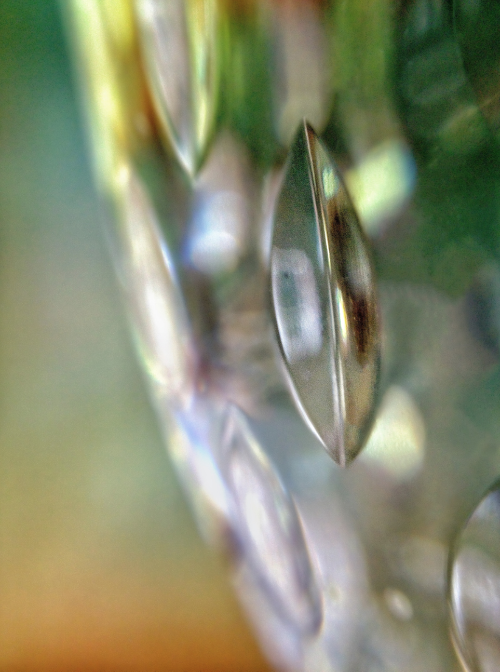
This is my final image, none of this would of been possible without the use of the Olloclip macro lens. I have created a unique still life image that is stunning to view and totally different to my original image. I am thoroughly pleased.
Irene Oleksiuk
Irene Oleksiuk was born and raised in Chicago and now lives about 40 miles from the city, in a country setting where she feels she belongs. In 2001 Irene signed up at the Morton Arboretum and started working on her Nature photography certificate. She loved it and met some great people. Since she purchased an iPhone her photography has really taken off. Irene contributes to Pixels/the art of iPhoneography and combined with the help of Knox Bronson (Pixels), Irene’s images have been show in galleries across California.
7 Comments
kathy
fantastic step by step… i have one i hardly ever use, and now that i have a format, i just might use it more, thank you for sharing this
Irene Oleksiuk
Kathy, Thank you so much! It really is a lot of fun but challenging and I do love a challenge. Hope you use your Olloclip soon and often.
David
Great tutorial, Irene! I love how you used the Olloclip lens and Snapseed to create your final image….fantastic!
Irene Oleksiuk
David, Thank you! Coming from someone with such wonderful work means a lot.
Darla
Irene,
As always, I enjoy your inspirational tutorials. Thanks for sharing this and motivating me to get started with the olloclip.
Darla
Irene Oleksiuk
Darla, thanks so much! Glad you enjoyed it. Hope to talk to you soon.
miss you.
lindaschenck
great tutorial, irene. a gentle reminder to me to get that olloclip out and use it!