Mobile Photography Tutorial – Using Layover and Diptic To Create A Composite Image
I’ve recently noticed that a number of the digital artists are creating some wonderful composite images using different frame-within-a-frame techniques. Seeing these images got me inspired to give this a try. While I know of one app that has several of its filters that will do this for you…as long as you’re willing to accept their formatting and effects. Instead of using this app, I decided to use Diptic and Layover to create my own composite image.
If you haven’t tried Diptic or Layover yet, you can download them here:
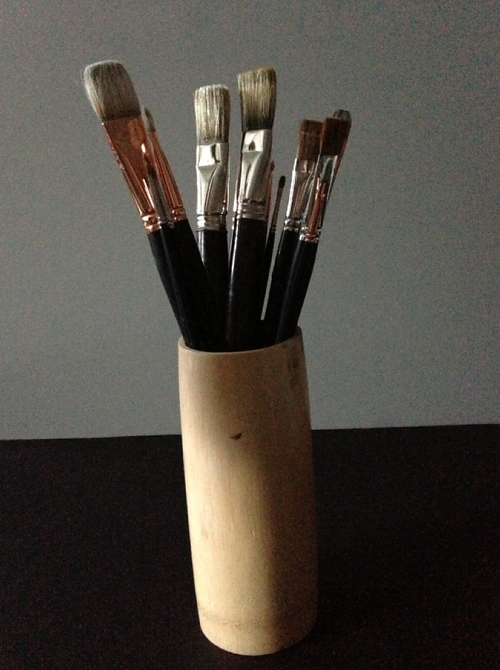
Since I like challenges I also decided to use just one source image…and one that in itself is what one would call “blah”. My studio stock shot of paintbrushes seemed to fit these criteria perfectly!! (Oh…before I get much further, I’m not going to do much in the way of “instruction” on how to use Layover and Diptic in this article. However, I think you’ll be able follow along anyway if you’re new to these apps.)
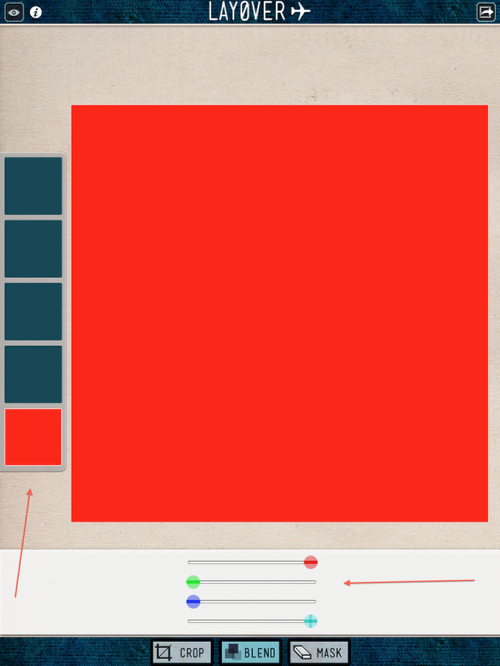
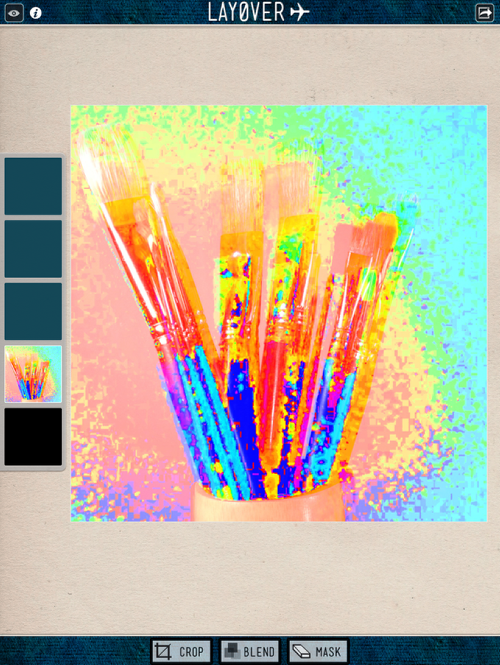
Opening Layover, I activated the background layer and clicked on “Blend”. Using the slider bars, I changed the background from its default color to this bright red. Don’t you love it!
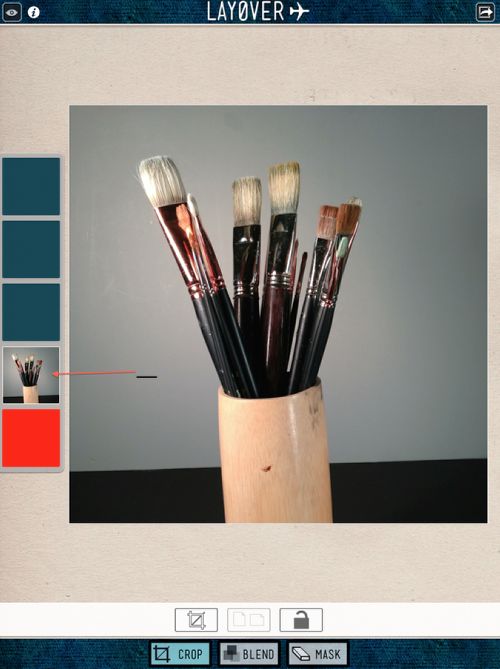
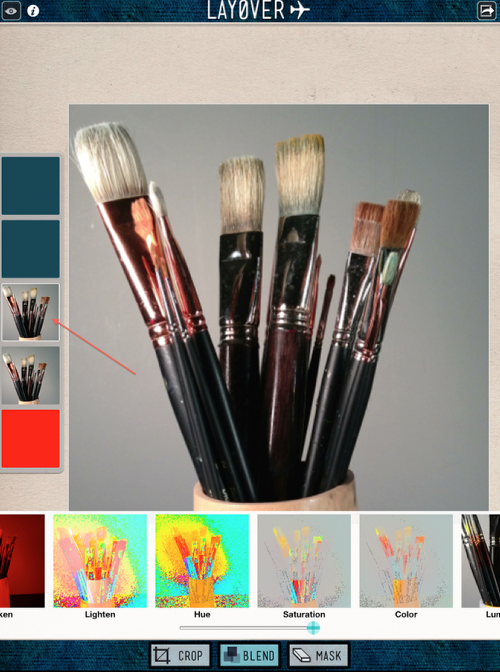
Next thing I did was to activate the second layer and bring in my source image. Lovely isn’t it!
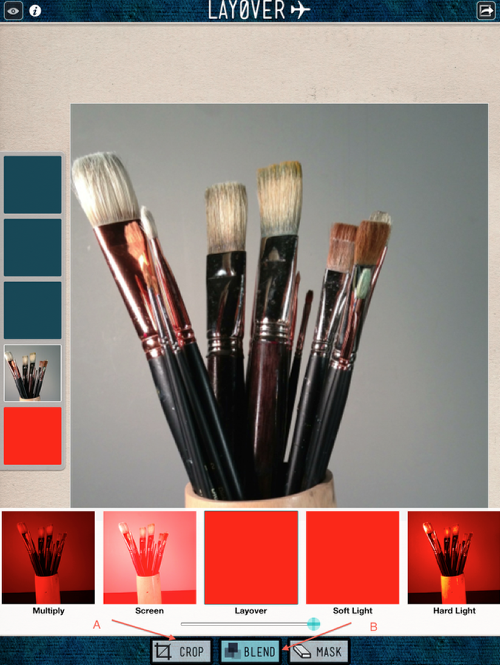
Two steps in one screen shot! First, I activated “Crop” (A) so I could arrange where I wanted the image…down and to the left. Then…I clicked on “Blend” (B) so I could play around with the blending choices.
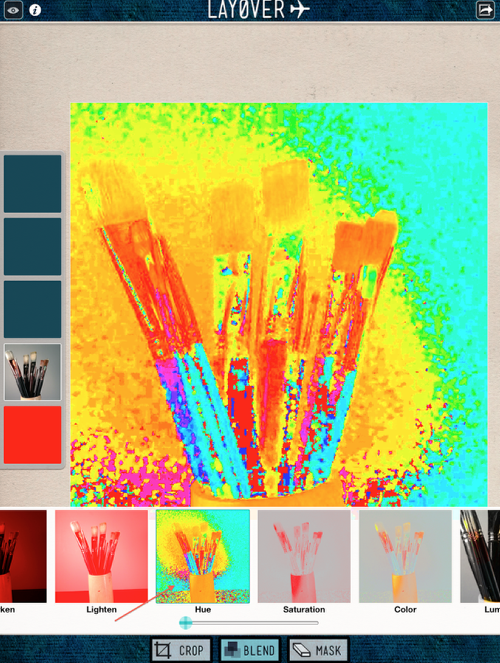
For some reason, “Hue” jumped out at me when I came to this choice…so that’s what I used!! Works great with the red background!!
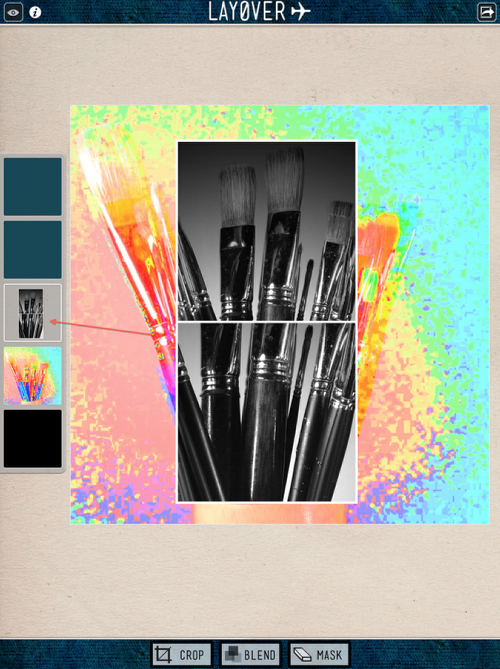
That layer in place, I activated the third layer and once again brought in my source image. I also moved it to the left and just a tad higher than the second layer to create a bit of offset.
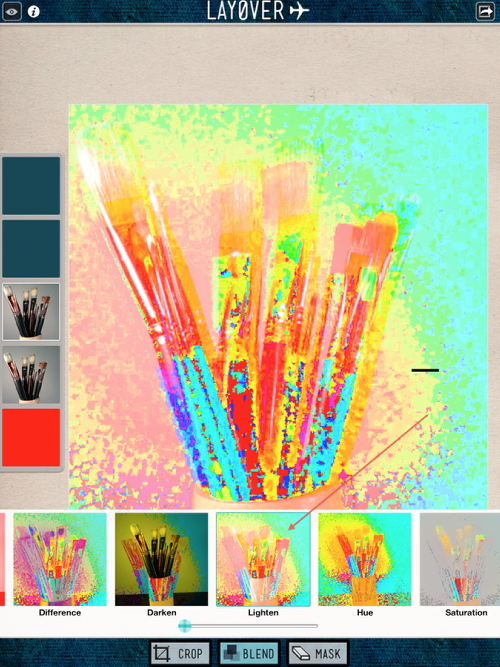
This time I picked “Lighten” as my blend mode liking how created shadow imagery without losing the vibrancy of my image.
Saving this image, I closed Layover, took a short break, and then opened Diptic!
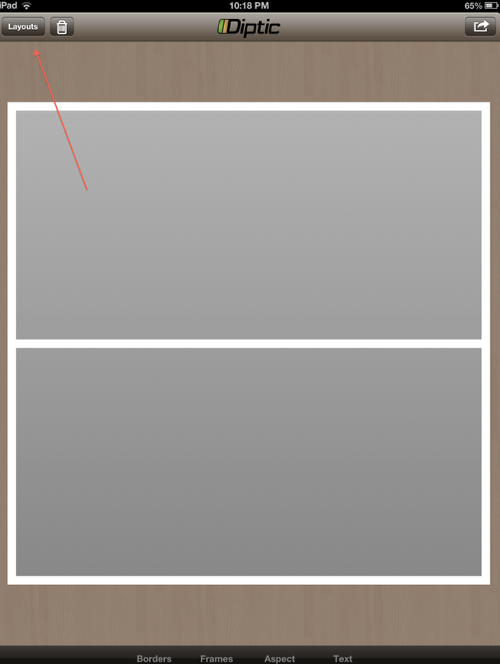
Diptic opened, I chose this “Layout”…
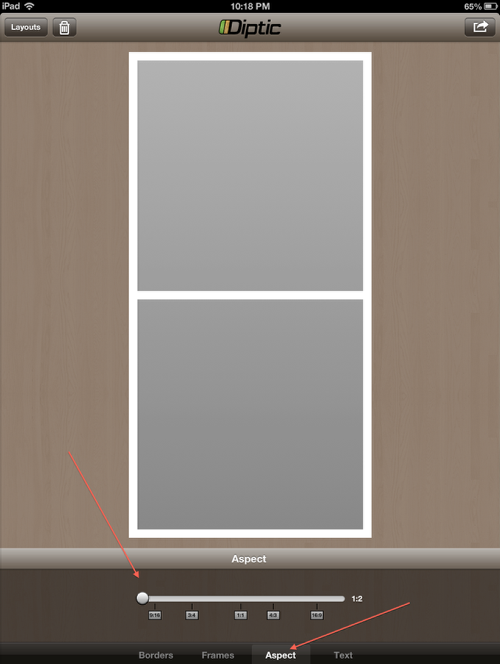
Still in this window, I clicked on “Aspect” and used the slider bar to change my structure to a 1:2 ratio giving me a square over a square.
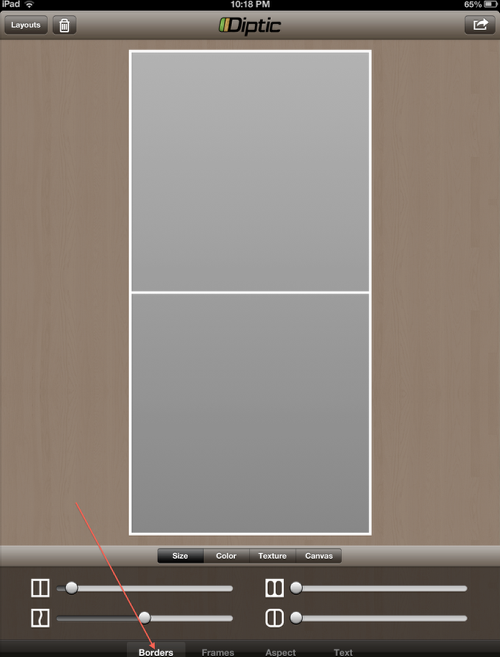
From here, I clicked on “Borders” and adjusted the size of the borders to almost a hairline. I decided to leave the color/texture/canvas at the white default feeling it would blend better when I moved this to Layover.
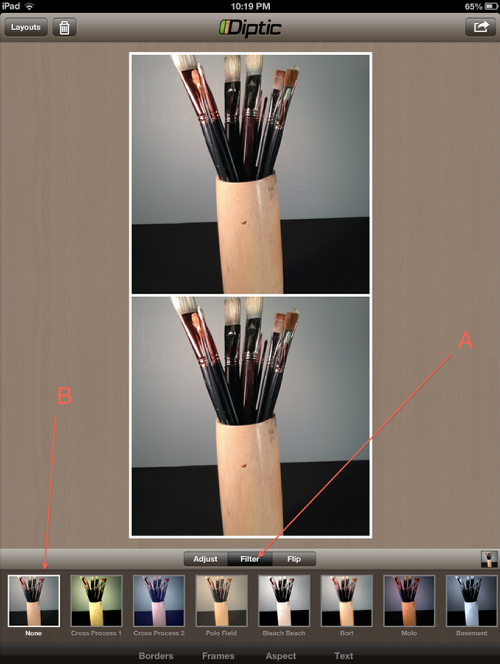
Remember those paint brushes? Well…they’re back!! Clicking on each square in turn, I brought in this image to both places. I also clicked on the “Filter” tab while I was at it…but left my filter choice at “None” (B).
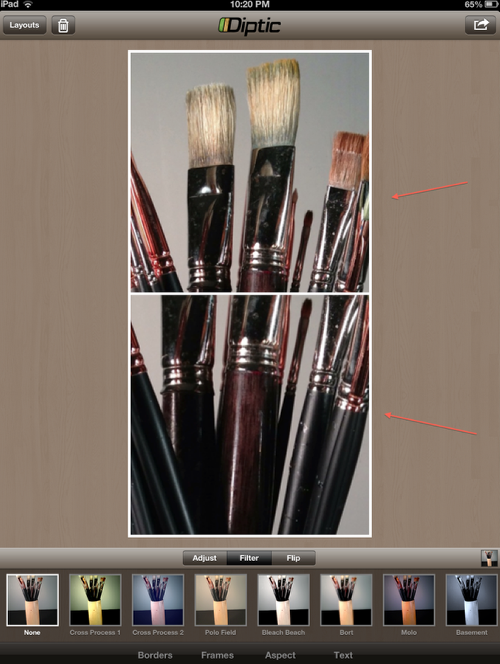
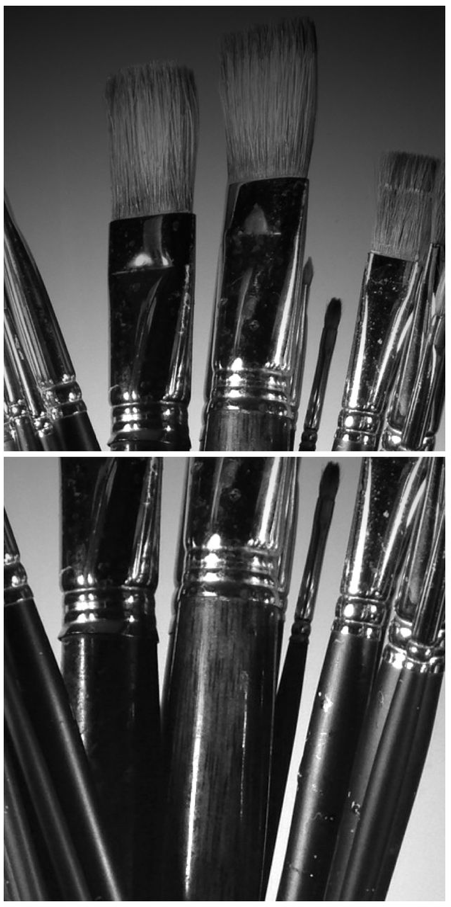
Moving the paintbrushes images around, I settled on this arrangement …the tops of the brushes and a bit of a close-up image below.
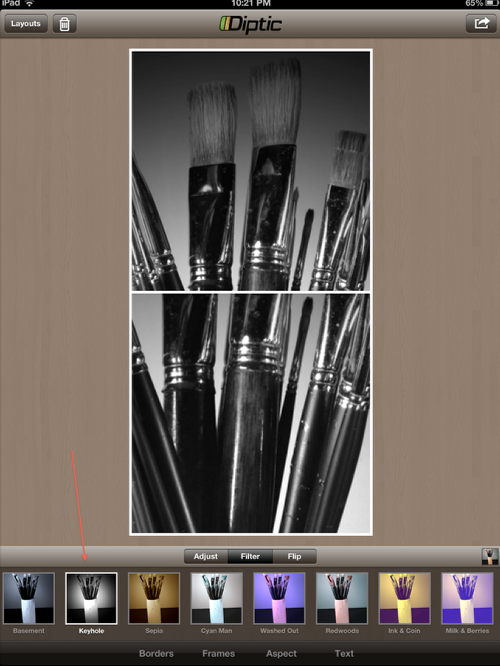
While it wasn’t my initial intent to pick this filter “Keyhole” for both squares, in the end I decided to go with it realizing it would work better in my final steps.
I saved this two-some to my camera roll and closed Diptic. Took another break…and reopened Layover!
Leaving the background layer at its default color, I activated Layer 1 and brought in my blended image from the previous steps.
The Diptic two-some went into Layer 2…and I moved this to roughly the center of my image trying to create a bit of an overlay.
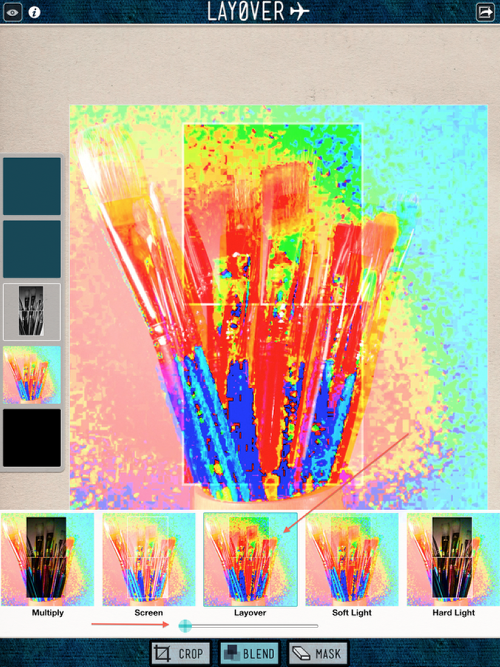
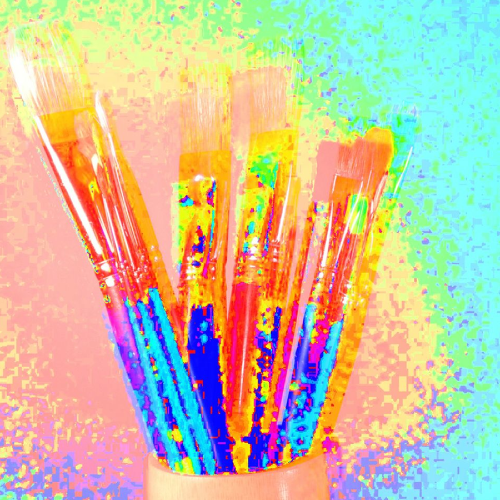
And…using the blend mode “Layover”…and a little adjusting of my placement…
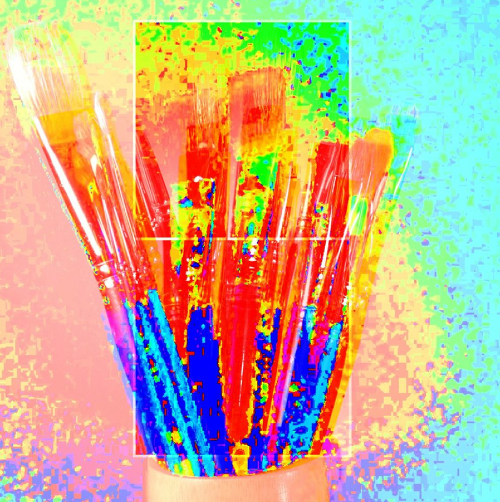
My composite image, “Paintbrushes” was complete! Now… I have to tell you. This really isn’t one of my typical images…I’m more into the dark and grungy side…but I do think this is a lot of fun!!
Thanks, as always, for taking time to go through this tutorial. Please don’t be shy with your questions and comments. I do love hearing from you!!
Please help us…
TheAppWhisperer has always had a dual mission: to promote the most talented mobile artists of the day and to support ambitious, inquisitive viewers the world over. As the years passTheAppWhisperer has gained readers and viewers and found new venues for that exchange. All this work thrives with the support of our community.
Please consider making a donation to TheAppWhisperer as this New Year commences because your support helps protect our independence and it means we can keep delivering the promotion of mobile artists that’s open for everyone around the world. Every contribution, however big or small, is so valuable for our future.
David Hayes
David is Head of Technical Tutorials here at theappwhisperer.com and this role adds to the many things David has done in his life…some of which he considers more significant than others. Yet, he feels all have made him the artist he is today. He’s been a cook at a truck stop, a janitor at a military base, worked in advertising, been a banker managing other people’s money, and an elementary school teacher. Trained as a photographer as an undergrad, he’s recently returned to these roots and now considers himself foremost a photographer and secondly a mixed media artist. You can find David’s work on many other popular websites including his own: http://www.clearerreflections.com.

9 Comments
Janine Graf
Fun tutorial David! Your tutorial convinced me to download Layover, and I haven’t purchased an app in ages! 😀
karen divine
Great…thanks and I hadn’t heard of layover…
melia
love it. thanks!
David
Melia ~ And thank you!!!
Tracy Mitchell Griggs
I downloaded Layover ages ago, but never used it. Nice optional use of Dyptic.
When I get inspired to take photos again, will review this nice tutorial. Cheers!
David
Tracy – glad this was helpful! Have fun with it!,
Janine – I’m so glad that I convinced you to pick up another app. One does not live on one app alone!!
Karen – layover has some great features. Do give it a closer look!!
Carol
I love your result! I’ve just checked my apps (so many I’ve lost track( and find I have Diptic and Layover so I’m going to have a play! Thanks Dave, always enjoyable…
David
Carol ~ can’t wait to see what you come up with! Diptic has so many different frame combos that it’s great fun to use!!
Pingback: