iPhone Photography Effect Workflow – Freelensing Part 2 – By Paul Brown
Last week we published Part 1 of Paul Brown’s Freelensing workflow article, if you missed that please go here. We’re delighted today to republish the second part to this wonderful feature, many thanks to Paul for granting us permission to do so, over to you Paul…(foreword by Joanne Carter).
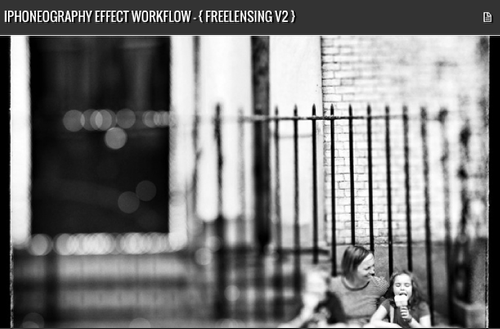
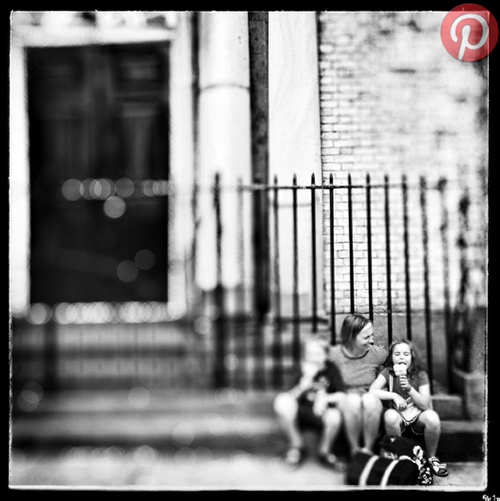
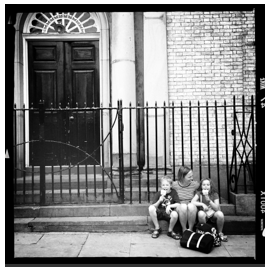
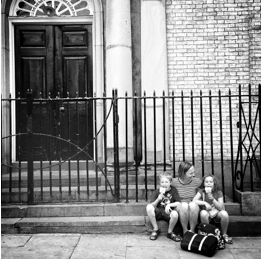
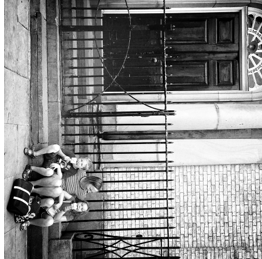
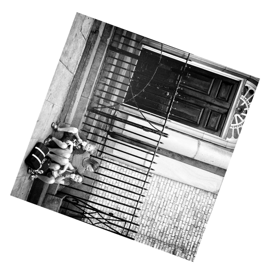
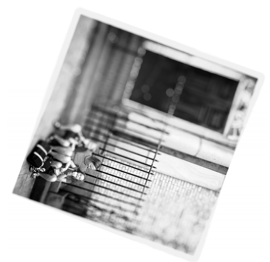
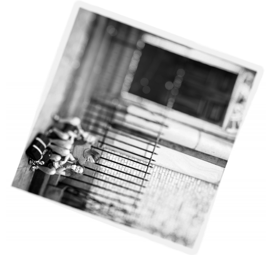
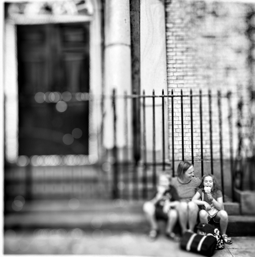
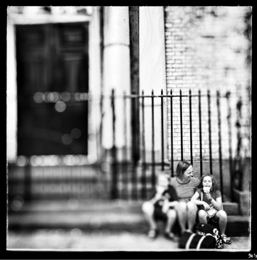
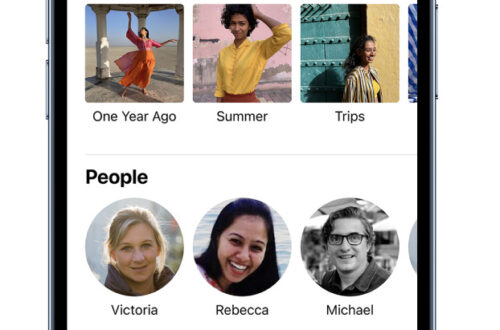
‘As last week, I used the following 2 analog freelensing images captured on black and white ISO400 film as my reference images together with the third image which is the iPhoneography result of last week’s process’.
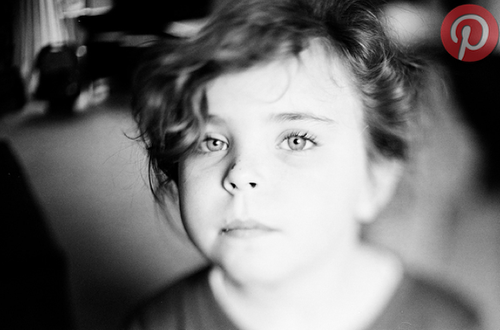
{ analog freelensing – example 1 }
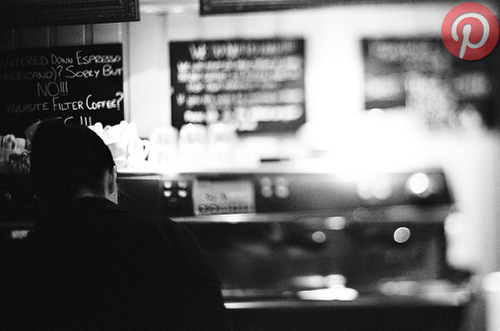
{ analog freelensing – example 2 }

{ iPhoneography freelensing – process one }
The reasoning behind my workflow has always been that to achieve something approaching a realistic freelensing / lensbaby effect through iPhoneography apps you have to have the ability to achieve 2 results:
- Make out of focus areas look out of focus, not just blurred. A key element for this as seen in the reference images is the ability to introduce the impressive bokeh circles or other aperture shapes from out of focus light sources, and
- Define the focal plane which for added authenticity should not necessarily be horizontal or vertical but angled across the scene to some degree.
Additionally though, it would be nice if the bokeh circles increased in size as they moved further away from the focal plane. This is the area that wasn’t considered too closely in my first process and so my iPhoneography freelensing experiments continued.
Key iPhoneography apps / processes (with links): AfterFocus • Filterstorm • freelensing • Hipstamatic • Snapseed • Superimpose
{ freelensing }
Process and iPhoneography apps used
Note: For the purposes of this iPhoneography workflow I am going to record the resolutions of the image at each stage of the save process. I have recently upgraded from iPhone4 to iPhone5 and therefore, now that I have more pixels to play with, I am keeping a close eye on what apps do to resolutions both on iPad3 and iPhone5.
Hipstamatic ~ initial capture. Normally where I anticipate significant processing I start with a pure image out of ProCamera. However, this Hipstamtic image from this weekend’s family trip to the ice-cream shop struck me as suitable for the experiment so I went with it:
Resolution 2448 x 2448:
Snapseed ~ crop the border away and boost ‘structure’ and ‘sharpen’ within the range 25 to 50 each (although this is to taste and image dependent):
Resolution 2239 x 2239 (reduced due to the crop):
Filterstorm ~ for this image I wanted the focal plane to be angled closer to vertical than horizontal. Therefore I rotated the image through 90 degrees (this process could just have easily been done in Snapseed but I needed Filterstorm for the next process):
Resolution 2239 x 2239 (although there was no need to save the image at this point – for reference only):
Filterstorm ~ My plan with this workflow is to use AfterFocus alone to achieve the freelensing effect. To do this I need to rotate the image so that the focal plane is angled through it. This will I hope become clear in the next steps. The first stage is to increase the canvas size to enable me to rotate the image without cropping the corners. The canvas is therefore increased (white selected) with the image centered:
Resolution 4000 x 4000:
Snapseed ~ Snapseed allows for rotation (‘straightening’) of up to 10 degrees whilst Filterstorm restricts to 5 degrees. I therefore bring the image back into Snapseed and straighten twice fully by 10 degrees to achieve the angle I want for the focal plane. The straightening process needs to ensure the image stays within the confines of the canvas. If more rotation is required the canvas would need to be bigger:
{ image one }
Resolution after rotation / straightening 4000 x 4000:
AfterFocus ~ Rotated image imported into AfterFocus where the focal plane is added. This is achieved by:
-
No masks are applied and I continue to the second screen,
-
I boost blur to the maximum amount, select the circle aperture and bokeh,
-
I select ‘Fading BG’ and manually position the focal line and background line to define the extend of the fade.
{ image two }
Resolution 2048 x 2048 (This is the maximum resolution I can save in AfterFocus on my iPad3. My iPhone5 will save at 3264 x 3264). Therefore depending on the process I may use my iPhone5 for AfterFocus edits:
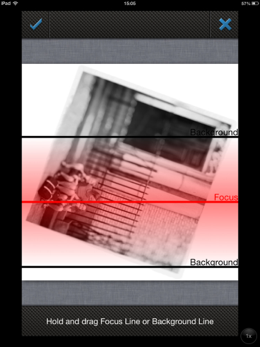
Afterfocus ‘Fading BG’ screen shot ~ You will see that the process of increasing canvas size and rotating the image was necessary to enable me to apply an angled focal plane. The ‘Fading BG’ effect can only be applied to an image horizontally:
Superimpose ~ this is a digital iPhoneography image after all and therefore I decide to reintroduce a little extra focus to my daughter’s face. I do this by importing image one as the background image and image two as the foreground image and applying a mask to allow the extra focus to show through:
Resolution boosted back to 4000 x 4000 (the resolution of the background image):

Superimpose Oval Mask screen shot ~ this screen shot shows the oval mask I applied with smoothness boosted to maximum to fully feather the mask in. The mask can be seen over my daughter’s face:
Snapseed ~ image rotated through 90 degrees and ‘straighten’ applied twice in the reverse direction to bring the image back in to line:
Resolution 4000 x 4000:
Snapseed ~ final edits applied to taste. Standard drama filter applied. The black and white film conversion preset is applied and adjusted by reducing contrast and grain to 25pct. Border added:
Resolution 4000 x 4000:
Looking at the result, I think we can see that this process achieves the third objective of increasing the bokeh light circle sizes as they move further away from the focal plane. Arguably therefore this workflow is a more straightforward process then the first freelensing iPhoneography workflow with added benefit. There are complications associated with how apps mess around with resolutions and clearly all the pulling and twisting of pixels is going to impact the end result. However, I am looking to achieve a grainy analog finish and any issues with quality notwithstanding the massive (in iPhoneography terms) final resolution of 4000 x 4000 are largely resolved for my purposes by the final edit process’.
Paul Brown
Paul Brown (known as Skip to most), is an exhibited and prize winning iPhone photography from Lincoln, England. He is a member of the global ‘AMPt Community’, a managing member of Lincolnshire based regional mobile photography Group ‘InstaChimps’ and a founding artist at ‘New Era Museum’. He also runs his own personal blog at http://skipology.com where he shares many of his processes with step by step guides for some of his most popular images and will shortly begin blogging about iPhone photography for iPhone and iPad Life Magazine. London exhibitions include images at ‘My World Shared’, ‘mObilepixatiOn’ and ‘Pixel This’ a curated charity exhibition where he exhibited alongside celebrities such as Stephen Fry, Ruby Wax, Peter Capaldi and Alexander Siddig. Skip was a finalist in the Photobox Motographer of The Year 2012 with his image ‘Skipping’ and is currently preparing for the InstaChimps second mobile photography exhibition due to take place in Lincoln later this Summer.

3 Comments
ifotoman
Paul, that is a very interesting tutorial, at first I was wondering why you used Afterfocus when Snapseed will give you blur, but then realised that you don’t get the Bokeh effect in Snapseed. Thanks for sharing. G
Skip
Thank you. Yes, if AfterFocus Fading background could be moved around like Snapseed or many other tilt-shift apps then it would be great but instead you have to angle the image around it first. I know tilt-shift gets associated with ‘toy-town’ but that’s not the whole story as I know you know G.
Pingback: