Technical Mobile Photography App Tutorial With Layover – ‘Variations On A Theme’
We have just published our latest Technical Tutorial by our Head of Technical Tutorials David Hayes. This time David gets to grips once again with the iOS photography app Layover and explores some excellent features (we have published various tutorials with Layover, if you’ve missed those, please go here). Over to you David… (foreword by Joanne Carter).
Layover retails for $0.99/$0.69 and you can download it here. Over to you David …. (foreword by Joanne Carter)
Recent trends I’ve noticed amongst the photographers I follow are studies of a single image where they’ve applied different apps and techniques to create variations of that image. I’ve done likewise but what the difference is that these photographers are using unique ways to group/display their studies.
I thought I’d use Layover’s capability to work with five layers at once and put together my own,
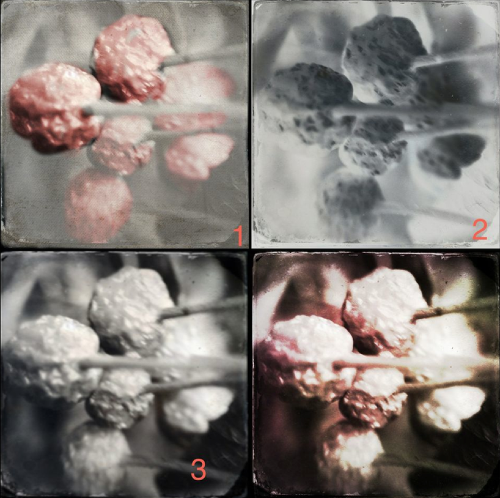
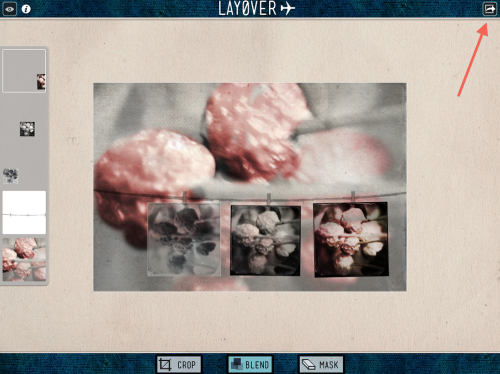
I first created three variations from an image originally shot using Hipstamatic. What this screen shot shows is not only the original but the three variations I created. In the order of appearance: #1 used Paint Fx; #2 used FX Photo Studio; #3 is the original; and #4 used Laminar Pro. (For all of these I started with the original image.)
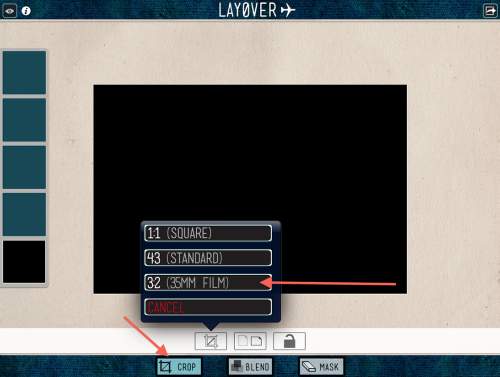
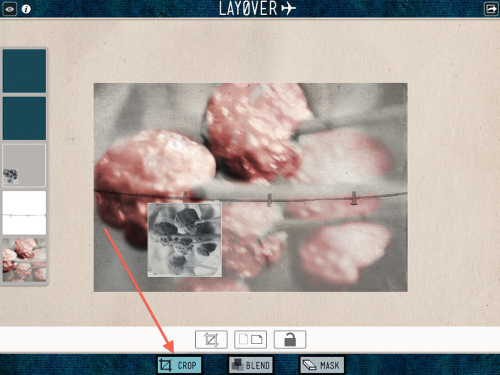
Okay! Time to get back to Layover…after all that’s what this article is all about!! Opening Layover, I clicked on Crop and chose the 3:2 aspect ratio for my work screen.
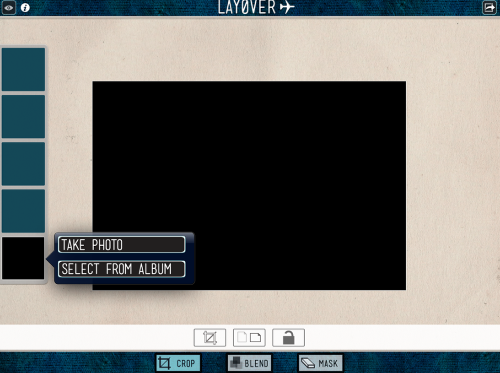
Usually I would change the base layer’s color before bringing in other layers, but this time I needed all five layers to create my Variations…so I clicked on the first layer box and went to my Camera Roll for my first image.
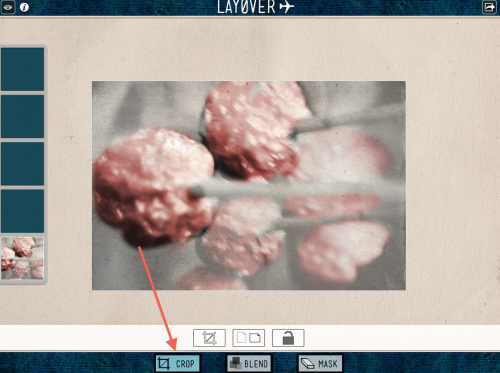
With my base layer in place, I clicked on Crop to fine tune where I wanted it on my work area. Using the usual finger pinch motions, I moved/resized the image until I was happy.
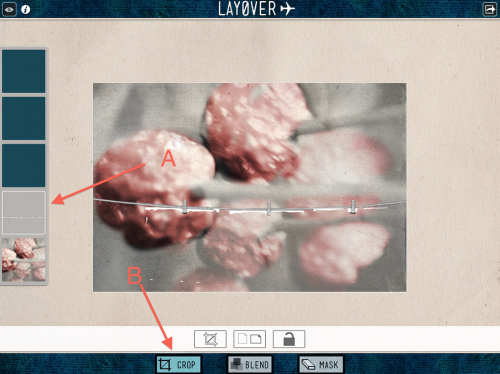
Next layer in…my clothesline! I’m not telling how I created this…a guy needs some secrets. It does look a bit ratty right now…but just you wait…it will look better in a moment!! As with the first layer, I used Crop to “hang” my line just where I wanted it!!
Going to Blend (A), I picked the Multiply mode (B) and adjusted its level (C) to full on. This gave the clothesline a nice translucent look.
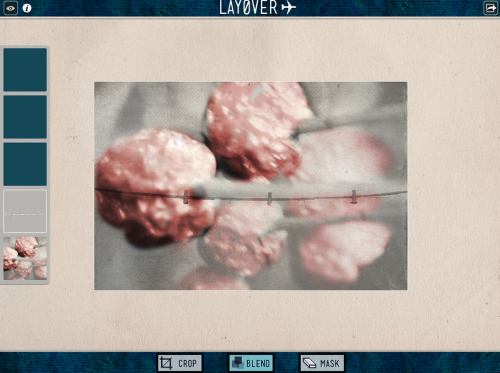
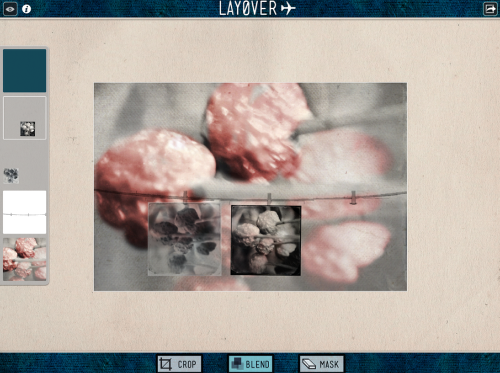
Here’s where I am at this point. Looking good so far…
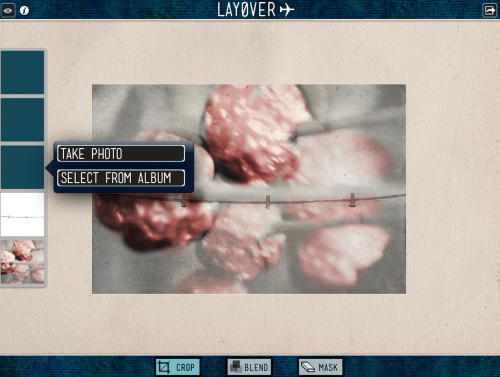
Let’s bring in the layer, shall we? Click on the Layer box…and select from your Camera Roll.
After bringing in this layer, I used the Crop function to size and place my second variation.
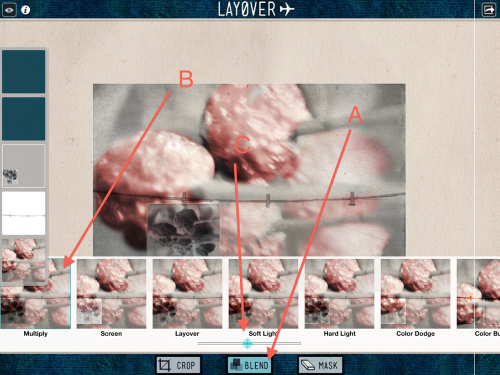
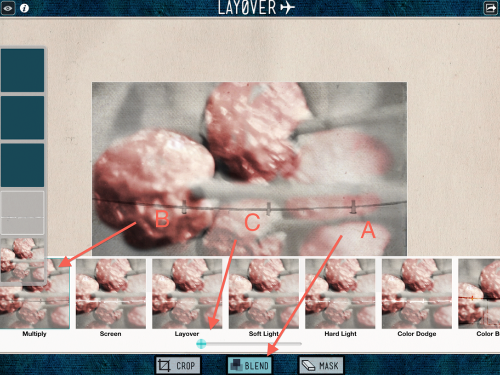
This is the same Blend sequence I used with the clothesline, but it’s worth showing again. Click on Blend (A), Multiply (B) as the mode, and the level set as indicated. (C) (I wanted to give the same translucent quality to each of these layers.)
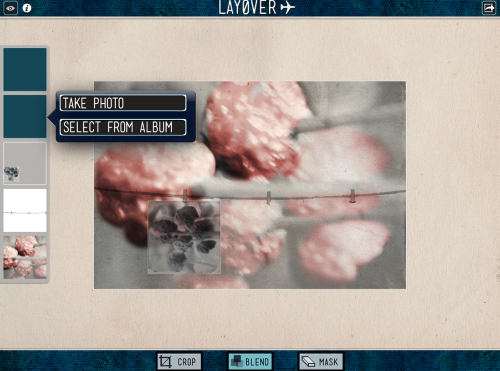
Next layer! As before…click and choose from the Camera Roll.
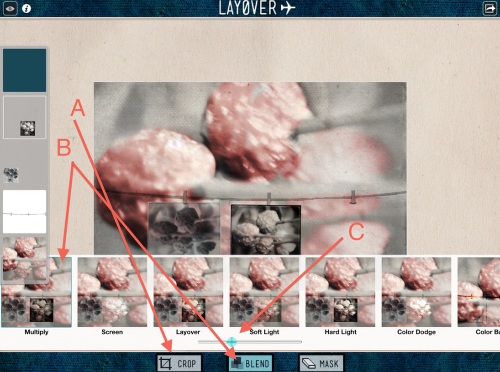
Speeding things up a bit since the sequencing just repeats for each layer, I brought in my third variation, used Crop (A) to place it, Multiply (B) as the Blend mode, and the same level as before (C).
So far, so good. I did go back to each layer at this point and did a little adjusting of where everything was placed. Layover allows you to re-activate each layer, make changes and continue without disturbing the other layers.
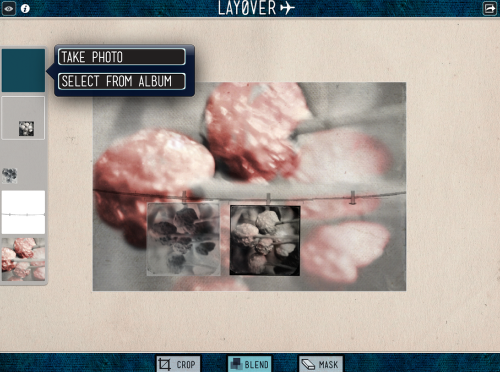
I know this is getting boring, but its what you have to do to bring in the next and final layer. Click on the Layer box…and select from album!!
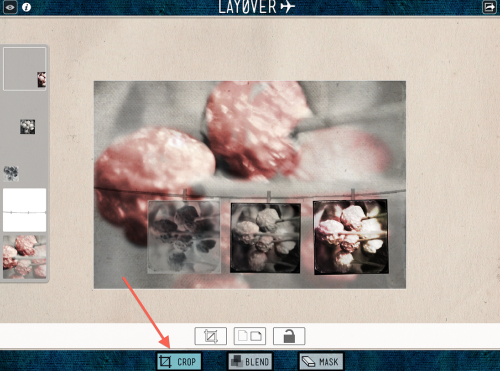
Which I did! I then used Crop to place and size my four variation.
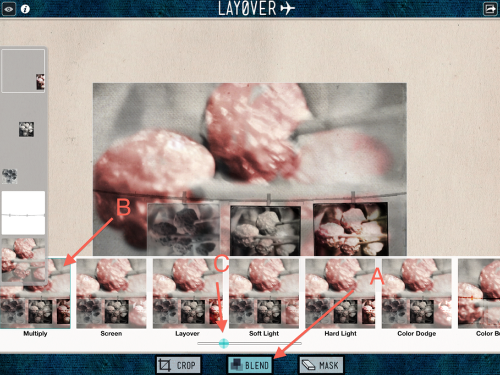
One last time…I clicked on Blend (A), Multiply (B), and adjusted the level (C) to give this variation the same feel as the others.
After a little more tweaking of each layer, I clicked on the Share icon and put it all into my Camera Roll.
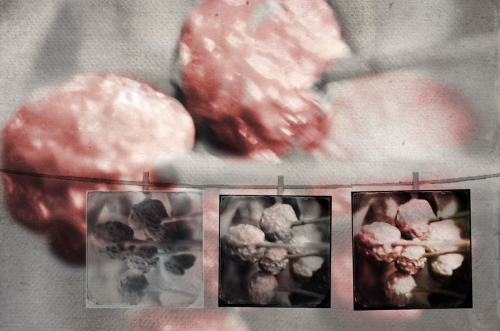
The final version…Variations on A Theme! Now it’s your turn to create your own!!
David Hayes
David is Head of Technical Tutorials here at theappwhisperer.com and this role adds to the many things David has done in his life…some of which he considers more significant than others. Yet, he feels all have made him the artist he is today. He’s been a cook at a truck stop, a janitor at a military base, worked in advertising, been a banker managing other people’s money, and an elementary school teacher. Trained as a photographer as an undergrad, he’s recently returned to these roots and now considers himself foremost a photographer and secondly a mixed media artist. You can find David’s work on many other popular websites including his own: http://www.clearerreflections.com.

5 Comments
Irene Oleksiuk
David, wonderful tutorial and the final image is great. Like the clothes line.
I think you should give us a little hint on the clothes line.
David
Thanks Irene! A hint? Well…all I’ll say is that PS Touch has some great extraction tools….
RegiB
Great tutorial in layover. It’s certainly easier to use than some of the other multilayer apps. I think….your clothesline in a cutout because, at first I thought you might have drawn it, but then I noticed on close-up inspection the remainder of cut photos, am I right? If I’m not, ha ha you fooled me!
David
Thanks RegiB! Yep…I used PS Touch to extract the clothes line from another image. I had first tried to draw one but couldn’t get it right so I did the next best thing!
Pingback: