iPhone Photography Technical Tutorial – VectorSNAP and iColorama: Step-by-Step Pop Art – By Jerry Jobe
We’re delighted to publish Jerry Jobe’s latest tutorial, this weeks tutorial is with the VectorSNAP app
along with a step-by-step procedural for using the output of VectorSNAP as a mask. I think you will enjoy this very much, over to you Jerry. (foreword by Joanne Carter).
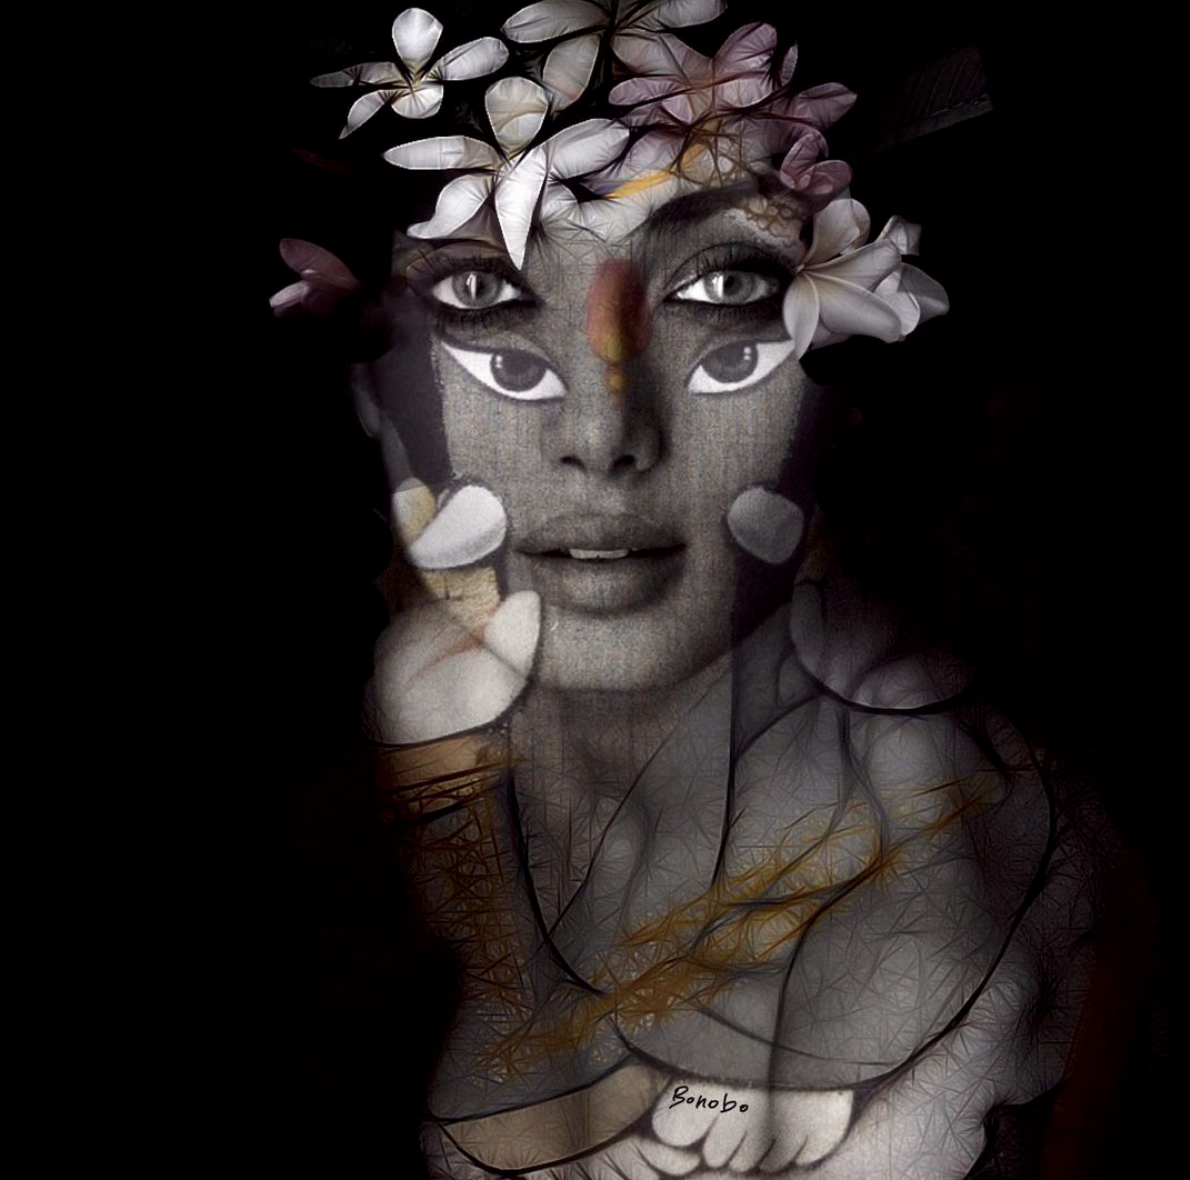
“About a week ago, a friend alerted me to the app VectorSNAP, which creates a black and white version of your images – solid black and white – with smoothed edges. This image can either be saved as a normal image file or as a vector file that can be adjusted with desktop products like Adobe Illustrator or Inkscape. However, the first thing I thought when seeing her image from VectorSNAP was not “Vectors!” but “Masks!”. I have done an earlier video tutorial on creating black and white masks from your image in iColorama, and I realized a series of masks would allow you to layer colors, textures and patterns, resulting in “pop art” images like the one below.
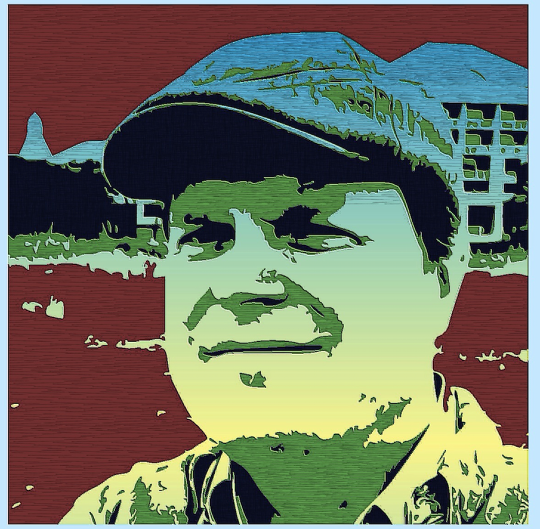
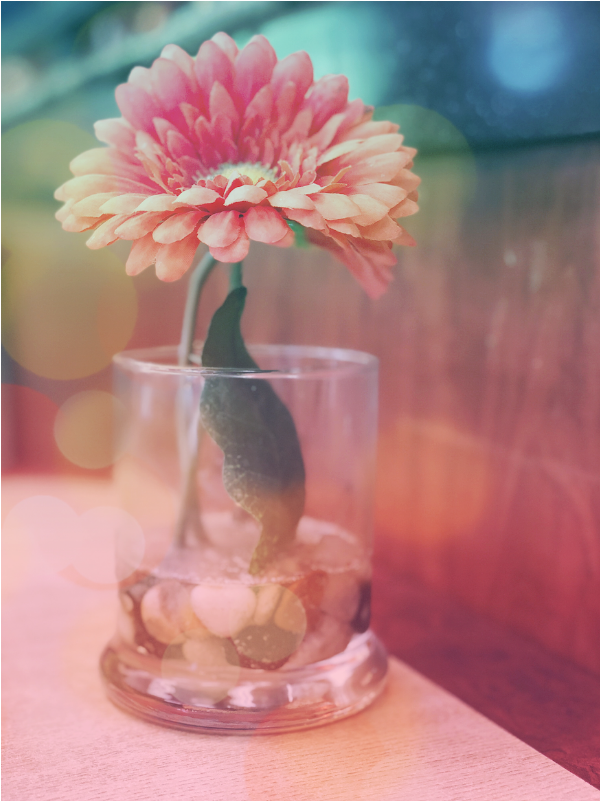
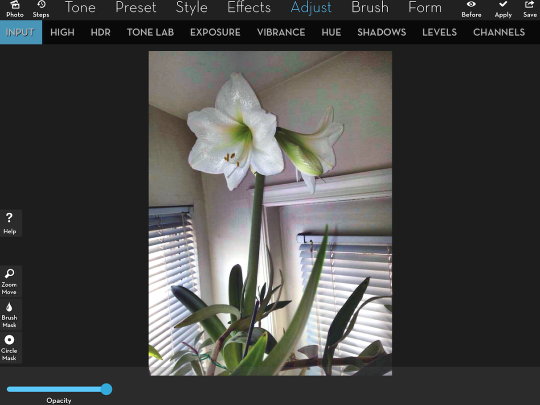
I’ve learned the hard way that not every image is suitable for this technique. In the image above, the background did not detract from the tones in my face and hat. With that selfie, there was no reason to prepare my photo before using VectorSNAP. In the flower picture below, the blinds, doorframe and ceiling wall corners that fall into the same dark- and midtones as the flowers might make it impossible to tell where the edges of the flower were. So I want to smooth all of the background out.
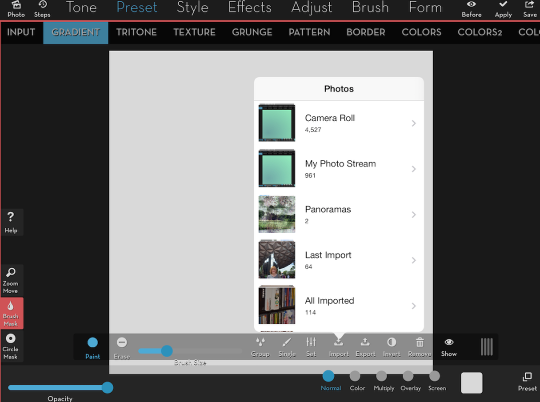
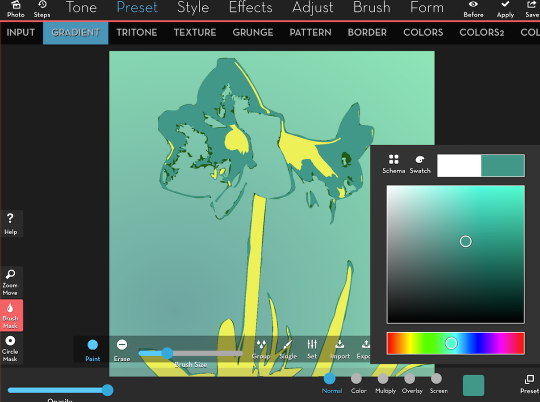
Luckily, I’ve already got a mask that will show me just the flower, and hide the background behind a solid color produced with Preset>Gradient in iColorama. I’ve chosen Preset>Gradient below, with the default color of white. Then I tap Brush Mask on the left and Import on the resulting toolbar. The third row, second column in my camera roll contains my mask. Remember, in iColorama, White conceals and black reveals your changes (in this case, a gradient), so I will have to tap the Invert button as well to make the white Gradient cover the background rather than the flower.
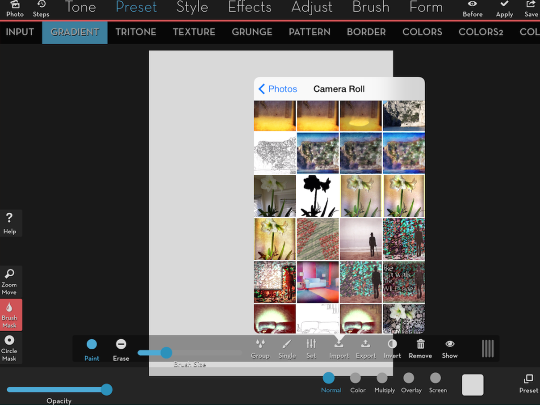
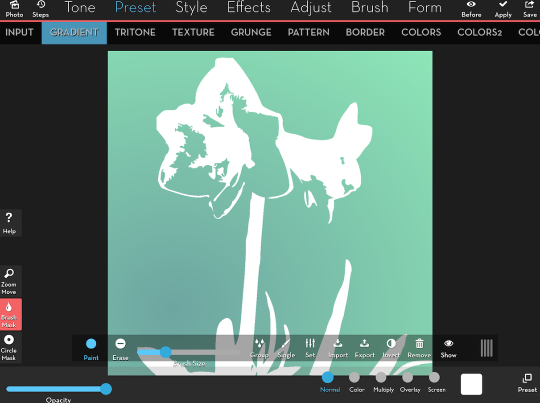
Next I go to the color picker on the bottom right and pick a nice green rather than a stark white as my background color. Choose the brightness or tone of your color wisely; any color lighter than the background in my flower will ALWAYS be white in the resulting VectorSNAP image, and therefore will always show the background in the resulting pop art. Don’t worry if that doesn’t make sense now; it will later.

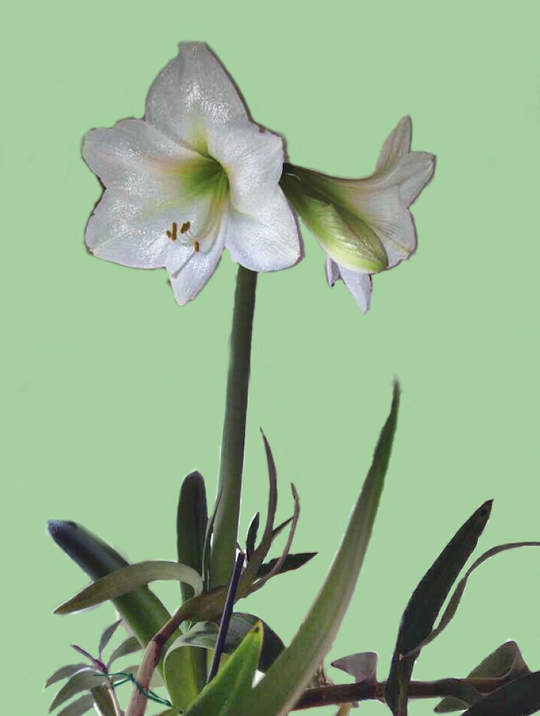
And here’s my masked-out flower that I’ll take into VectorSNAP.
VectorSNAP is not a universal app; if you run it on your iPad, as I’m doing here, it will remain in portrait mode and be “blown-up” to fill the larger screen. Tapping the picture icon will allow you to load a photo from your camera roll.
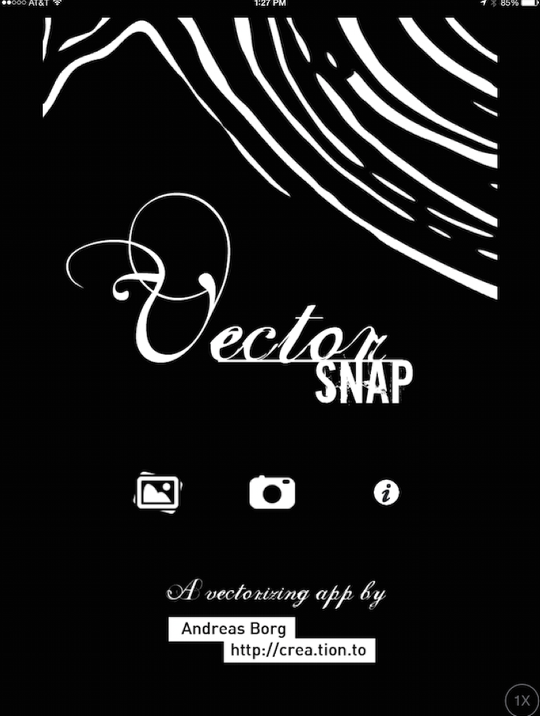
VectorSNAP is simple to operate – just a couple of sliders and buttons. But it does limit you to a square format (something I would love to see changed in a future release). So the first thing you’ll need to do is position your image correctly.
You position the image with a two-fingered pinch and drag. As you are repositioning the image, it will be shown with its original colors, as seen below.

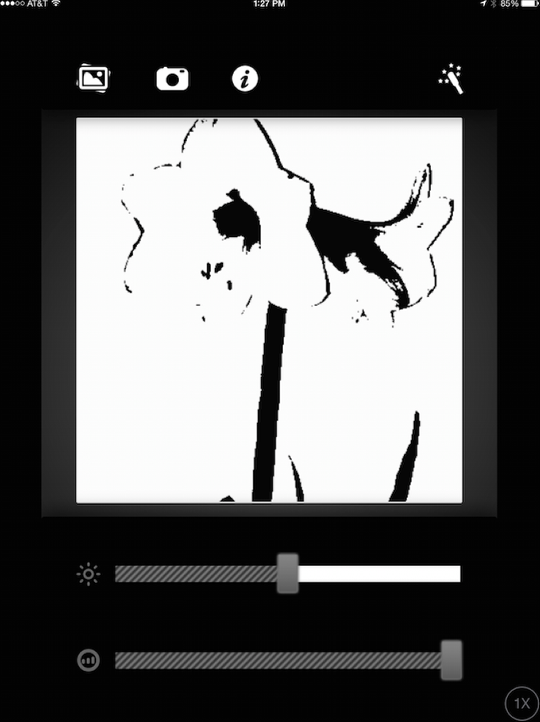
When you release it, it will show you the black and white version. The top slider is “brightness”. This will determine the brightest tone that will be converted to black in the photo. In the image below, I moved the slider to the left until the background started turning black, then back to the right until no background was black. See how there are parts of the bloom that remain white. That is because the background (green) of the original photo was darker than those portions of the bloom.
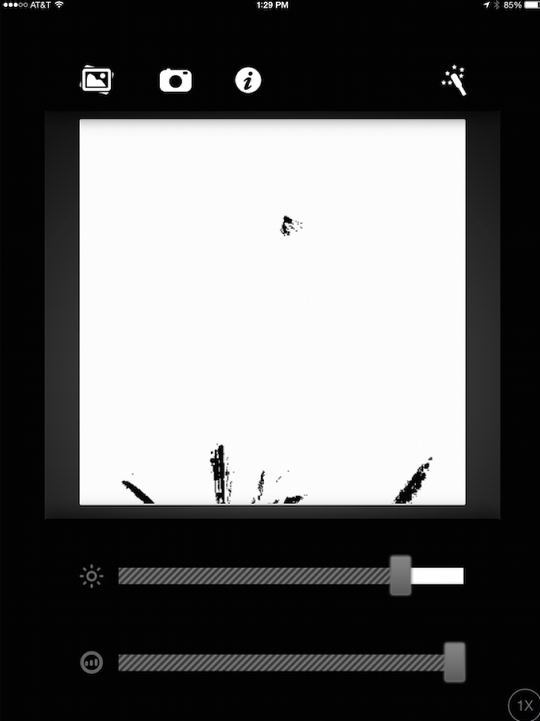
When I move the “brightness” slider to the right, only the darkest portions of the image will be converted to black. The image below has too little black to be of any use to us as a mask.
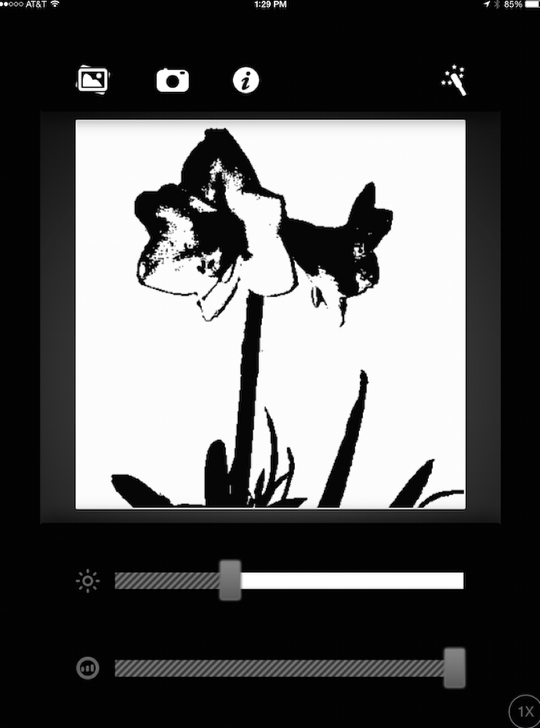
The bottom slider, with an icon that looks like a “levels” control, works the opposite way: it makes the darkest portion of the image (in this case, the leaves) white without affecting the lightest portion. In this way you can get some interesting edge effects, as the dark leaves turn white, but the slightly lighter edges stay black.

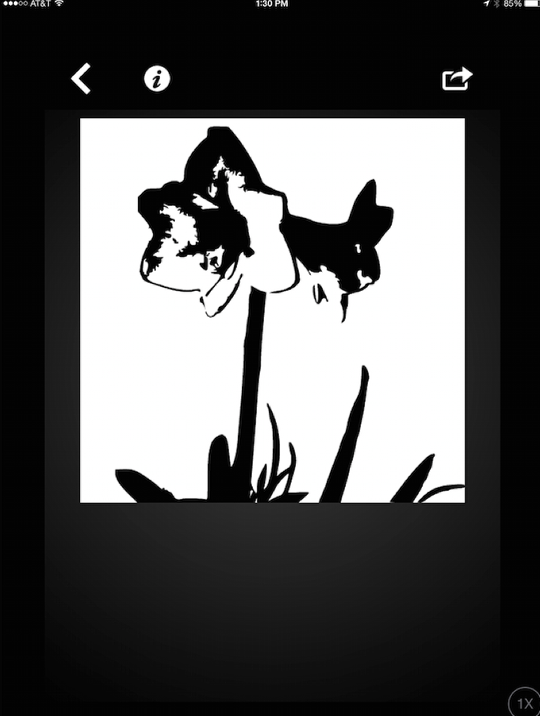
Tapping the “magic wand” icon at the top right vectorizes the image, removing the smaller dots and smoothing out the edges. You can then choose to save the image by tapping the icon at the upper right. If you’re unsatisfied with your image, you can tap the arrow at the upper left and return to the sliders for further tweaking.
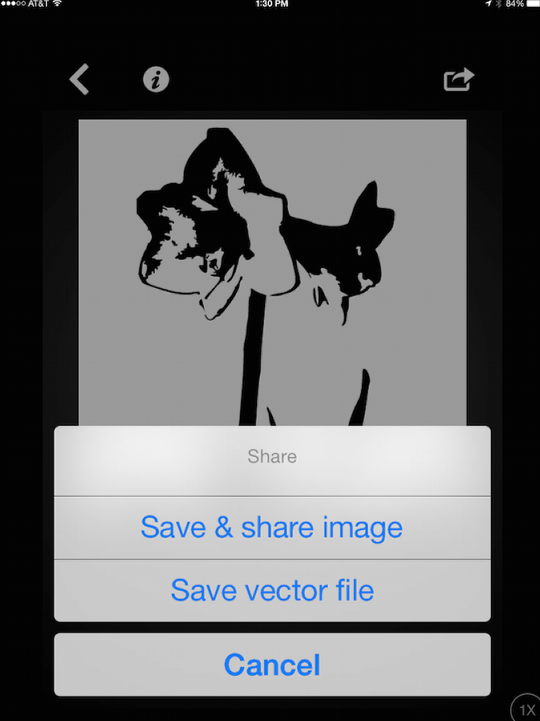
You have two ways to save your image: as a JPG image file, or an SVG vector file. For this tutorial, we want to save it as an image to our camera roll, so we choose “Save & share image”.
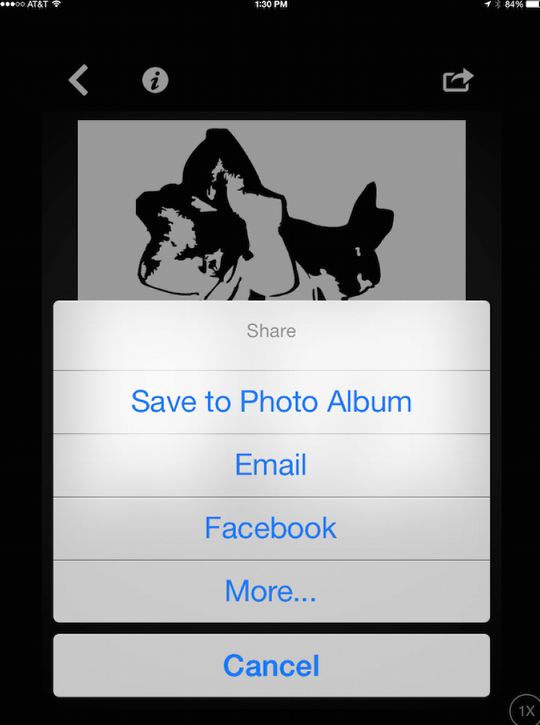
Then we choose “Save to Photo Album”.
In order to have different masks that I can apply different colors to, I go back and adjust the sliders, create another vectorized image and save it. I do that a third time, and I have three different masks for use in iColorama. That’s about as many as my poor brain can handle, but you are free to create more.
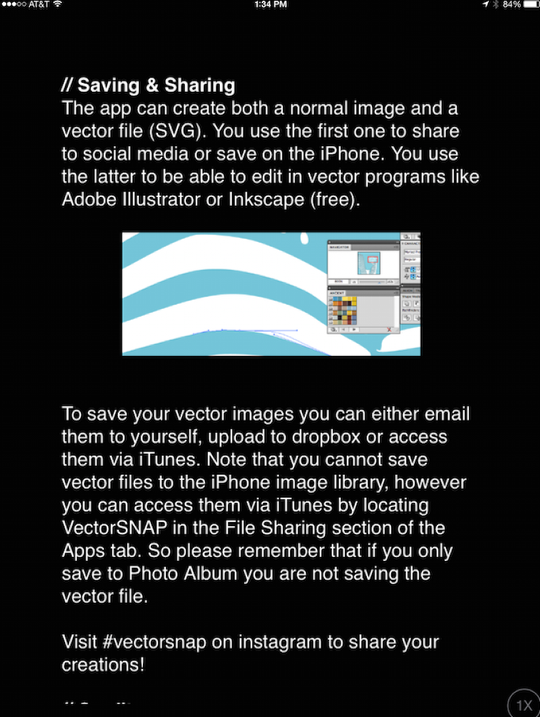
Below you’ll see the help file from VectorSNAP, explaining that SVG files cannot be saved to the camera roll, but can be accessed through File Sharing in iTunes, and moved into your desktop illustration programs.
That’s pretty much it for VectorSNAP. If you like the black and white images, or if you can use the vector files in a desktop program, then you’re done. But I’m happier when I use the results as masks, so let’s step you through the procedure in iColorama.
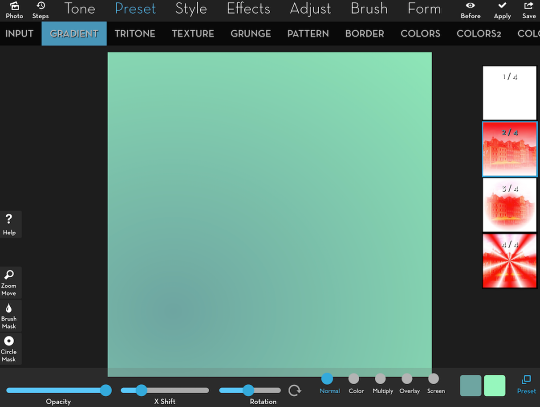
The first thing I do is load one of the masks as my base. These masks I’ve created are square, and if I try to load a square mask to a rectangular image, the mask will be stretched and misshapen. VectorSNAP saves as a 1200×1200 square, which is sufficient for my purposes. The image below shows me laying down the base that my masked colors will be applied to. In the “selfie” at the beginning of my tutorial, that was a blue-to-yellow gradient. Here, I selected preset 2 under Preset>Gradient and chose a green-to-teal gradient. I Apply that gradient, and a history Step is created.
Next I’m going to apply a single color Preset>Gradient, and I’m going to use one of the masks to apply that color to a flower-shaped portion of the image. I tap Brush Mask, then Import. I start with the mask that has the most black in it. If I started with the one with the least black, then subsequent masked colors would cover the first one completely.
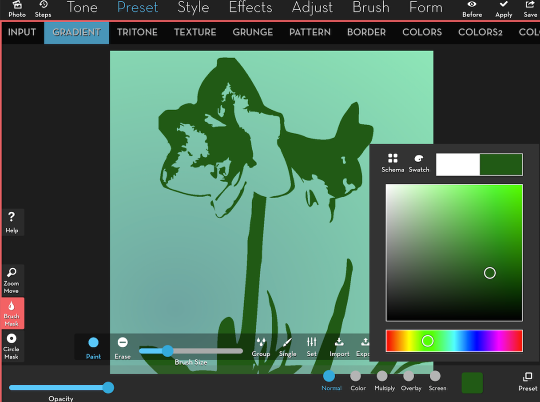
I’ve loaded the mask below, and you can see the default white over the background. That looks nice as it is, but we’ve got other things we can do, so I’ll change that white to another color.
Using the color picker, I choose a dark green as my first color. There are millions of different ways to apply colors, but as a guideline, I’ve found that applying a dark color, then a light, then finishing with another dark will normally give me the most pleasing result.
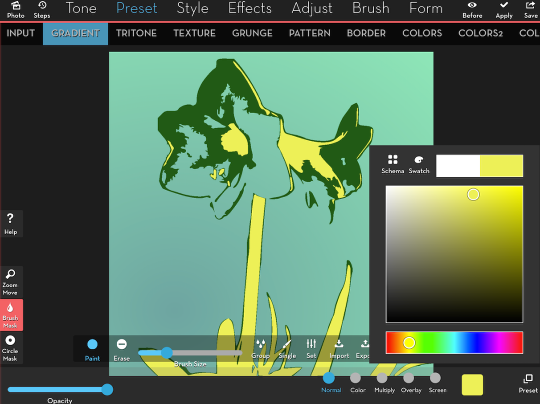
I Apply the green and move on, choosing Preset>Gradient again and loading the second mask. This time I choose a bright yellow.
I finish up with the third mask, for which I choose a mid-tone teal. By this time almost all the dark green is covered – that’s just a peculiar twist of the combination of original image and the masks I created. You’ll have a different balance between colors on your own images.
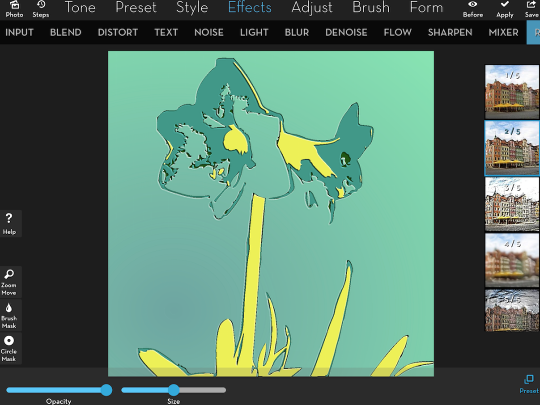
So now I’ve used my three masks to apply three different colors – what can I do to improve the image? One thing I like to do is use Effects>Raise, to give depth to the color layers. In the image below I’ve applied Effects>Raise>1. Many times this is a nice effect, but I’ve zoomed in here to show you the bright color fringing that can occur. Notice the bright blue along the bottom edges of the yellow.

I can tone that down by using the Size slider. But it’s still there.

For this image, I prefer Effects>Raise>2, shown in the image below.
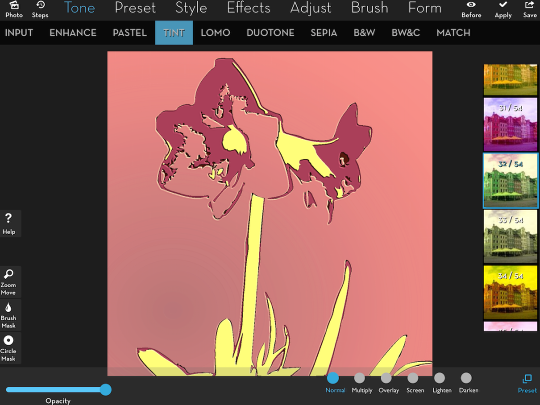
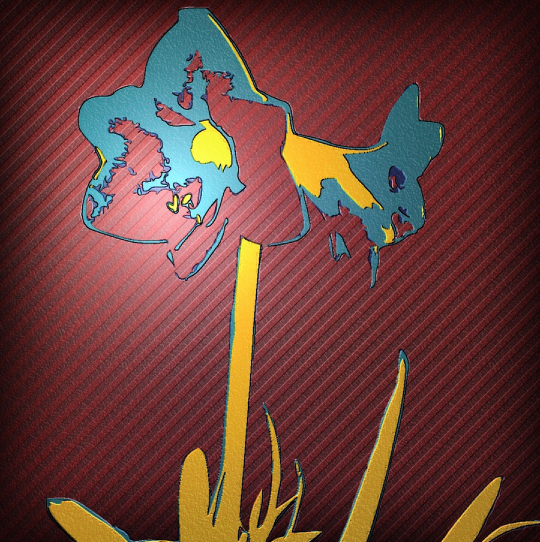
If I’m not satisfied with the colors I’ve chosen, I can change them using Pastel, Tint, Lomo, Duotone, Hue, or any of the Color Presets. In the image below I used Tone>Tint>32, which changed the green to red.
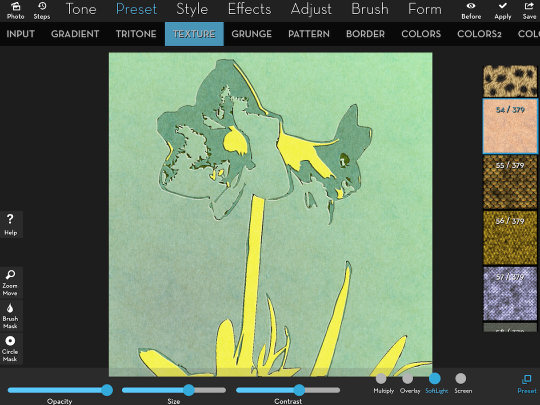
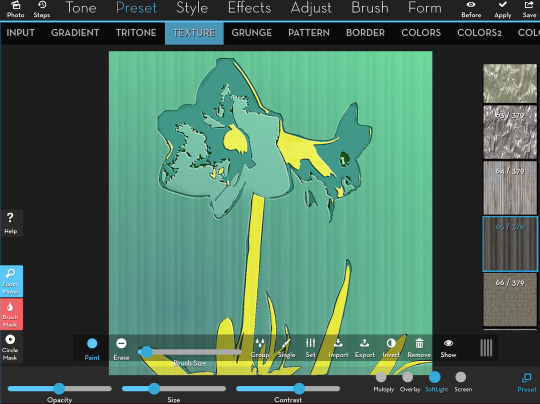
I can also add Texture. If I wanted Texture on the background, why didn’t I apply it at first before adding the flat colors? Because if I then decided to use Raise, as I did here, then the texture would be raised also – and that can be a mess, with a whole lot of bumpy texture. Here I applied Texture 54 in Soft Light mode with the Contrast raised slightly.
I decided to give it stripes instead, using Texture 65. I didn’t want the stripes on the flower so I painted in a new mask to remove them. I couldn’t use the mask that I used to prepare the image for VectorSNAP way up at the beginning of the tutorial – it was rectangular while this image is square. So I had to roughly repaint it.
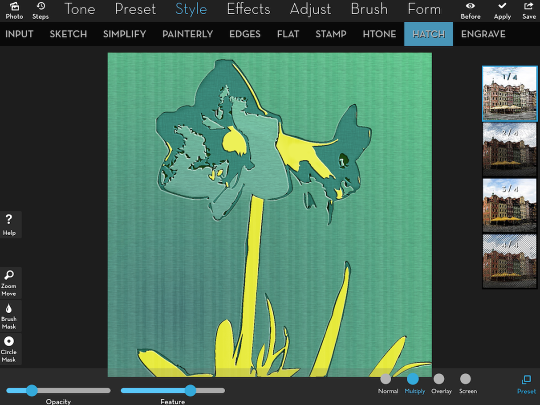
I removed the painted mask and applied a low-opacity crosshatch to the entire image.
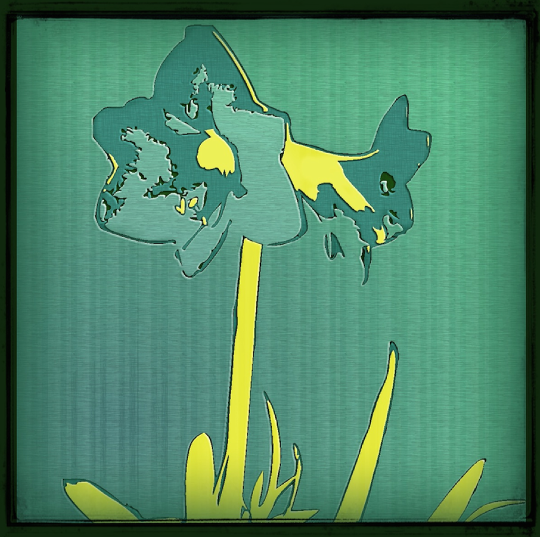
Adding a border completed my image, seen below.
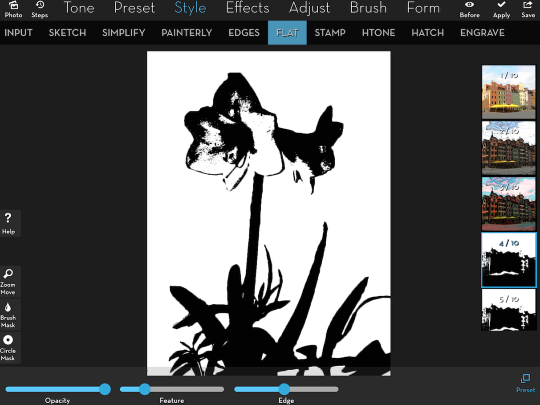
It is possible to use the same technique without using VectorSNAP, remaining entirely in iColorama. VectorSNAP produces cleaner, smoother edges, but iColorama allows you to keep all of the original rectangular image. It’s a longer process within iColorama, as well, using Flat and Flow. There are two different Style>Flat presets that produce a black and white image, 4 and 5. 5 is shown below – an interesting look that incorporates gray and one that could produce some interesting masks, but not what I’m trying today.
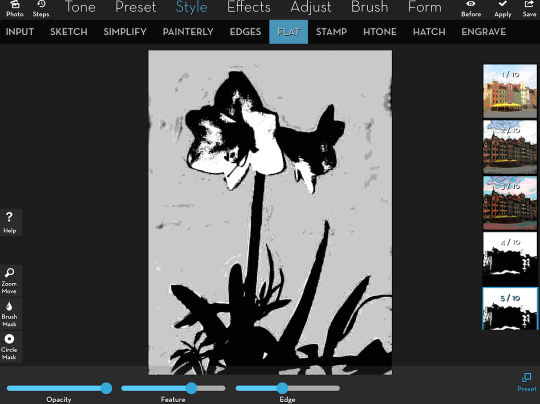
Style>Flat>4 produces pure black and white, and is adjusted using the Feature and Edge sliders. I Apply the Flat.
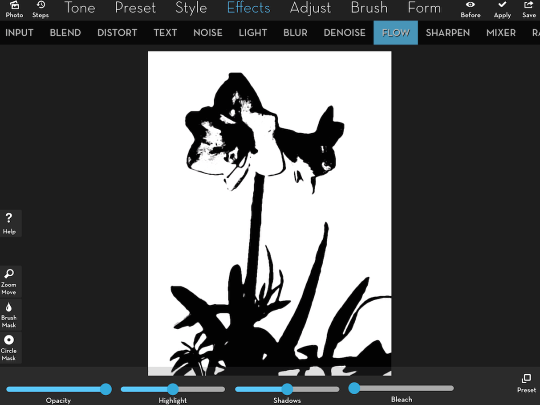
I use Effects>Flow to smooth out the edges. I save the result without applying.
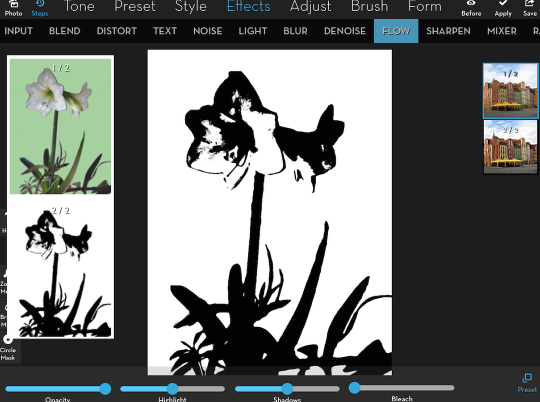
Then I use history to step back to the original image, and start the Flat>4 and Flow procedure again, using a different combination of Feature and Edge to create a different mask.
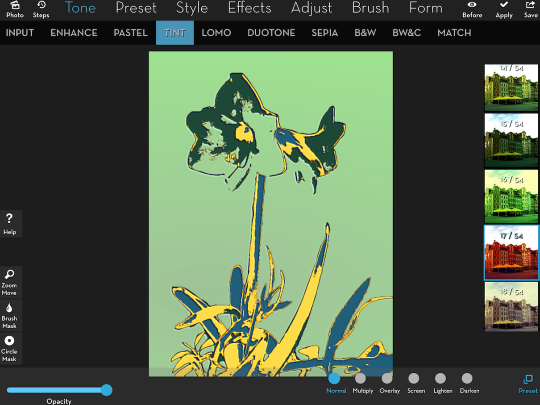
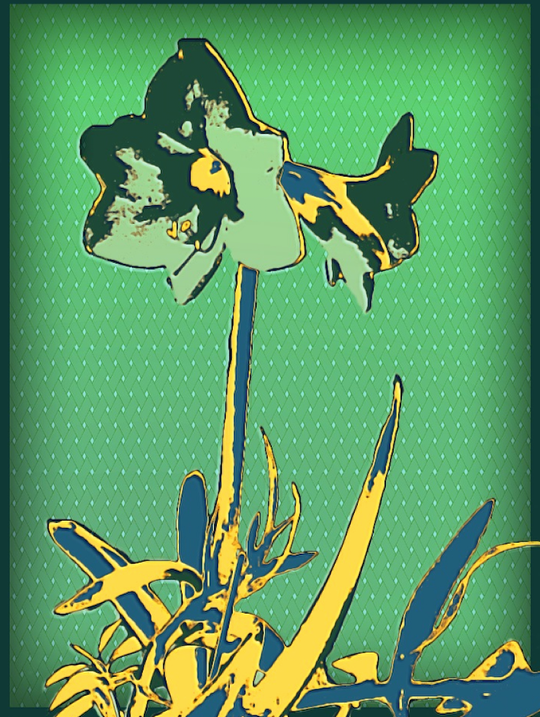
I used the same basic background and layer colors in this all-iColorama version. Then I kinda liked what Tint>17 did.
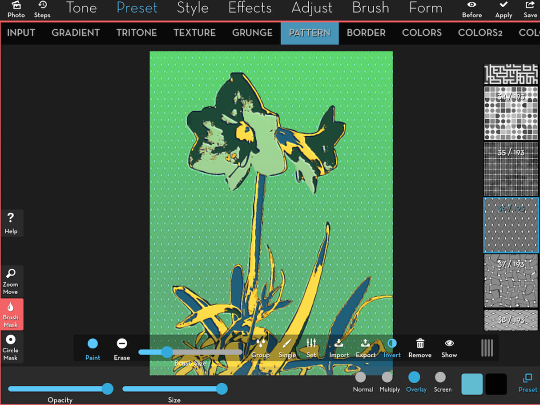
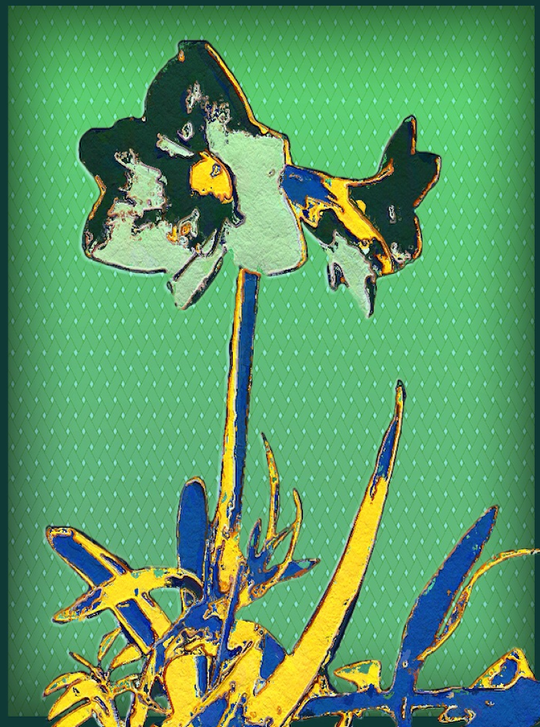
Another advantage of doing it entirely in iColorama is that the original mask can still be used. Here I’ve loaded the original mask and applied Preset>Pattern>36 to the background. Pattern is a new feature in iColorama; notice that you can assign the light and dark colors of the pattern, changing them from black and white.
Another advantage of using a mask that goes to the edge of the image is that it can be used to mask out a border. In the image below I am applying Preset>Border>3 with the mask in place over the flower.

Keeping the mask in place, I added an addition Preset>Border>1 to finish the image.
I took that image through Glaze and brought it back into iColorama with the original mask, to give the flower a painterly look rather than a graphic look. Mixing of styles is definitely an option when using masks in iColorama.
So there you have it. VectorSNAP is an easy-to-use app that can help you turn your images into pop-art masterpieces, when you use the results as masks in iColorama. You can also use the output of Style>Flat>4 and Effects>Flow as masks, but they’re a little rougher than the VectorSNAP masks.
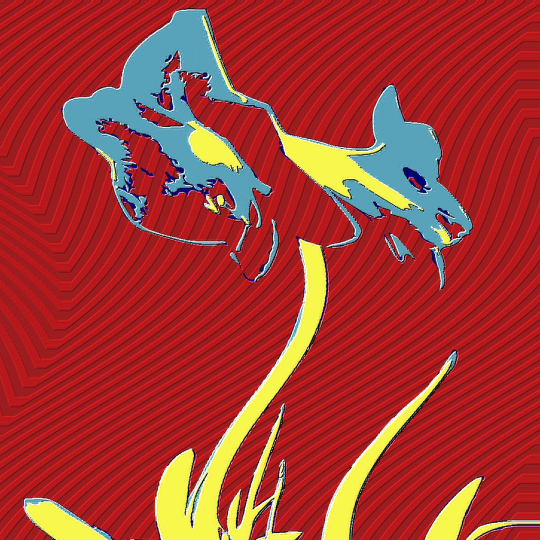
I’m going to finish with a few images that illustrate earlier points I made. First is a point I made about Raise. In the following image I used a striped pattern as the background and built up my colors on that before using Raise. Then I used Effects>Light for the spotlight effect. Notice how Raise gave depth to the stripes in the background also.
Next I used Form>Wave instead of the Light command, and ended up with “Garden Dream”.
In the next image, instead of layering dark, light, dark colors, I did dark, mid-tone, light colors. In addition, I added a different pattern to the mid-tone and light colors. Not entirely successful. I wanted to show you this to let you realize that not every experiment is going to be worthwhile – but it’s an easy matter to step back and try again when you’ve got the masks to load.
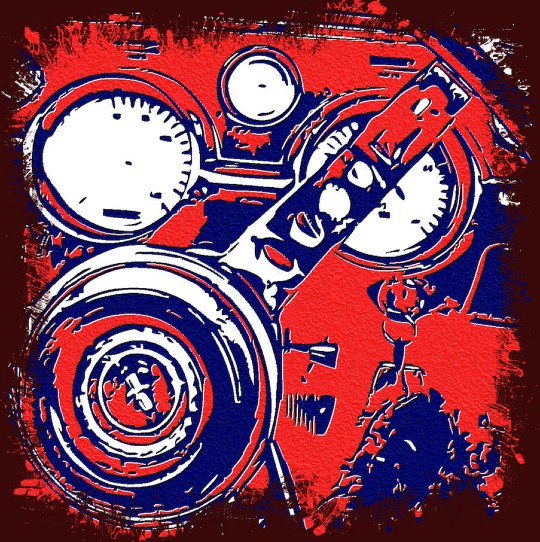
Last, here’s the very first image I created when I acquired VectorSNAP – the steering wheel and instrument panel of my niece’s awesome Mustang. Hopefully I’ve inspired you to try this technique and create your own art. I’d love to see your results! Enjoy!
Jerry Jobe
Never content with just scratching the surface of what an app can do, Jerry Jobe decided to pass on what he learned about imaging apps to others. He’s constantly trying to figure out just what tools other artists have used, and trying to incorporate them into his own work, in an attempt to find his style. He’s written tutorials on over 145 apps so far, which you can find (along with his Song of the Day entries) at http://enthusiasmnoted.wordpress.com/ He lives near Atlanta, Georgia, where he also finds a creative outlet in acting and directing in community theater.