iOS Photography Tutorial – ‘PhotoToaster Part 3: Borders and Brushes’ by Jerry Jobe
We’re delighted to publish the third and final part of this wonderful Photo Toaster tutorial series by Jerry Jobe. If you have missed Part 1, please go here and Part 2 can be found here.
PhotoToaster retails for $2.99/£1.99 and you can download it here.
We are sure you will enjoy this very much, over to you Jerry (foreword by Joanne Carter).
“As I said last time, I made a couple of errors in the first installment of my articles on PhotoToaster, and I’d like to clear them up here. The first is a feature that I did not find while experimenting with the app. When using the Custom Picker to choose an image for editing from your library, I stated that the only difference I could see was the sort order. Actually, you can press-and-hold on any thumbnail to see the full image. This is helpful when you are trying to choose between many similar images, such as you might have when using multiple apps to create a finished image. This is a very helpful feature – well worth using the Custom Picker.
The other error I made was with the Recent Edits setting. I said it reflected how many “undos” could be accomplished. Instead, it denotes how many editing sessions are saved on the “Recent Edits” list on the home screen. I pointed out that having to exit to the home screen to change settings was awkward; but if you then access the most recent edit, you can return to your current edit without having to reload the image and start over. It’s still a bit awkward in my eyes, but not nearly as bad as I made it out to be”.

Now let’s return to our discussion of the rest of PhotoToaster. As I mentioned last time, PhotoToaster was recently upgraded to release 6.5. The new release does not make radical changes to the user interface, so you needn’t worry that these tutorials are out-of-date. We move on to Borders. They are accessed by tapping the Border icon at the lower right.

Just as with Textures, the Borders are divided into File Folders; the number of the current folder is reflected by the number within the Folder icon at the top center of the Preset pop-up. Below I’ve tapped the Folder to go to Folder 2.

Tapping the Sliders icon on the Preset pop-up will show the various borders along with a single slider: Width.

The Width slider only makes subtle changes to the width of the border. Below I’ve moved the slider nearly all the way to the left, and the border is kept from becoming so thin as to disappear.

When I move it all the way to the right, it doesn’t get large enough to obscure the image.

There are a few borders that are affected differently by the Width slider: Grids, Squares and Fans. If you move the Width slider on a Grid or Square border, the size of the individual squares changes. Below you’ll see a Fan border with the Width slider to the right. There are more vertical rectangles, since each individual rectangle is narrower.

Moving the slider to the right increases the width of each rectangle, resulting in fewer total rectangles.

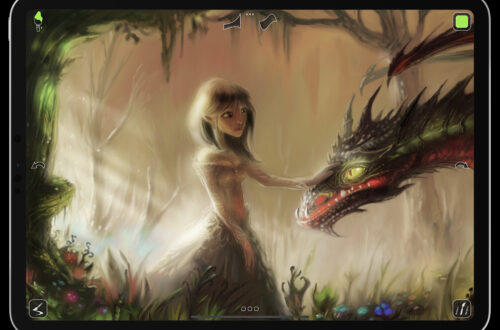
I decide on a thin Leather border for our building.

Tapping the image hides the toolbars, allowing us to see the full image. Tapping the image again brings them back.

So now we’ve covered the icons along the bottom: Lighting (Tone), FX, Vignette, Texture and Border. Tapping the Brush icon at the upper right. Brings up a drop-down menu. We’ll take a look at the contents of this menu from the bottom up. First: Photo Info.

Photo Info will show you the metadata included on the image, including size, location taken, time taken, etc. If the metadata has not been saved on this particular image, this information will be limited.

The Help option brings up a graphic representation of the screen, with text explanations. Tap Done to return to editing.

Reduce Noise can get rid of a good bit of the noise that is in images taken in low light. It can also “flatten” your image, eliminating detail. It’s best to see the effect of Reduce Noise by zooming in.

Below you’ll see the building image before Reduce Noise is used.

Moving the slider all the way to the right eliminates the detail of the bricks and the leaves. This can be useful as a flat, “painterly” look.

Next up is the Lighting Brush: the Dodge and Burn tools of PhotoToaster. These are very nice tools for adding some depth to your images. Once you enter the Lighting brush screen, there are Lighten (Dodge) and Darken (Burn) icons at the bottom. I have selected Darken and brushed quickly across the street and over the sky, darkening those areas.

The Wrench icon within the Lighting Brush screen allows you to clear Lightening and Darkening separately and start over.

Tapping the check mark returns you to editing, with your other edits (such as Texture and Border) applied.

The final menu item under the Brush menu is FX brushing. The Fx button at the top drops down a menu to allow you to choose from the different effects: Desaturate, Defocus, both Desaturate and Defocus, and Soft Focus.

What you are accomplishing on this screen is painting in a mask, where the chosen effect will be applied. At the bottom of the screen you will see icons for brushing and erasing, and a hard-edged or soft-edged brush. The yin-yang button inverts the mask, and the Trashcan deletes the mask. Below I’ve painted Defocus (a very strong blur) over the tree with a soft brush.

The orange button at the top right is the Show Mask button. Orange overlays the portions of the image where the effect will be added.

Below you’ll see where I’ve added Defocus to the trees.

Changing the Fx selected will change the effect added, not add on to it. For example, below I’ve changed the painted effect to Desaturate from Defocus. Only one effect can be painted onto any one image. Trying to add multiple effects requires a save in between.

I find the Fx brush to be easy to use, but not all that useful. The effects can’t be modified in any way; Desaturate takes the masked area all the way to B&W, without allowing for washed-out color. The blur applied is either the fairly strong Soft Focus or the very strong Defocus. If you are going to use the Fx brushes, I recommend you use the Show Mask function. You can see below that I managed to brush in an additional area over the parking garage inadvertently.

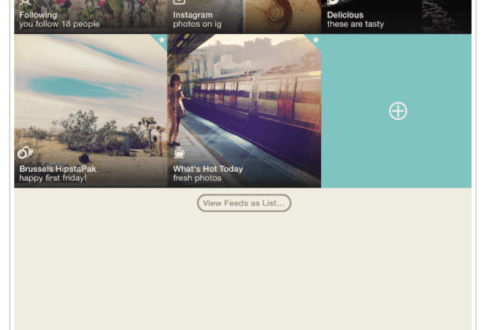
Tapping the Save button (the box with the arrow on the main edit screen) brings you to the following screen, with all kinds of save options. It also will allow you to send the image to East Coast Pixels’ companion app, TitleFX.

Back in part one, we saw a setting to “Prompt for Save Albums”. I chose to save my image to the Photo Library, and this screen is the prompt. A separate switch is there for each album on your device. Flipping the switch on will save a copy to that album in addition to your Camera Roll.

And here is the finished image.

So the question becomes: is PhotoToaster the basic editor for you? I can’t give you that answer, but you should be able to find the answer here. If the user interface makes sense to you; if it complements your workflow; then it is the one for you. Personally, the textures, borders and Lighting Brush make it of value to me. The ability to tailor the Fx brush and to add multiple textures would make it even more valuable.
I wanted to end with an example of the brushes and how they can add to your image. First of all, an image taken in the Colorado Rockies grunged with various programs.

Then, the same image with the Darken brush around the edges and on the grass, and the Soft Focus brush on the faraway trees on the slope to the left.

I hope you’ve learned from this look at PhotoToaster. Enjoy!
Jerry Jobe
Never content with just scratching the surface of what an app can do, Jerry Jobe decided to pass on what he learned about imaging apps to others. He’s constantly trying to figure out just what tools other artists have used, and trying to incorporate them into his own work, in an attempt to find his style. He’s written tutorials on over 145 apps so far, which you can find (along with his Song of the Day entries) at http://enthusiasmnoted.wordpress.com/ He lives near Atlanta, Georgia, where he also finds a creative outlet in acting and directing in community theater.
You May Also Like
AppArt School – Ten iOS Painting Apps that offer Tutorials, Community Features, or Resources to Help Improve your Painting Skills
Mobile Photography App Tutorial – Oggl – A Love/Hate Relationship – TheAppWhisperer