iOS Photography App Tutorial – ‘Water Battle Part 2: Flood – Color Lake
We’re delighted to publish the second part to this fabulous technical tutorial with the creative app Color Lake. Jerry Jobe has once again created a comprehensive and fully immersing tutorial, we are sure you will find it very useful. If you missed Part 1, please go here.
Color Lake usually retails for $1.99/£1.49 but it’s actually free right now and you can download it here. (foreword by Joanne Carter).
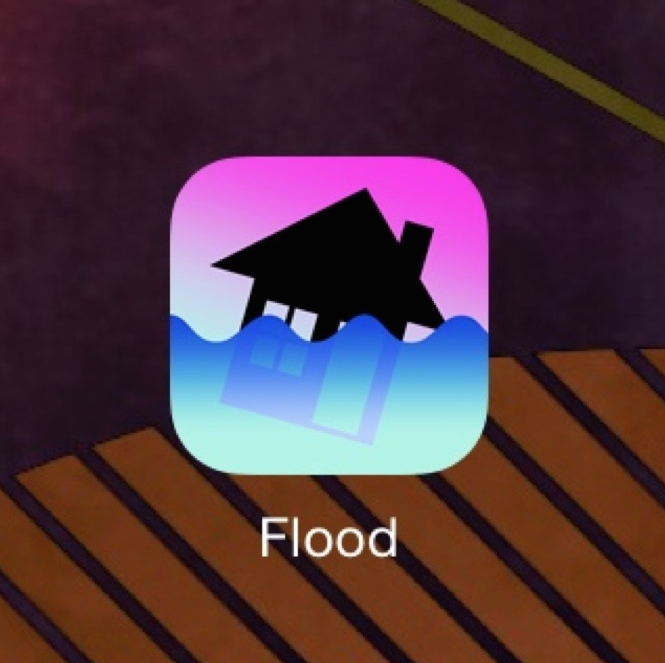
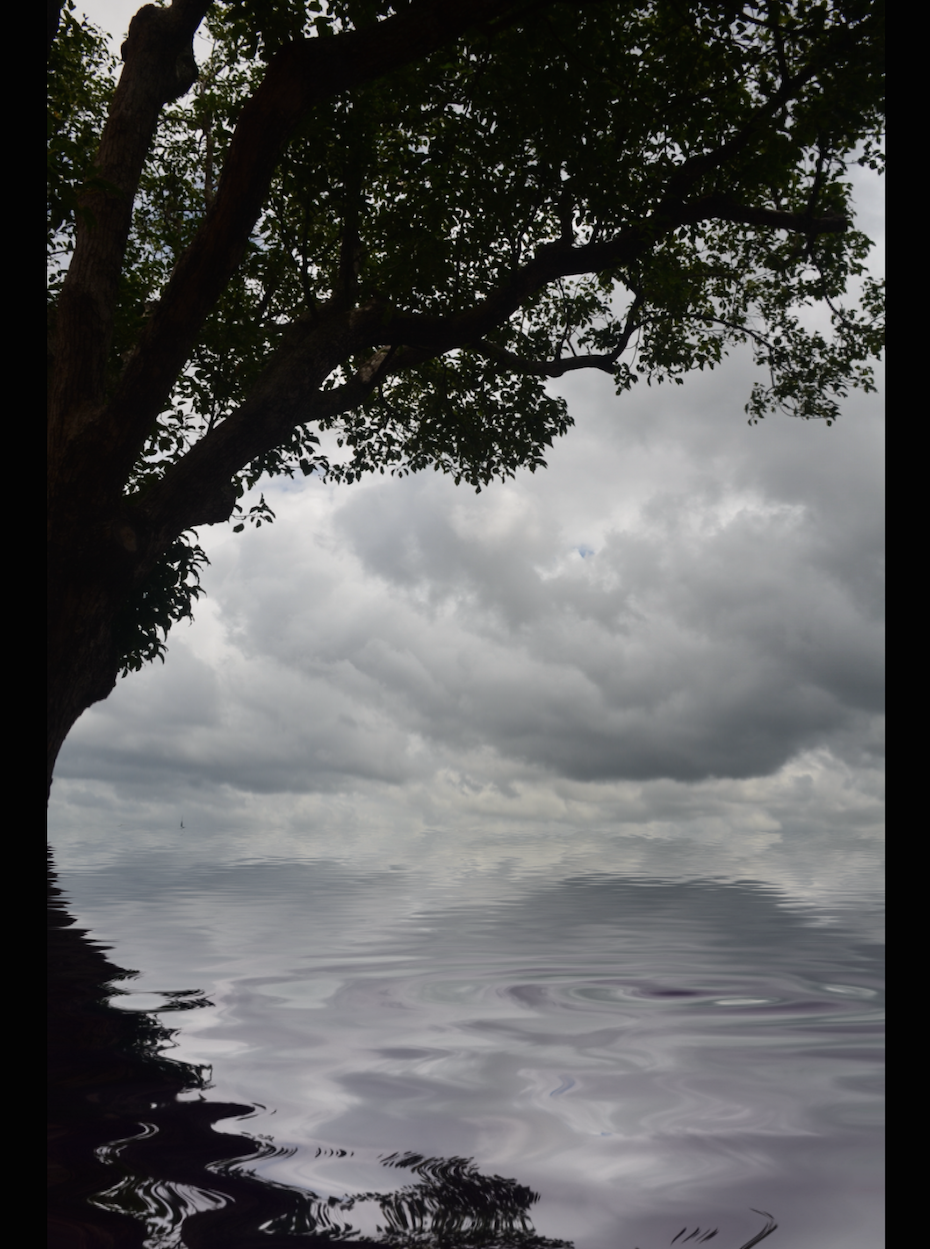
ColorLake, the app I covered in the first part of the Water Battle, was initially released in January 2012. Two years later, a challenger stepped forward to submerge your photos by the name of Flood. Flood was developed by Flaming Pear Software, makers of many desktop Photoshop plug-ins (including Flood for Photoshop). There are resemblances to ColorLake, but the first difference you’ll notice when working with both is that Flood does not create moving water or videos. The water is static.
Flood loads with an essentially blank workspace. Once you start to work with Flood, your last project will automatically be loaded. The first time you use it, a sample image is loaded; that’s the image I’ll be using for my tutorial today. Across the top of the workspace are buttons for Load, Help and Save; along the bottom are buttons for Wave, Ripple, Blur, Perspective and Random.

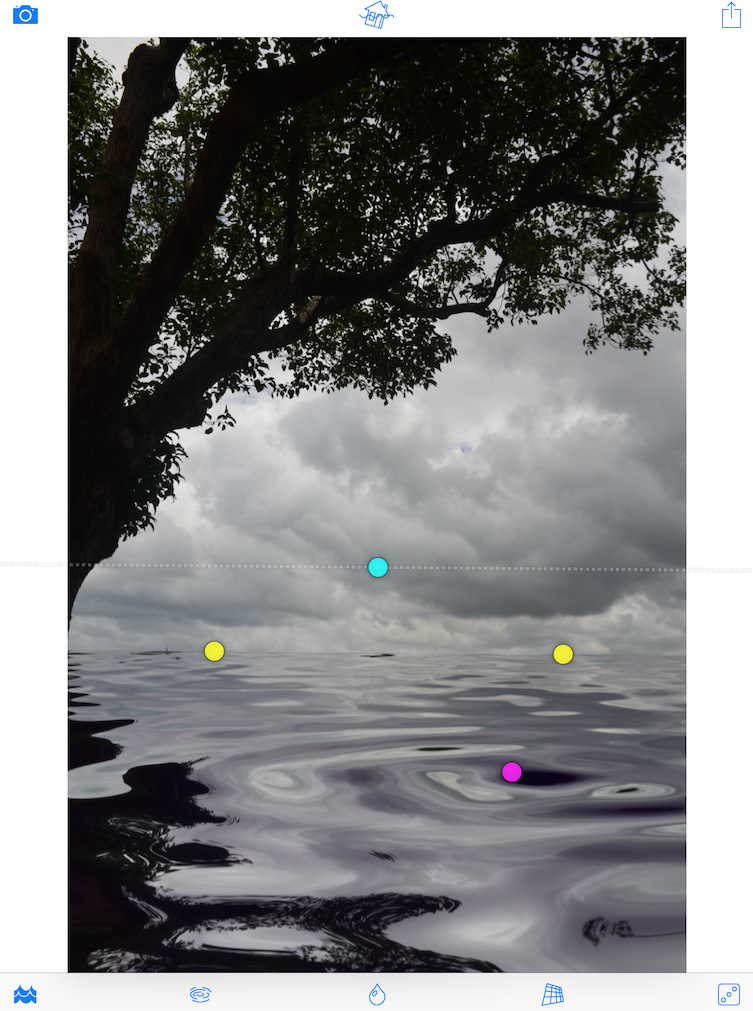
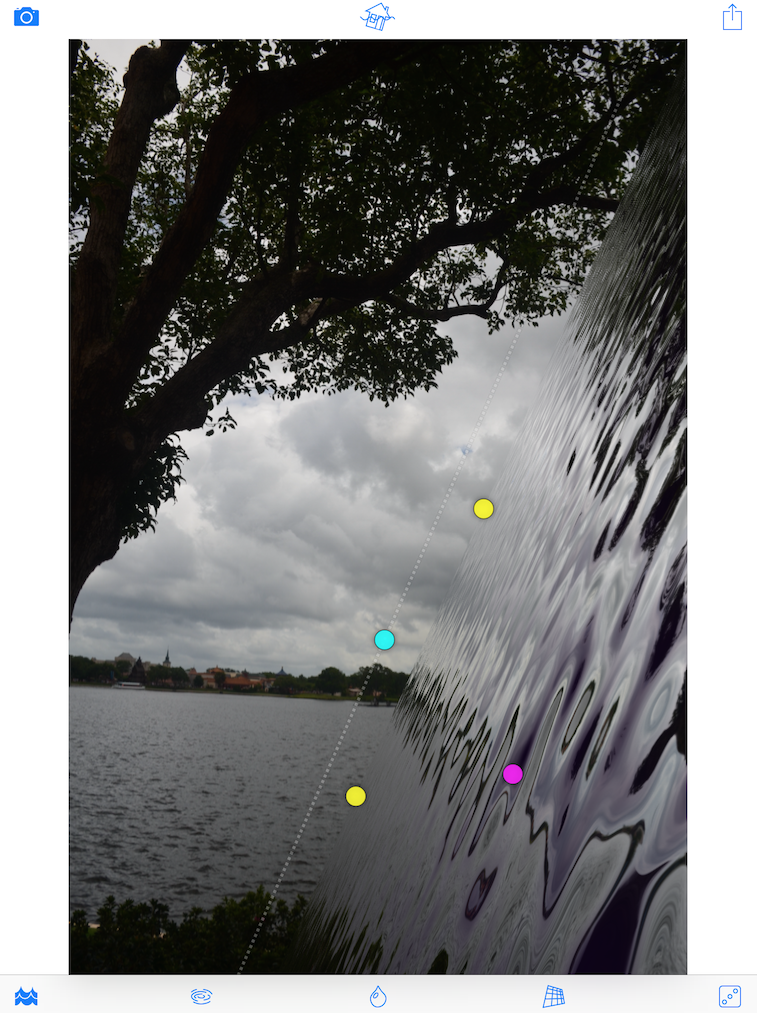
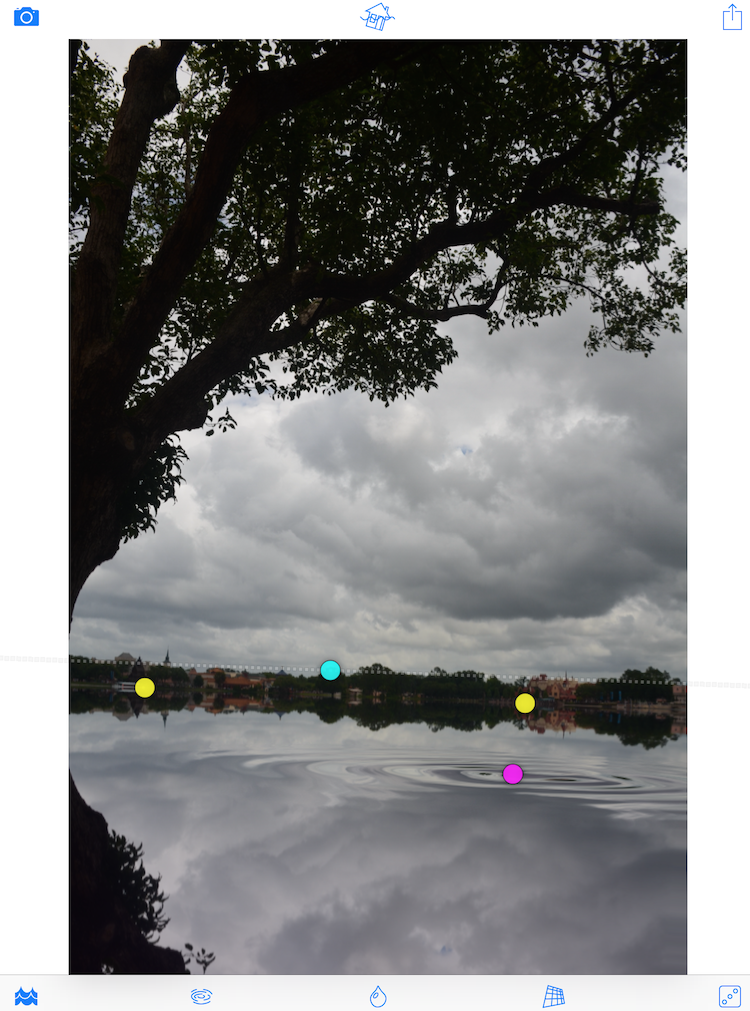
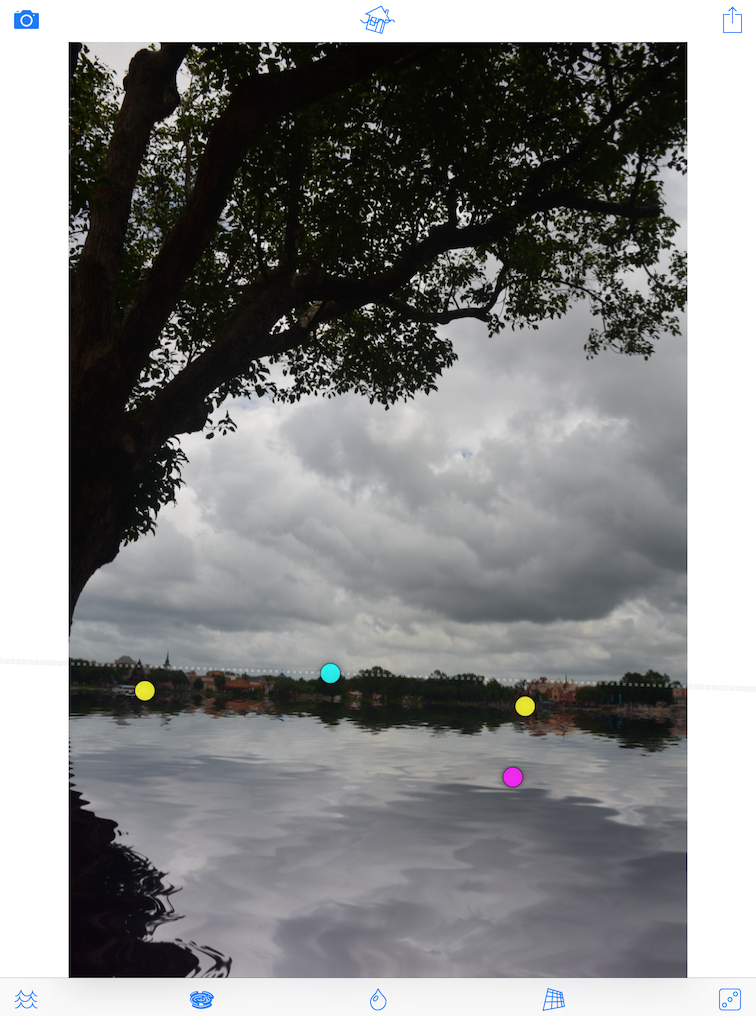
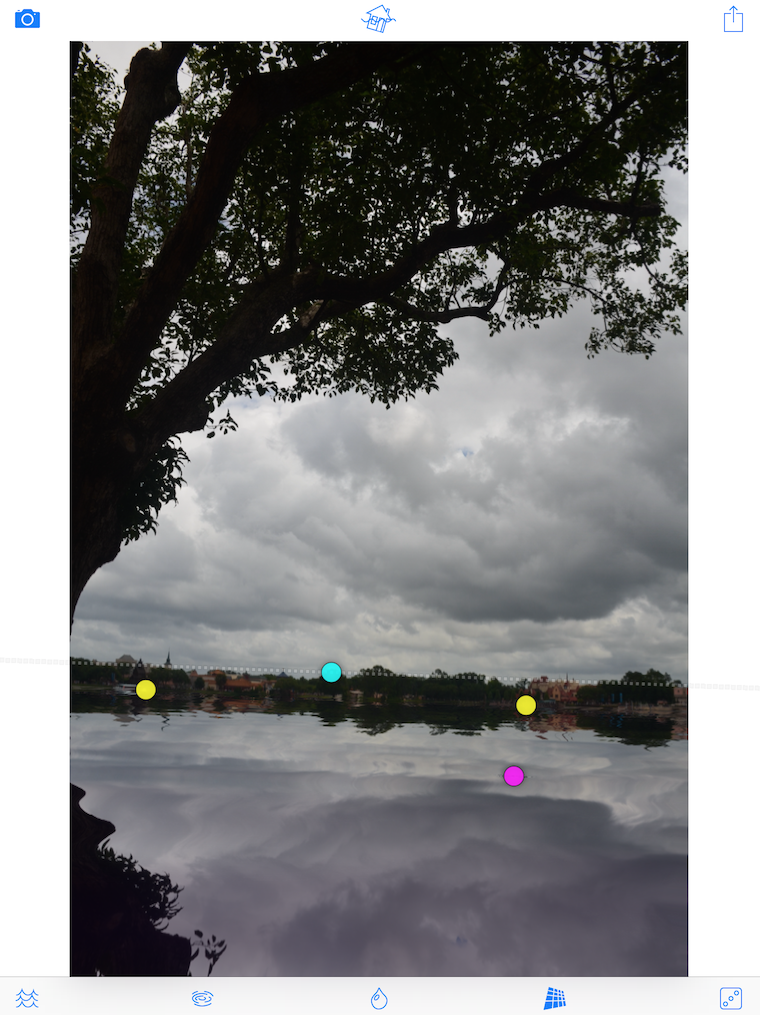
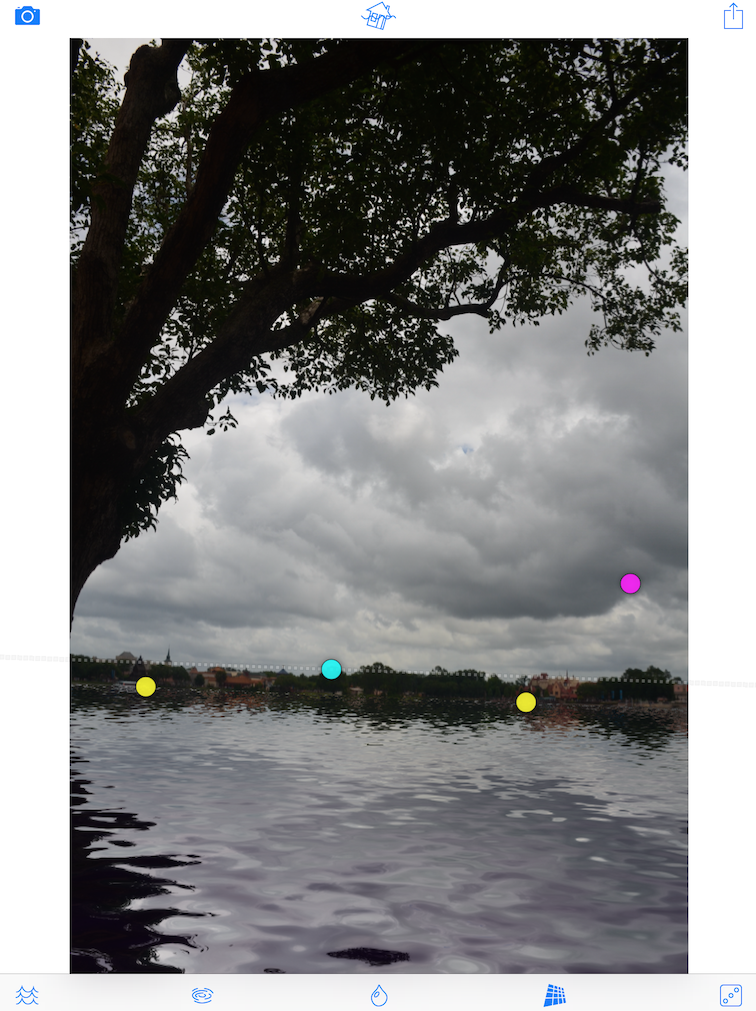
Below you’ll see that the test image has loaded, and a number of dots have appeared. We’ll go over the purpose of those dots later; just note that there are more controls than the single horizon line in ColorLake.
Let’s take a look at the help. The Guide is the first option in the list.
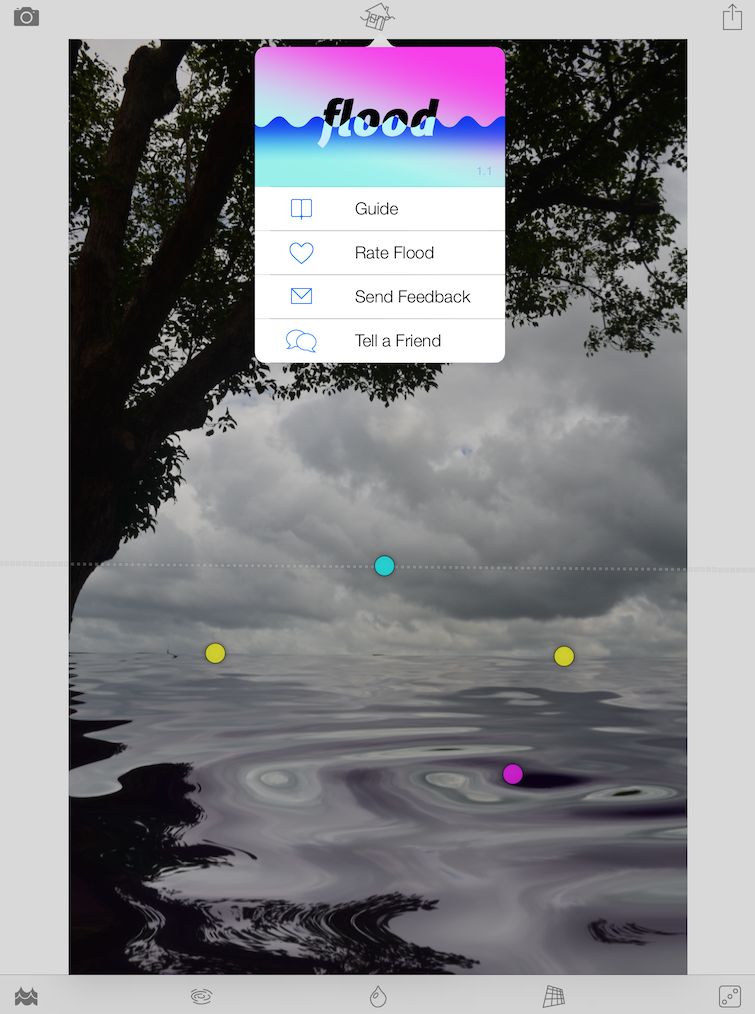
The Guide is eight pages of instructions about the control of the app. You flip through the pages by swiping back and forth. It’s a quick reminder of the more detailed information I’ll be showing you.
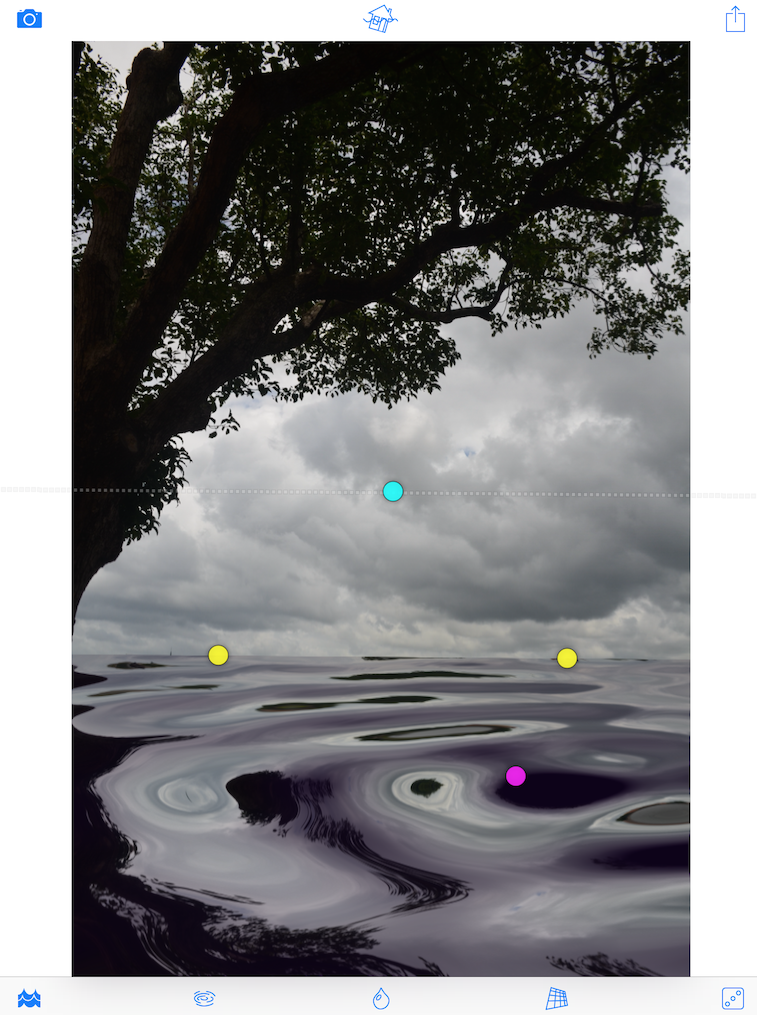
Let’s get back to those dots. You have a single blue Horizon dot; two yellow Waterline dots, and one magenta Ripple dot. Moving the horizon away from the waterline, as I’ve done below, is equivalent to moving your camera closer to the water – you see the closest ripples, but those farther away (and thus smaller) are hidden to you by the closer waves.
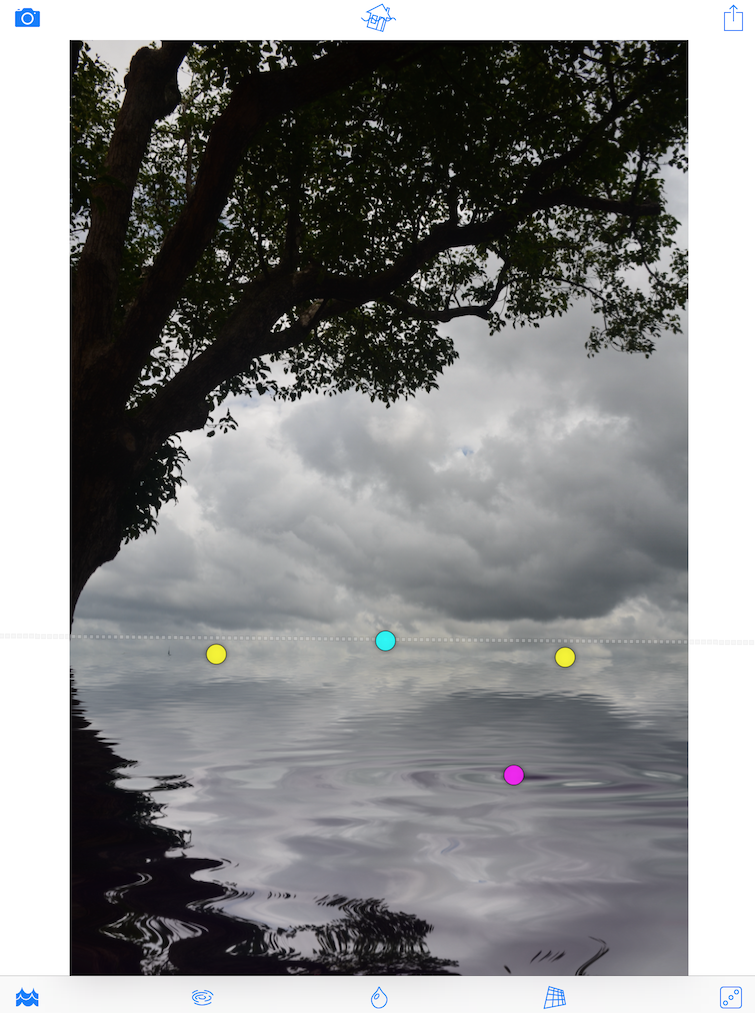
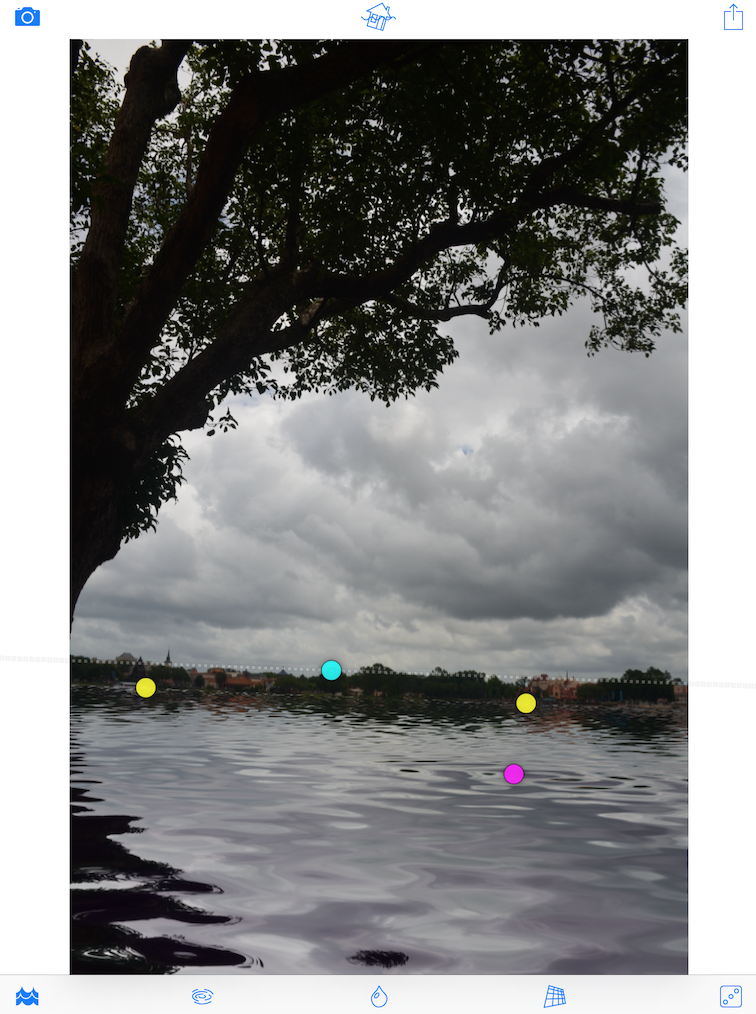
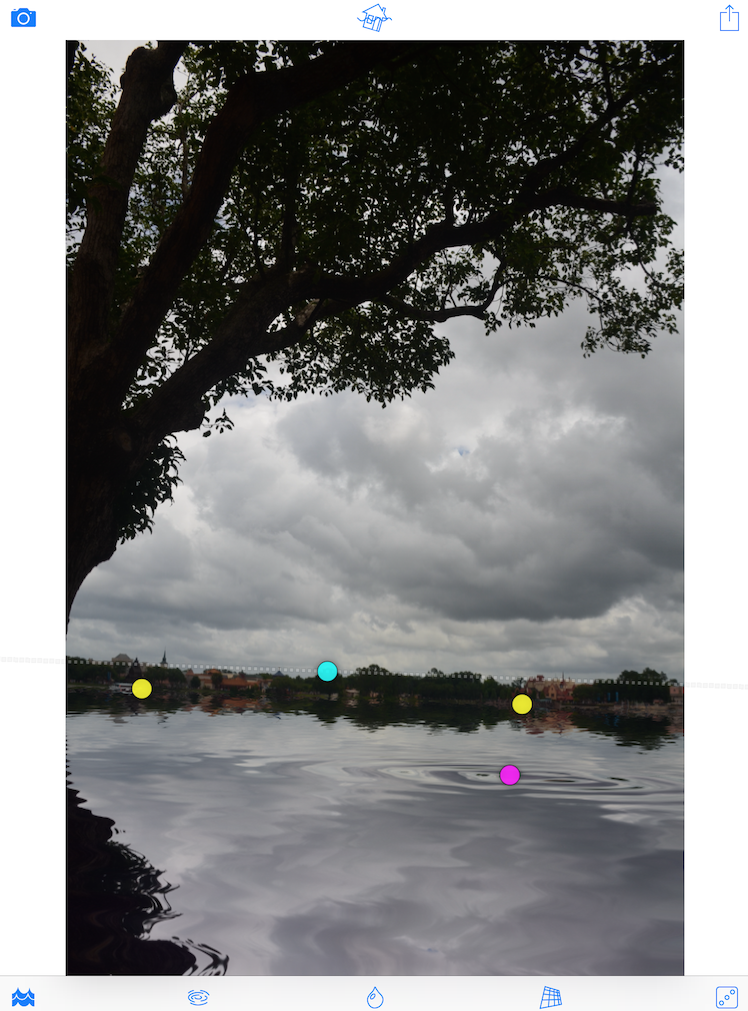
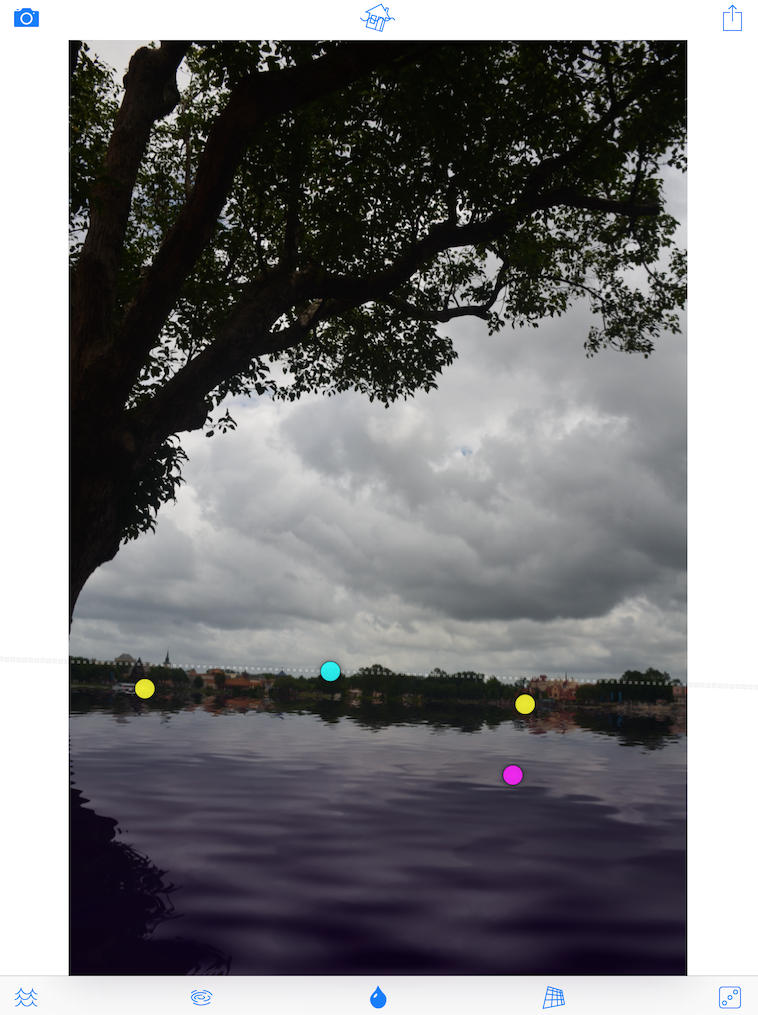
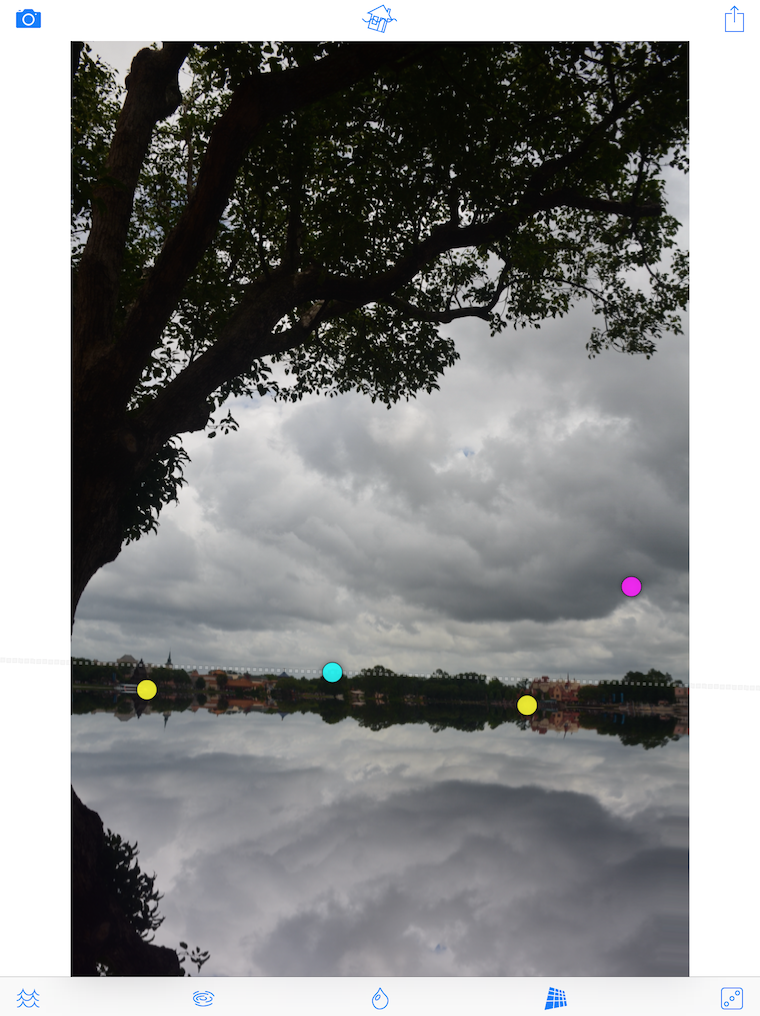
Below I’ve moved the horizon right on top of the waterline, and it now seems that you can see the water all the way to the horizon, even the smallest, farthest away waves.
A double-tap on the image will hide the toolbars and the control dots, so you can see you image unobstructed. A single tap will restore the workspace.
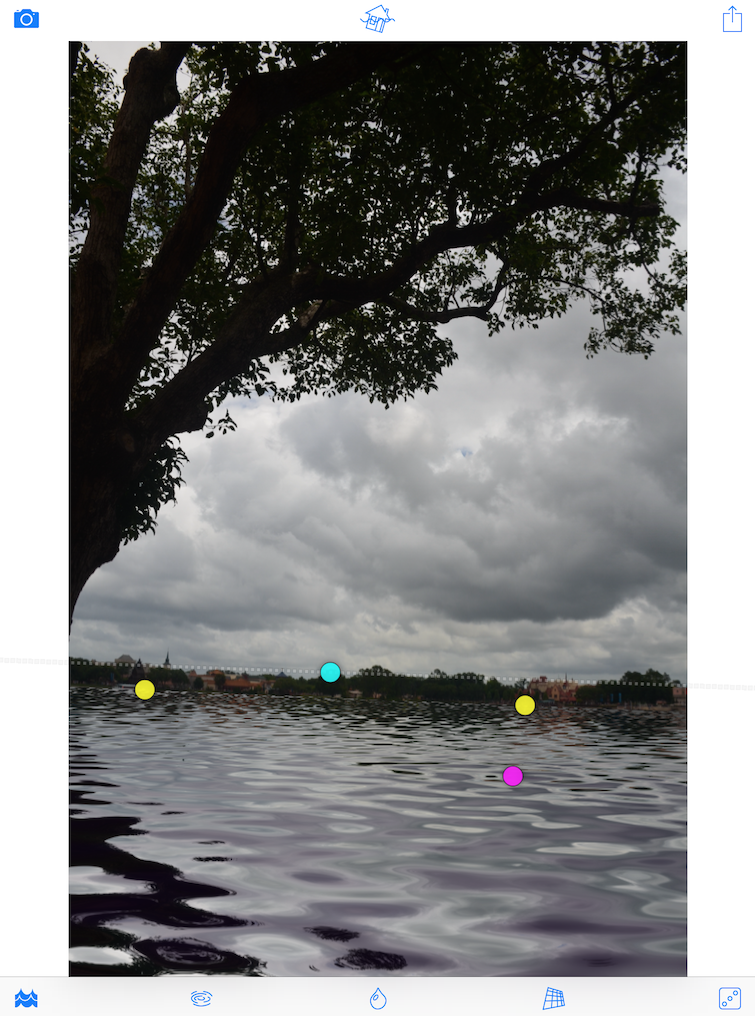
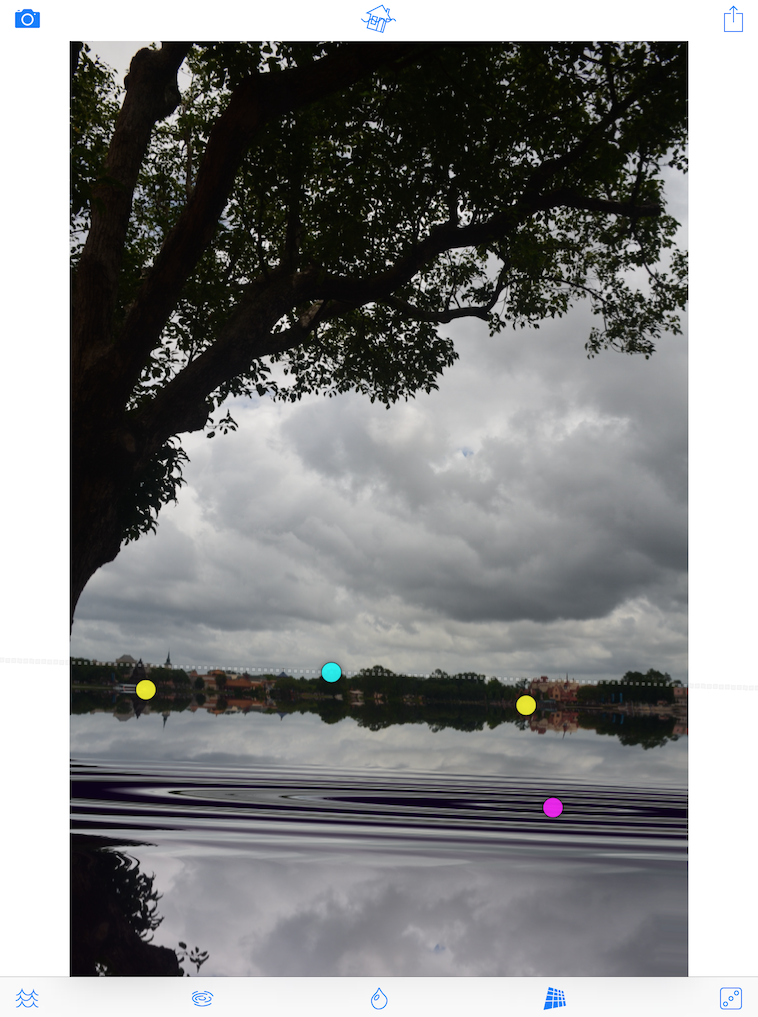
You may be asking “Why are there two yellow dots to control the waterline?” The answer is: so you can take the waterline out of a strictly horizontal orientation. You can get some interesting surreal effects when you can create a wall of water rather than a placid pool.
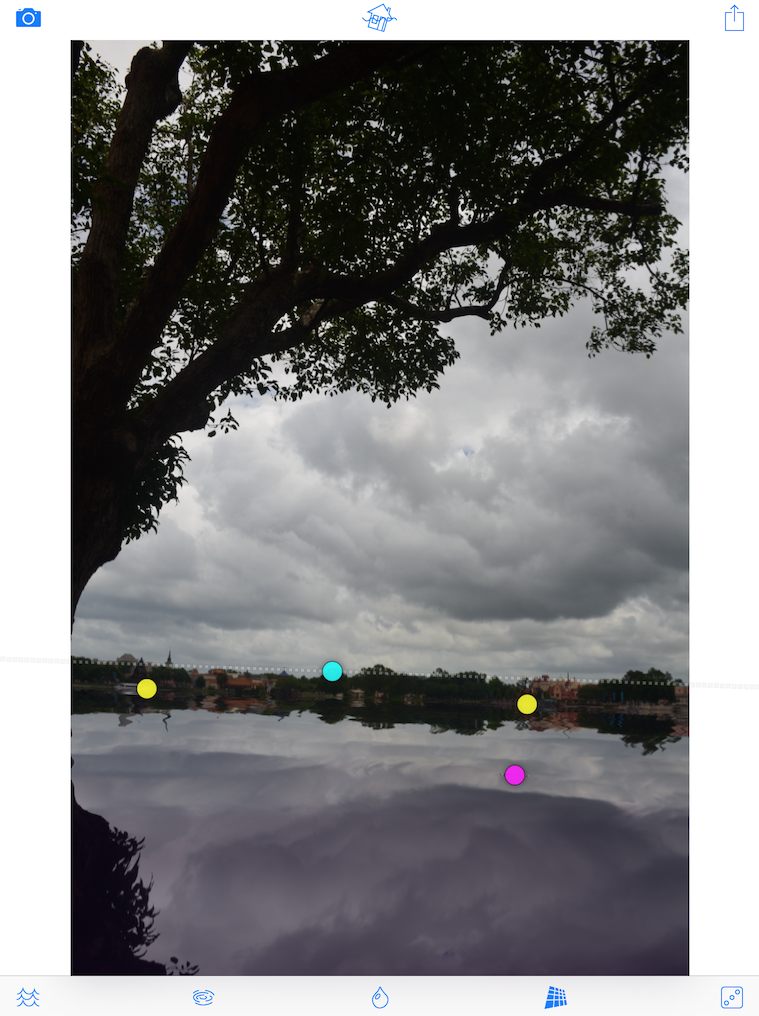
Below I’ve set the waterline to follow the treeline in the background. It seems more natural to me than the result when it was straight across, and I had some partially submerged vehicles shown in the foreground. We can now look at the controls along the bottom, starting with Waves.
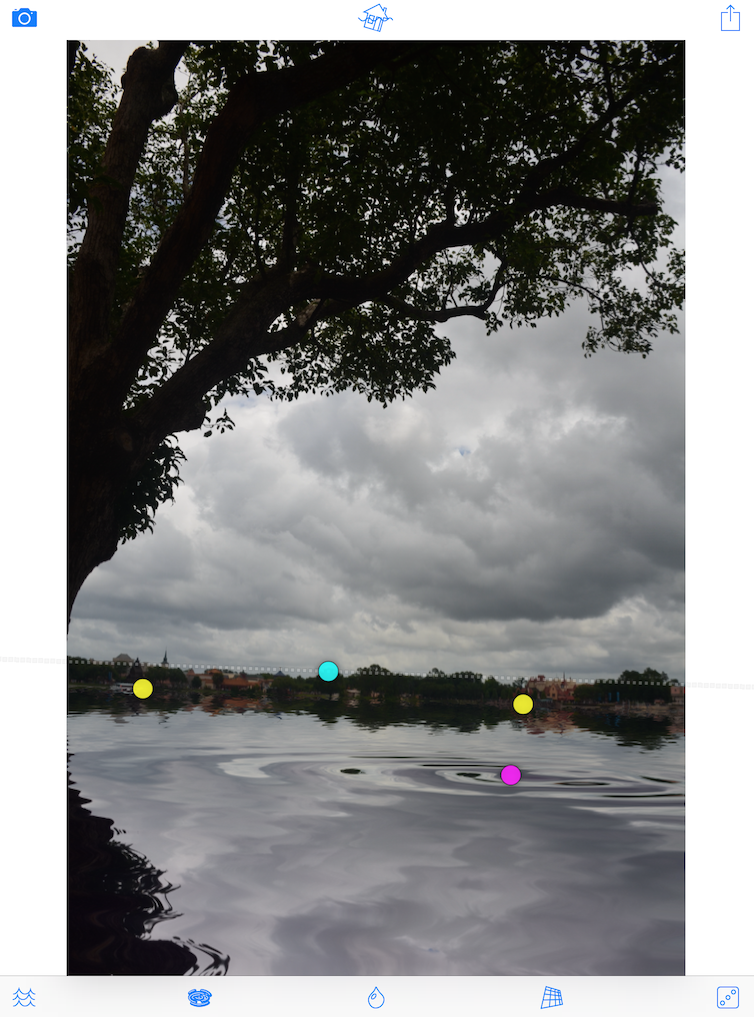
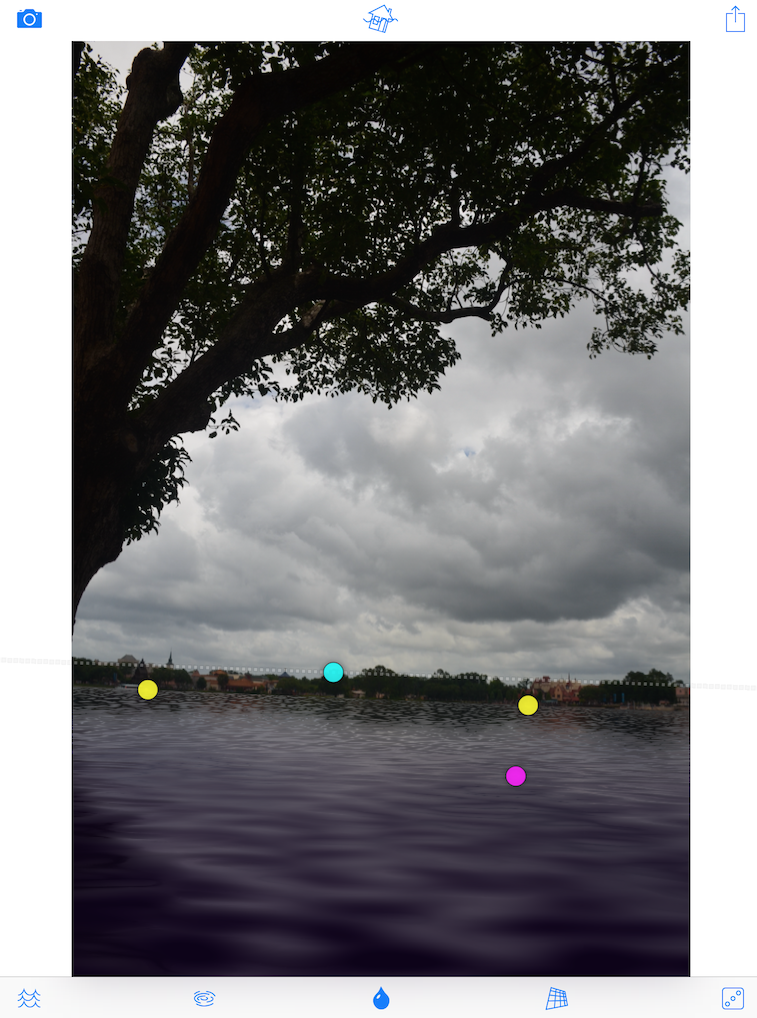
The bottom controls are manipulated through swiping on the image itself. A vertical swipe is a different setting than a horizontal swipe. For instance, a vertical swipe on the Waves option will control the strength of the waves. Below it’s at the default setting.
When I swipe upward, it increases the strength of the waves, as shown below.
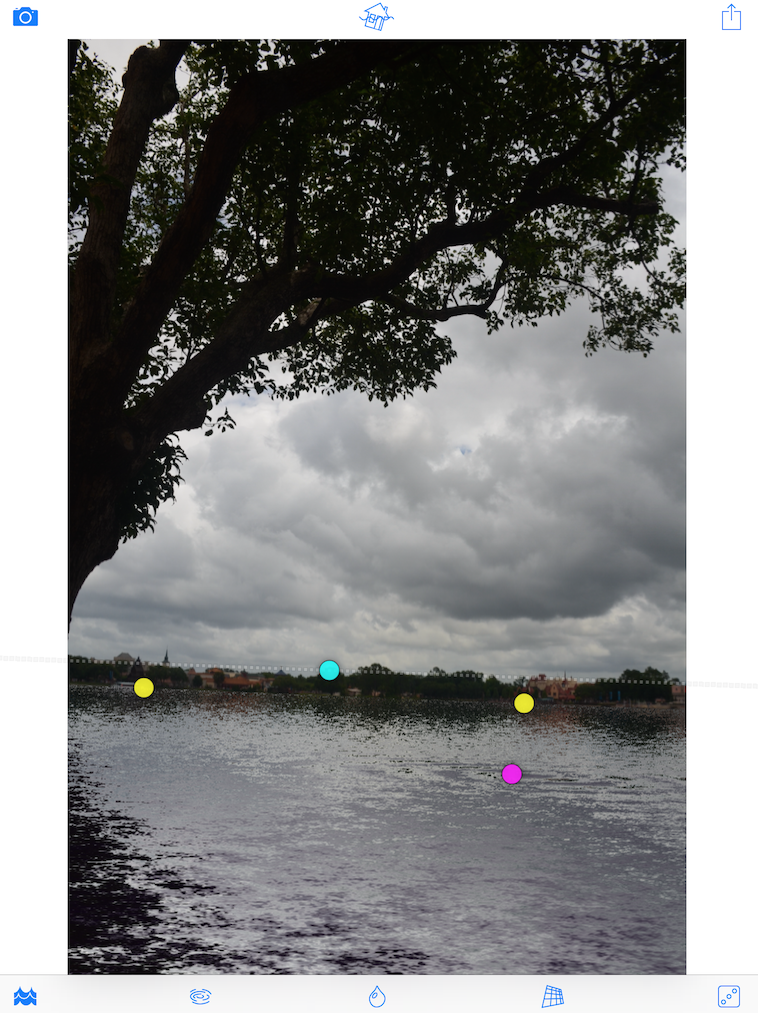
A horizontal swipe controls the complexity, or number, of the waves. Below I’ve swiped to the left, which essentially removes the waves.
And in the next image I’ve swiped to the right, making lots of little waves. Very choppy conditions today!
The next control is for the Ripple, which you can place using the magenta dot. It represents a fish that has just surfaced or a stone thrown into the water. It is more evident when the water itself is glassy, so I’ve adjusted the Wave control to make the water smooth.
A vertical swipe on the Ripple option controls the height of the ripple.
A horizontal swipe controls the size of the ripple.
Next is the Blur option – the “water drop” button. A vertical swipe changes the brightness of the water.
A horizontal swipe will blur the reflection in the water.
The next control is Perspective, and it changes the look of the reflection in the water. A vertical swipe controls the “altitude”.
A horizontal swipe controls the “zoom”. I doubt that many of us will really be able to predict what altitude and zoom will do in relation to the reflection, but experimentation can yield some nice results.
Clicking the die at the lower right will give you a random combination of Waves, Ripple, Blur and Perspective. The Randomizer will not affect the placement of Horizon, Waterline or Ripple.
One more note about the Ripple: even at the smallest size, it is visible. In the example above, the ripple was so small it was hidden by the magenta dot. If you are not interested in having a ripple in the water, place the magenta dot above the horizon.
Tapping the Save button in the upper right will give you the standard iOS save box.

Here’s the result from the last time I hit Randomize.
I decided to make the water not so glassy, so I used the Wave control to add more waves.
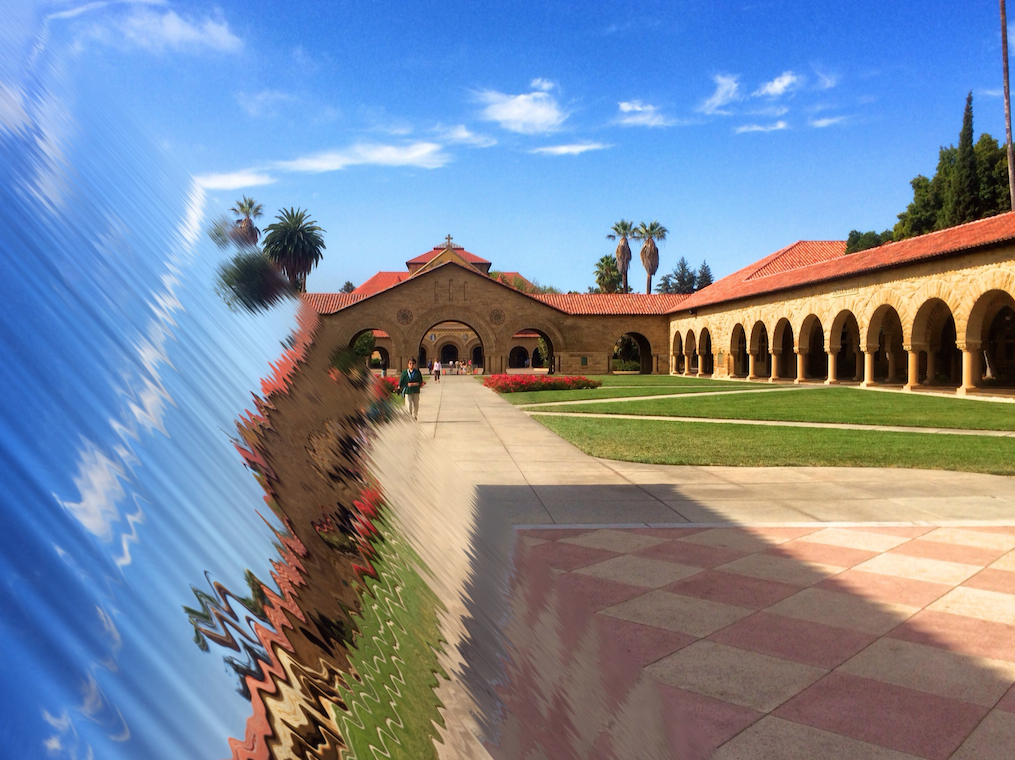
Flood does not have any color controls. The water reflects the colors of the image, without any added tint. I took the image below through Snapseed to add a little pop that the original image did not have.

So that’s Flood. It’s time to announce a winner in the Water Battle!
Our first combatant, ColorLake, shows a constantly moving water source. That’s great for video, but makes it harder to grab a still at the correct moment. The other effects, Snow and Rain, are a little cheesy for my taste. ColorLake, as the name suggests, allows for tinting the water. That effect can go from realistic to surreal.
Flood has no tinting or video capabilities, but the water itself is much more customizable, with a nice added Ripple effect. It also has the advantage of letting the water be a wall or ceiling.
In my own purely subjective opinion, the winner is: Flood! I am always working with static pictures, so the ability to tailor the image exactly as I want it, without the water flowing or the snow or rain falling, is valuable to me. My opinion would change if ColorLake allowed for freezing the image while adjusting, and adjusting the angle of the water. My opinion would be strengthened if Flood allowed for tinting the water.
I hope you got something from the comparison of the two apps, and that you make your own decision as to which one works better for you. Enjoy!
Jerry Jobe
Never content with just scratching the surface of what an app can do, Jerry Jobe decided to pass on what he learned about imaging apps to others. He’s constantly trying to figure out just what tools other artists have used, and trying to incorporate them into his own work, in an attempt to find his style. He’s written tutorials on over 145 apps so far, which you can find (along with his Song of the Day entries) at http://enthusiasmnoted.wordpress.com/ He lives near Atlanta, Georgia, where he also finds a creative outlet in acting and directing in community theater.