Olloclip’s Telephoto/Circular Polarizing Lens System
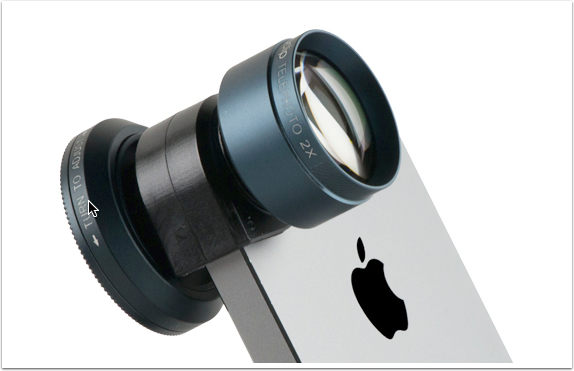
In this article I take a look at Olloclip’s Telephoto/Circular Polarizing Lens system that gives the user some unique choices in their quick-connect lenses.
As with all their systems, the lenses are made from precision ground glass and multi-element optics. The quick connect housing is machined from aircraft grade aluminum and is designed to give a tight fit over the iPhone lens. This system, which consists of a 2X Telephoto lens and a removable Circular Polarizing Lens (CPR) currently retails for $99.99. What I really like about their CPR is that it can be used on its own or slipped over any of Olloclip’s other lenses. (A lens adapter comes with this set so the CPR can be used over small lenses as well.)
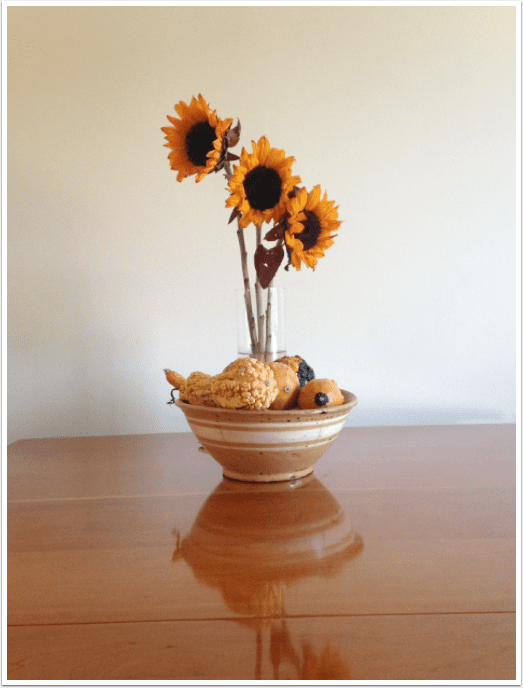
To put this system through its paces I took a number of shots to give you a feel for what each lens will do. In this first set-up, I shot the still life using my iPhone5’s native camera app and lens. Take note of the reflection on the table.
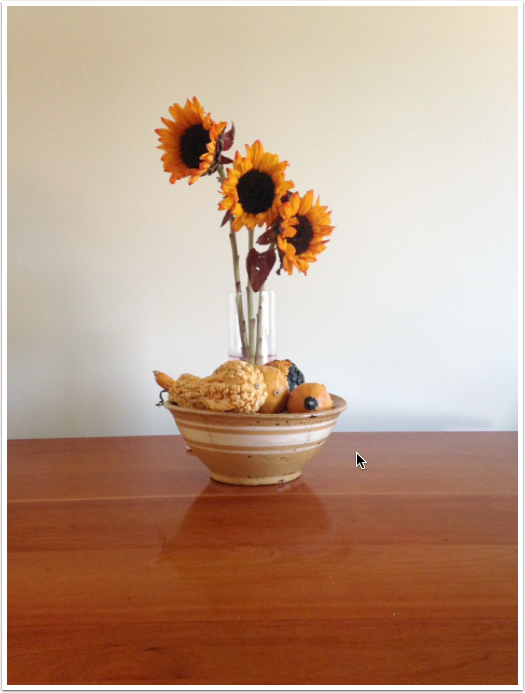
In this shot, I used the CPR and rotated it until the glare/reflection on the tabletop pretty much disappeared. This is one aspect of using this lens that I find quite useful.

This time I shot the same still life from the same perspective and distance as the first two shots but this time using the 2x Telephoto lens. Not only does this give me a tighter shot but also introduces a bit of depth-of-field effect into the scene. I caused the focus to be on the gourds that gave a slight blurring to the sunflowers. You could certainly play with this to make the DOF more dramatic.
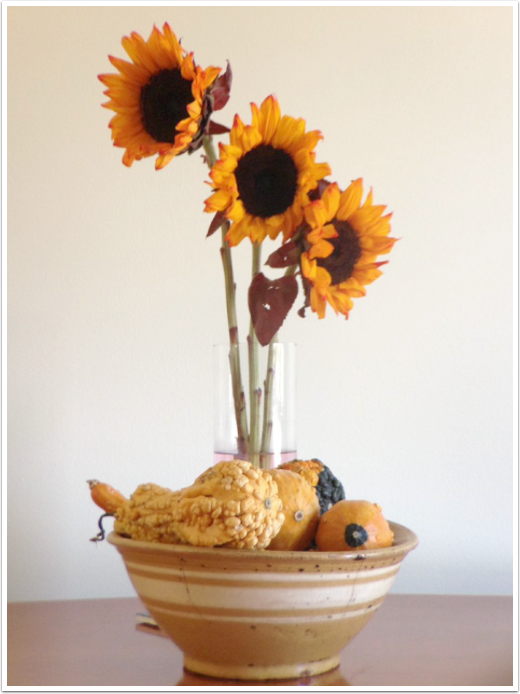
Same set up as before but this time I used the CPR. Comparing the two images, you can see how the tones and colors are a bit richer and deeper.

Next, I did a couple of series outside which is wear most would consider using a telephoto lens as will as a polarizing lens. This shot is using the iPhone’s lens and native camera app.
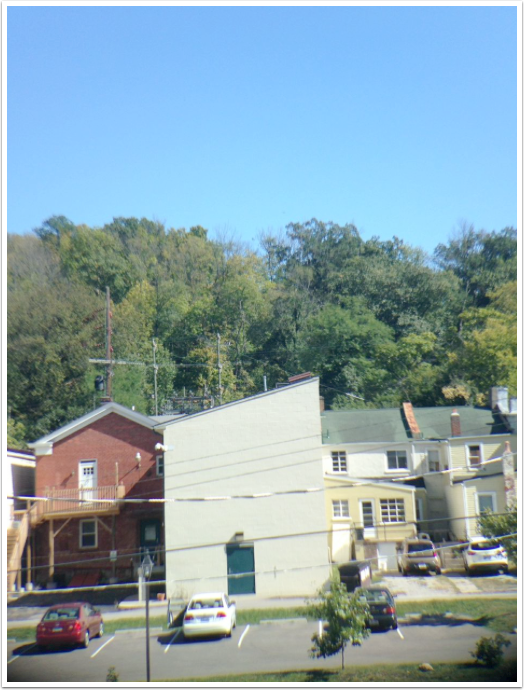
Staying where I was, I slid on the telephoto lens to get a tighter shot of this scene. I also noticed that while I focused on the tree line and sky, there was a bit of blurring in the bottom of the image that is something to take into consideration while using this lens.
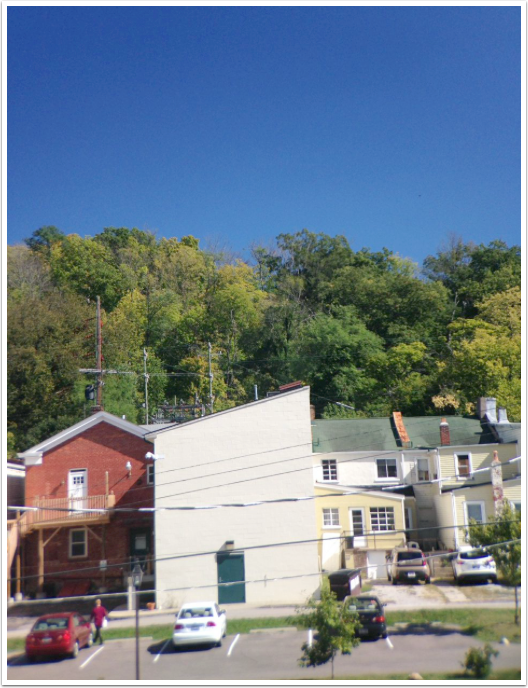
Using the CPR over the telephoto lens gave me a richer blue sky as well as deep colors on the buildings. Again, the blur on the bottom of the scene is noticeable.
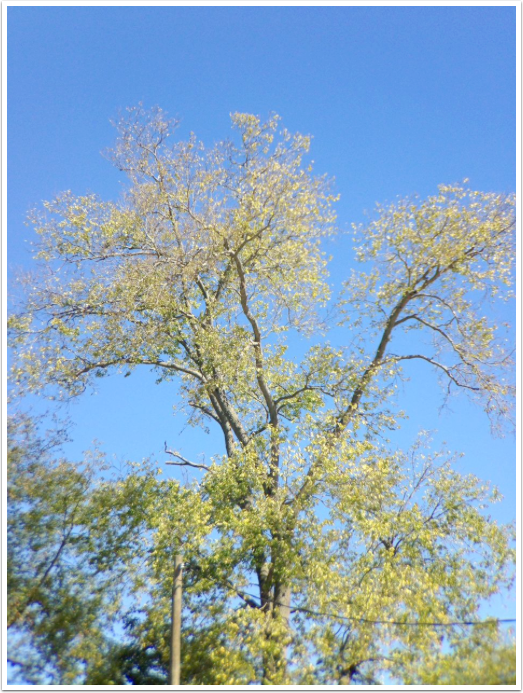
Couldn’t help myself…had to grab a snap of this tree and sky behind it with the telephoto lens!
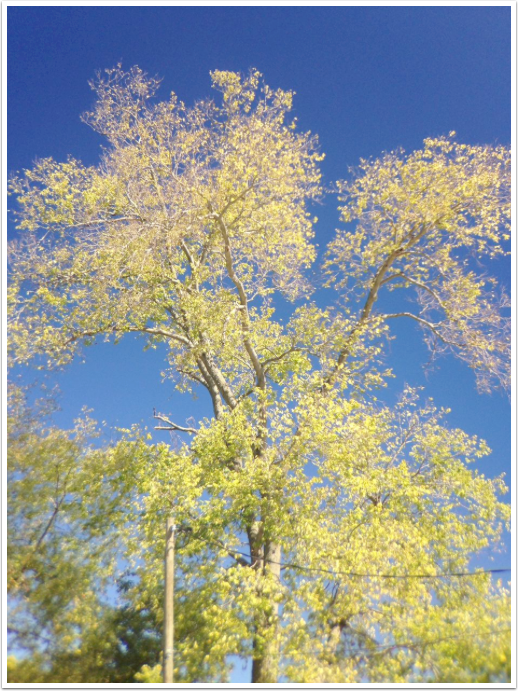
Same tree and sky…this time with the CPR attached to the telephoto lens.

There’s a new ice cream place in town whose front windows have some fun things going on…like this graphic. Standing in front of the window I took this shot using the standard lens. There’s a bit of glare and reflection in the shot that might be considered a “distraction”…so I put on the CPR lens!

While the CPR didn’t take away all the glare and such, it did a pretty good job doing so while deepening the colors of my shot.
So there you are, a quick look at what this set is capable of doing for you. I will have to admit that I kept thinking that I could do the same sort of things with the apps I typical use whilst in “post-production”, on the other hand using this system would allow you to shot and publish without having to do any editing. Something to think about…
David Hayes
David is Head of Technical Tutorials here at theappwhisperer.com and this role adds to the many things David has done in his life…some of which he considers more significant than others. Yet, he feels all have made him the artist he is today. He’s been a cook at a truck stop, a janitor at a military base, worked in advertising, been a banker managing other people’s money, and an elementary school teacher. Trained as a photographer as an undergrad, he’s recently returned to these roots and now considers himself foremost a photographer and secondly a mixed media artist. You can find David’s work on many other popular websites including his own: http://www.clearerreflections.com.

One Comment
Astra
Wow I had no idea the polarizer can go over other lenses … thanks for the photos … I’m sold on the polarizer … thx for the photo comparison and write up … thx TAW for sharing!