How to Improve your Mobile Photography Skills by Martin Duerr for TheAppWhisperer
We are delighted to publish this wonderful article by our Tech Editor, Martin Duerr. He has created a step-point feature, full of tips to help focus your mobile photography skill-set. Don’t miss this (foreword by Joanne Carter).
“Guess what? Yes, you constantly need to improve your photography skills … not only with your professional equipment, your small pocket sized camera is worth any effort to get more out of it. Whatever you are looking for: better image quality in terms of a technical aspect, or in terms of compositing, “messages”, image buildup and so on.
Here are some facts and tips you can use to improve your ability to take images you want”.
1. Limit yourself to one camera
That’s correct. Just use your mobile phone and let all the other stuff at home. No other cameras required. Why? You will definitely run into situations where you have to choose. Mobile phone or DSLR? Could be any kind of camera, but you need to avoid that situation, because this doesn’t help you to get better with the mobile phone.
But, for sure, you will have to live with the fact that some situations get lost because you can’t capture them with your mobile phone as you would do with your professional equipment. You can carry more equipment with you when your are more familiar with your phone and how to capture scenes as you want, but for now: mobile phone only please!
Image ©Martin Duerr
2. Don’t limit yourself to one theme
Image ©Martin Duerr
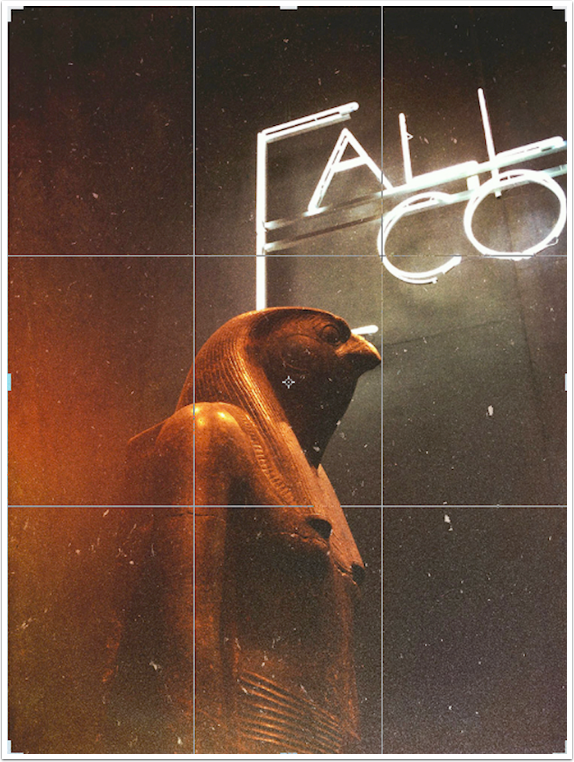
Dont’t be to rude to yourself. The limitation to one camera is enough. Be open to what comes along. There is in fact no problem if you concentrate on one “subject”, like a visit of a museum, the zoo or anything else which gives you enough space to play and experiment.
As with your professional equipment you will find what you like most. Nature, Landscape, People, Architecture. But be aware that this could differ from your DSLR favourites.
3. Read a book or two!
Image ©Martin Duerr
Believe me, this is mandatory. You don’t have to do it before you start, but at any point these two books will help you to shape out a diamond from a block of rough carbon.
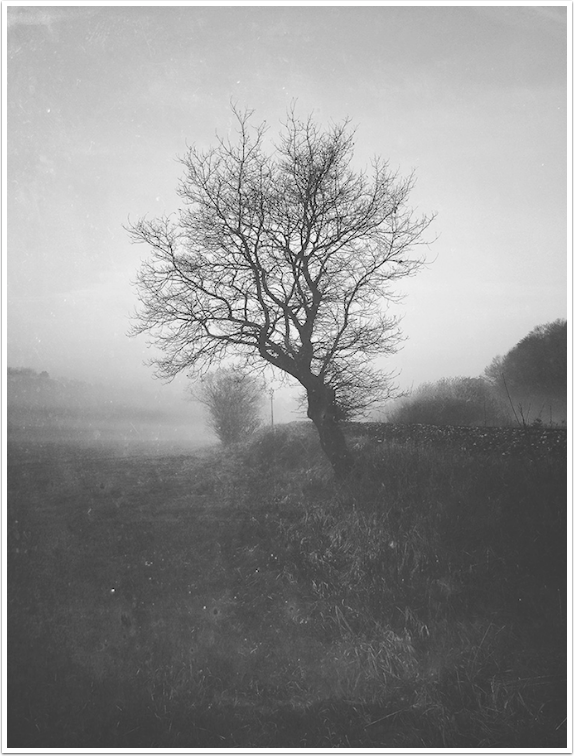
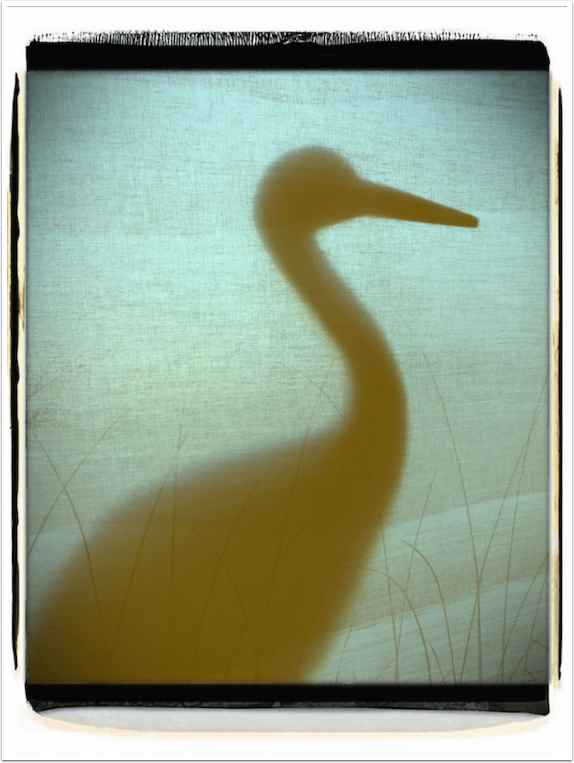
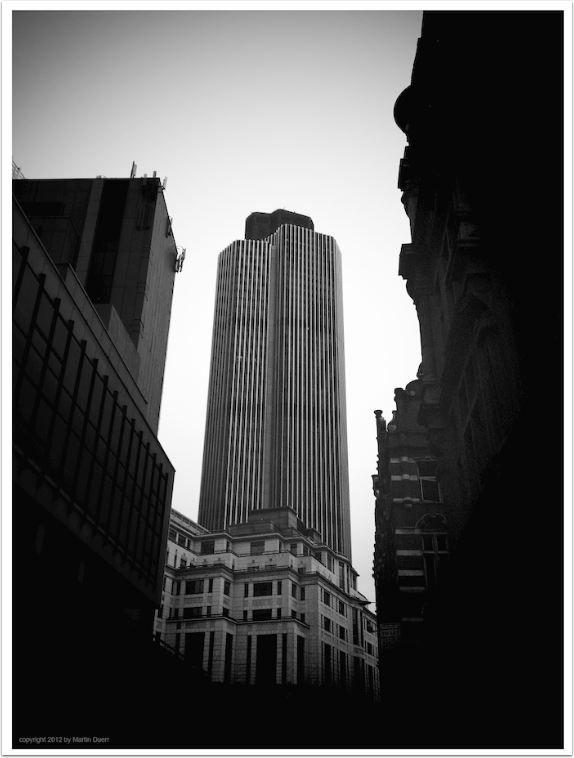
You will notice that these two books have nothing to do with mobile photography or photography at all. Another point for you, but … you can learn from illustrators and cinematographers especially when it comes to make better looking images. Or how to establish a scene. Not convinced at all? Here is an example. Illustrators often work with a technique, called “negative space”. With this technique you guide the eye to the main subject in your image via negative, or black image parts. Below you will see some images that use intensively negative space.
FIVE C’S OF CINEMATOGRAPHY: Motion Pictures Filming Techniques (link)
Framed Ink: Drawing and Composition for Visual Storytellers (link)
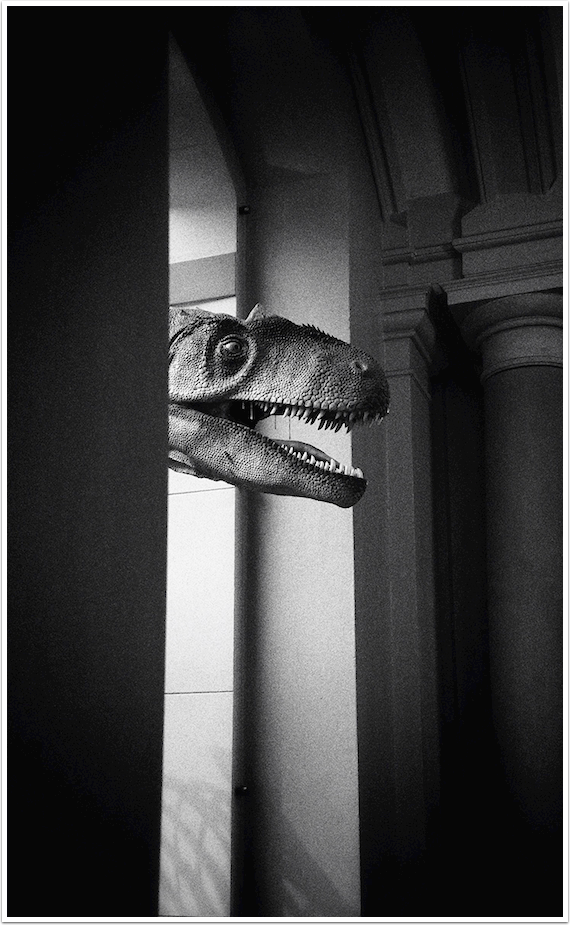
Image ©Martin Duerr
4. Take your time (Be patient)
Image ©Martin Duerr
While the mobile phone has got its world wide attention as a camera device through the fact that you can use it instantly … but we need more time to improve our skills. So take your time to shoot as you would do with your professional equipment. You will need enough time to look for subjects you want to shoot, make the right composition, make all the adjustments and then hit the trigger. We are talking about minutes not seconds.
5. Use the rule of third
Image ©Martin Duerr
While there are so many visual guides you can use while taking images – use a grid which follows the rule of third. Before you ask. All the other visual guides (Golden ratio, golden spiral) are good too, no doubt, but … they are much harder to visualize if you have no visual help at all. If you are a professional shooter (with your DSLR) you will recognise after years of experience that you won’t need visual guides. But if you look at your images in Photoshop you see that you made it instinctively. And this is not as easy with the golden ratio or the golden spiral.
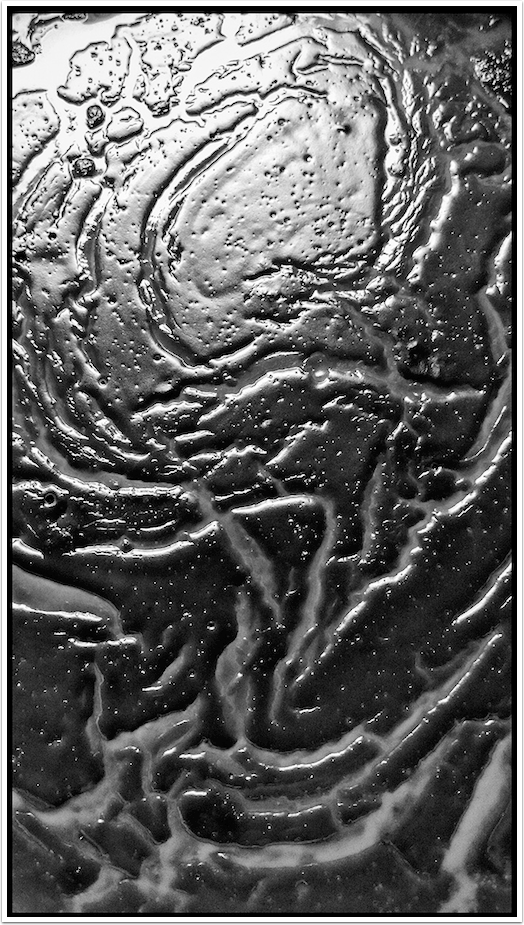
6. Pixelate this!
Image ©Martin Duerr
Sometimes it is really hard to analyse an image with your own (yes, it is much easier to do it with images of other photographers). But wait, there is a simple trick. Take Photoshop, load in your image and start to pixelate it (Mosaic filter). Sometimes it is good to reduce the image size a bit and/or make the image black and white. Below you will see an example. Because it shapes out the light and dark areas while taking away all the detail, you get aware of the great general composition you have done … or not.
7. Tell a story (make a review by your own)
Image ©Martin Duerr
This is maybe the hardest part of all, but you should give it a try. Whenever you have the chance to get a professional review of your work you should do it. Like with the new portfolio review service here at TheAppwhisperer (link). But what to do in the meantime? Showing friends what you have done? Believe me, “cool” and “awesome” are not the things that will make your work better. Here another trick. Take one of your images. Print it out or look at it on your monitor. Take your time and then … tell yourself what you see. Right. Do it in a way as you would tell it a blind person. Make it as simple and clear as possible. No descriptions like “great image” or “sensational blue sky”. Be neutral. Here another example.
8. No gimmicks please (no filters while shooting)
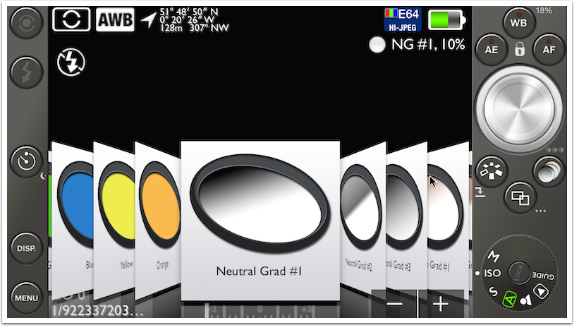
Don’t take away creativity from yourself because you are shooting with fancy filters. This is no way to push your own creativity because a part of the artistic arrangement comes from the filter. Start with a camera application that offers a “normal” camera with some manual features like setting the focus and the exposure spot. And with “no filter” I don’t talk about filters that help to enhance the image like 645 PROs ND filters (Neutral Density).
9. Make yourself look like a fool
Image ©Martin Duerr
Another hard part to get the most out of your images, but believe me it is worth every minute you do it. As an example I will tell you a story. Last year I booked a photography tour through a hidden place nearby Berlin. And with me 50 other photographers. Yes, I have had my professional equipment with me, but it ended up that I shot 90% of all my images with my iPhone and my Nokia. No problem do you think? You will be treated like an idiot. All other photographers showed up their stuff and aggrandised oneself. But I was much faster going from one location to another, was able to do everything I want and came back with a bunch of images I really liked. Below you will see some examples. So follow your path and don’t look at others.

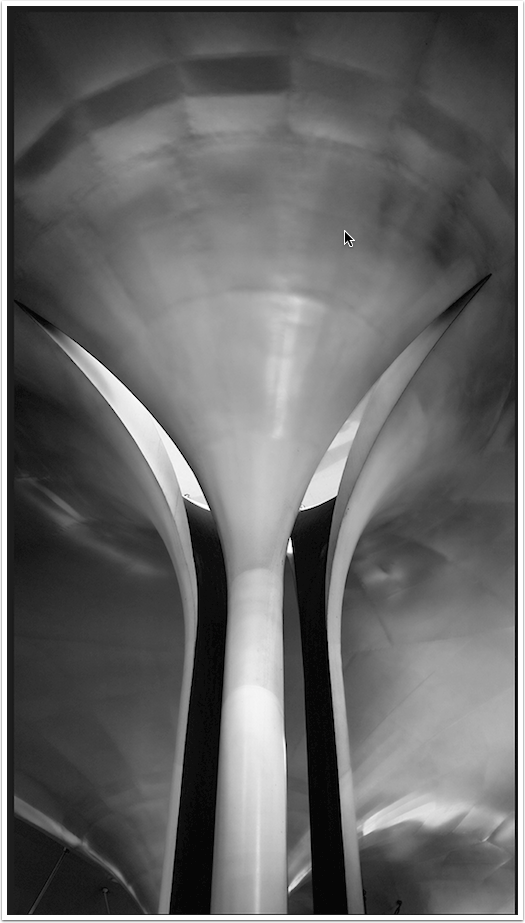
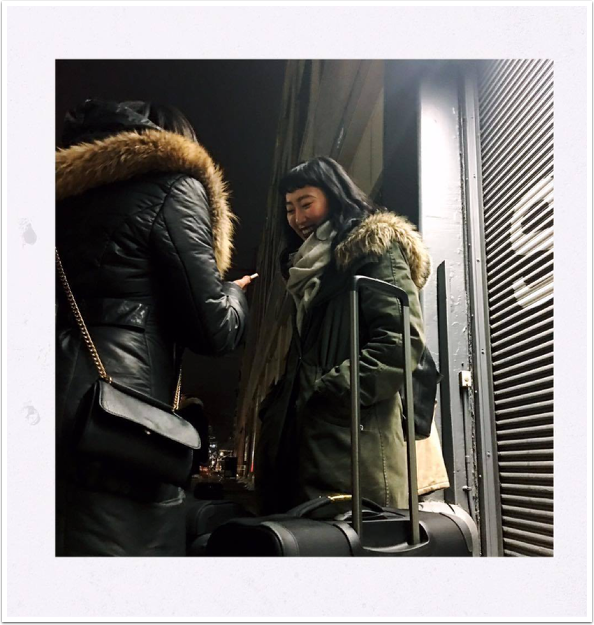
10. Move yourself
Image ©Martin Duerr
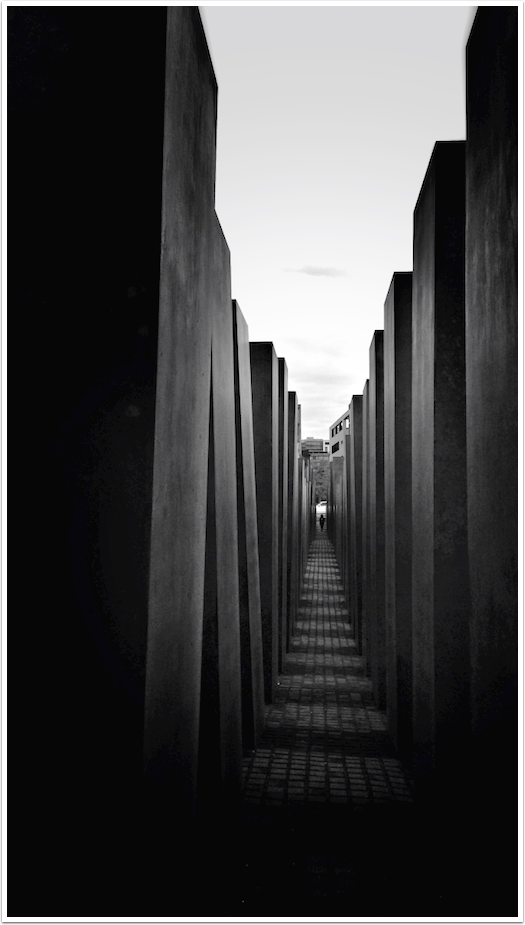
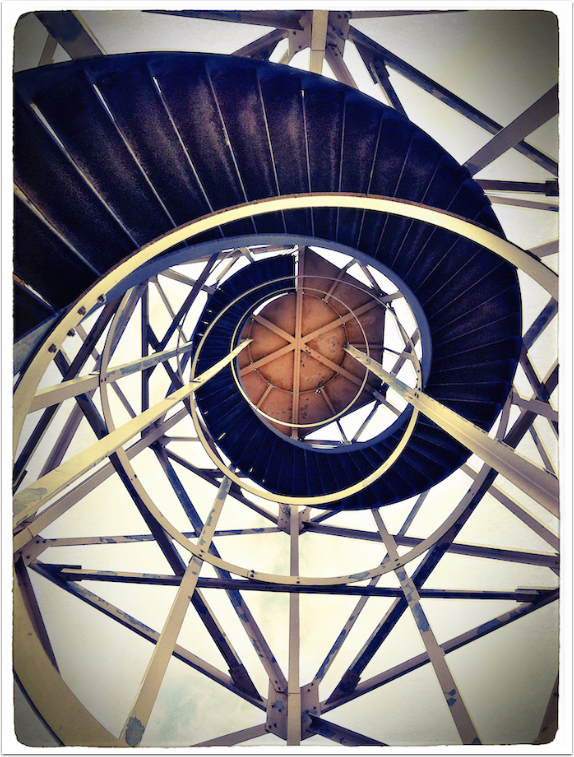
Your mobile phone is basically nothing other than a camera with a fixed lens. And if you can avoid it, don’t use the digital zoom function a lot of apps offer. Instead … move, to your subject , away from it or whatever you have to do to get the image you want. Sure this is a limitation, but remember that a lot of great photographers have been shooting with a fixed lens. If you use a zoom you don’t interact with the scene you want to capture. If you move, you are part of it. For the image below I had to move through a very, very thin gap to be in the middle of the light post. Couldn’t take that image otherwise.
11. Breaking rules!
Image ©Martin Duerr
Yes! The thing you have in your pocket is not only a versatile camera, it’s a lab and a research center too. So from time to time you have to break bad … in terms of bypassing photographic rules. Use long time exposure with your mobile phone handheld in the night.
12. Use a tripod
Image ©Martin Duerr
There is no reason to always shoot handheld. Sure you have a stabiliser in some apps and more than that with the new iSight camera with the iPhone 6 and 6+, but if you want to do bracketing, an HDR or a night shoot use a tripod. There are several nice solutions available, from carry on tripods to adapters that fit onto your existing tripod equipment.
13. Don’t mess with your other equipment
Image ©Martin Duerr
Don’t compare your images with the other stuff you do, no matter if you are a hobby photographer or a professional one. It sounds stupid, but the mobile photography is a class of its own and should not be compared to the pixel quality of a Hasselblad. Of course you can compare images based on general compositing, theme or look.
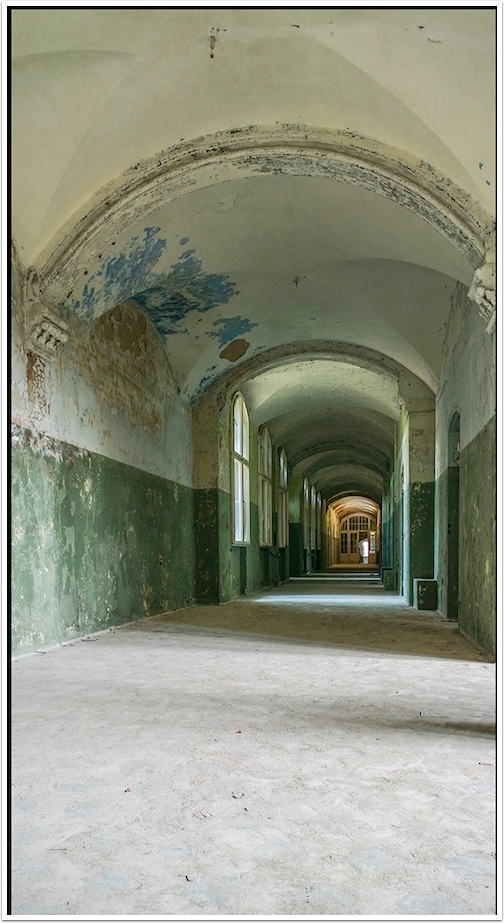
Image ©Martin Duerr
Martin Duerr
Martin was born in 1959 in Germany and studied Graphic Design at the University of Applied Science in Munich. His father led the camera development team at AGFA in Munich. Martin’s father was also a gifted painter, illustrator and photographer, enabling Martin to be exposed to this medium at an early age. Martin’s images today are either photographs or illustrations and have a graphical shade, like old etchings. He concentrates on shapes and textures rather than a full spectrum of colours. Martin’s images mostly show technical or mechanical equipment, landscapes, architectural objects, plants and some animals – his illustrations are more a mix of fantasy themes, sci-fi as well as surreal and the erotica. For the past 25 years Martin has been working for companies including Ferrero, Honda, Mercedes, BMW, Jaguar, Siemens photographing, compositing, 3D modeling, vfx and illustration. From 2008 Martin has run a company – Models from Mars LLC which specialises in visualisation, cgi and photography with Clint Clemens (Canon Explorers of Light) in Newport, Rhodes Island.


One Comment
José Freitas
Great recomendations. If I may, I’d just add a lastpass one: have run.