Mobile Photography Tutorial – Snapseed 2.0 in Depth: Part 3 (Stack) – TheAppWhisperer
We are delighted to publish Part 3 of a new three part series with the upgraded Snapseed app tested by Jerry Jobe. This is an extensive tutorial and series and we are sure you are all going to enjoy this. Previously we have published an overview video of Snapseed (here) and you can find Part 1 of this series (here) and Part 2 (here). (Foreword by Joanne Carter).
“In part 1 of the Snapseed 2.0 tutorials, the nine Tools were covered. In part 2, it was the eleven Filters. In the video overview, the new interface was featured. But the most powerful part of Snapseed 2.0, which was hinted at in the video tutorial, needs to be shown in depth: the Stack.
The Stack allows you to remove, modify or mask previous edits. It also allows you to apply edits from one image to another. It really expands Snapseed from a touchup tool to an editing suite”.
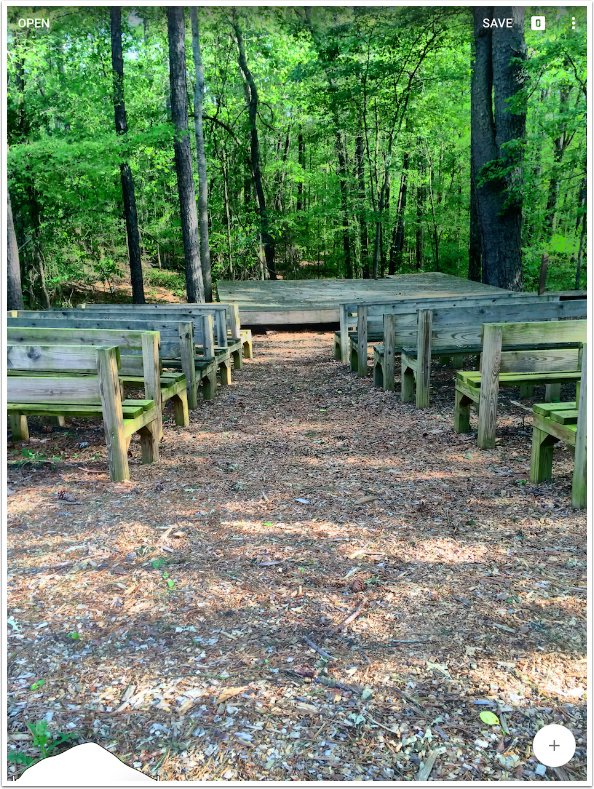
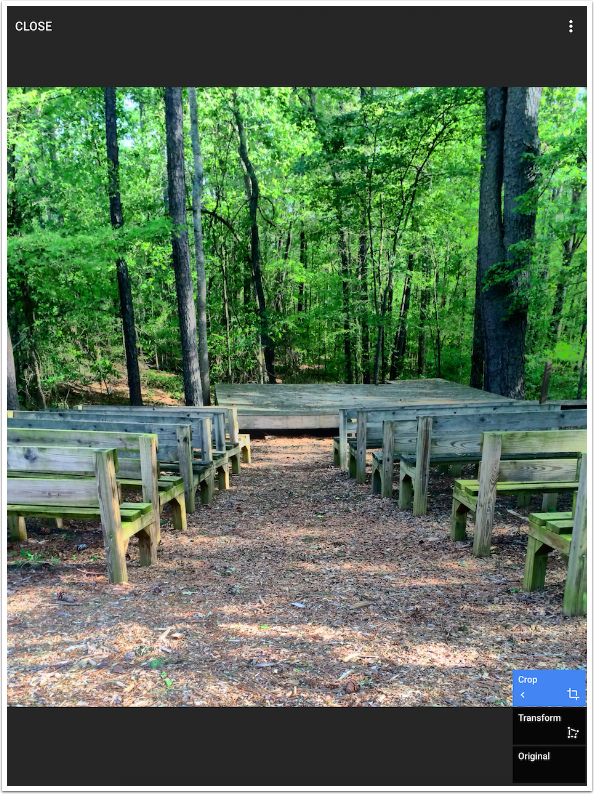
The stack will be examined by editing the image below. It’s an outdoor stage at a local nature center. In looking at it, there are a number of things that I’d like to do with it. Some of those changes are overall changes, and some are targeted edits. I find it easiest to do changes to the overall image first, such as Transform and Crop. This will ensure that I don’t spend time on my targeted edits just to have them cropped away.
If you’ll remember the discussion on the Transform tool, you’ll remember that transforming your image adds black triangles to the corners, which are then filled in with Snapseed’s approximation of what would complete the image, based on the surrounding pixels. Because this is an imperfect process, it is easier to perform a Transform before a Crop. That way, the crop can eliminate any imperfections introduced by the Transform.
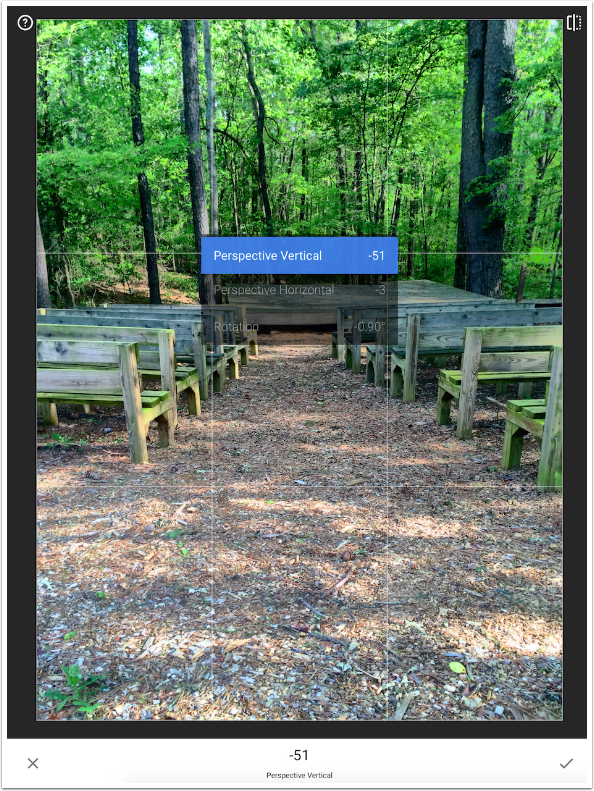
Below you’ll see the settings I used for the Transform. I changed all three settings.
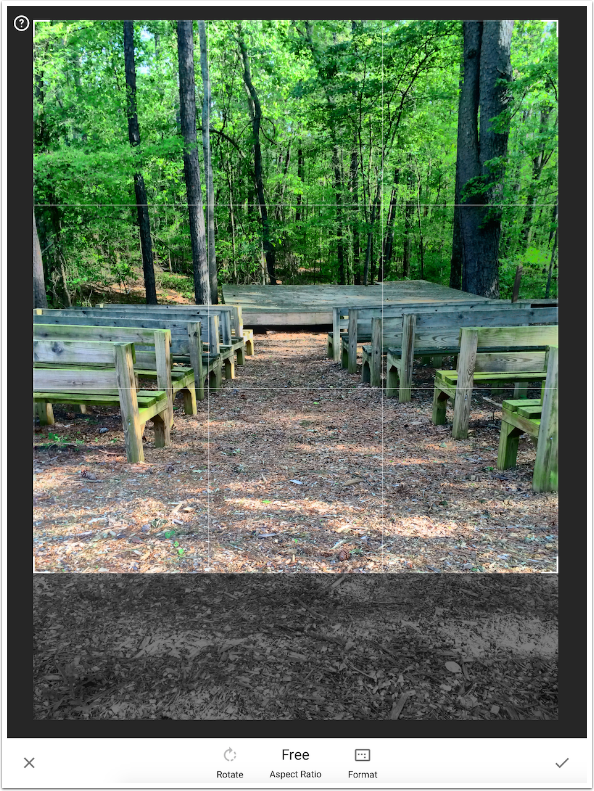
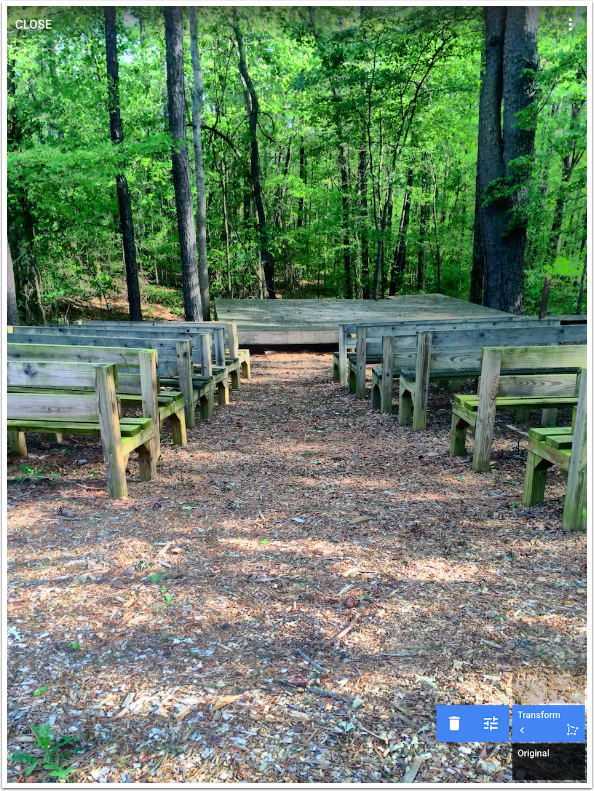
Next I crop. What bothers me about the image is the large amount of empty ground at the bottom, so I move the bottom edge up, but don’t change any other edge.
I apply the Crop, and return to the main screen. Looking up in the upper right corner, I see a box with the number 2. This button accesses the Stack. It tells me that I currently have 2 edits in the Stack (Transform and Crop).

Tapping the box takes me into the Stack. Looking down at the lower right I see the Original image on the bottom. On top of that is the Transform, and on top of that is Crop. Crop is highlighted, showing that all edits are visible.
The trees are still a bit off vertical, so I want to revisit the Transform step. Normally that would mean discarding the edits done after the Transform (the Crop). But deleting steps isn’t necessary with the Stack. I tap the Transform step and the preview shows the image without the Crop. By tapping the < below the word Transform, a menu appears with a trash can (Delete) and a representation of sliders (Modify). I press Modify.
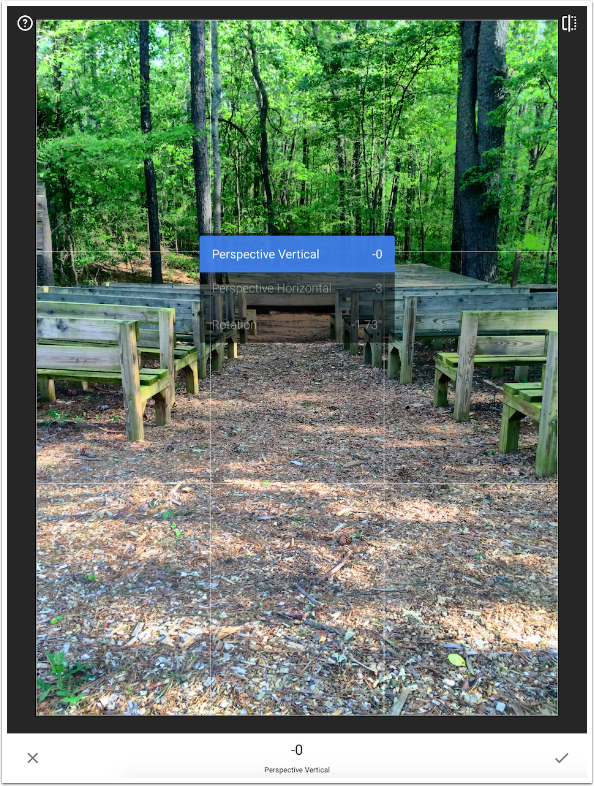
That takes me into the Transform tool, where I take away the Perspective Vertical, returning it to 0, and increase the Rotation to -1.73.
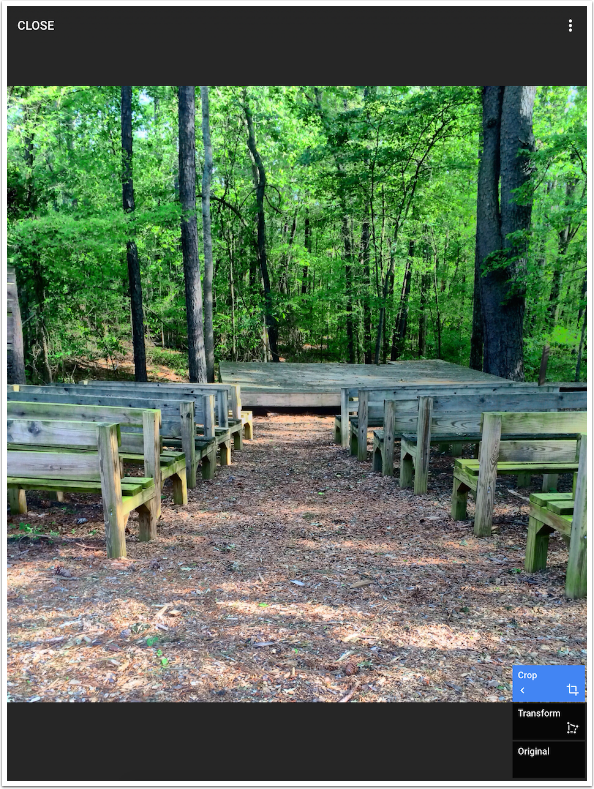
When I accept the changes, I’m taken back to the Stack. All I have to do is tap the top step (Crop) and all subsequent edits are applied on top of the modified step.
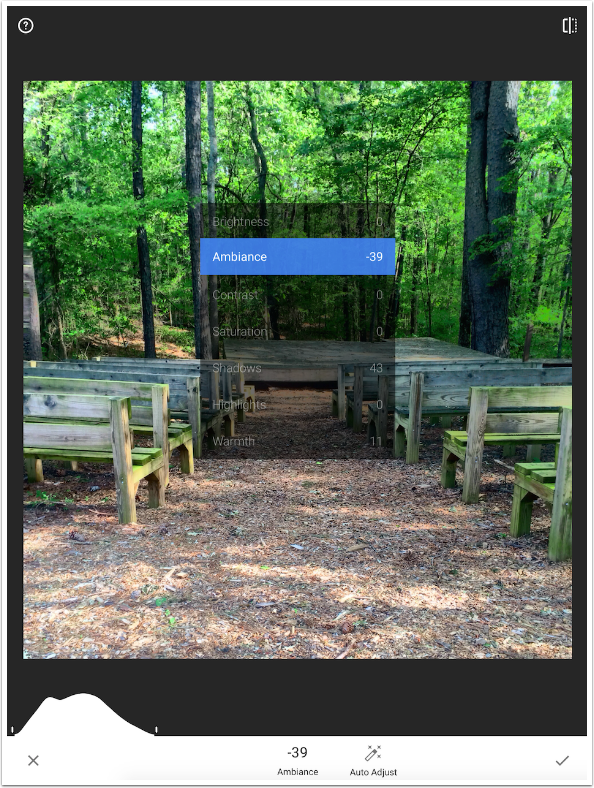
Next I want to Apply Tune Image. I give it negative Ambiance, lighten the Shadows, and add a little Warmth.
That’s fine, but the boards on the benches and stage are a little washed out. I’d like to increase the contrast and make them a bit darker, but not affect the trees and ground. The only option available prior to Snapseed 2.0 is to use the Selective Adjust. But that would require a lot of tedious work to select the gray of the boards and not the gray of the ground. Look how the button I added below picked up the ground but not the green ends of the boards.

Wouldn’t it be easier to paint where I want the changes in brightness and contrast to go? With Snapseed 2.0 a masking feature has been introduced to allow me to do just that.
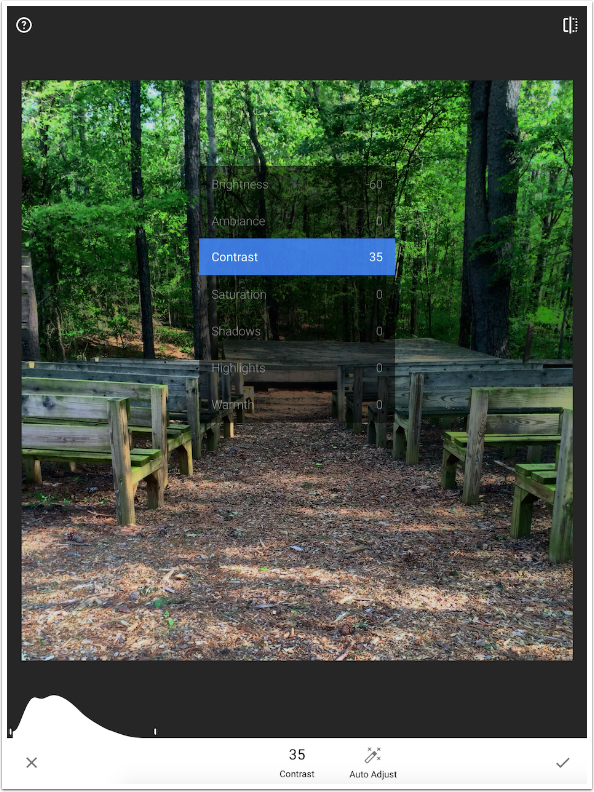
I start by using the Tune Image tool to decrease Brightness and increase Contrast for the entire image, looking only at the boards when determining the values.
After applying the changes, I return to the Stack and access the fly-out menu for this second application of Tune Image. In addition to Delete and Modify, there’s a brush icon for Mask. (This is the first time we’ve seen Mask since it is impossible to mask Crop and Transform.)

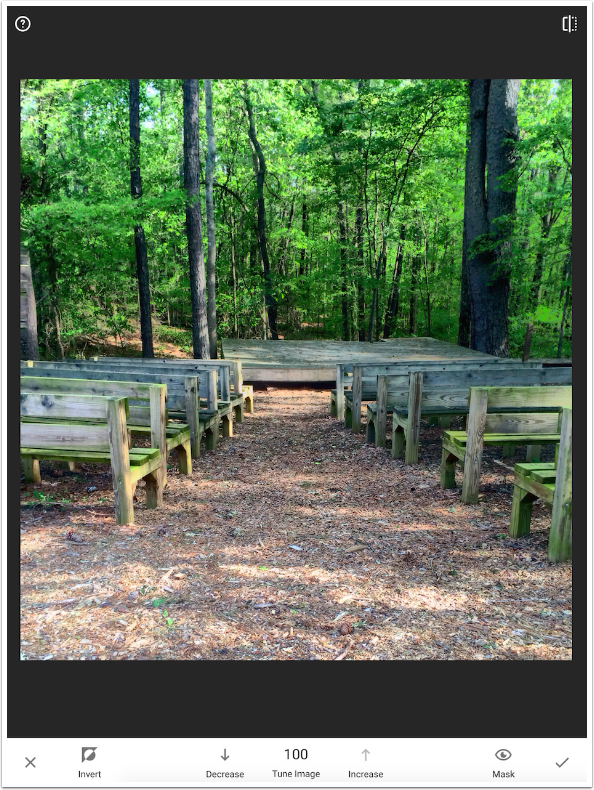
On the Masking screen, shown below, you are presented the image without the changes applied. The default is to paint to mask the changes in. If you want to apply the changes over the whole image, you tap the Invert button. The changes will show over the entire image and the brush will mask them out.
At the center bottom is the opacity indicator. Currently it is at 100%. You can use the Decrease and Increase buttons to change the opacity at 25% intervals. A value of 0 acts as an eraser.
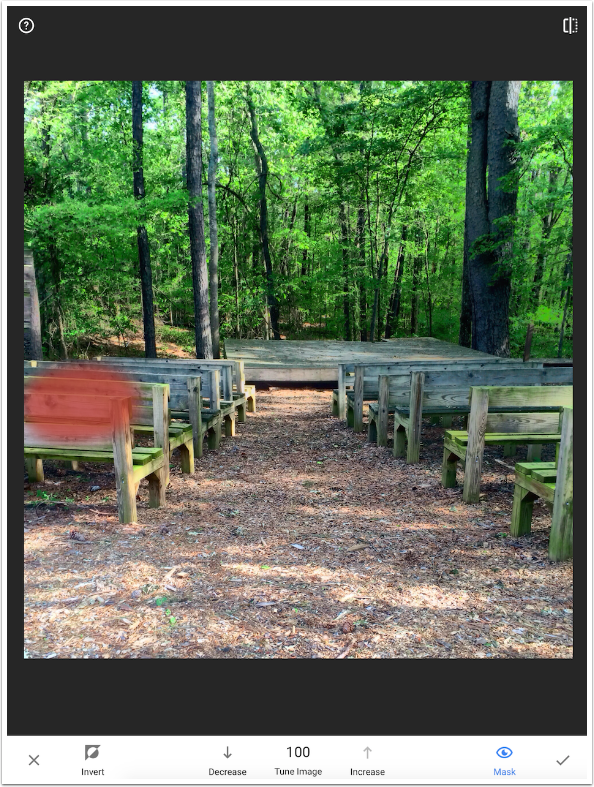
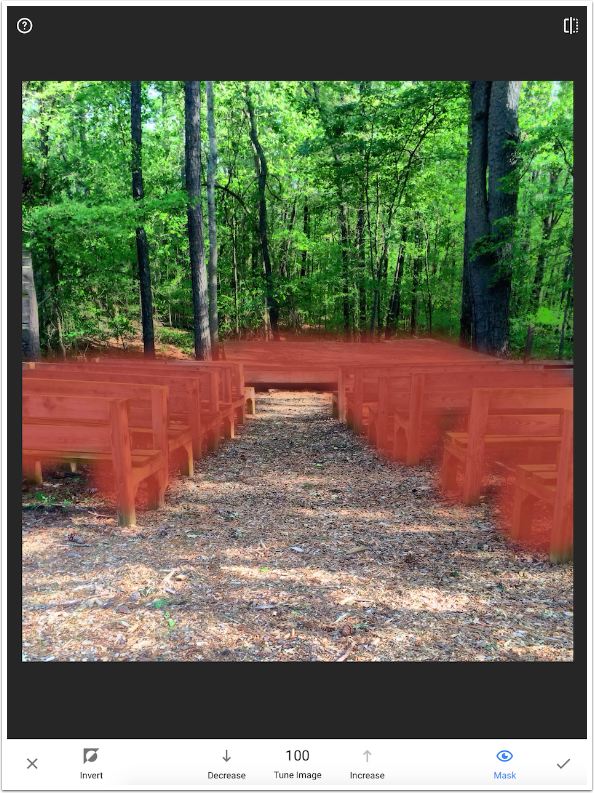
Below I’ve made my first dab with the brush and turned on the Mask button. The red overlay shows where the changes will be made, whether you are brushing in or brushing out.
I continue to brush roughly until the boards are painted in.
The brush size is relative to the screen, so it will only change by zooming in and out. To do fine work you zoom in as far as the app will allow. (Unfortunately, that isn’t far enough to do really fine work. Perhaps that can be changed in future releases.) I decrease the opacity to zero and erase the mask where it overlaps the trees.
Below is the mask after the erasing.
After getting the mask right, I turn the red overlay off so I can see the change applied only where the mask is. I like the effect, targeted only on the boards.
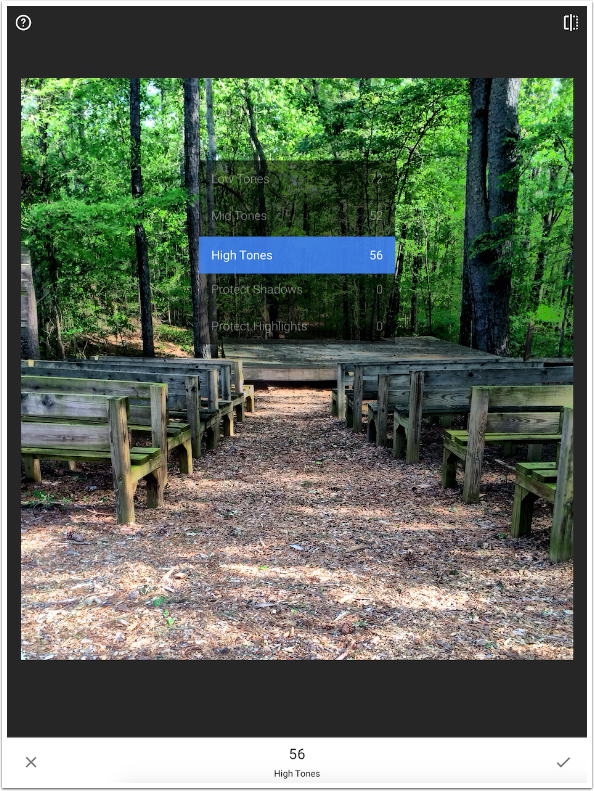
Next I decide to improve the Tonal Contrast. You can see the changes to Low, Mid and High Tones below.
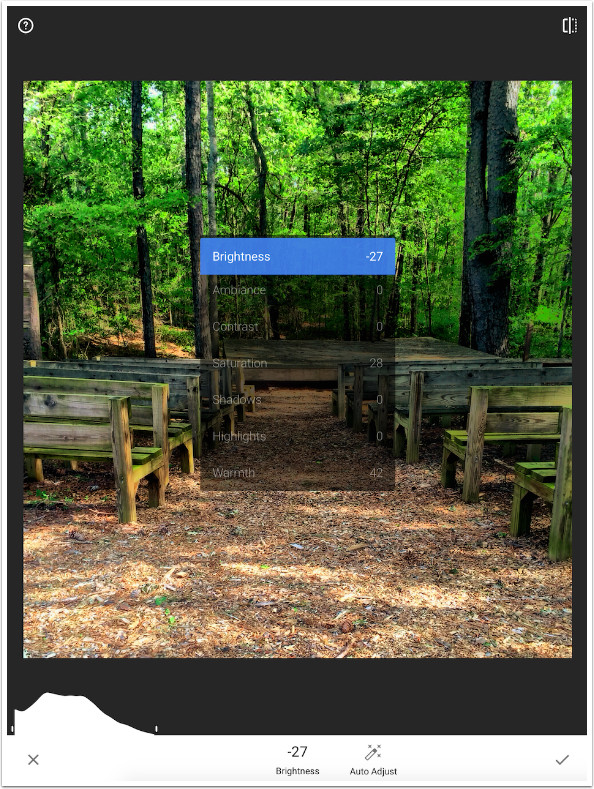
The Tonal Contrast emphasized how gray the leaves on the ground are. I would like to warm them up considerably. I return to Tune Image to add Warmth and Saturation and decrease Brightness. Of course, that makes the green in the Trees and on the boards toxic. We will have to go back and mask these changes.
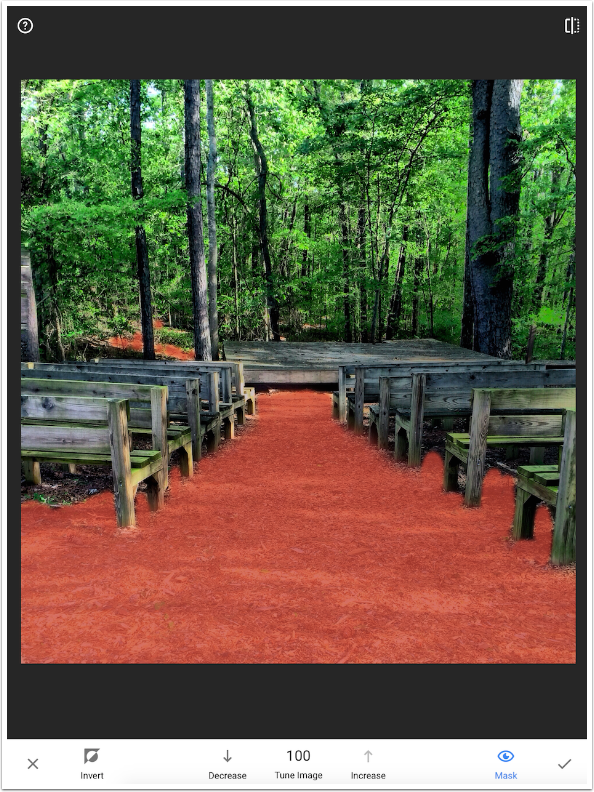
By brushing and zooming in and out, I mask only the ground, including the ground you can see back in the trees on the left.
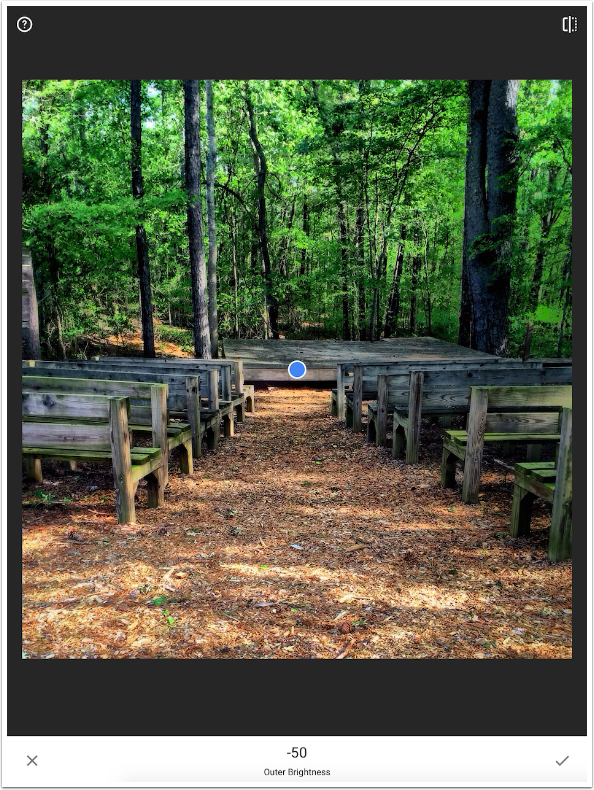
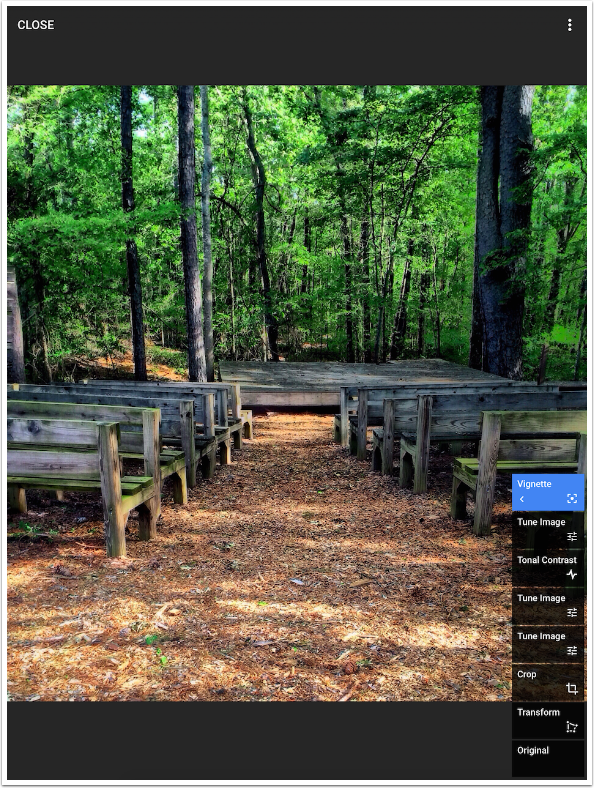
The final change I want to make is to add a slight Vignette. I accept the default values.
Below you’ll see the final stack. We have the Original, Transform, Crop, overall Tune Image, Tune Image targeted to the boards, Tonal Contrast, Tune Image for the ground, and Vignette. Seven steps. I do not know if there is an upper limit to the number of steps, as my personal high number of steps is nine.
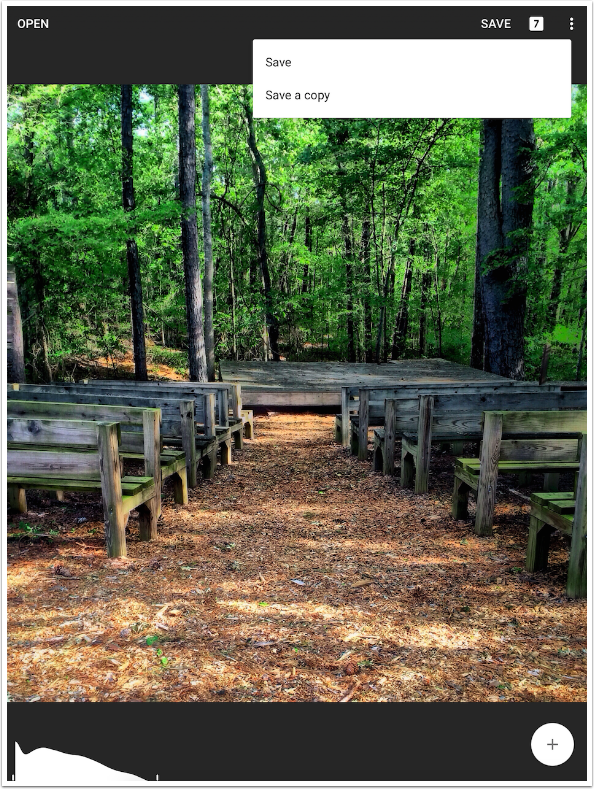
After closing the stack, I am ready to save the image. As I said in the video, “Save” overwrites the original, so you should always “Save a copy”.
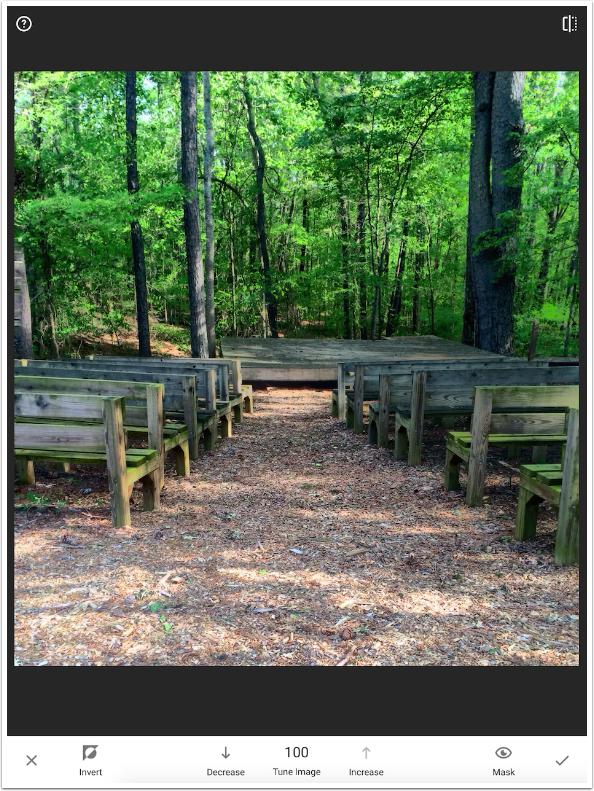
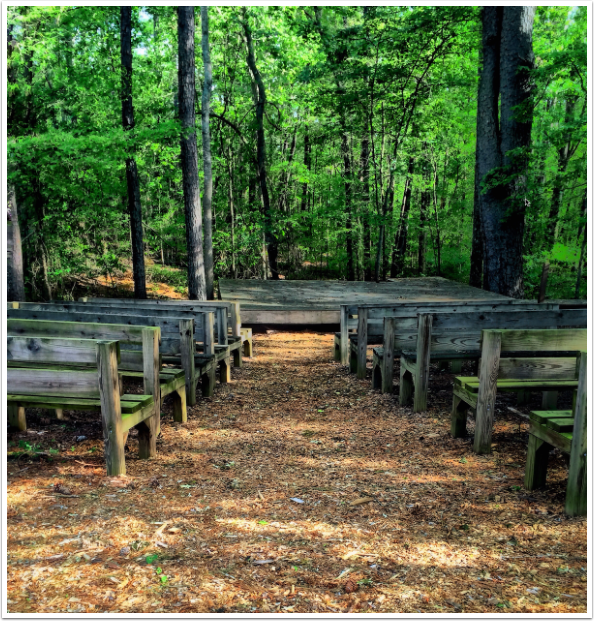
And this is the completed image.
As I said in the opening paragraphs above, Snapseed 2.0 allows you to copy the edits from one image to another. It does not allow you to save a stack as a “preset”. Instead, it saves the stack as a “sidecar” file associated with the original image. When you re-open an image edited in Snapseed, the original image is opened and the Stack is re-applied.
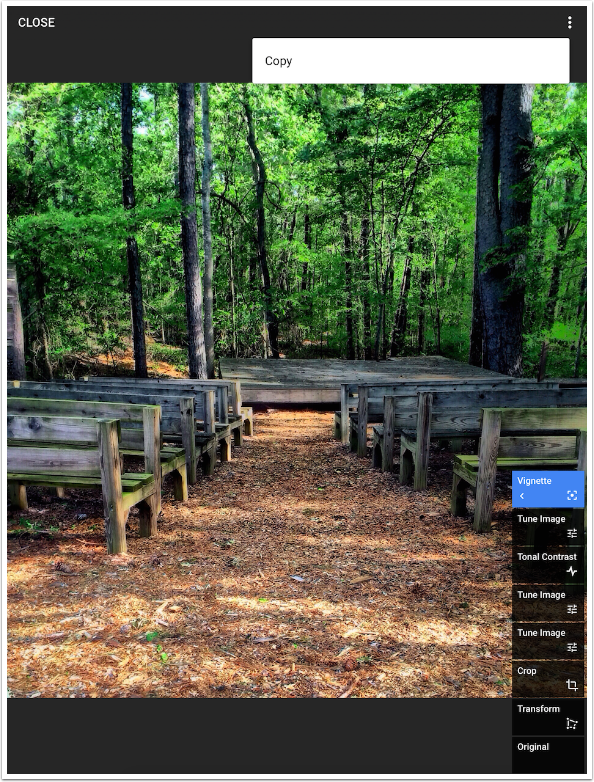
After performing edits on other images, I re-opened the image I just saved above. When I access the Stack, I see all seven steps intact. By tapping the three dots at the upper right on the Stack screen, I am given the opportunity to Copy the Stack.
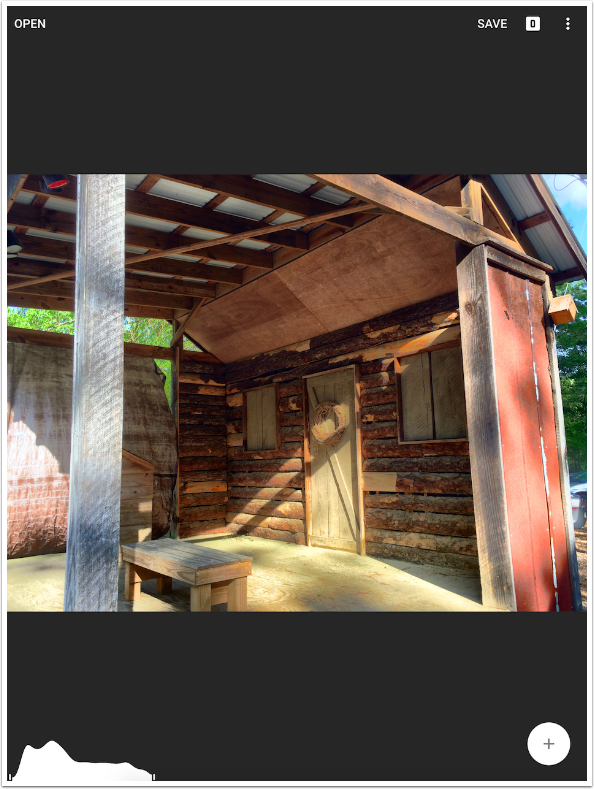
Now I open another image taken the same time as my outdoor stage. When I look at the numbered box at the upper right, I see there are no steps in the Stack. I enter the Stack anyway.
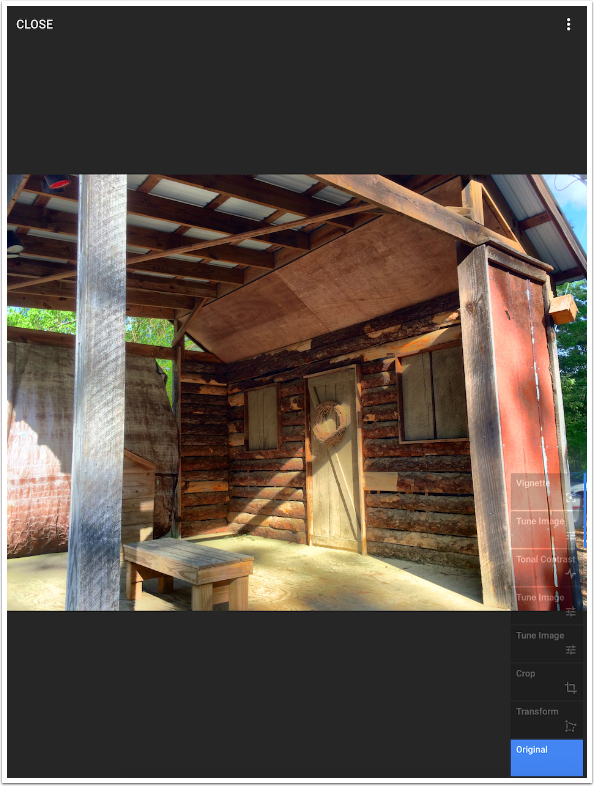
Now when I tap the three dots, I see Insert instead of Copy.
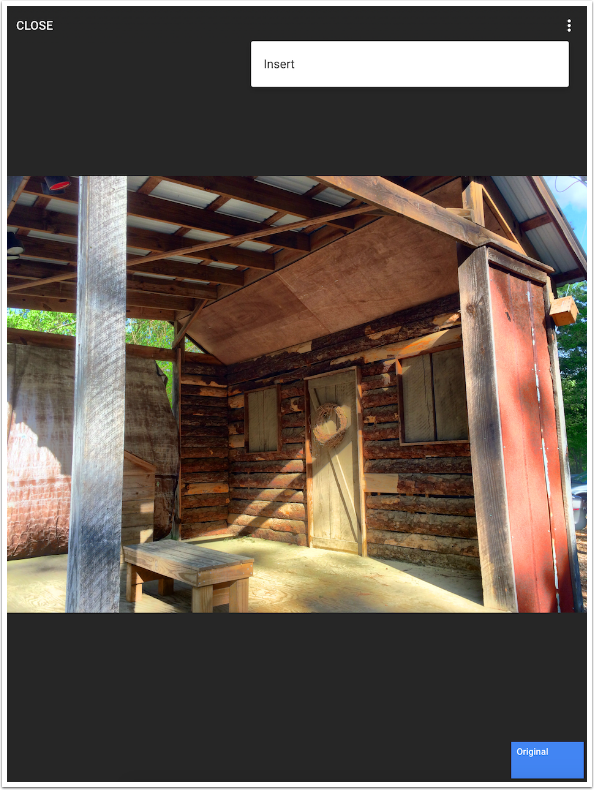
Tapping Insert places all my edits within the stack – but none are visible at first.
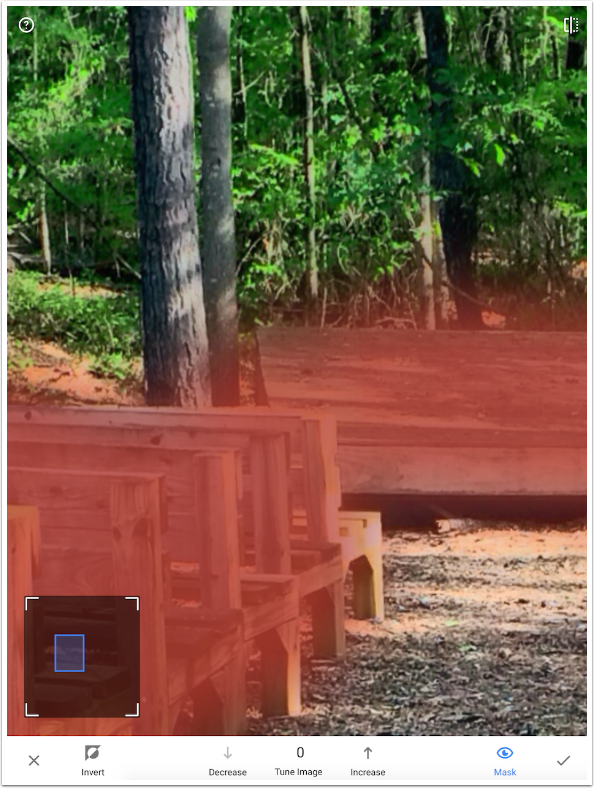
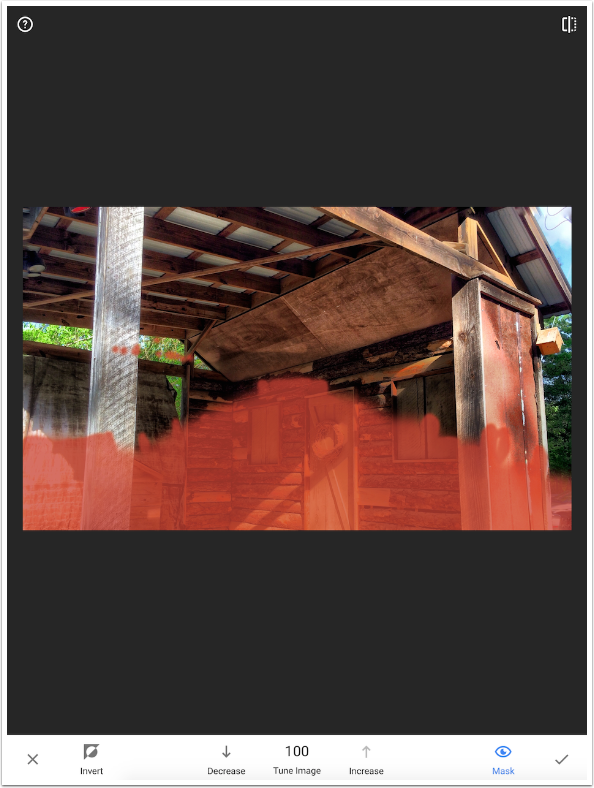
By tapping the last step, Vignette, all the edits are made visible. Wow, that’s ugly. The Transform and the Crop do not work with this image. And what’s with the horribly over-saturated logs at the bottom?

Copying a Stack copies ALL the settings. The Crop takes off the bottom of the image, just as I did on the stage photo. The masks are also copied, which can be proven by going back into the Mask screen on the Tune Image step we used for the ground. In that step I increased Warmth and Saturation, which explains why the logs at the bottom are VERY red.
So copying a Stack is possible, but you might find that editing steps in the Stack to conform to the new image will be more labor-intensive than just starting over.
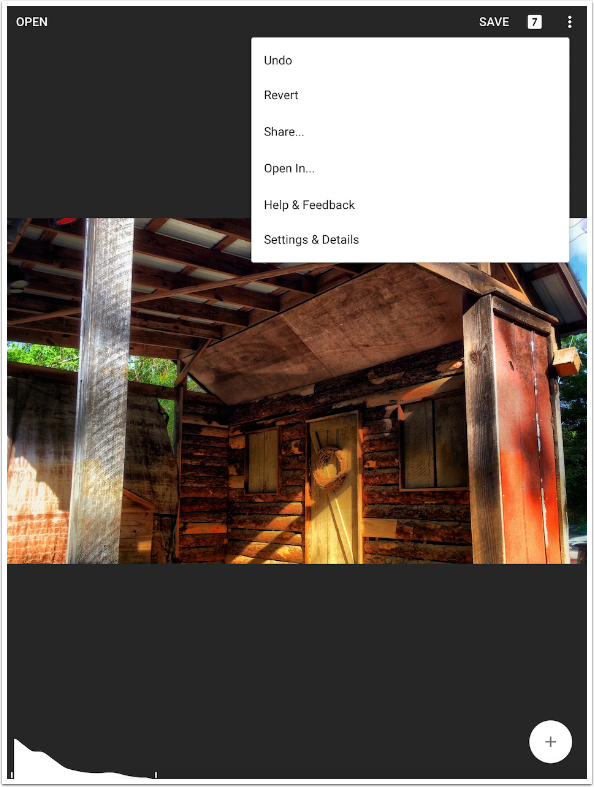
Before we leave our discussion of Snapseed 2.0, I want to discuss the applications settings, which are accessed by tapping the three dots in the top right corner of the main screen (not the Stack screen). You can see the drop-down menu below. You have entries to Undo the last edit (delete the top entry in the Stack), Revert (delete all entries in the Stack), Share the image, and Open the image in another app.
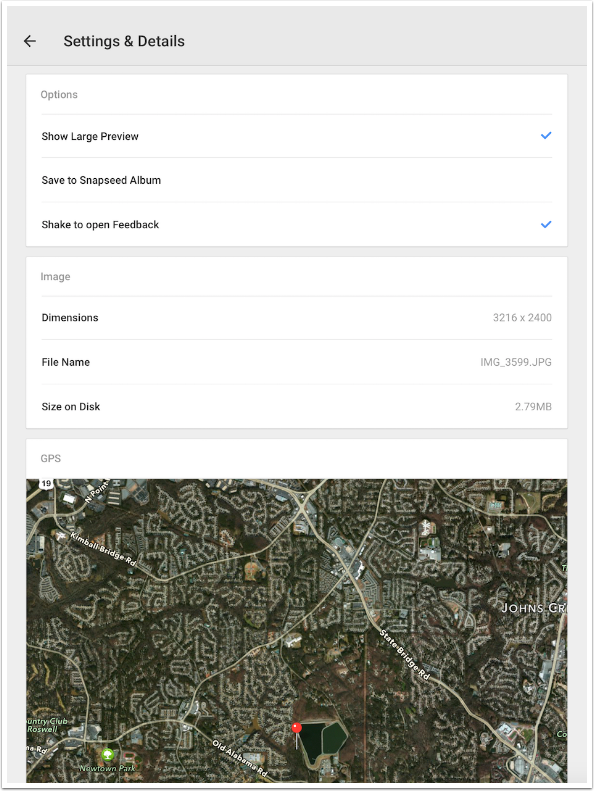
There’s also a Settings & Details button, which takes you to the following screen. There are only three options, which I have left at their defaults. The remainder of the screen is information about the image being edited.
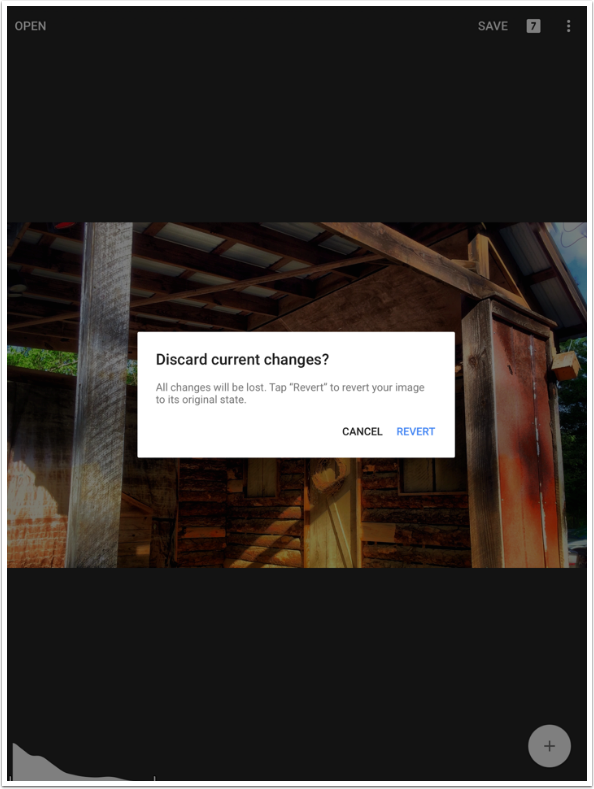
If you decide to Revert, discarding all the entries in the Stack, you will get a confirmation screen.
That brings us to the end of the series on Snapseed 2.0. Although there are some who consider the loss of the Grunge filter a great loss, I think everyone can see that it is a great improvement on an already solid app. And you can’t beat the price – free!
It’s not perfect, however. There are three improvements I would like to see:
Better masking brush control, allowing the user to change the size and softness of the brush.
The ability to move steps within the stack.
A noise-reduction tool.
Whether these changes are ever made or not, Snapseed remains a valuable part of your editing app arsenal.
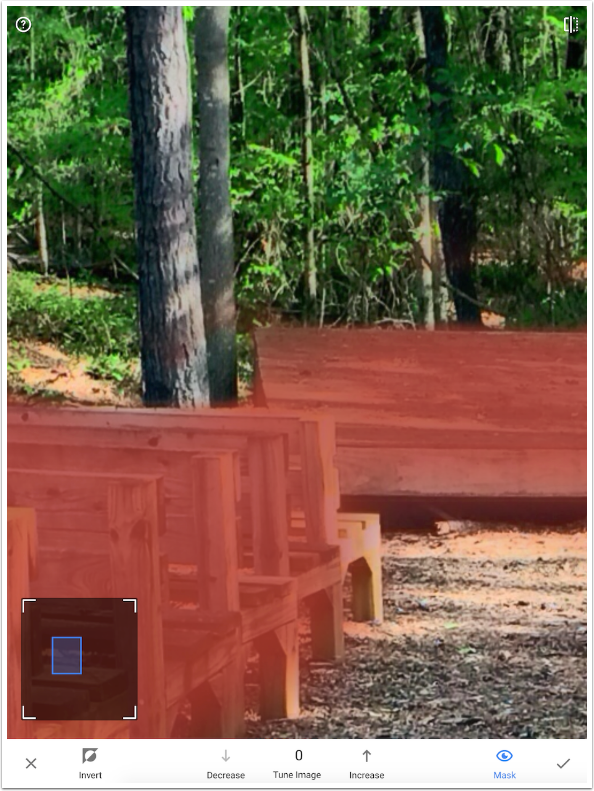
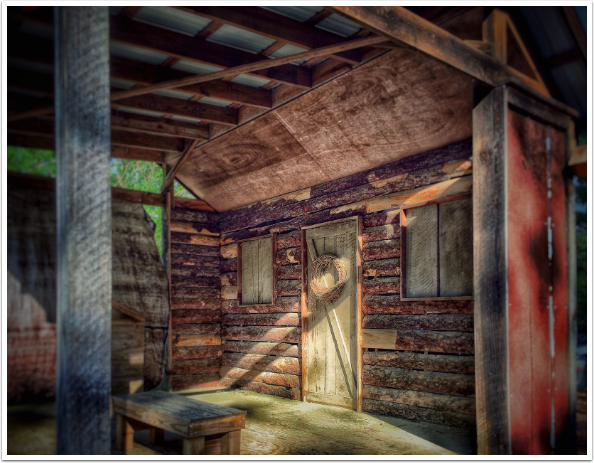
By the way, the image from above that I copied the stack onto, making it worse than the original? I took it in another direction that works much better.
Please support us
TheAppWhisperer has always had a dual mission: to promote the most talented mobile artists of the day and to support ambitious, inquisitive viewers the world over. As the years passTheAppWhisperer has gained readers and viewers and found new venues for that exchange.
All this work thrives with the support of our community.
Please consider making a donation to TheAppWhisperer as this New Year commences because your support helps protect our independence and it means we can keep delivering the promotion of mobile artists thats open for everyone around the world. Every contribution, however big or small, is so valuable for our future.
Jerry Jobe
Never content with just scratching the surface of what an app can do, Jerry Jobe decided to pass on what he learned about imaging apps to others. He’s constantly trying to figure out just what tools other artists have used, and trying to incorporate them into his own work, in an attempt to find his style. He’s written tutorials on over 145 apps so far, which you can find (along with his Song of the Day entries) at http://enthusiasmnoted.wordpress.com/ He lives near Atlanta, Georgia, where he also finds a creative outlet in acting and directing in community theater.


3 Comments
Mary Greer
Thank you for all the details. Stacks can be confusing at first and this has really helped. The only thing I’d like to have seen would have been before and after photos side-by-side. I kept scrolling back and forth but that didn’t allow me to really compare.
Jerry Jobe
Great feedback! I’ll try to take that into account in future articles.
Julie Buxton
Snapseed 2.0 is absolutely my favorite app for editing my iPhone photos. I sincerely appreciate this 3- part series detailing all of Snapseed’s features/tools.