Mobile Photography Tutorial – Hipstamatic 300 – Revisit your Pictures with an Editor
We are delighted to publish Jerry Jobe’s latest mobile photograph tutorial for our reading and viewing pleasure. This week Jobe takes a look at the update to Hipstamatic, Apple’s original App of the Year. Read his thoughts as he puts it through its paces (foreword by Joanne Carter).
Hipstamatic is free (there are in-app purchases) and you can download it here.
“I have a special place in my heart for Hipstamatic. As with many iPhoneographers, Hipstamatic was my gateway into the possibilities for wonderful images created with my iPhone. I selected a lens and a film, and snapped away, leaving hundreds of square images on my Camera Roll. When I posted these images to Facebook, I had several inquiries on how I had made the images. I replied “Hipstamatic”, which led to the next question: “OK, I know you used that app, but how did you MAKE them?” That led me, in November of 2012, to write my first weekly tutorial on Hipstamatic. I haven’t missed a week yet, as creative vistas have opened before me.
Hipstamatic is an idiosyncratic app. One of the things that people loved about it was that you took the picture, but the lens and film, chosen ahead of time, would affect your image in ways you weren’t expecting. This appeals to people who operate on instinct, who like to shoot from the hip. To others, it was a drawback. Some loved being limited to a square image, because it made them think about composing based on that square, rather than counting on a crop in editing. Others wanted to be able to shoot all kinds of aspect ratios.
Hipstamatic has continued on its way for years now, adding new films, lenses and flashes, but sticking to their aesthetic of old film cameras. With film cameras, you were stuck with the film and lens you loaded up when you went out for your shoot – Hipstamatic was the same way (even though it was much simpler to swap out in the middle of a “roll”). Now, with the advent of release 3.0 (or 300, depending on how you look at it), Hipstamatic has changed their game entirely. They have upgraded in three different ways.
– The camera can be switched to “pro mode” which allows for tuning of exposure, focus, white balance, ISO and shutter speed as you capture your image.
– The aspect ratio of the image can be changed from square to rectangular.
– You can edit your photos after capture, changing film, lens, flash and a number of parameters. You can even add that Hipstamatic look to images captured with another camera, or created in art apps like iColorama or Procreate.
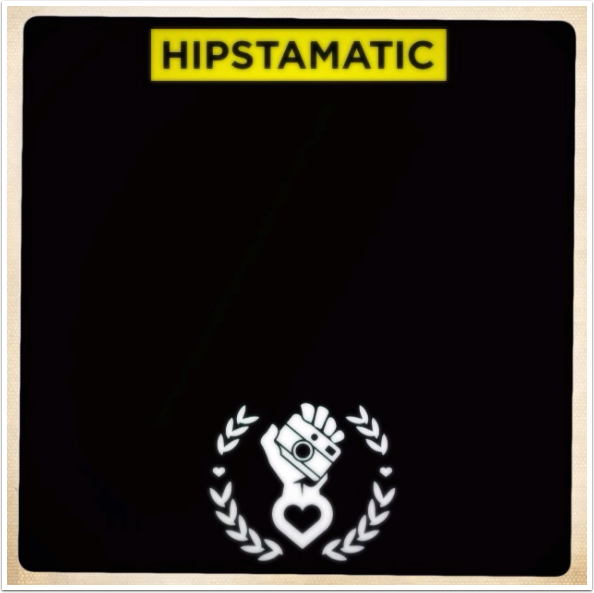
My first image shown here is the splash screen, edited in iColorama to make it square, and passed back through Hipstamatic to give it the border of Ina’s 1969 film”.
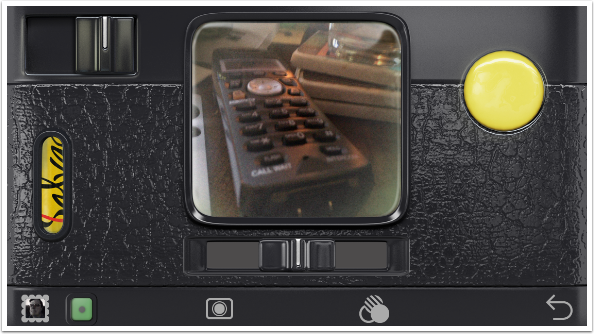
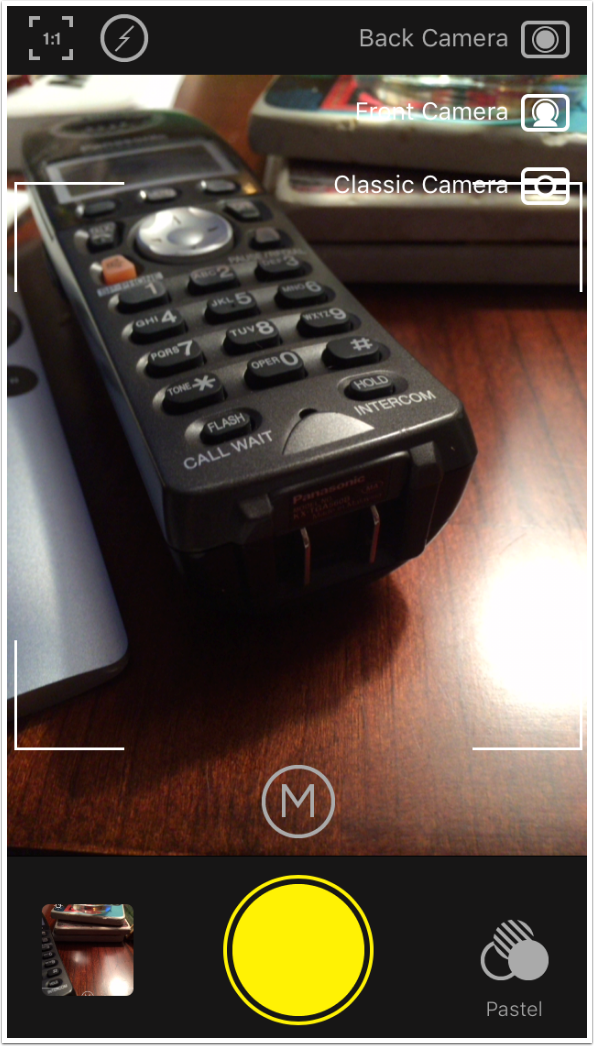
The folks at Hipstamatic (and I say that even though I read somewhere that they only have a single developer) made sure that lovers of the instinctual Hipstamatic were not left out in the cold with the new release. It is entirely possible to use Hipstamatic in the old way. The classic camera will load, and all the controls are the same. As a matter of fact, some controls, such as multi exposure and software flashes, are only available with the classic camera and not with the new pro camera. The only new control you will see on the back of the classic camera is the square with the circle inside, located on the bottom, left of center. This changes the camera from classic to pro mode. (The Favorites button was changed from a star to the three “filter” circles.)
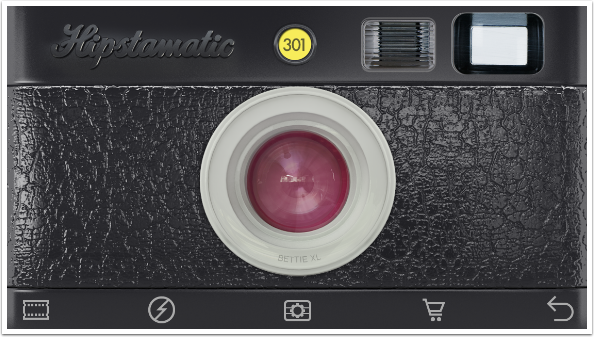
The front of the classic camera remains the same, with buttons along the bottom for changing films, flashes and cases, and accessing the store and the back of the camera.
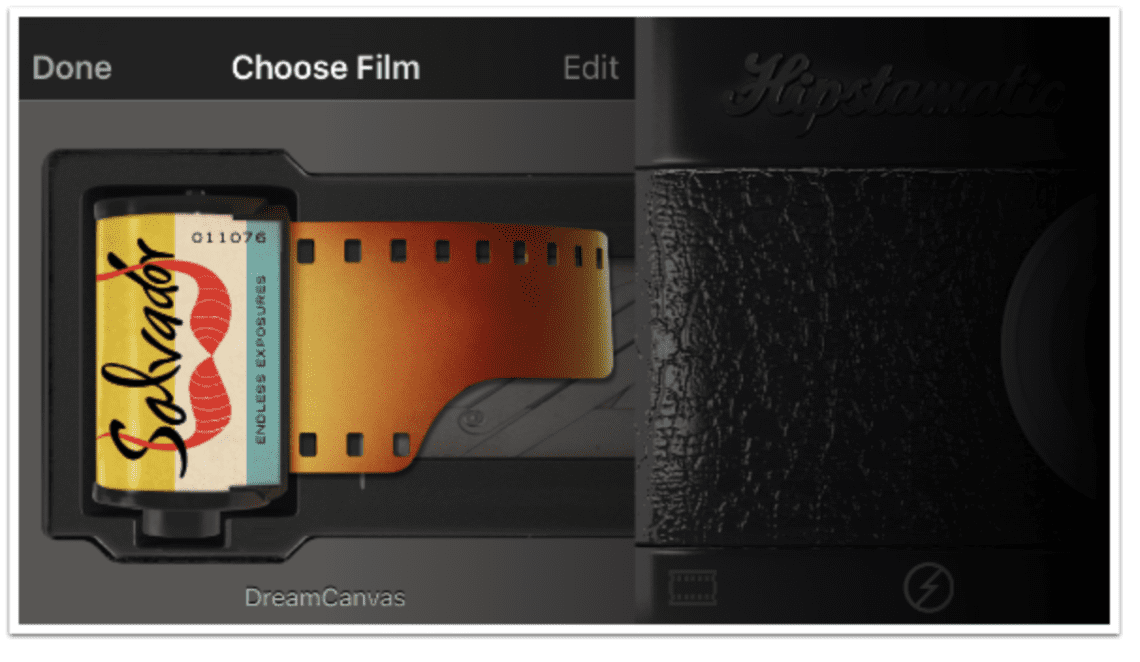
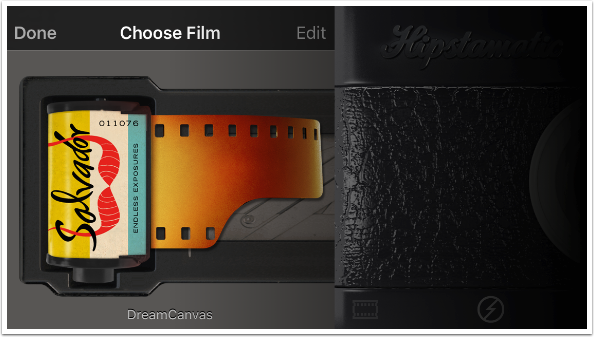
Just as in the prior versions, changing films is just a matter of swiping through those you have installed. There is also the familiar Edit button that allows you to arrange your films, lenses and favorites in whatever order you prefer.
Below I’ve changed the camera mode from classic to pro. I’ve turned the camera to landscape mode to capture the image, and I’d recommend that due to cropping – an issue I’ll deal with in the next article. As you can see from the screenshot, the controls do not turn to landscape mode. They are only read in portrait mode.

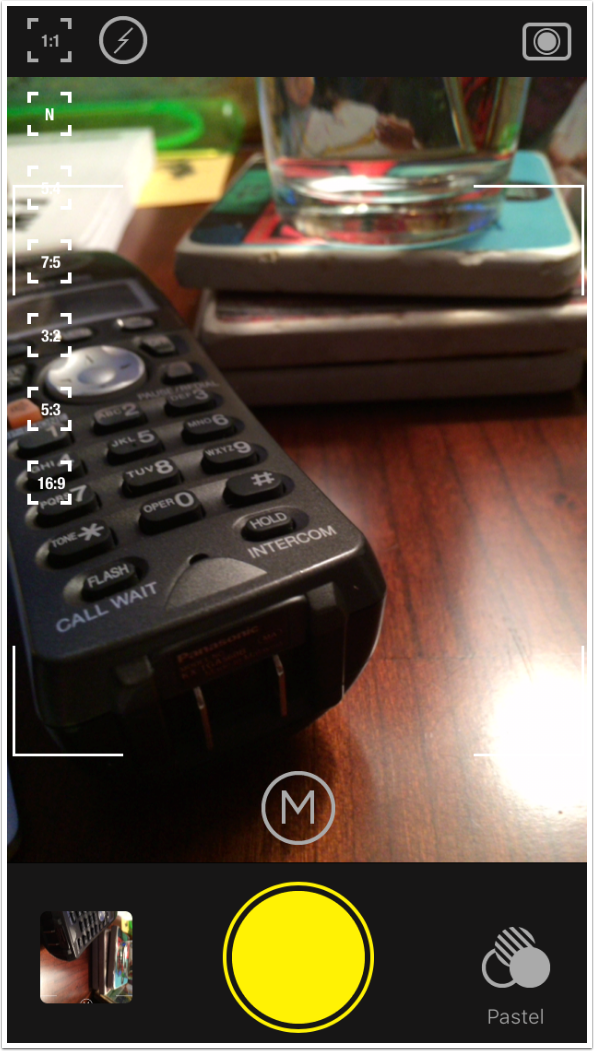
The first control is for aspect ratio, and you can see the possible values in the screenshot below. The white box within the image shows the size of the finished image.
The next image shows the actual capture. Hipstamatic always captures the full-screen image, then crops it according to the aspect ratio. The full image is always available in case you want to change the aspect ratio later. You can change an image you captured at 1:1 to 4:5, and the parts of the image that were chopped off to make a square are added back to make it a rectangle, rather than cutting the square image down farther.
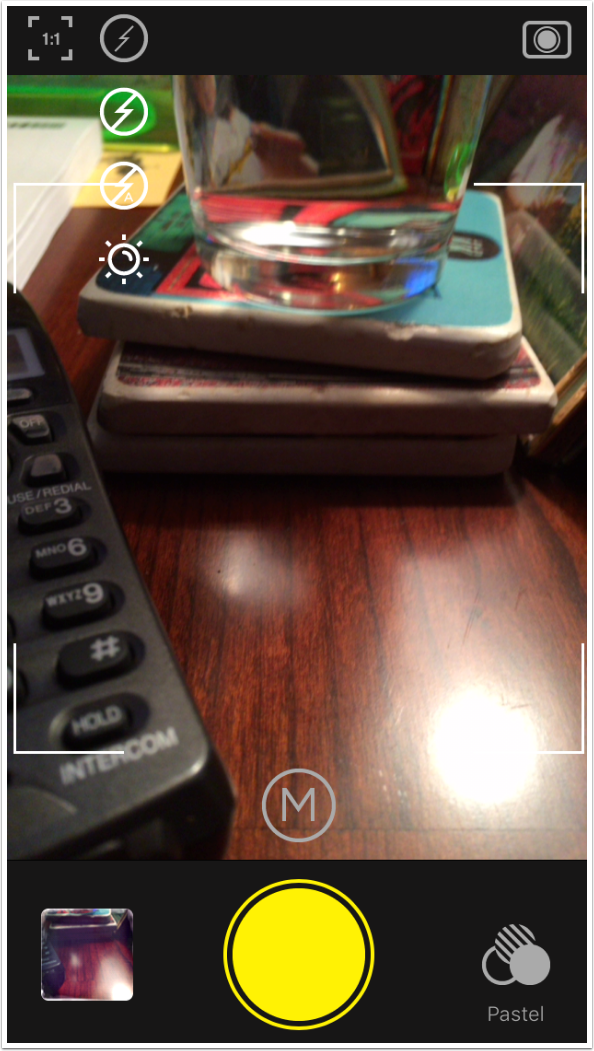
The next control is flash. This is not the software flashes available as part of the Hipstapaks; these are the hardware flashes available through the iPhone hardware. The values are On, Auto and Torch, which leaves the flash on. If the flash is on, you turn it off by tapping the On button again.
The next control at the top is the circle bounded by the square. This changes the camera mode, so you can return to classic mode. You can also use the front camera – something unavailable in previous releases of Hipstamatic – so now you can capture those Hipstamatic selfies!
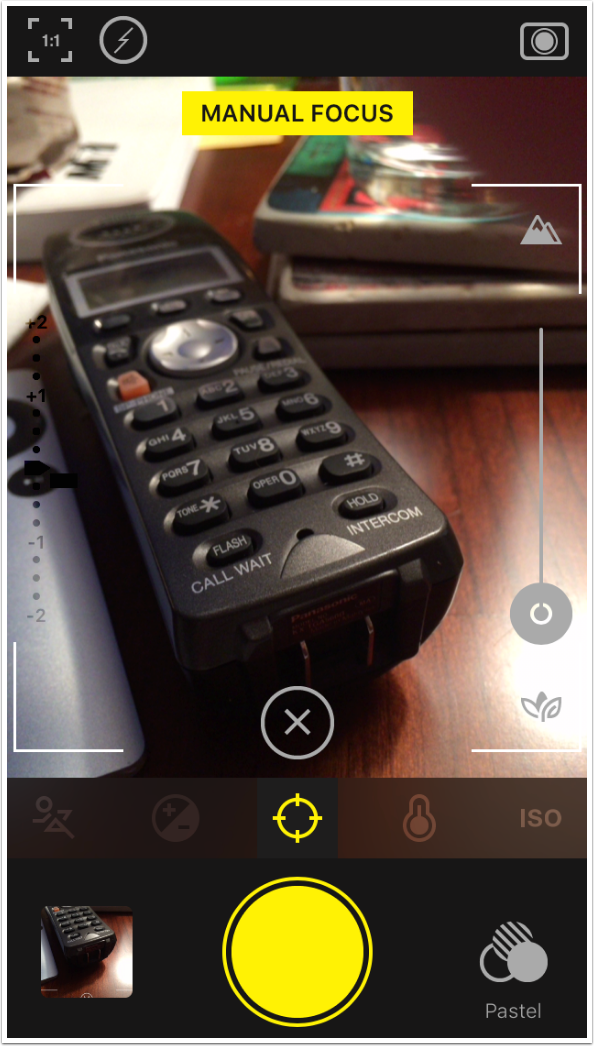
The M button at the bottom of the image allows you to switch to manual camera mode. This brings up five additional controls. The running figure is shutter speed; the +/- is exposure; the target (highlighted in the screenshot below) is focus; the thermometer is temperature; and the ISO is…well, ISO. The slider on the right side manipulates the chosen control. The Manual Focus slider puts closer objects in focus at the bottom, and farther objects in focus at the top.
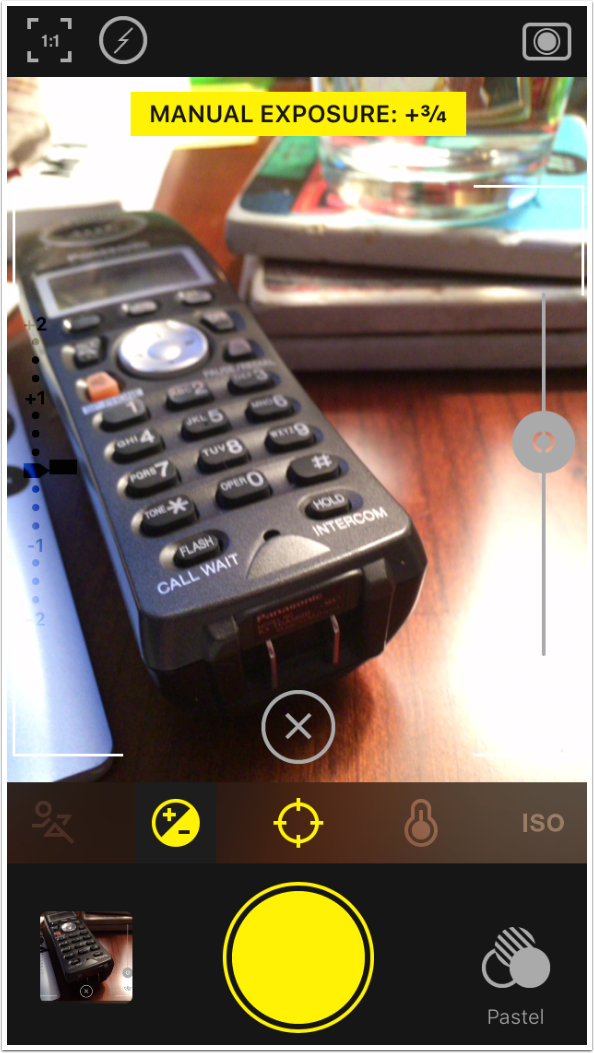
The Exposure control is delicate, and will make changes that are way too extreme at the ends of the slider.
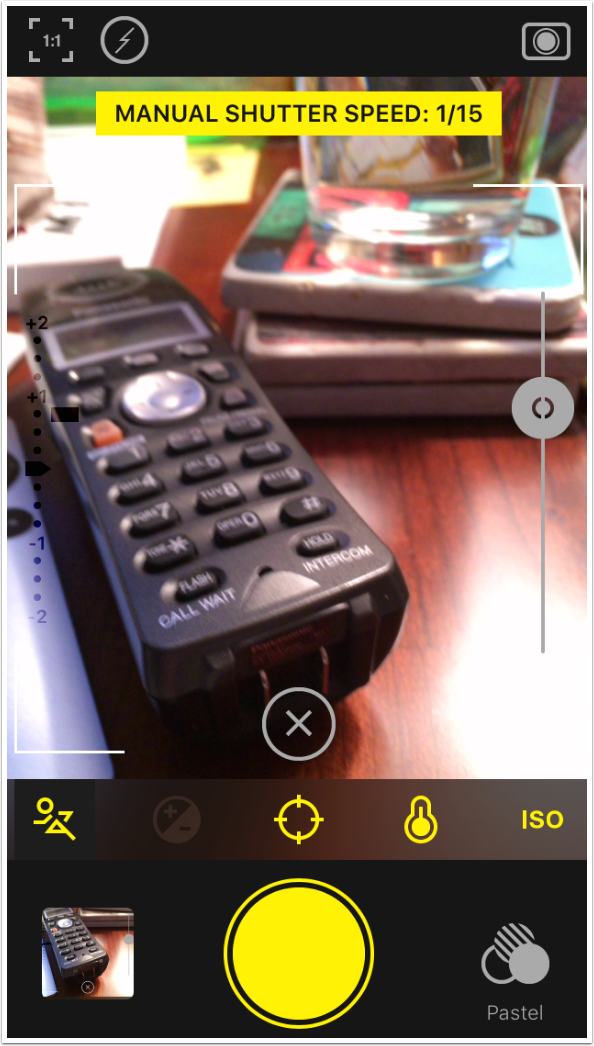
Shutter speed has a range of values from 1/1000 of a second to 2 seconds. White balance has a range from 3000K to 9000K. ISO has a range from 30 to 2180.
When you tap the three-filter-circles icon at the lower right, Hipstamatic shows you your Favorites. A few Hipstamatic default favorites have been added. Your initial capture will use the chosen lens/film combinations, but these can be changed later.
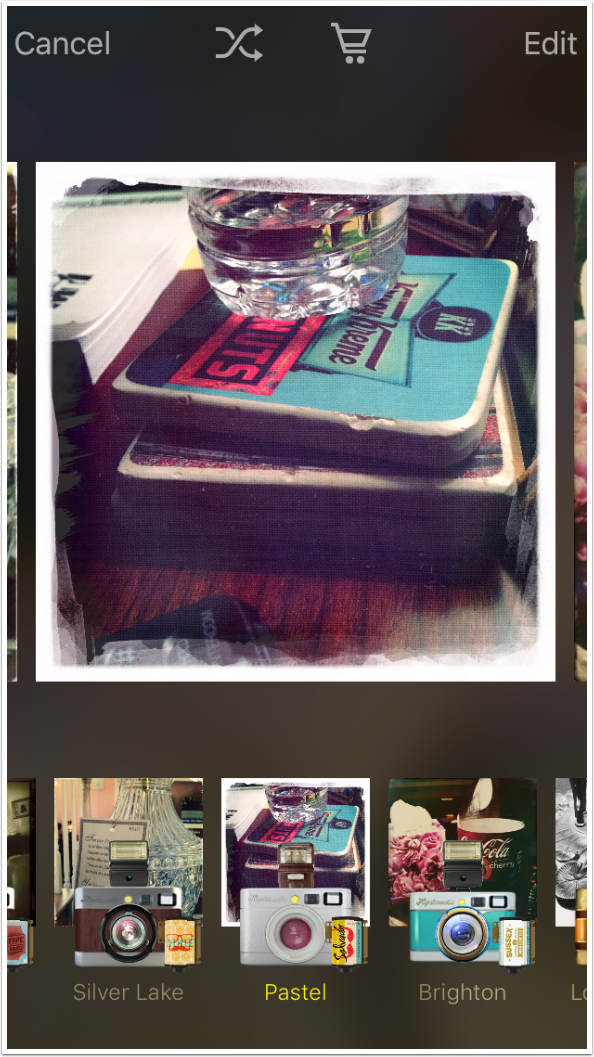
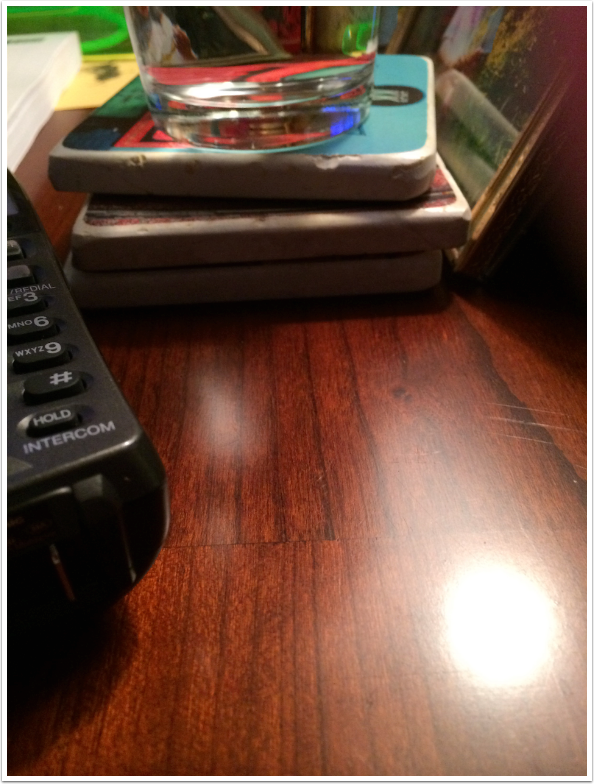
Here is a capture with the Pastel combination of the Bettie XL lens and the Dream Canvas film. The hardware flash was set to Torch, and the aspect ratio was square.
There is an issue with Hipstamatic captures that is like the issue with Snapseed when it changed radically earlier this year. The image seen below is as it is seen on the Camera Roll. However, the image on the Photo Stream, or moved into Dropbox, is the uncropped capture with no lens, no film, no changes of any kind. In order to move the image through Dropbox and into this article, I had to bring the image from the Camera Roll into another app (in my case Snapseed) and save it without any changes. Hipstamatic is supposedly working on this issue, but it was not fixed as of release 301.

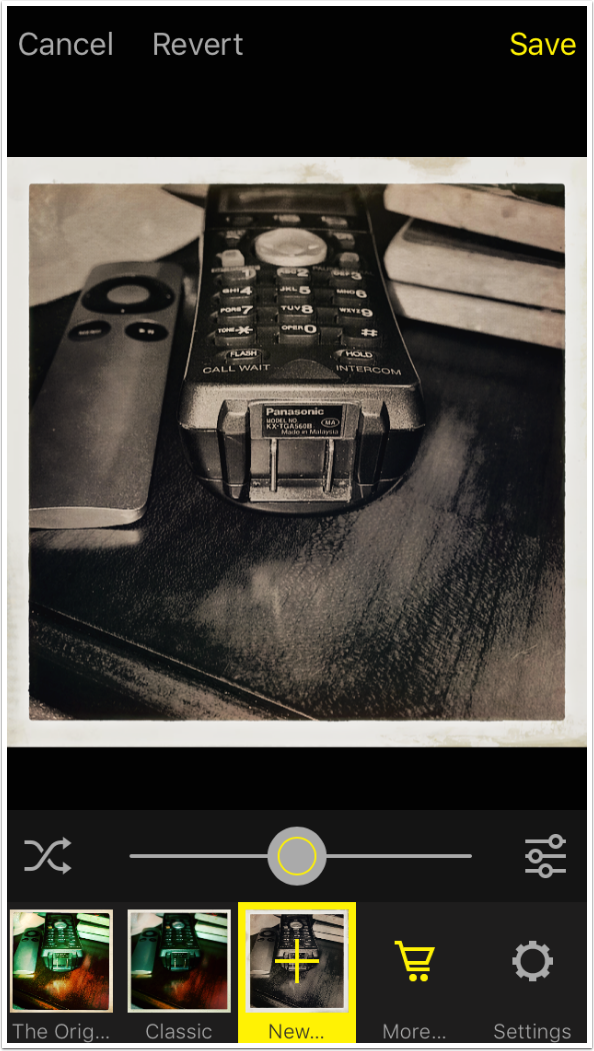
Tapping the thumbnail at the lower left takes you into the library, where you can choose images for editing. I chose the most recent image, and then tapped the filter-circles image to edit. The default is to choose from among your favorites to edit your photo.

I changed to the Vintage favorite, which is the John S lens and the Uchitel 20 film.
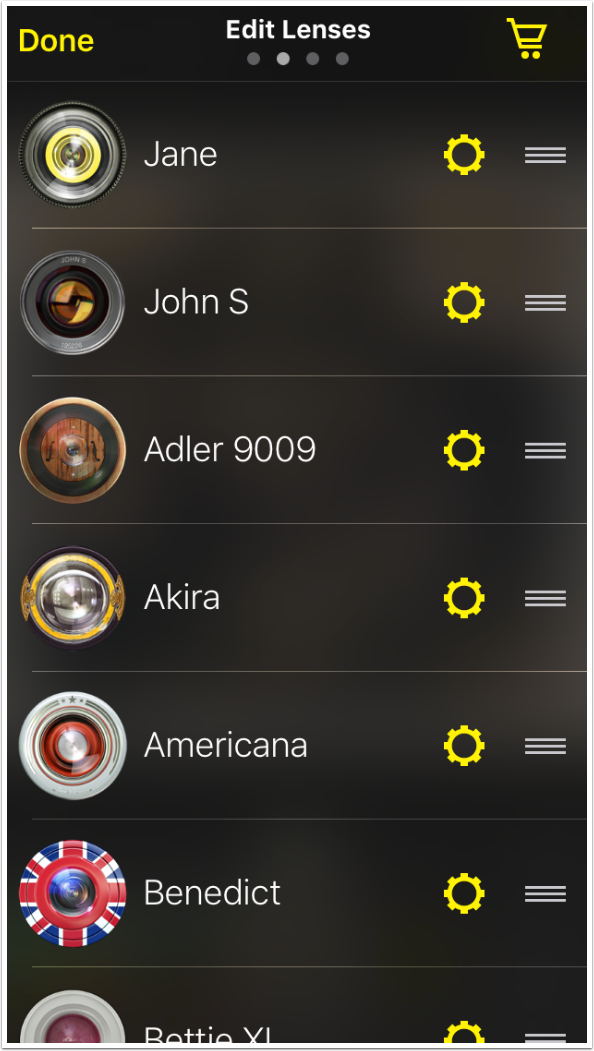
Tapping the Settings gear at the lower right allows you to arrange your Favorites, Lenses, Films and Flashes, just as you can in Classic Camera mode. To move an item up or down in the list, hold the three bars at the right end of the item and drag it up or down.

I keep the Jane and John S lenses at the top of my lens list, and arrange the rest in alphabetical order. I do the same thing with my films, except that I group the B&W films together in alphabetical order, then my color films.
The Hipstamatic store, accessed by tapping the More shopping cart button, works the same as it always has, allowing you to buy new Hipstapaks as they are released. I have kept up with Hipstapaks from the beginning, so I have all of them save one – the colorful cases. (I really see no need for them.)
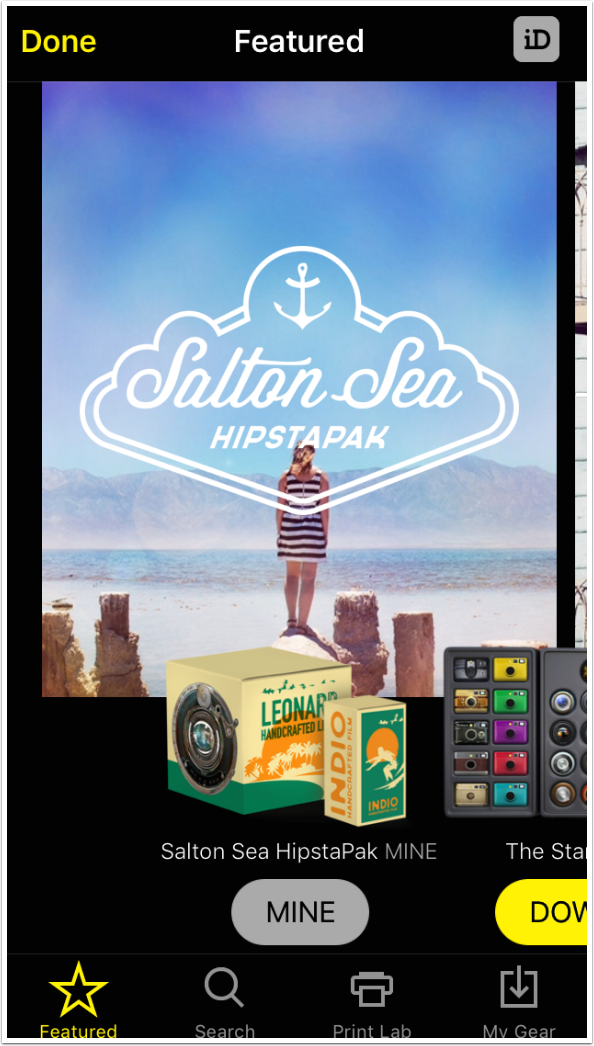
If you have to reinstall Hipstamatic, you will want to know how to restore your purchased Hipstapaks. Just tap My Gear in the store and scroll to the bottom, where you will find a button for Restore Purchases.

The double crossed arrow on the edit screen gives you a random lens/film/flash combination, just like shaking the camera did in classic Hipstamatic. Below I ended up with the Triad Gel flash, which gives some interesting texture to the empty portion of the tabletop.

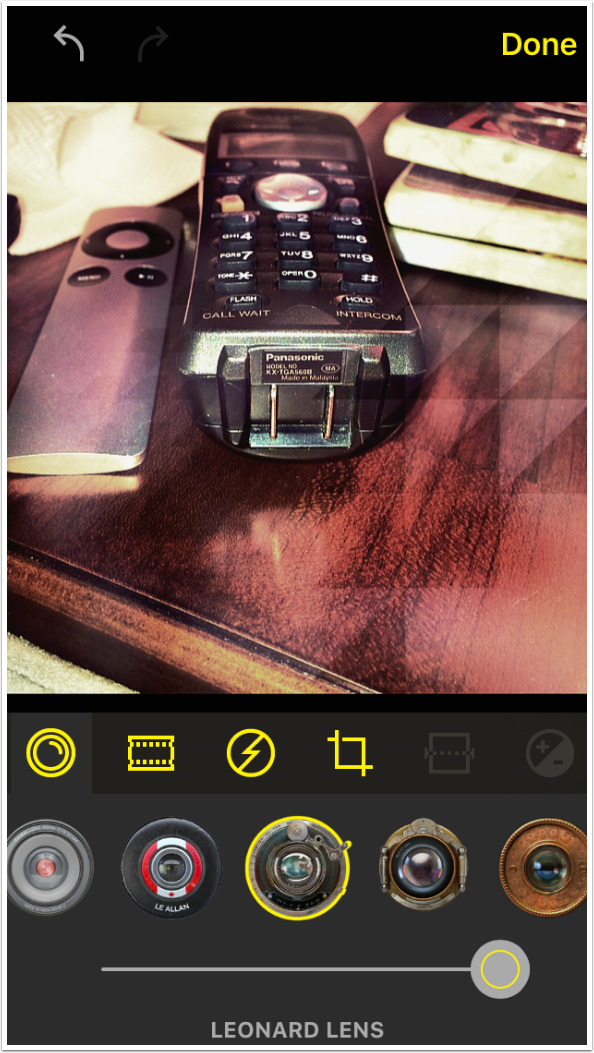
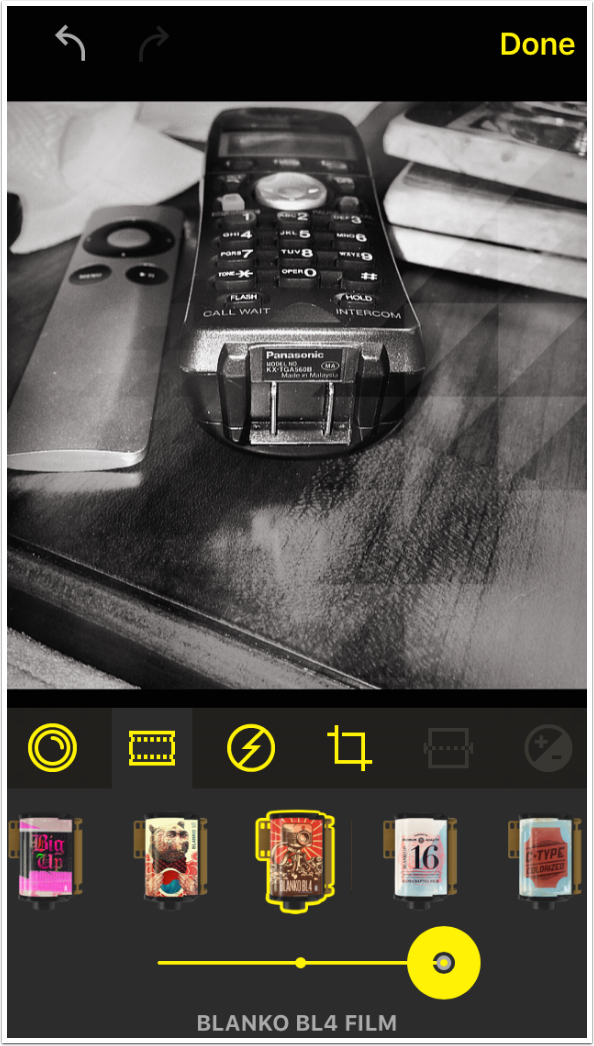
Tapping the sliders button brings you into full edit mode, where you can manually choose lens/film/flash rather than choosing from Favorites. The full edit mode will be covered in detail in the next article, but I wanted to show you a couple of things right now. In the shot below I can see that the Random function gave me the Leonard lens.
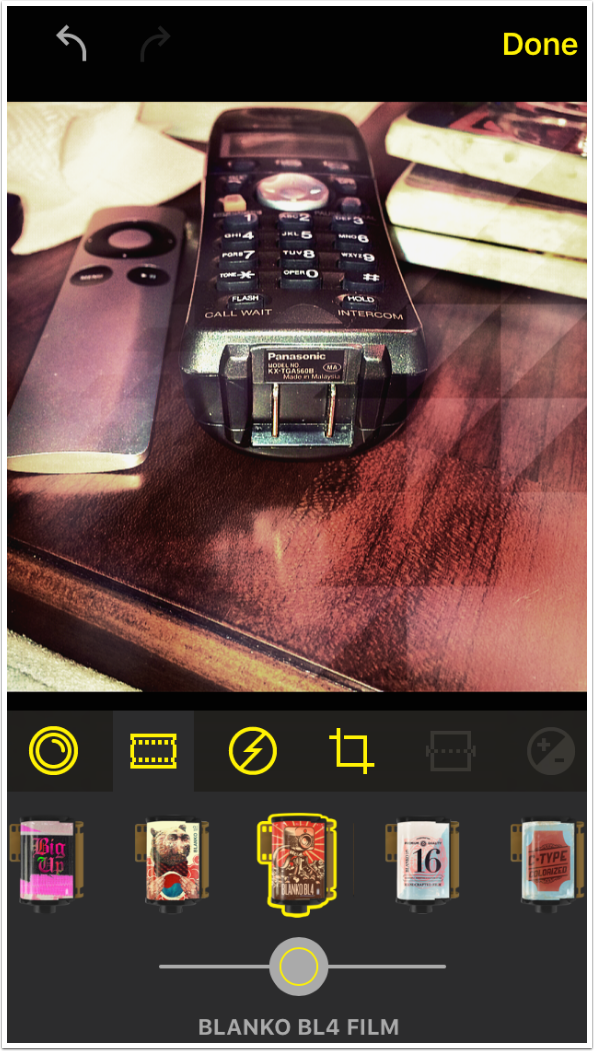
I can also see it chose the Blanko BL4 film.
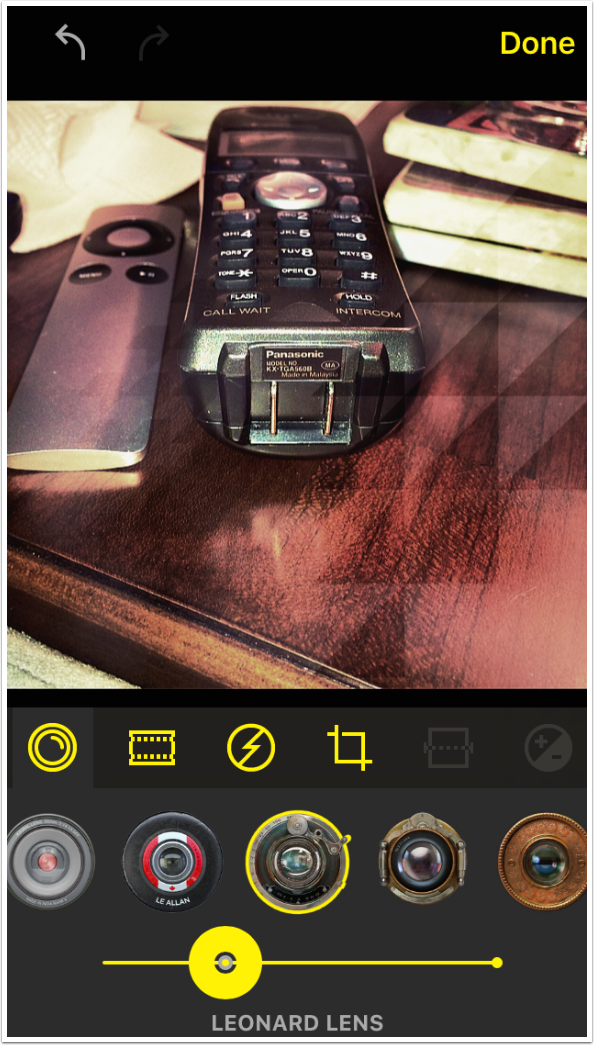
There are sliders associated with the lens and film. By moving the lens slider to the left, I get a darker image, with less of the light leak from the lens.
Moving the film slider to the left saturates the image.
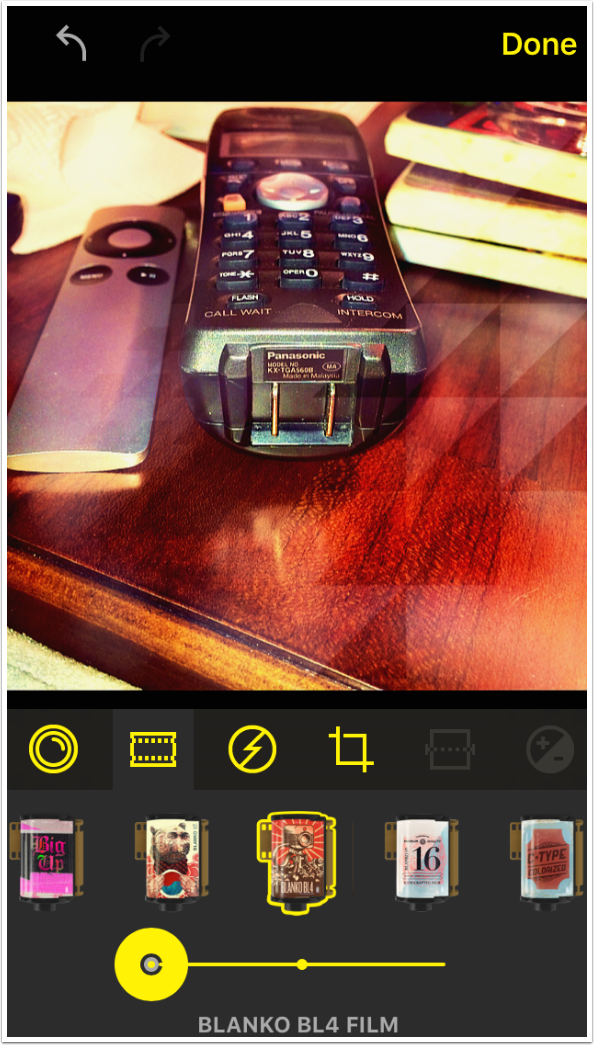
Moving it to the right desaturates the image. In this way, you can turn a color film into a B&W film, yet keep other aspects such as the frame and graininess.
Before leaving, I need to show the settings accessed through the Settings app, not directly through Hipstamatic. If you go to Settings>Hipstamatic, the first thing is the access permissions. These are typical, and you want to give access for the Camera and Photos. Optionally you can let Hipstamatic access Location (for tagging your photos) and Cellular Data (for downloading Hipstapaks and uploading images to social media).
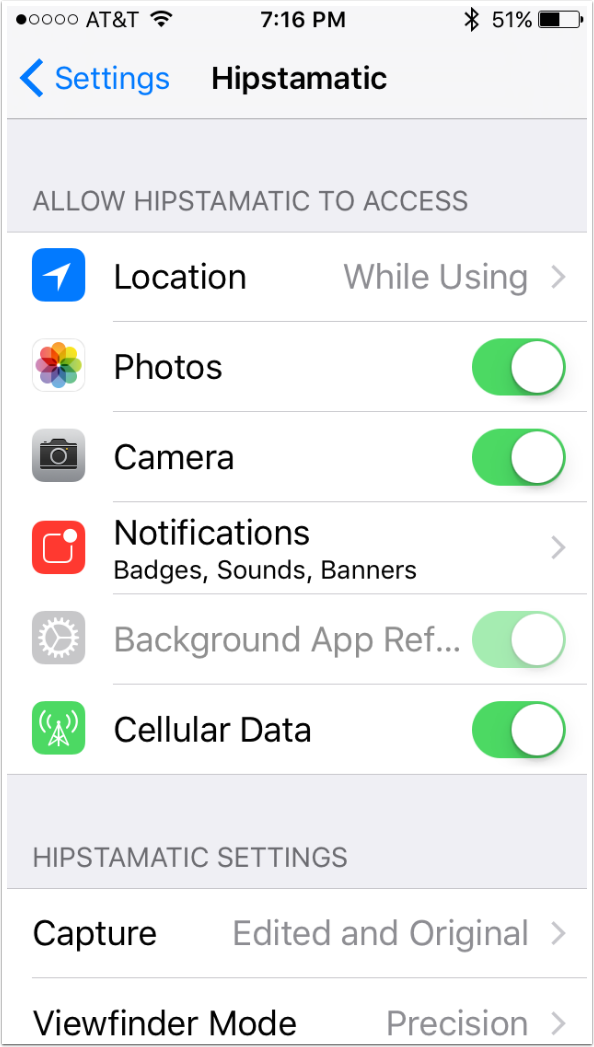
The new setting in the next group is Capture, which should remain set at Edited and Original. This allows Hipstamatic to keep the full frame image, so that the data outside the square or 16:9 crop is not lost.
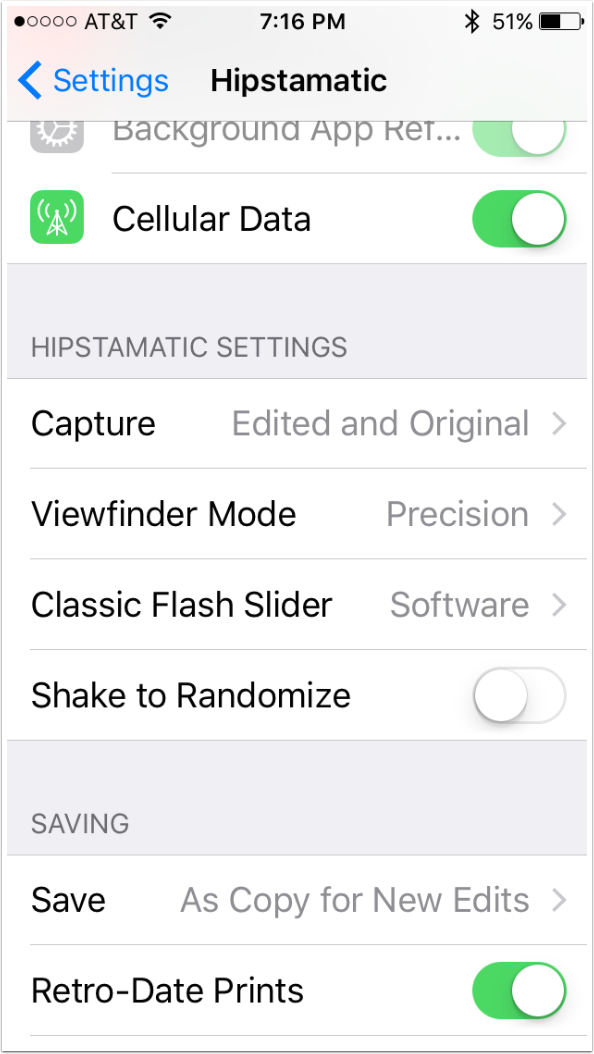
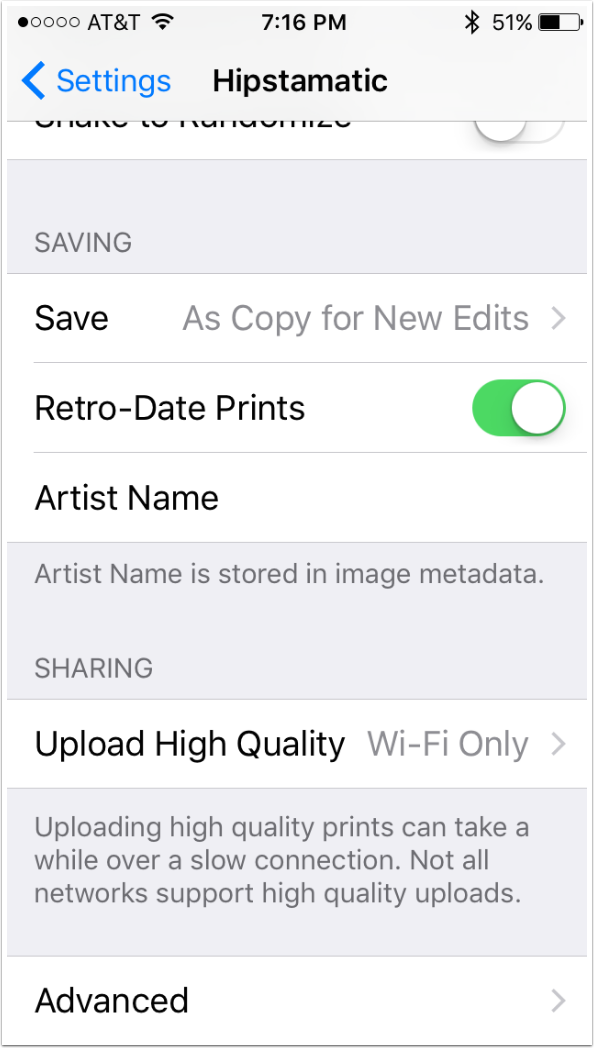
In the next group, the first setting, Save, is where the issue with the new version arises. The value shown below, As Copy for New Edits, should allow you to save multiple versions of the image as edits. Instead, editing modifies the original. The Camera Roll shows the most recent edit, but you have no way to access previous edited versions. This broken setting also results in the original image being the only image that is passed through the Photo Stream and Dropbox. This needs to be fixed immediately; my example shots at the end of the article all had to be saved through Snapseed to get the correct version moved.
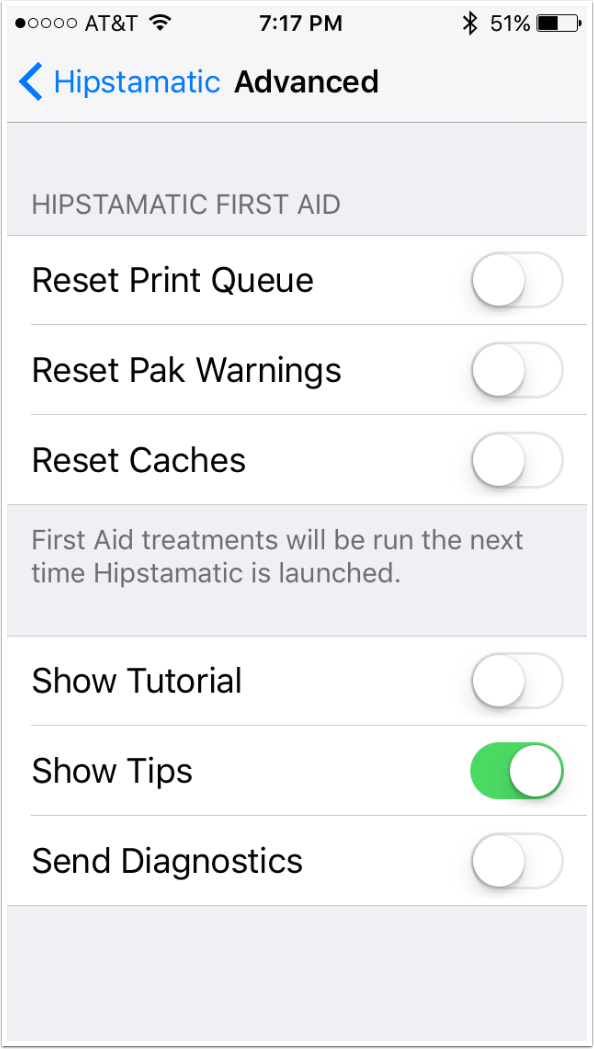
The Advanced settings are shown below. Know they are there, but there’s no current need to worry about them.
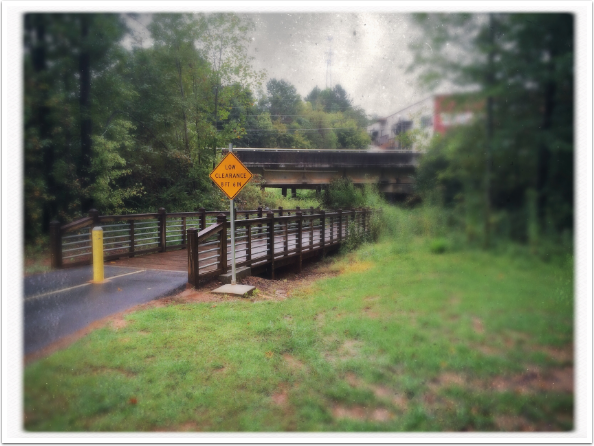
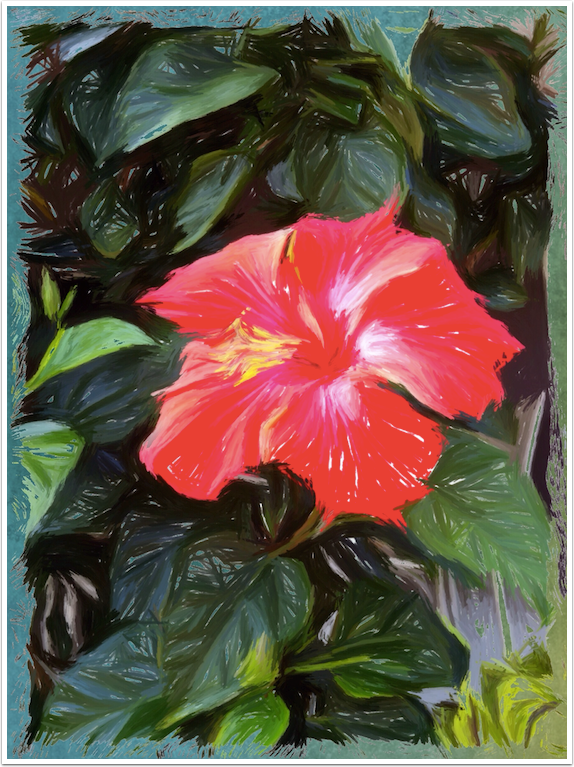
It’s still odd for me to see rectangular prints coming out of Hipstamatic. This first image uses the Loftus lens and the Ina’s 1935 film, with some added texture and vignette (covered next article).
Things can get a lot more intense than with original Hipstamatic, as shown with the shot below.
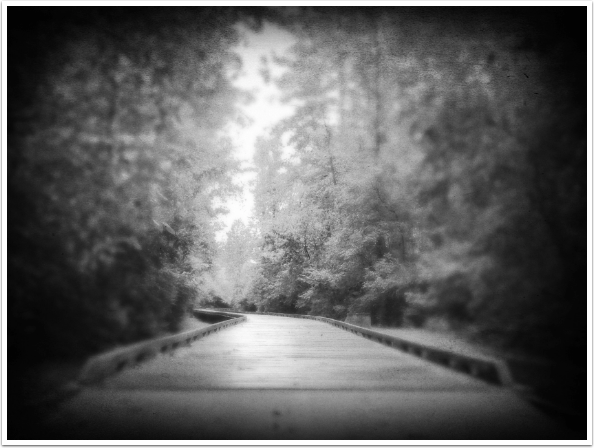
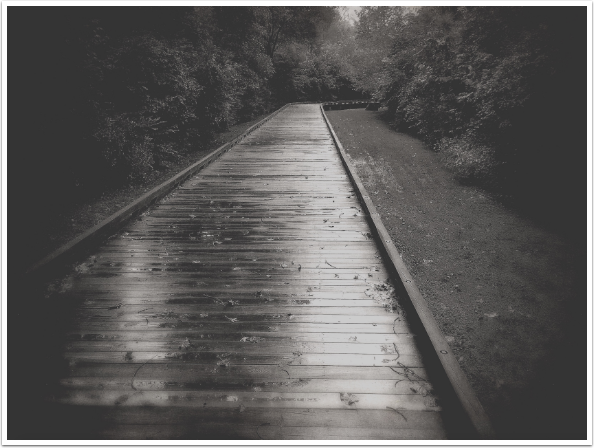
I shot all these images with Loftus/Ina’s 1935, but thanks to the new Hipstamatic, I was able to change the shot below to Hornbecker/Uchitel 20.
I’ve got to say that I really like the concept of the new Hipstamatic. Unfortunately, even after installing release 301, I am still getting crashes regularly (which didn’t happen with classic Hipstamatic). I also don’t like not being able to save multiple edits. Strangely, that only happens with images captured in Hipstamatic. Those captured by the native camera can be edited and saved multiple times, while keeping the original. It’s almost like they are encouraging you to shoot outside of Hipstamatic!
Nevertheless, I think that, once they get the bugs ironed out, Hipstamatic will remain among my favorite apps. It retains the ability to be spontaneous, while also allowing you to change your mind about what look you want after taking the shot. Inspiration and perspiration, all in one app.
Come back for the next article, when I will cover the editing tools. Until then, enjoy!
Jerry Jobe
Never content with just scratching the surface of what an app can do, Jerry Jobe decided to pass on what he learned about imaging apps to others. He’s constantly trying to figure out just what tools other artists have used, and trying to incorporate them into his own work, in an attempt to find his style. He’s written tutorials on over 145 apps so far, which you can find (along with his Song of the Day entries) at http://enthusiasmnoted.wordpress.com/ He lives near Atlanta, Georgia, where he also finds a creative outlet in acting and directing in community theater.
One Comment
Zarina
Thank you so muc. I fell in love with Hipstamatic and discovering new things everyday. This helps me to underatand faster.