Mobile Photography / Art Tutorial – BlackCam and Black: Dark Horse Monochrome Apps
We are delighted to publish Jerry Jobe’s latest mobile photography/art tutorial for our viewing pleasure. Take it away Jerry…(foreword by Joanne Carter).
“There are many monochrome apps, and I’ve covered quite a few of them: Noir, Dramatic B&W, Ansel (now called Nova) and others. Some are merely editors, and some have shooting capabilities. Some vintage apps, like Vintage Scene, Lo-Mob and Superslides have some monochrome aids within them.
The two apps today (which, by the way, bring me to 150 different apps covered in tutorials since November 2012) are “dark horse’ monochrome apps in that they are not as fully-featured as some monochrome apps. However, each is surprising in its own ways. I am impressed with only one, however.
The first app is BlackCam by Pierre Gougelet, which is a shooter as well as editor. Gougelet is the author of Pixagram, covered last week. As I said then, his apps tend to fall well below the top tier of photographic apps.
However, BlackCam is surprisingly good. It’s a universal app that sells for $1.99 on the App Store, and is also available for Android. (As a matter of fact, there seem to be some features, such as a grid, that are only available on Android).”
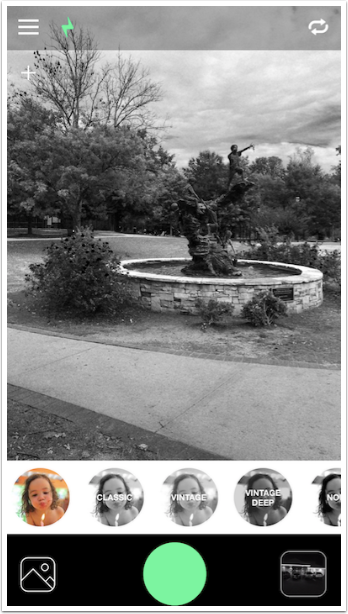
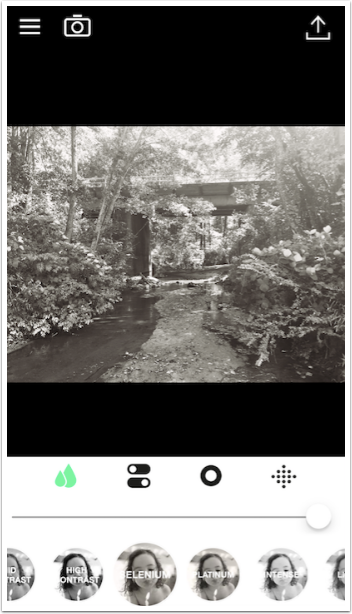
BlackCam is primarily a shooter, so the app starts in camera mode. At the top are controls for Menu, Flash, and switching between Front and Rear cameras.
There is also a + sign for camera adjustment, on the image just below the Menu button. At the bottom are filters that are reflected in the image.
In other words, it is a WYSIWIG app – what you see is what you get. There are also buttons for the Photo Library, the Shutter, and the internal Gallery.
The Menu button shows that it is from the author of XnView. There are two switches: Watermark and PNG output. These are the only settings in the iOS version. Tap the three line button to return from the Menu.

Here’s an example image with the Watermark in the lower right. I have left it on for the remaining images in this column, but it is easy to turn off using the Menu.

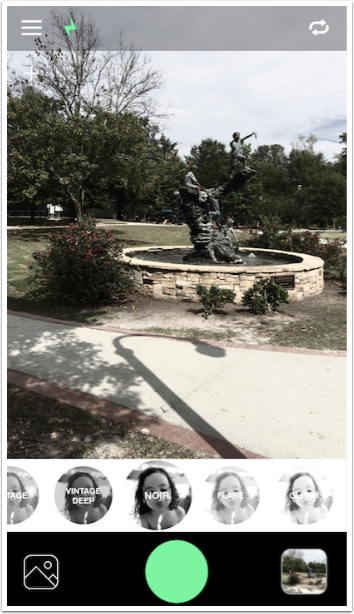
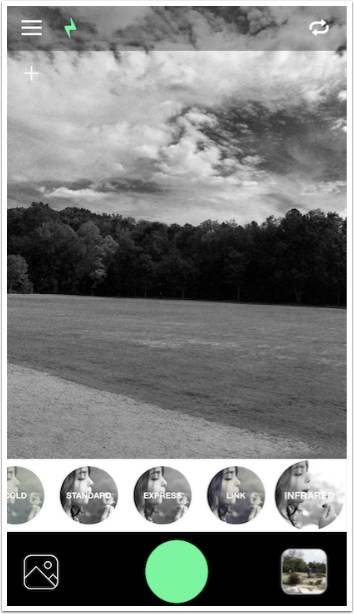
There are thirty different filters in BlackCam. You can also shoot with no filter and apply a filter afterwards. Choosing a filter thumbnail enlarges the thumbnail. For instance, I can see that I’m using the Noir filter on the screenshot below.

Sliding your finger up and down on the image itself changes the opacity of the filter. This results in a desaturated color image rather than a fully monochromatic one.
Some monochrome filters are not fully black and white, like the Platinum filter shown below. (Please pardon the finger in the shot on some of these screenshots. Capturing screenshots is a two-handed operation, and can be difficult to achieve cleanly.)
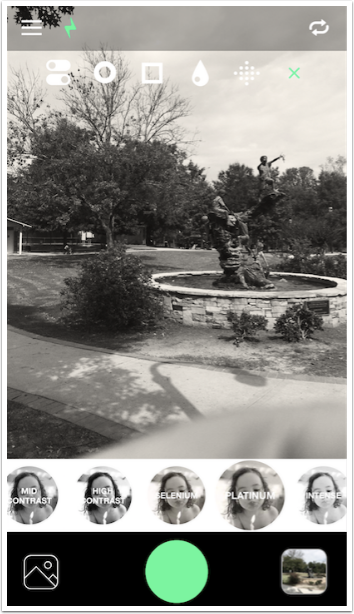
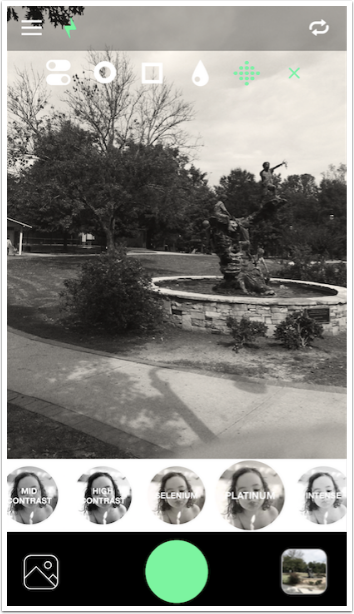
Tapping the + sign brings up five camera controls: Adjustment, Vignette, Square Crop, Depth of Field and Grain. We will start with Grain on the right.
The icon turns green when selected. All controls except Adjustment are on/off controls. There are no sliders to control the amount or opacity of Grain, Depth of Field, or Vignette.
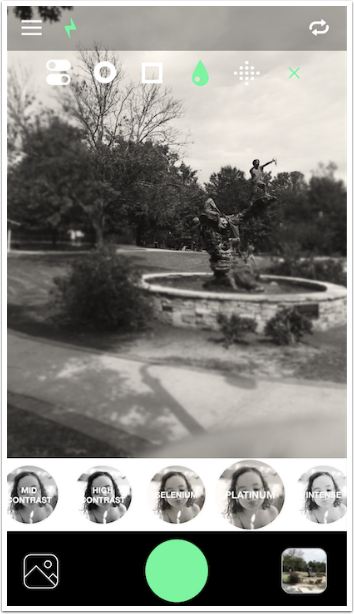
Depth of Field is circular, leaving only the center of the image in focus. It is not adjustable.
Square Crop is a switch between the regular dimensions and a square crop.
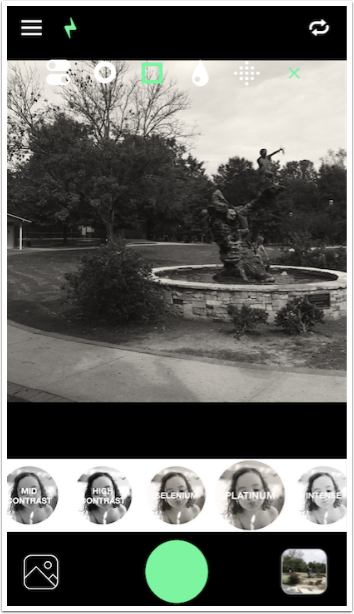
Vignette is also static, with no ability to change the size or opacity.

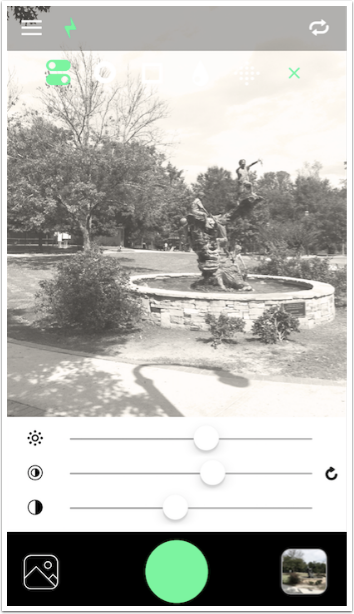
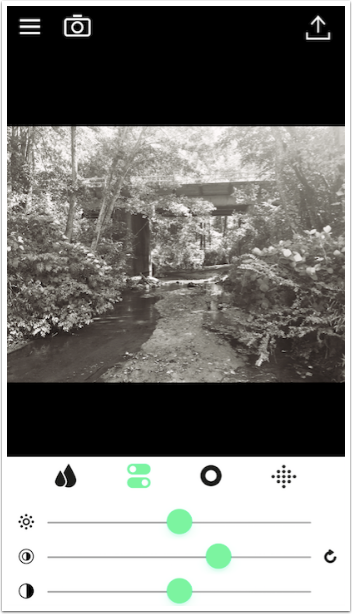
There are three Adjustment sliders: Brightness, Contrast, and Exposure. They are set according to the filter chosen, but can be adjusted. To return them to the filter defaults, use the circular arrow at the right.
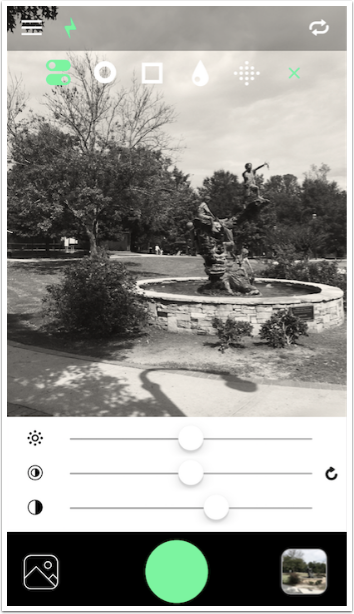
Below I increased Brightness and Contrast, but lowered the Exposure slightly.
There are thirty filters available, including color filters like Red, Green and Yellow that approximate using color gels in front of the lens. But one of my favorite implementations is the last filter, Infrared.
Infrared is not possible from just putting a gel over the lens – it comes from a rebuild of the sensor to “see” those wavelengths of light. This is difficult to do in software, and I’m usually not happy with the Infrared look available in apps. BlackCam manages it pretty well.
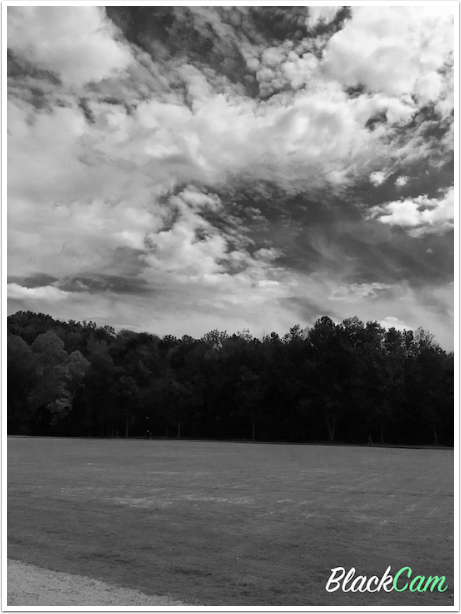
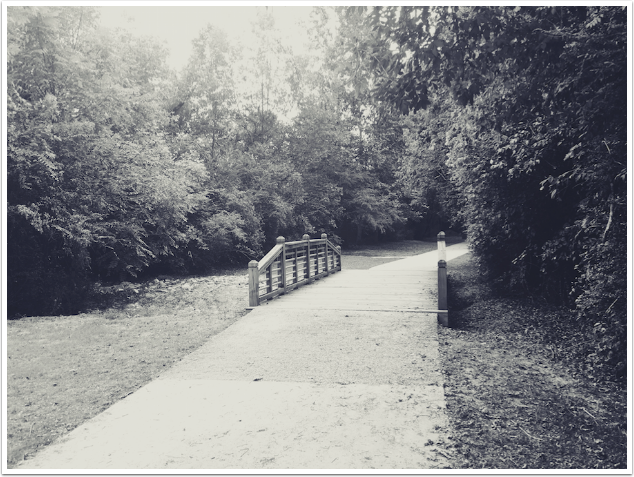
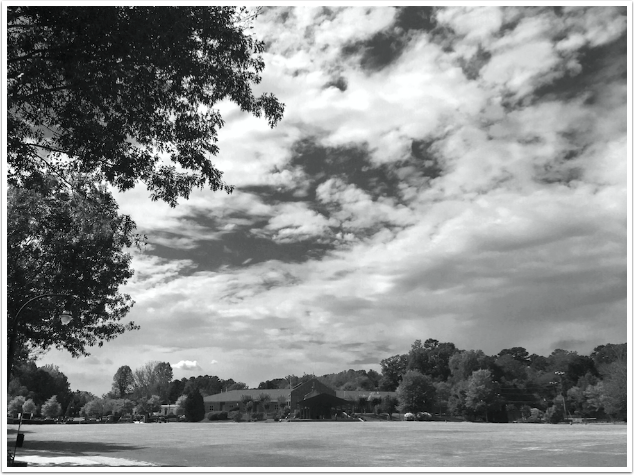
Here’s an example of an Infrared image. The blues in the skies are darker, and the greens in the grass are lighter (but not as light as it would be in true infrared).
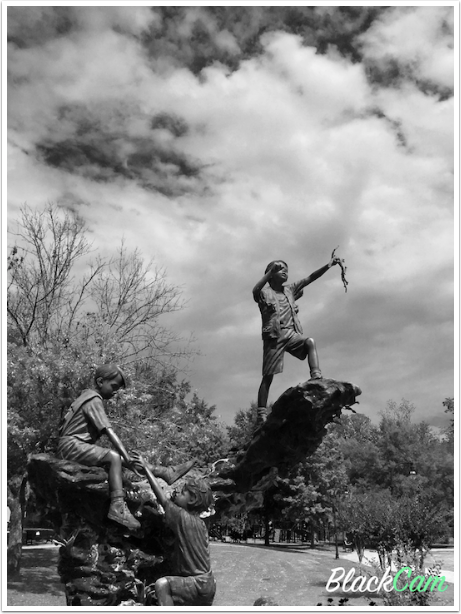
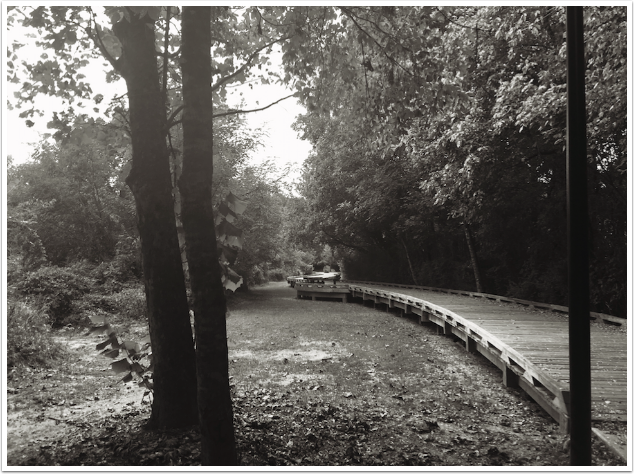
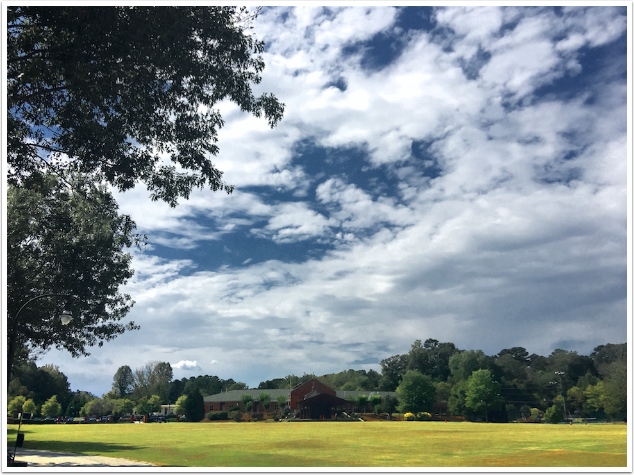
Here’s my favorite capture made with BlackCam. Notice the watermark is still there. The watermark only seems to be placed on portrait orientation shots when you have the Watermark switch turned on.
When I turn to landscape orientation and shoot, the watermark does not appear.
Images are automatically saved to your Camera Roll immediately upon capture.
Images are also saved to the internal Gallery. This is my main complaint about BlackCam. The Gallery is unnecessary. You can Share to social media apps from the Gallery, but you can’t re-edit. As a matter of fact, you can’t delete from the Gallery, which means BlackCam takes up more and more space with each capture. I have a support email written asking how to clear the Gallery, and if I get a response, I will add it in the comments.
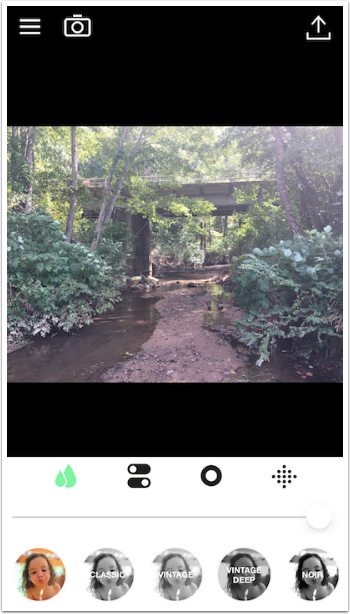
You can also use BlackCam for editing. Below I’ve brought in a color shot for editing. The Drops icon is for the filters, with a slider to adjust the opacity. There are also buttons for Adjustment, Vignette and Grain. Square Crop and Depth of Field are not available in the editor.
Just pick a filter and adjust the slider to get the desired result.
The Adjustment sliders are the same in the camera and in the editor.
Vignette in the editor has an opacity slider. You still can’t adjust the size or the softness of the vignette.

Grain also has a strength slider that is not available in the camera.

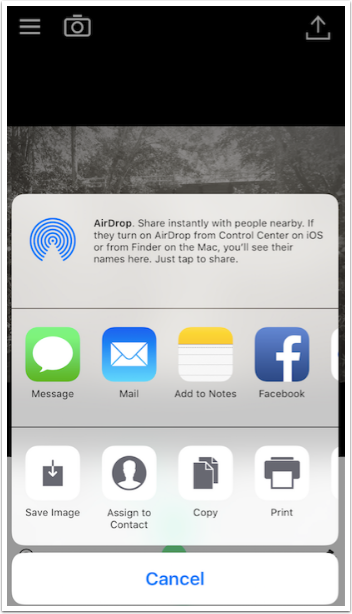
Tapping the Save button at the upper right takes you to the standard iOS dialog. BlackCam will not reduce your image on save.
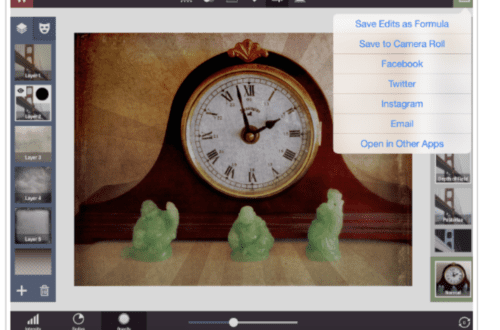
Below is the image after a little tweaking in Stackables.
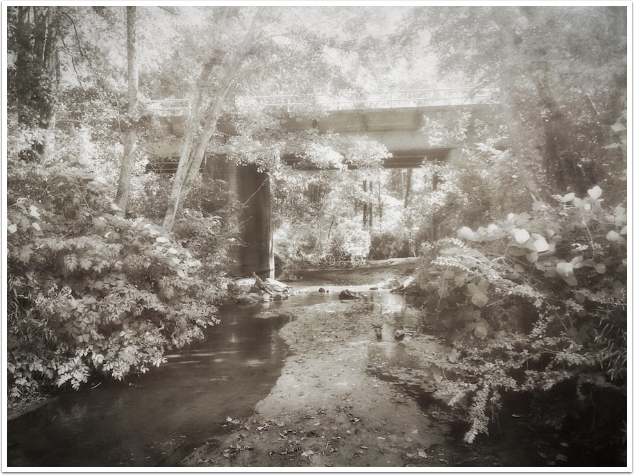
Since I like the tonality of the Infrared filter so much, it was a simple matter to capture a color image, then add the Infrared filter.
I was then able to create a color infrared by blending the original back in Color blend mode (which I accomplished in iColorama, but can also be done in Image Blender, Leonardo, or other blending apps).
Let’s move on to Black by Peter Stojanowski. It is a B&W film emulator. It is an editor only, so you can’t capture images in this app.
It’s an odd little app, available only on the iPhone, but it is free (with in-app purchases). It emulates ten different B&W films, and some are “expired” meaning Black emulates some of the degradation of film kept past its expiration date.
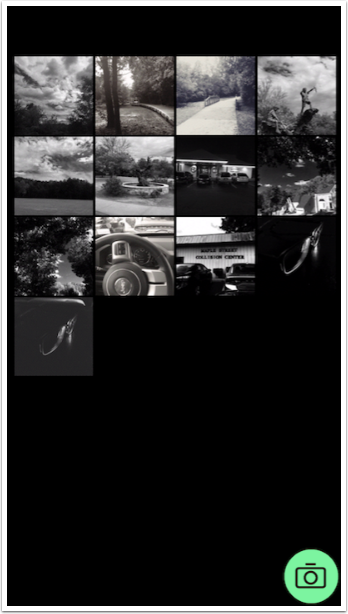
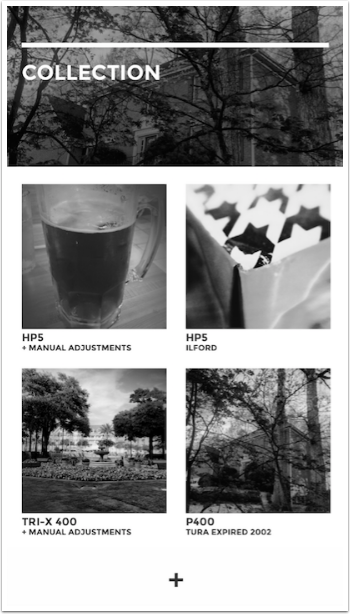
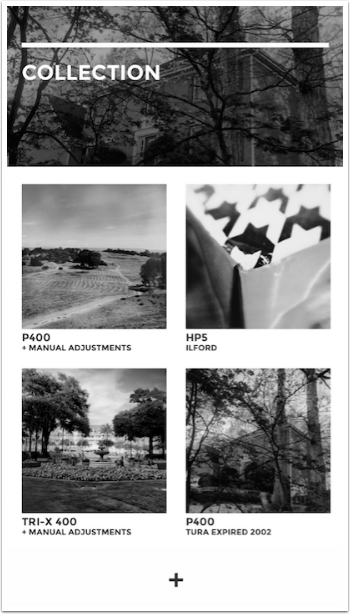
Black also has its own internal Gallery or Collection. Tapping the + sign at the bottom allows you to import images from the Photo Library. The Collection displays the film used on the image and whether any manual adjustments were made.
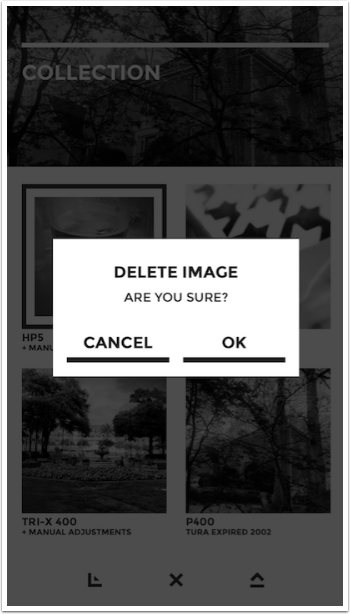
Tapping an entry in the Collection changes the options available at the bottom to Edit, Delete and Save.
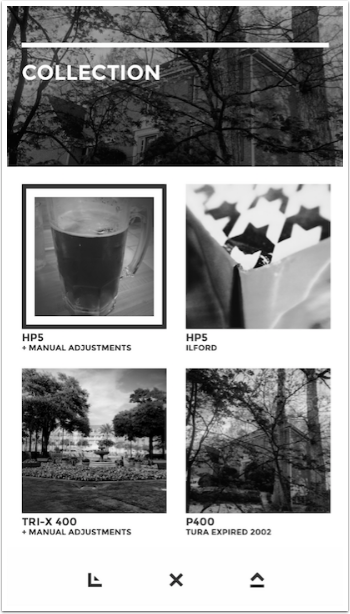
Deleting from the Collection is easy, which helps keep the Black app at a manageable size.
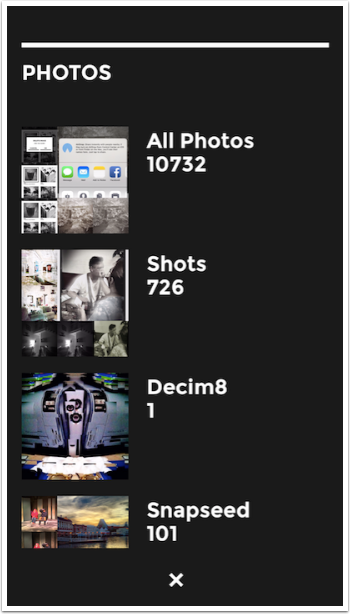
Importing from the Photo Library is just a matter of selecting from your albums. Scroll down to select another album.
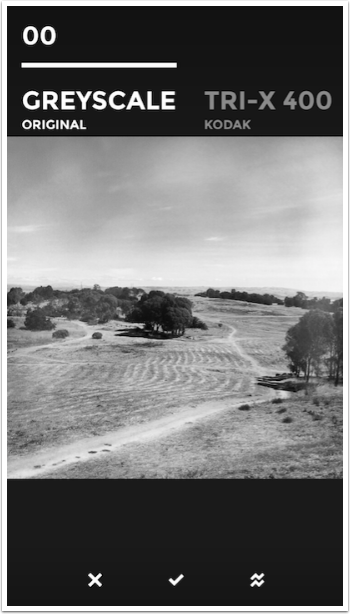
The default emulation is just to change the image to Greyscale. Other emulations are accessed by scrolling sideways at the top. The emulations are:
00 – Greyscale
01 – Tri-X 400
02 – Lady Grey 400
03 – Neopan 400
04 – GP3 100
05 – HP5 Ilford
06 – APX 400
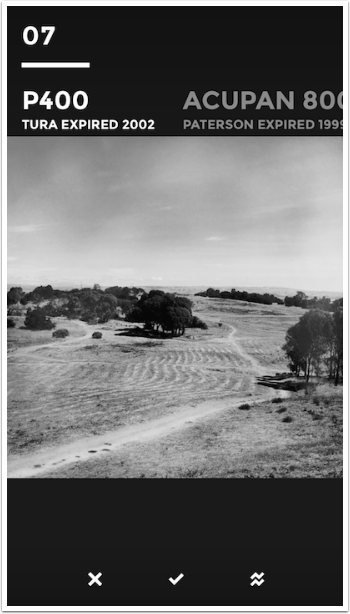
07 – P400 Expired 2002
08 – Acupan 800 Expired 1999
09 – FP-3000B Expired 2013
10 – N15
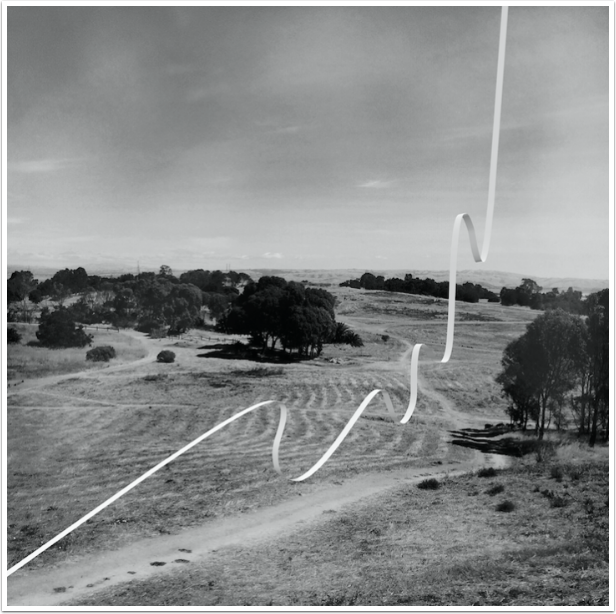
Once you’ve selected an emulation, you can tap the check at the bottom center to return the image to the Collection, where it can be saved. You can also discard any changes by tapping the X, or tap the two wavy lines to make Manual Adjustments.
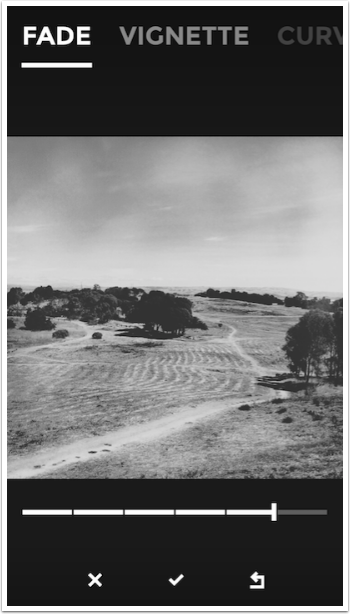
Manual Adjustments are the in-app purchase (.99). There are three available: Fade, Vignette and Curves. The Fade adjustment is s simple slider.
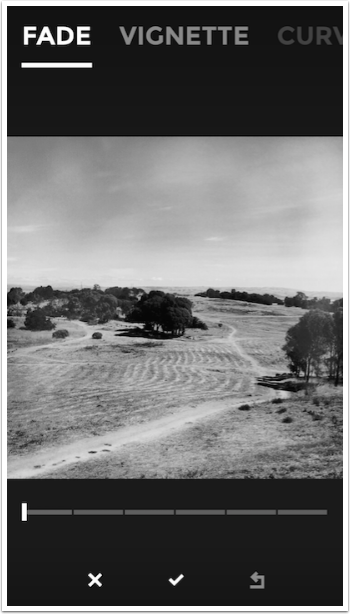
Fade lowers the contrast.
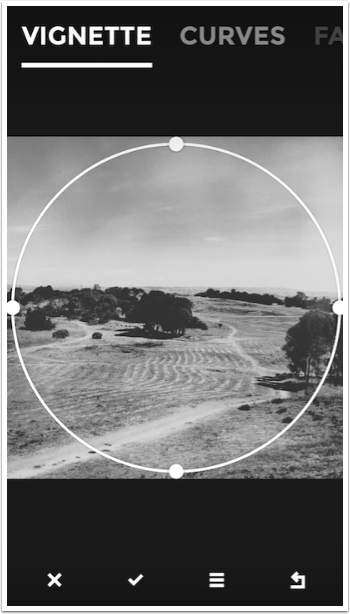
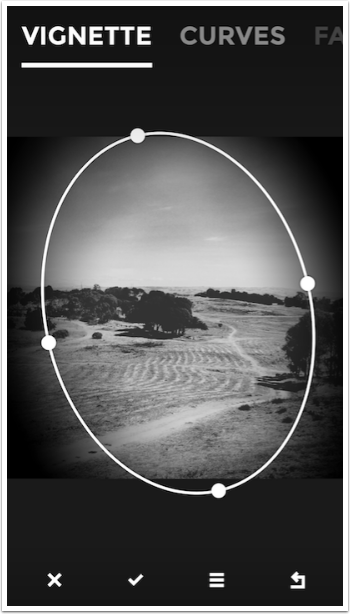
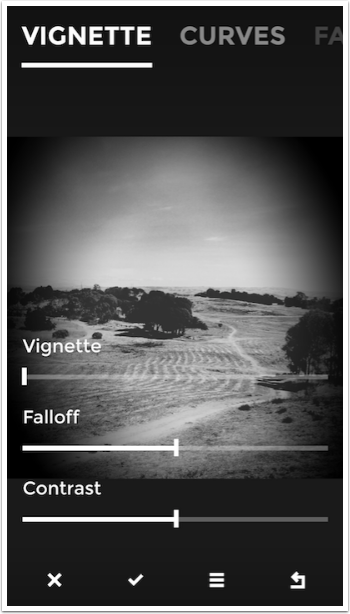
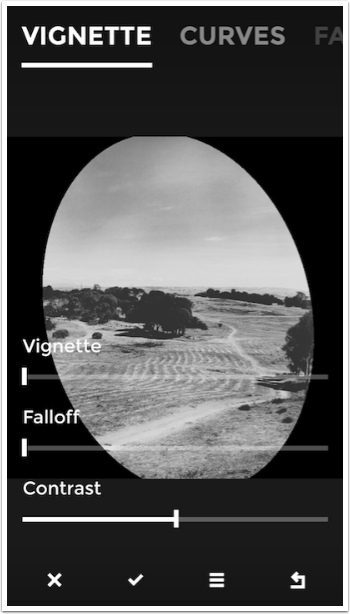
Vignette gives you much more control over the size and type of vignette, but NOT opacity, which is rather odd. You are given a circle with handles that you can adjust from a circle to a tilted oval.
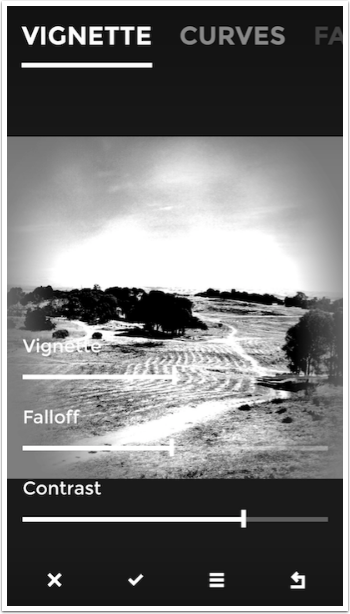
Once you adjust the circle, you can see the vignette. Tapping the “three line” icon at the bottom will display the other adjustments for the vignette.
The adjustments are Vignette, Falloff, and Contrast.
Falloff controls the softness of the transition. Moving the slider all the way to the left makes a sharp transition. Notice that the vignette itself is fully opaque.
The Vignette slider controls the “color” of the vignette, from fully black on the left to fully white on the right.
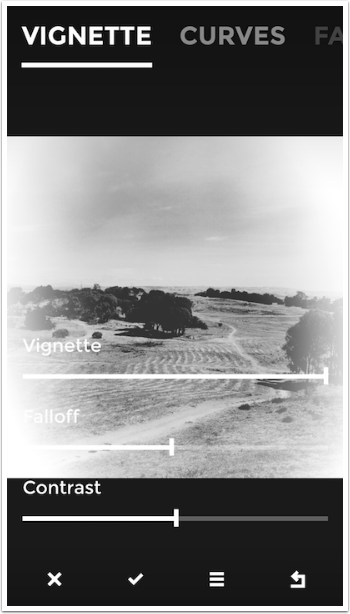
The center is 50% gray. The fully opaque vignette is something I’ve never seen in other apps. Vignette is usually applied in Multiply, Darken or Overlay modes. This is the first time I’ve seen it applied in Normal blend mode.
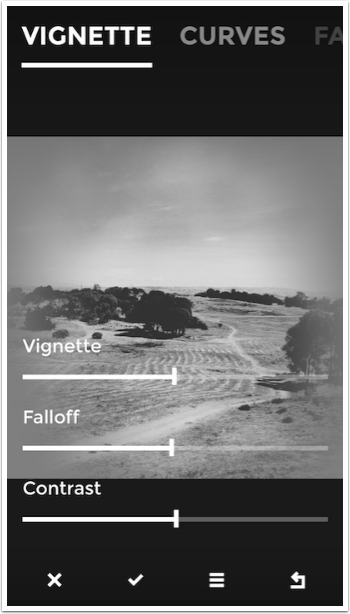
Contrast is a very odd control to have for Vignette, also. It just increases or decreases the overall contrast, not just the vignette.
I didn’t like the vignette, so I tapped the X to discard all the manual adjustments. Now I can tap the wavy lines to return to the Manual Adjustments.

Curves only has three points available, You can’t add or delete a point, so there’s no way to add an S-curve, the standard photo curve.
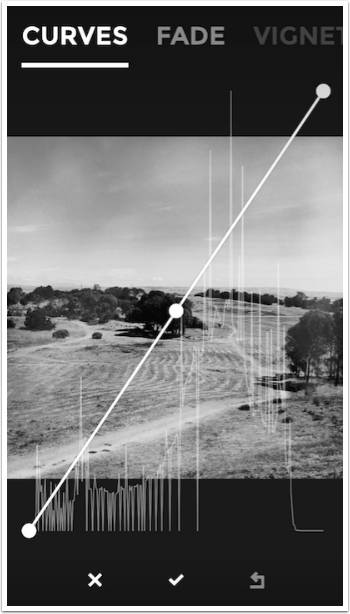
Three points is not as useful as I would want from a Curves adjustment.
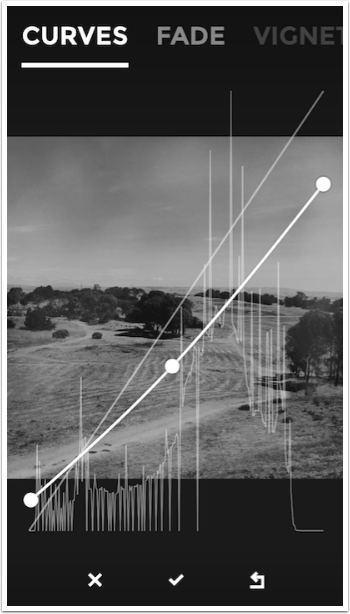
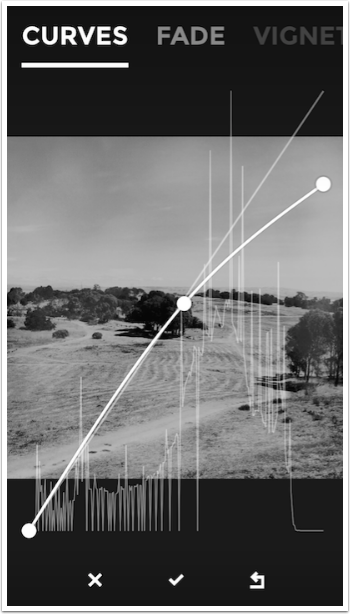
With enough experimentation, you might get something useful.
When you accept the changes, you are returned to the Collection. You have to select an image to be able to Save it.
Save options are fairly standard. Black will not reduce your image on save.

Here’s my image with a little LoryStripes added.
The bottom line on BlackCam: There is a distinct lack of control over things like Grain, Depth of Field and Vignette. The internal Gallery is useless and a real drawback. But I really like the fact that you can see the filter applied during capture, and some of the filters (like Infrared) are as good as I’ve seen anywhere.
I truly can see myself using it on a regular basis, as soon as I can clear the internal Gallery.
The bottom line on Black: It’s an odd little app. The filters are fine, but limited. I’m not sure if the emulations are accurate, because I can’t tell my Tri-X from my Neopan. And the manual adjustments are clunky and just plain weird. I’m not sure I’ll ever attempt to use it again.
Until next time, enjoy!
Donating = Loving = TheAppWhisperer.com
TheAppWhisperer has always had a dual mission: to promote the most talented mobile artists of the day and to support ambitious, inquisitive viewers the world over. As the years passTheAppWhisperer has gained readers and viewers and found new venues for that exchange.
All this work thrives with the support of our community.
Please consider making a donation to TheAppWhisperer as this New Year commences because your support helps protect our independence and it means we can keep delivering the promotion of mobile artists that’s open for everyone around the world. Every contribution, however big or small, is so valuable for our future.
Jerry Jobe
Never content with just scratching the surface of what an app can do, Jerry Jobe decided to pass on what he learned about imaging apps to others. He’s constantly trying to figure out just what tools other artists have used, and trying to incorporate them into his own work, in an attempt to find his style. He’s written tutorials on over 145 apps so far, which you can find (along with his Song of the Day entries) at http://enthusiasmnoted.wordpress.com/ He lives near Atlanta, Georgia, where he also finds a creative outlet in acting and directing in community theater.

One Comment
Pingback: