Ask Misho – ‘How to Add Text To Your Instagram Photo Using PicFrame’
First up, I’m excited to be writing for The App Whisperer. As Joanne mentioned in my introduction I was going to write this column about street photography and storytelling but I’ve changed my mind.
Instead, I’d like to make this column into an old fashioned ‘mailbag’ where you guys can ask me anything that you’d like to know about iPhoneography. I’m open to any types of questions including shooting process, editing, apps, sharing and accessories.
(We are really pleased with this great initiative by Misho, please send any requests to the bottom of this post and Misho will endeavor to answer them). JC

To start off I’m going to answer one of the most common questions I receive on Instagram:
“How do you add text to your photos?”
For those that follow my Instagram (@mishobaranovic), I like to post a series of photos (between 5-10) to tell small stories on a given day. In order to help signpost these photos I add short descriptions and numbering to the pics.
I use PicFrame ($0.99) to add text to my photos. Here is a quick demonstration of how I’ve used the app to add text to one of my Zombie Walk photos taken this past Sunday.
Step 1
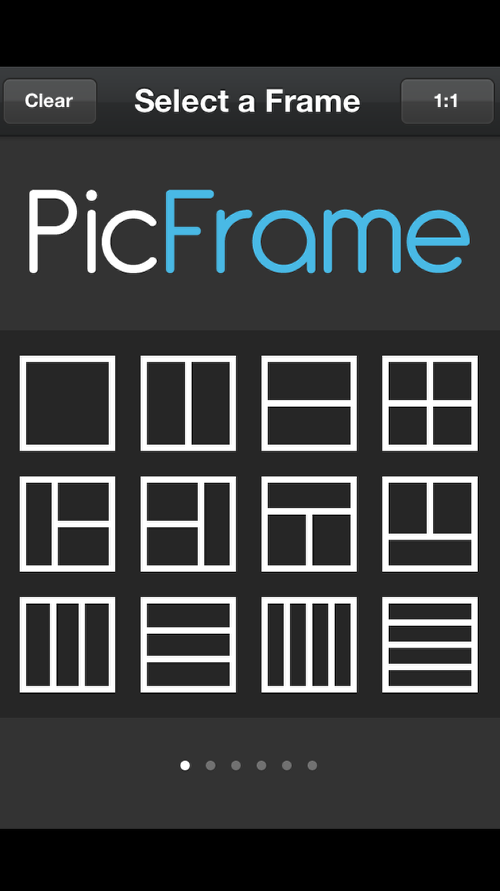
Launch PicFrame and click on the first Frame option, the square.
Step 2
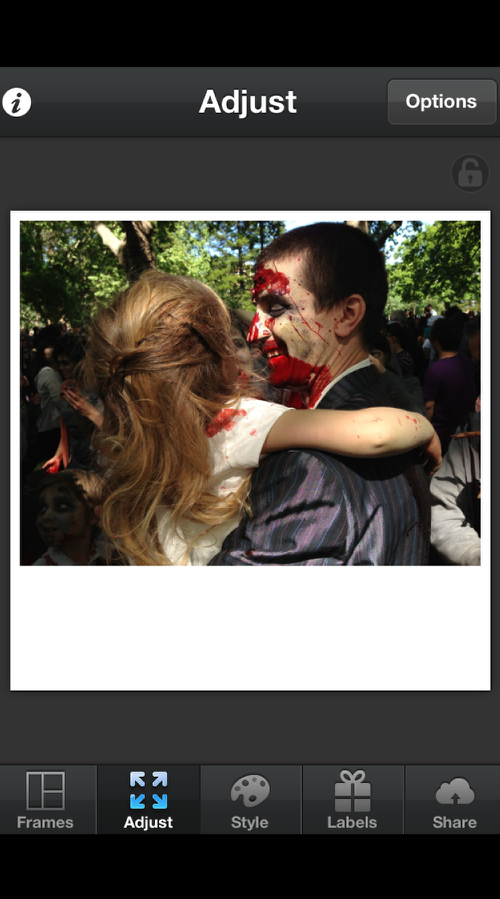
Next import a photo from your Photo Library. Here I’ve added my favorite shot from the Zombie Shuffle. I’ve already positioned the rectangular photo on a square white canvas using the Squaready app.
Step 3

The photo above currently has a white border which is automatically added by PicFrame. To remove this border, click on the Style tab in the bottom menu. This brings up the below function screen. Moving the ‘width’ slider all the way left removes the white border.
Step 4
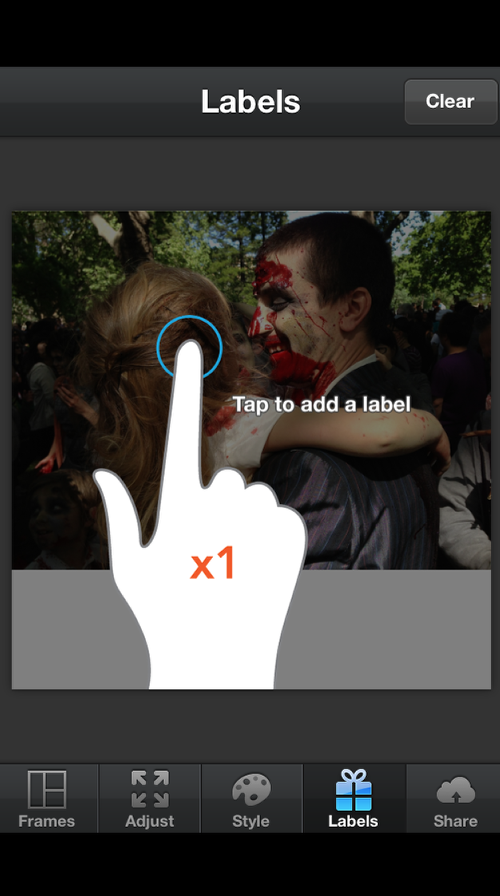
Now to add some text, first select the Labels tab in the bottom menu bar to bring up the below screen. You can add your text by pressing anywhere on the screen.
Step 5
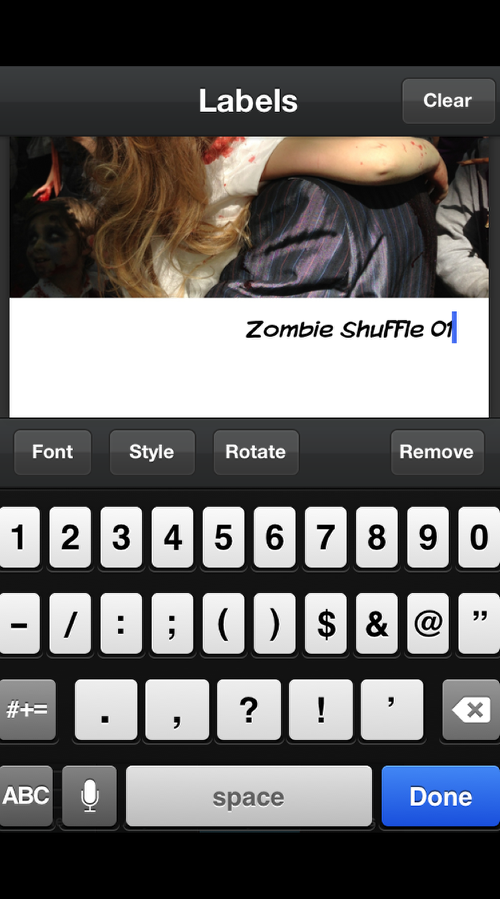
I’ve pressed on the white space below the image and typed in my text.
Step 6
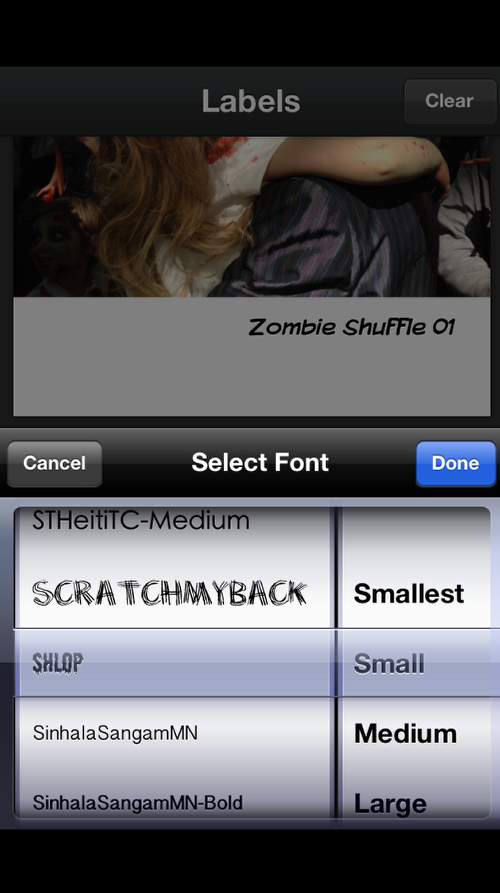
Next I select the Font button to change the font type. Usually I use different combinations of a sans serif font like Helvetica or Gill Sans but in this case I’ve decided to stick with the Zombie theme and gone with Shlop. I also generally use smaller font sizes so I don’t distract the viewer from the picture.
Step 7
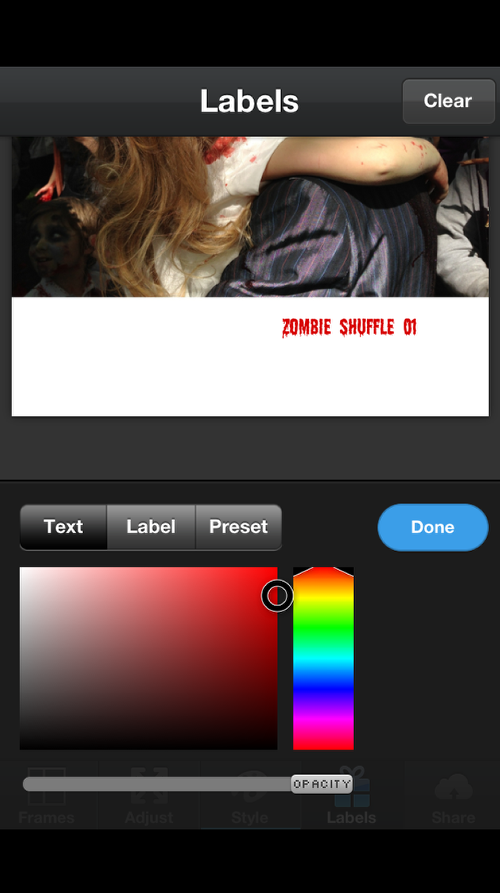
Next I’ve selected the Style function to change the color of my text. I’m going for a nice blood red color.
Step 8
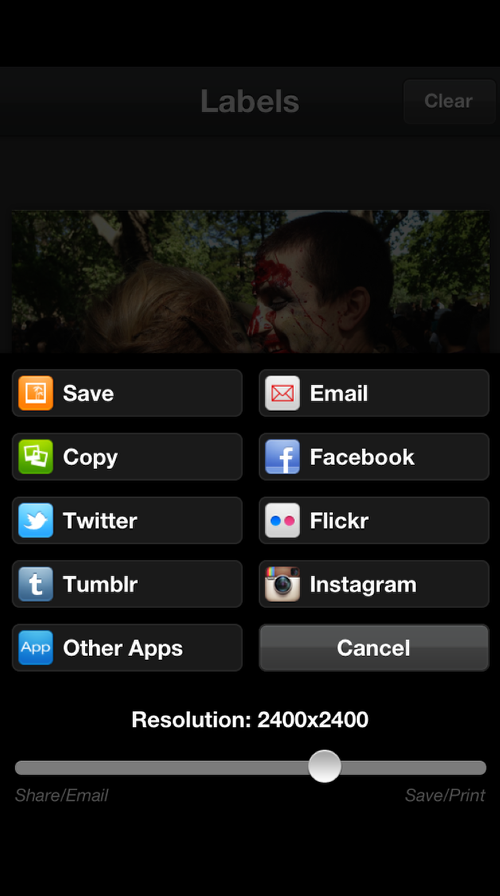
Finally I select the Share tab to save or send the final photo with added text.
Step 9
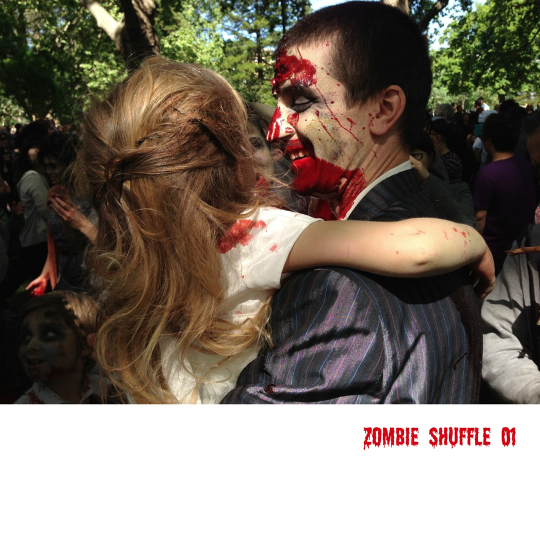
Here is the final photo and text.
Slideshow Of The Whole Zombie Shuffle Series
Misho Baranovic
Misho Baranovic is the ideal mentor for teaching you how to use your iPhone to take great images. After years of working as a photographer he’s now also widely regarded as one of the world’s leading mobile photographers, having exhibited his mobile photography in Sydney and Melbourne Australia, Oakland California, New York in the US and Paola Italy. Misho is both passionate and knowledgeable about mobile photography and is increasingly being sought after to teach on the subject around the world.