iPhone Photography App Technical Tutorial – Glaze – By Jerry Jobe
Don’t miss our latest iPhone Photography App Technical Tutorial, this time featuring the very popular app, Glaze. Jerry Jobe our newest recruit and Technical Tutorial Editor has written this superbly crafted tutorial that we’re sure you are going to enjoy. Over to you Jerry (foreword by Joanne Carter)…
Glaze is free to download, although there are in-app purchases. Click here to download Glaze. All other apps that are mentioned within this tutorial are in bold with app links to the Apple App Store.
‘Perhaps because I’ve never been able to hold a paintbrush or pen in hand and create a smooth line or a valid representation of what I’m seeing, painting apps were among the first I loaded to my iPhone and iPad. But no matter how many times I hit the Undo button, what I see when I look at my strokes, done in Procreate or Inspire, Sketch Club or Painteresque, is a mess.
But when I use an app like Glaze (by The 11ers), then I can be happy. My photo can be transformed into a painting with no effort on my part, yet it will still look different than someone else’s result using the same photo – there are an infinite number of variations.
So let’s get started looking at what can be done. I encourage you to zoom in on the photos to see how natural the strokes look, and how the amount of paint varies.
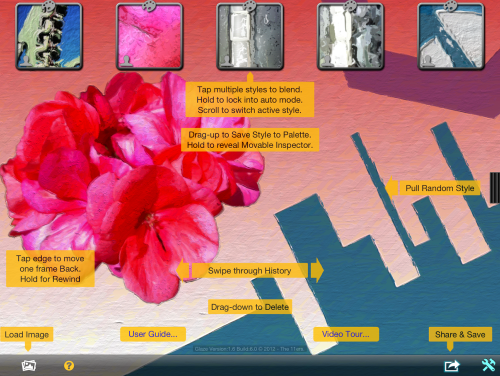
The splash screen that comes up as the universal app loads is plain, belying the wonders within.
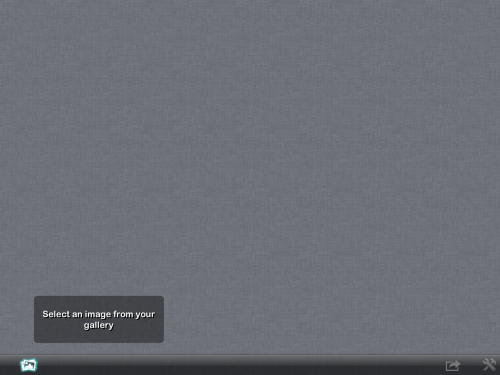
You are immediately prompted to select an image from your library. Nothing else is active until a photo is loaded. The photo load process is not instantaneous; my guess is that some preprocessing takes place which is common to all images, and therefore does not have to be redone each time you use a new style on your image.
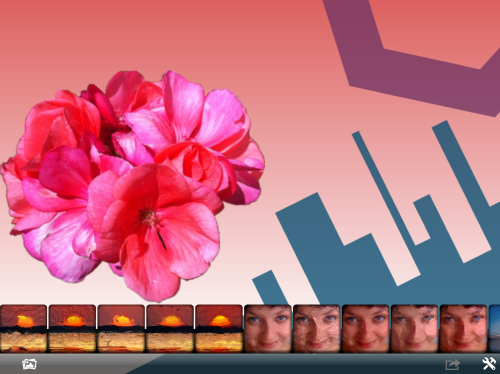
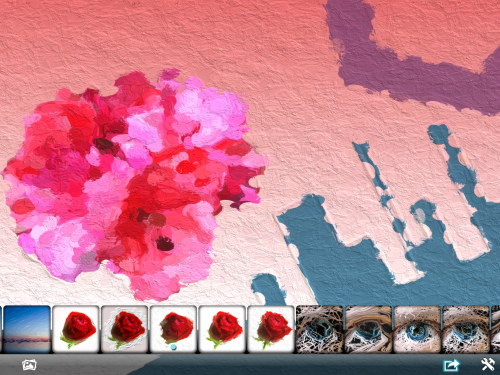
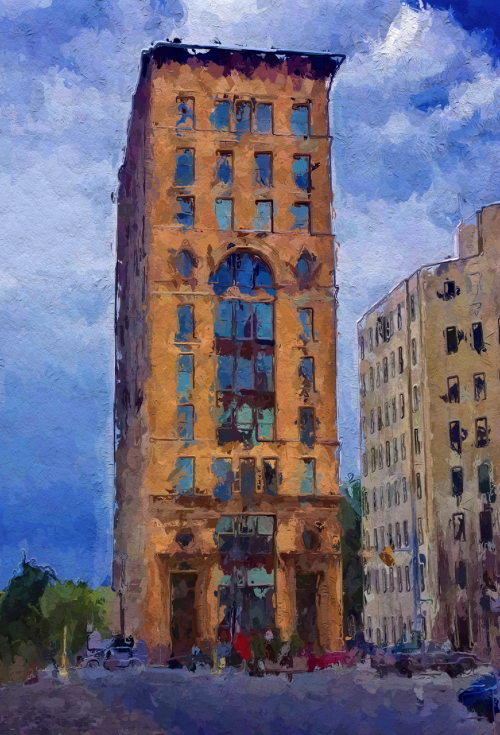
The photo is loaded as is, and you are taken to the Studio, where multiple styles are lined up at the bottom of the screen. You get an idea of what each style does by the thumbnail displayed; the styles are not named. The styles can be scrolled through horizontally.
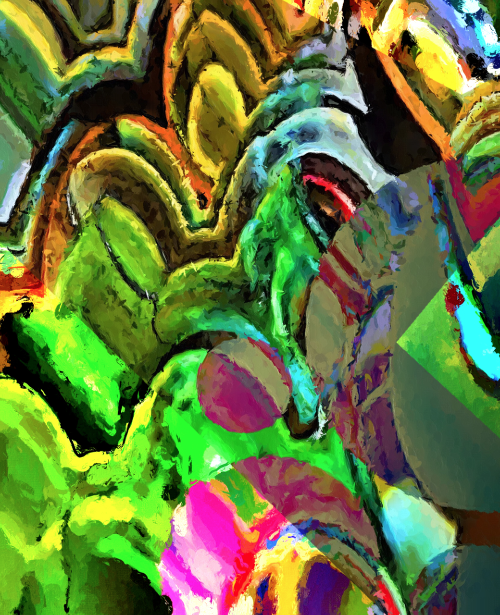
I start by using an image I created. The gradient background was made in iColorama, then was taken into Tangent for the blue and purple ornaments. Finally the flower was added in Superimpose. I tried to give a nice mix of color change, sharp lines and an organic image to show the way each are handled by Glaze.
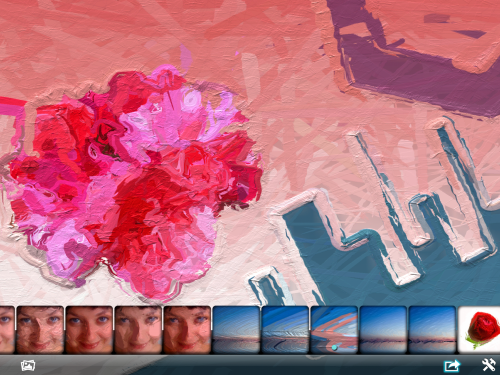
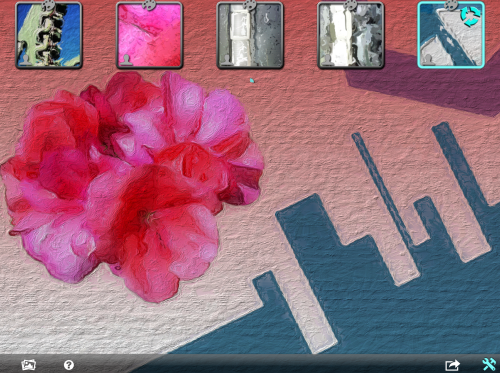
Choosing a style is just a matter of tapping on one of the thumbnails. Here I’ve chosen the middle one of the horizon line series of thumbnails, and it’s now highlighted by a blue dot. That blue dot will remain throughout the current session, and returning to that style is a matter of either tapping on the swatch again, or scrolling to the right on the photo itself. Glaze keeps all iterations of your image so that you can return to it without Glaze having to recalculate it.
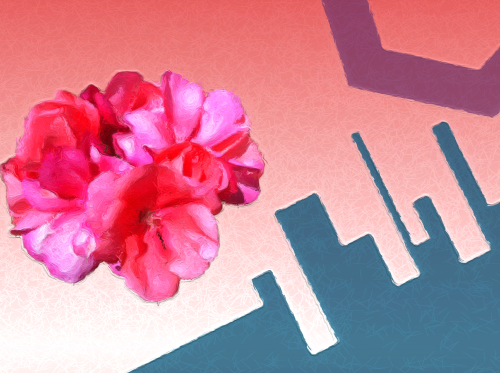
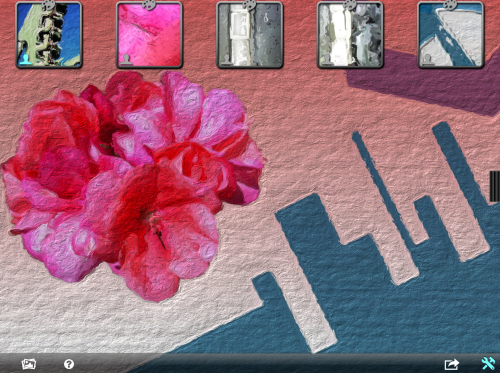
As you can see from the thumbnails, there are styles that retain much of the detail of the image, and some that don’t. The example below does not retain much detail at all, while giving lots of texture of layered paint.
By tapping anywhere on the image you can hide the toolbars. Just tap again to restore them.
Glaze comes preloaded with six groups of four styles each. Through in-app purchases, you can buy an additional six sets for a dollar each, or get all six at one time for three dollars. I’m sure it won’t surprise you when I suggest that you buy them all for half-price at once.
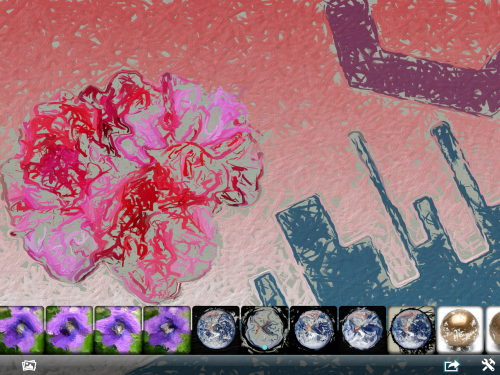
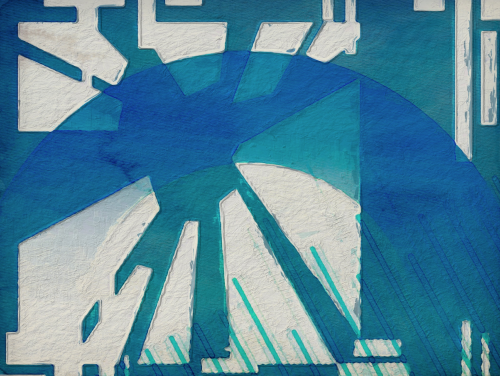
Some of the styles do not cover the entire canvas, but instead let black, white or gray “shine through”. The following image is part of the purchasable Planet style group.
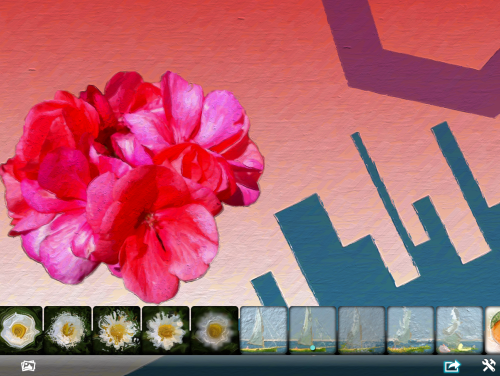
The second style in the Sailboat group is one of my favorites for retaining detail and a nice smooth texture.
So, by about this time, you’re wondering “Infinite variations? I only see 48 different styles available!” And you’d be right, if Glaze was limited to the styles available in the Studio. But there’s a second are of Glaze: the Workshop. This is where you’ll want to go when the canned styles aren’t enough. You get there by tapping the wrench and hammer icon on the lower right.
In the screen below I’ve tapped on the question mark (help) icon, to show the options available in the Workshop. Tapping on the question mark again hides the help.
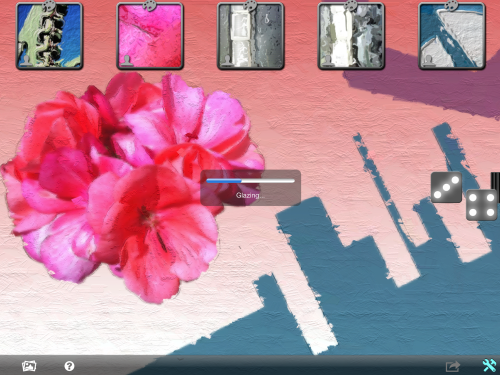
If you pull the tab on the right side of the screen to the left, a random style will be applied to your image. This may be one of the presets, or it may be a combination of them. You can get lots of ideas by just scrolling through.
When you find one you like, you can save that particular style by dragging the style from anywhere on your image into one of the palette slots at the top. Tapping that palette slot will apply that style to the current image. Below I’ve chosen the first saved palette style, and the “person” icon has turned blue to identify it.
Here I’ve changed it to the third style, which is a bit smeary and has a lot less texture.

What if I want to have a style that is between the two? More texture than style 3, but more smeary than style 1? Well, I can combine the two styles by tapping both. Not a simultaneous tap, but “tap-tap” one after the other. (Order does not matter.) Now both are highlighted (blue person) and both are used. I like this one so much that I’ve already dragged the style up into the fifth slot, and now I can apply that combination of styles to future images.

There is further variation available within a style. Just press and hold on a style in the Workshop and a circular blue arrow will appear, sending the program into auto mode. Variations of the style are applied to the photo, and the results are all saved, so that you can go back through the images and save the one you liked best.
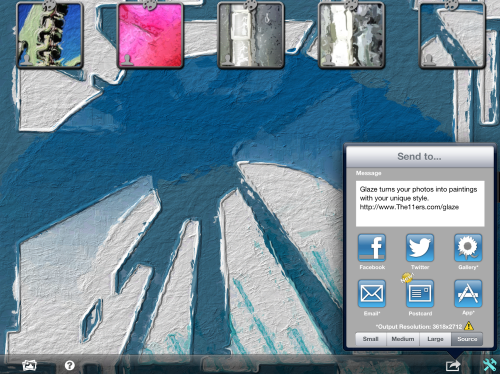
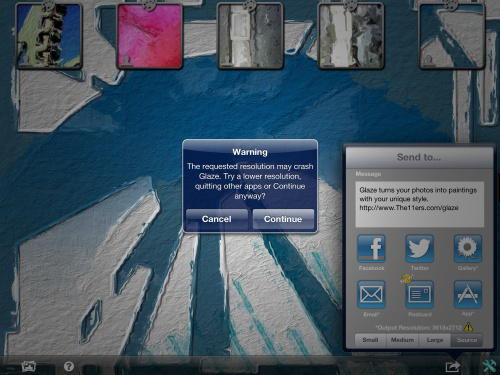
Tapping the save icon brings up the save options. You should take particular note of the bottom, where you determine the resolution of the output. My original was 3618×2712, and the “caution” icon tells me that, while Glaze can handle that large a file, it may crash.
When I decide to leave it at original size, an additional dialogue box is displayed. I have never crashed Glaze on my iPad, but I realize that potential is there on my older iPhone 4.
Here’s another image (one that I pulled from my old Facebook album), and you can see that the original size is a paltry 416×604. Not a resolution that I would care to use.
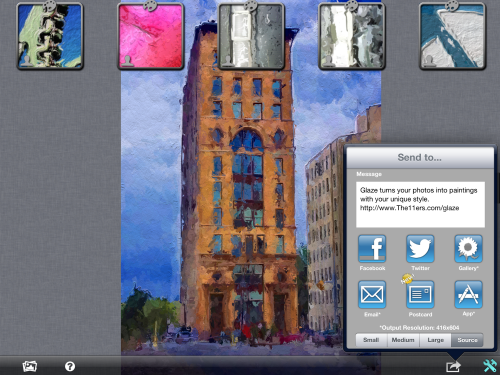
Not to fret. Glaze will recalculate the brush strokes for a larger resolution. I choose “Large” and get the option to save it at 2821×4096.
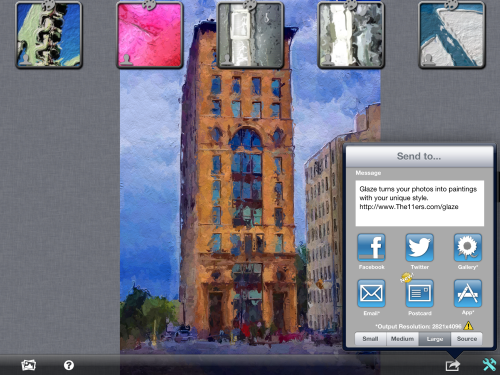
And here’s the result.
Conclusion and Examples
Wow, do I love this app. Not only for what it can do by itself, but what it can do in combination with other apps. In my first example. I’ve taken the Glaze output I saved above and blended it with a watercolor version I created with Aquarelle.
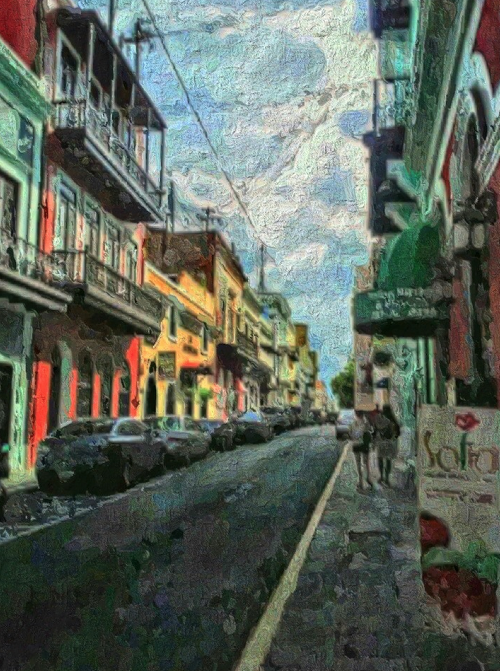
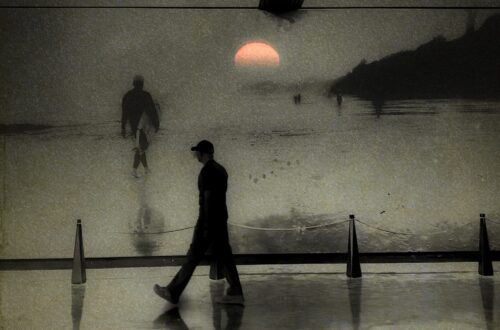
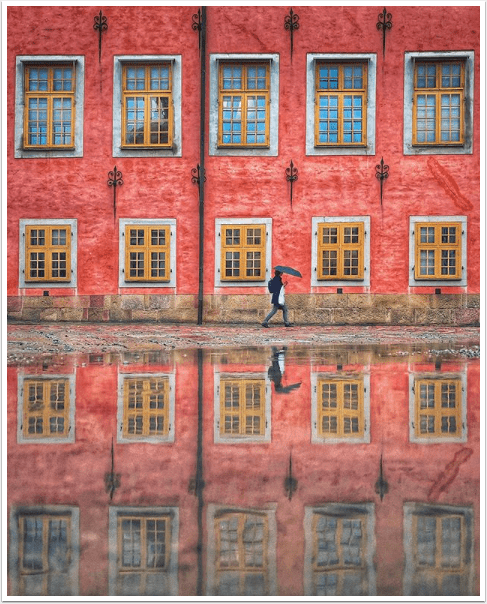
Here’s a low-resolution street scene, first taken through an HDR app.
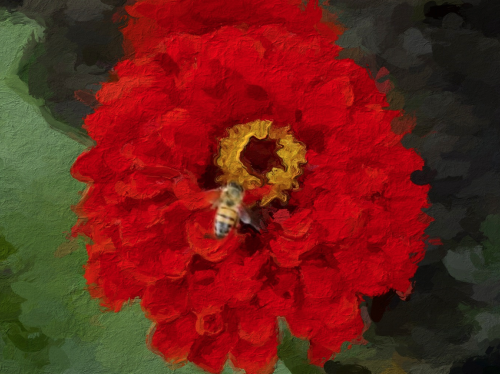
I took a photo of a bee and flower outside the Alamo in San Antonio a few years ago. Even though the bee is out of focus, I was able to blend the Glaze output back with the original image to make it look as though the bee was so confused it landed on a painting.
Here I took two different Glaze outputs and blended them with a polygonal mask in Leonardo. (You should be able to see the lines dividing the two versions.) I call this one “Fetch”.
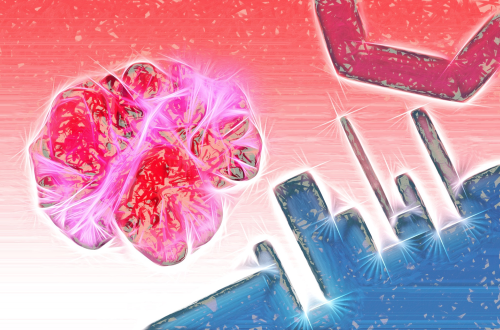
Below I took our example image and blended it with a Tangled version to create a “sparkly” image.
And finally, I decided to see what Glaze could do with a relatively plain photo. In this case, I used Scratchcam on a plain white background to have an image that was just grunge. I passed the output through Glaze, and I’ll be darned if I don’t like this too.

If you have actual painting talent, I envy you. There are apps that can help you create beautiful works of art right on your iDevice. But for those of us whose stick figures are wobbly and misshapen, Glaze can create paintings without a single messy digital paintbrush.
Jerry Jobe
Never content with just scratching the surface of what an app can do, Jerry Jobe decided to pass on what he learned about imaging apps to others. He’s constantly trying to figure out just what tools other artists have used, and trying to incorporate them into his own work, in an attempt to find his style. He’s written tutorials on over 145 apps so far, which you can find (along with his Song of the Day entries) at http://enthusiasmnoted.wordpress.com/ He lives near Atlanta, Georgia, where he also finds a creative outlet in acting and directing in community theater.
6 Comments
Robert Lancaster
Thanks Jerry! Awesome tutorial.
Candice Chidiac
Great tutorial! I keep reading great things about it but have never really understood how it works! This helps a lot! Thank you so much!
TBurton
awesome tutorial, I’ve been using Glaze but this definitely helped! I’ve also been uploading a lot recently to what went down (www.whatwentdown.com) since I interned for them- including a couple of things I made on glaze too.
Carlos
Gracias Jerry…nice explanation!
Regib
Wonderful tutorial! I too have tried so many painting apps. I so wanted to make a painting, reading , learning, trying, all to no avail! That’s why I love Glaze too! Something like a painting but not. Who would know though. It does satisfy something in me too!
Tracy Mitchell Griggs
Thanks for the download on Glaze, a go to app for moi!