Technical iPhone Photography App Tutorial With Halftone 2
We’re delighted to publish our latest Technical Tutorial, this time exploring Halftone 2, written by our Head of Technical Tutorials, David Hayes. We have published several articles and tutorials using the earlier version of Halftone and if you’ve missed those, please go here. We also published a Creative Tutorial, using Layout and Halftone apps in combination, by Nettie Edwards – if you missed that please go here.
This tutorial focuses on the very latest version of Halftone, aptly called Halftone 2 and David gives an absolutely fabulous overview to really help you get to grips with it. It’s an incredible comprehensive tutorial and one that we feel you will find very useful.
If you would like to download Halftone 2 you can pick it up here. It retails for $3.99/$2.49/download
Over to you David (foreword by Joanne Carter).
‘You know, anytime I can create comic strip panels, I’m going to go for it. I have always liked the Juicy Bits app, Halftone so to get a chance to take a look at Halftone 2…and create a comic strip…well…it’s a done deal!!
This article will be a bit longer than usual as there is so much to show you about this great app…and I’ve only covered the basics!
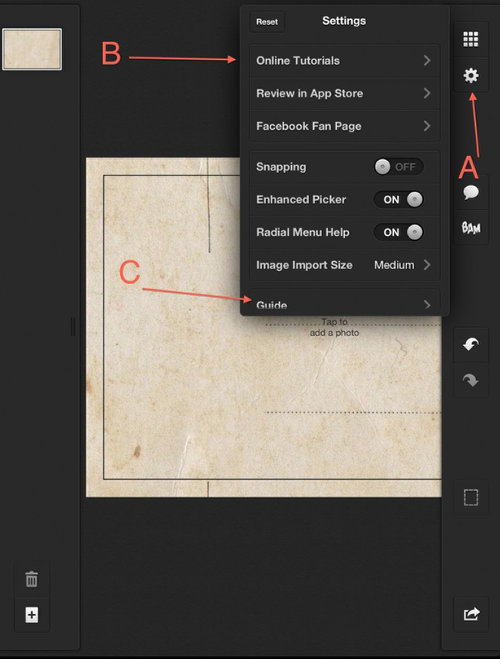
I’m jumping ahead just a little here, but when you get to the working window of Halftone 2 click on the Gear icon (A) and take a moment to view the Online Tutorials (B) and/or the Guide (C).
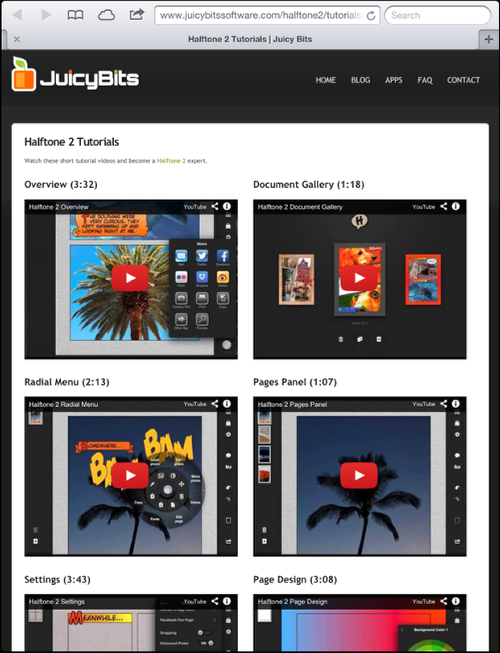
Each of the Online Tutorials will give you a good working start in using Halftone 2 so it’s well worth your time to view these. However, if you already know Halftone…or just like to jump right in…
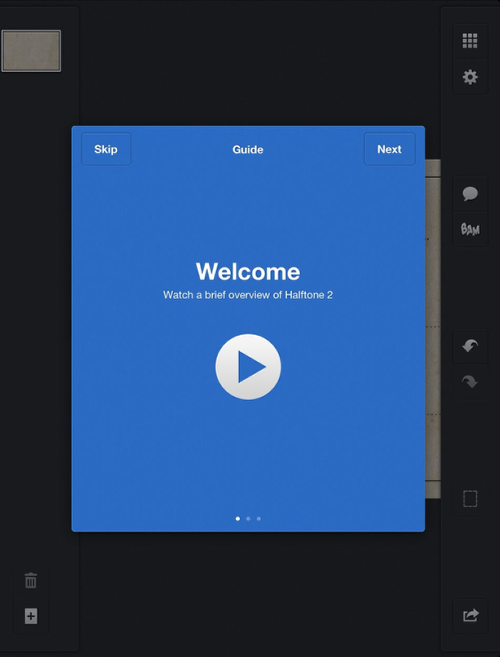
…do take a look at the Guide. This is a brief overview of the app and you’ll be glad you at least looked at this!
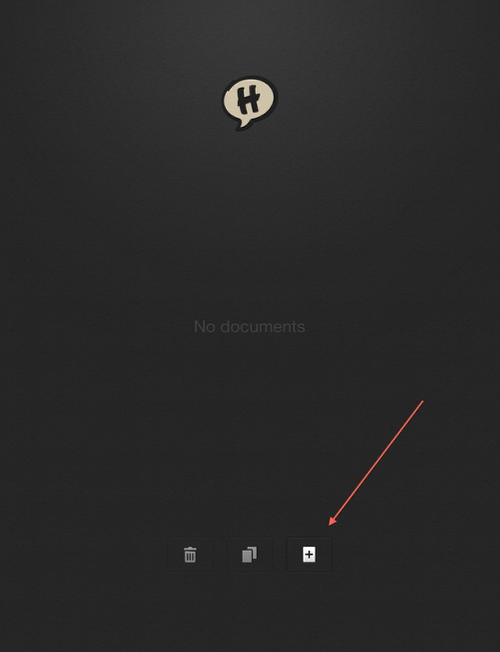
Okay…from the beginning. When you first open Halftone 2, you’ll be greeted with this screen that states “No documents”. So…let’s make one! Click on the + icon to get started.
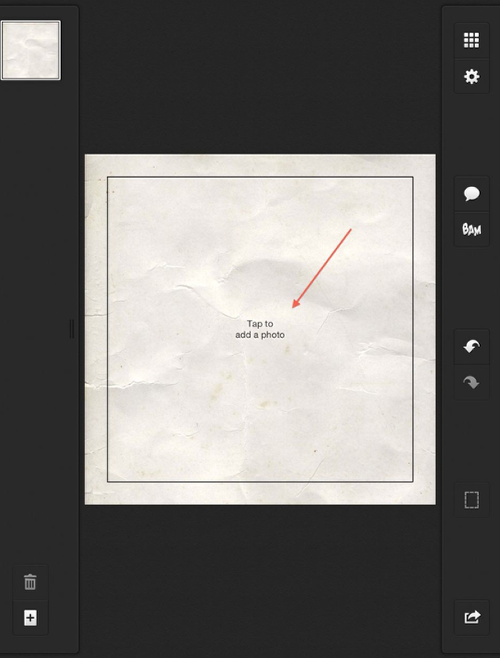
This will take you to that work screen I mentioned above…and you’re given a “default” layout to work with. Not what you want? Then…single tap where it says “Tap to add a photo”. (Actually you can single tap anywhere on the layout.)
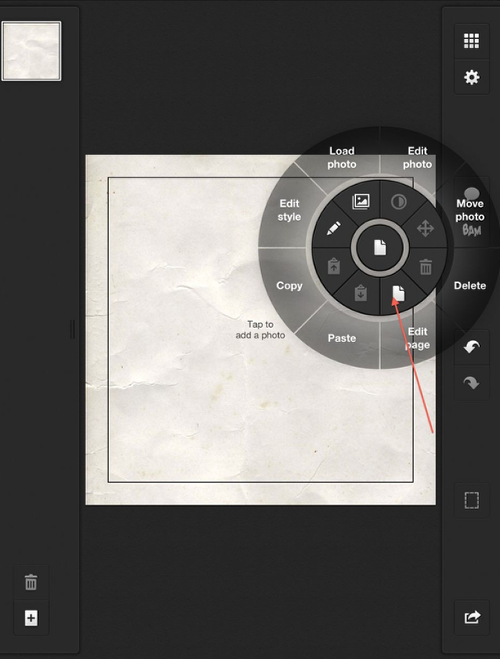
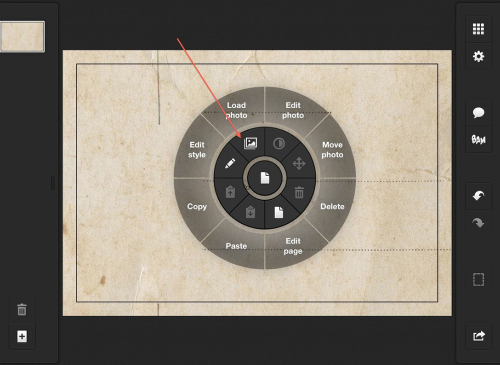
Halftone 2’s radial menu will open giving you the choices you see. To edit the current page, click on the Page icon. (Make sure to click on the icon and not “Edit Page”. All that will do is close the menu.)
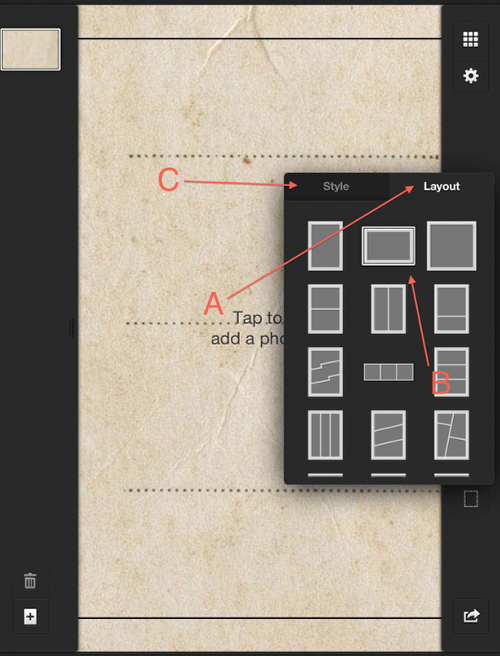
The Layout/Style menu will open…click on Layout (A), scroll up/down until you see a layout you like and click on that. I chose (B). Time to work on the Style of your page. Click on (C).
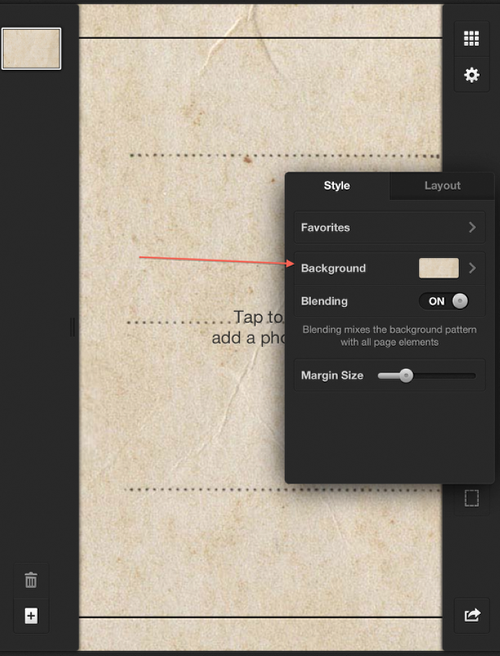
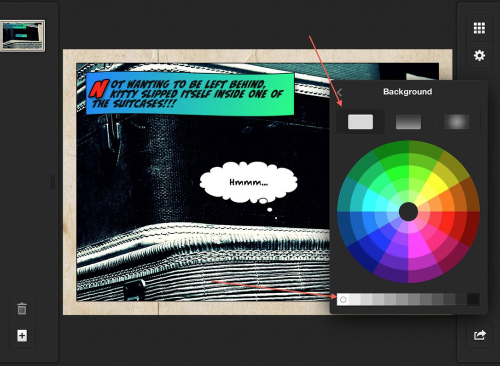
Let’s take a look at the Background choices available in Halftone 2. Click on “Background” to open this menu.
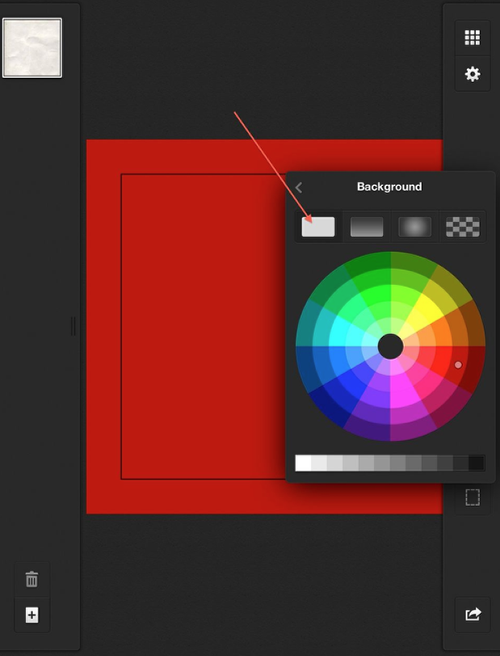
Starting with the first choice…a solid color. Click on this icon and bring up a color wheel of choices. Tap within the color you want to apply that to your layout. (I’m using a different layout in the next couple of screenshots…if you noticed!)
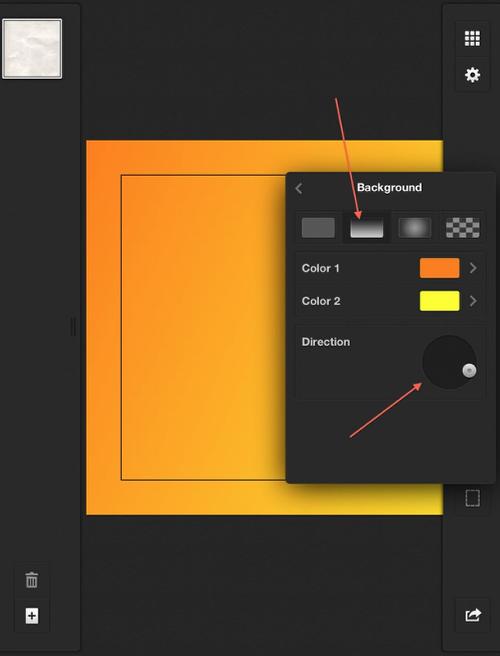
The next icon gives you a two color linear gradient. Tapping the color blocks for Color 1 and Color 2 will bring up the same color wheel. You can also change the direction of your gradient.
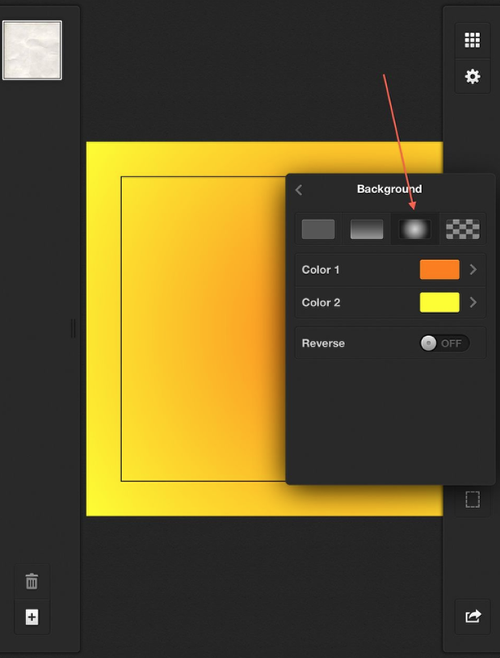
The third icon gives you more of a circular gradient. Same deal with the color choices as before…
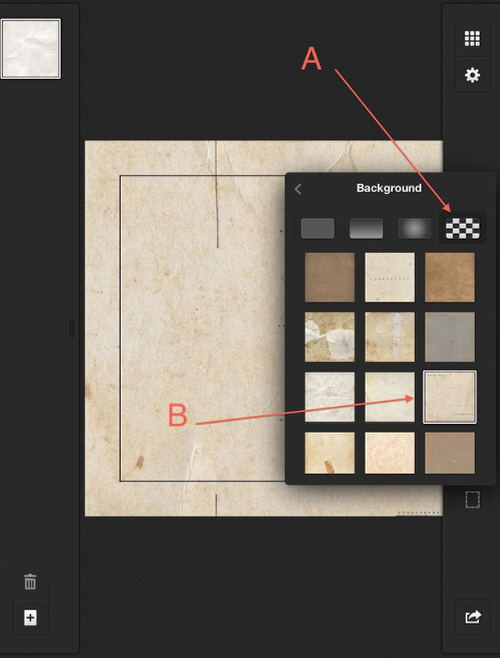
The last icon brings up Halftone’s wonderful set of backgrounds. For this project, I chose (B). Clicking on that applied it to my layout.

Time to bring in an image! Tap where is says to tap which will open the Radial Menu.
Tap on the “Load photo” icon to bring up your image libraries.
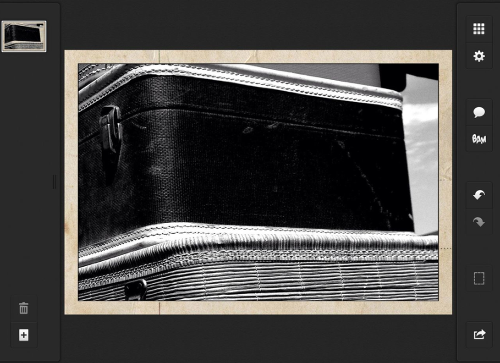
I picked this shot of suitcases that I had captured recently at a flea market. I used a high contrast black and white app for this shot…I like how this plays well with the background.
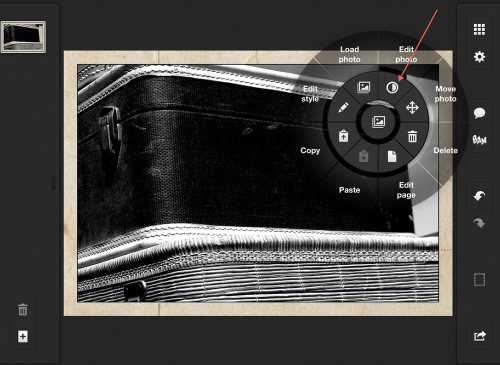
As much as I like my image just the way it is…I wanted to do some tweaking so I pulled up the Radial Menu again and this time clicked on the Edit photo icon.
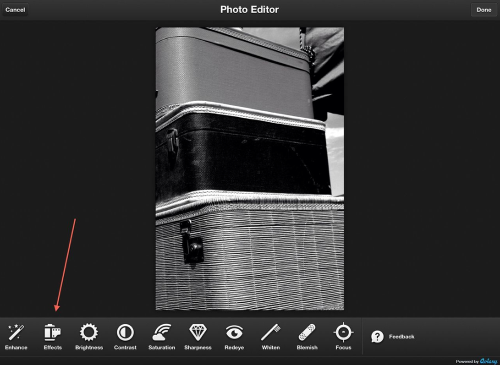
In this screen shot you can see my full image. Let’s open “Effects”…
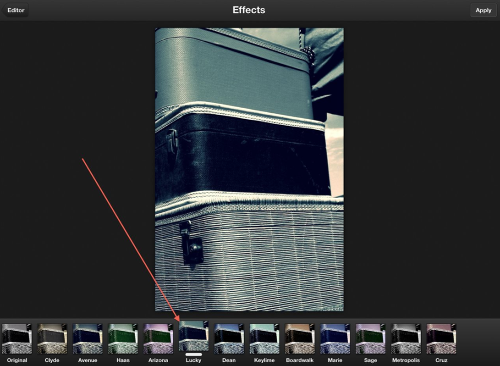
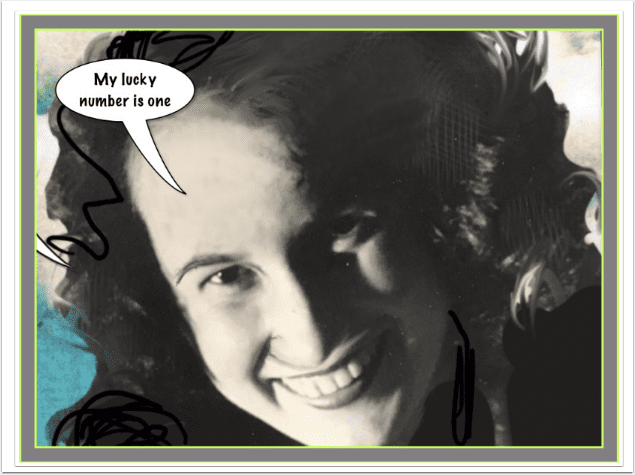
Halftone 2 comes with some great filters as shown in this screen shot. I went with “Lucky” liking the blues/turquoises of this filter.
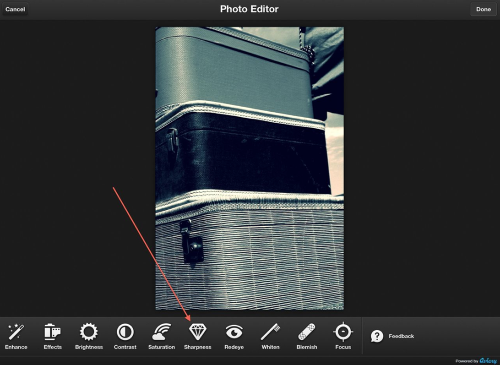
Next up…adjust the Sharpness. Click on this icon…
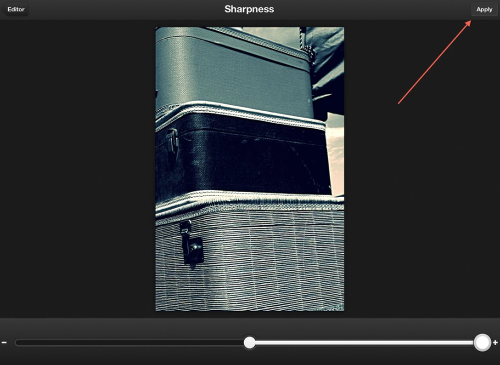
…which will bring up a slider bar to make your adjustments. When you have it the way you like it, click on Apply.
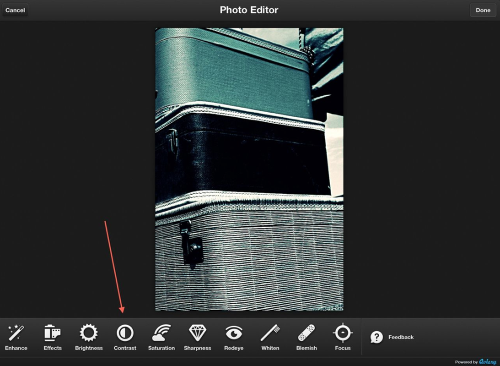
A little Contrast adjustment is always nice. Click on this icon…
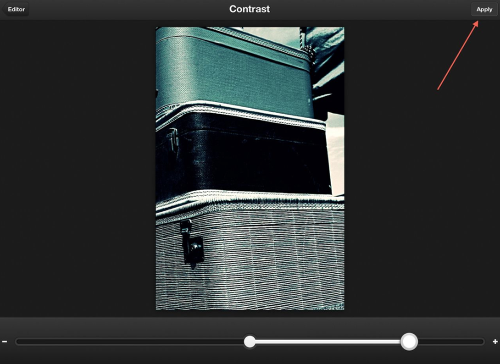
As with Sharpness, you’ll get a slider bar. Again…when finished with your adjustments, click on the Apply icon.
You’ll follow this same sequence with all the other editing tools. When all done, click the Done icon that you’ll see in the top right corner of the work screen.
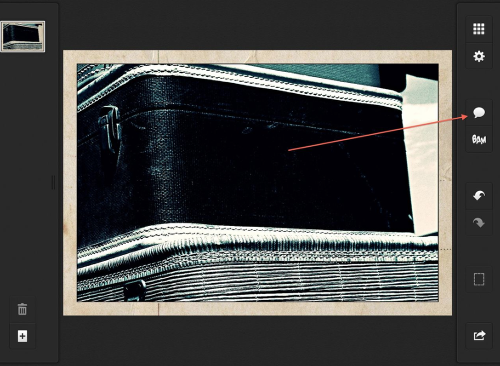
Let’s see. I’ve chosen a layout and a background. I brought in an image and applied a filter and done some adjustments. Time to start adding text bubbles!! Click on the Bubble icon to get this started!!
A menu will open which gives you choices for Style, Text, and Arrange. A “default” bubble will also appear within your layout.
You can use this one or chose a different one. If you do want a different one, simply tap on the Bubble to bring up the Radial Menu.
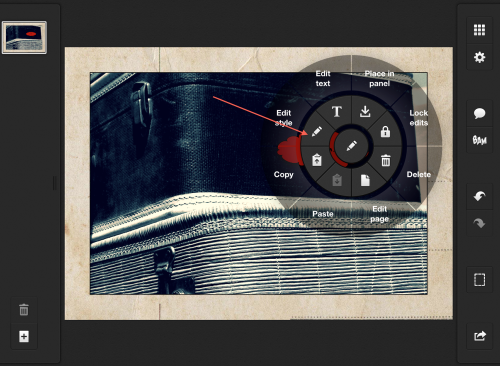
In the Radial Menu, tap on “Edit Style” and this will bring up the Style menu.
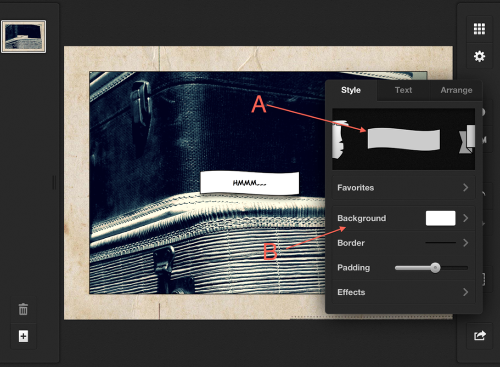
In the Style (A) tab, pick the one you want to use. This done, I wanted to work with the background color, so I clicked on Background (B).
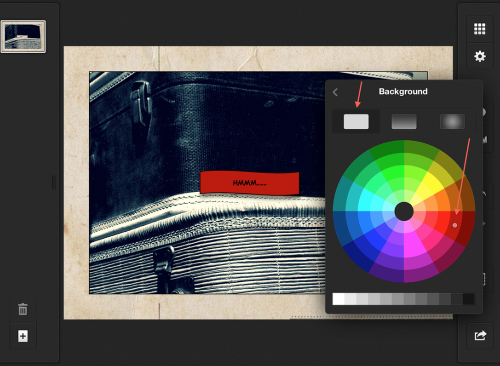
Just like when working with the Layout background, the same choices are available. I first tried a solid color…but didn’t like that after all.
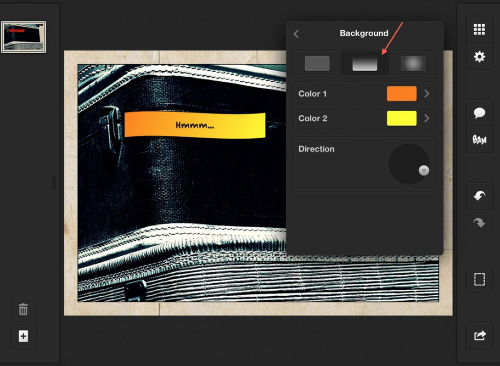
I then went to the two-color gradient…that I liked…but I wasn’t thrilled with the default colors.
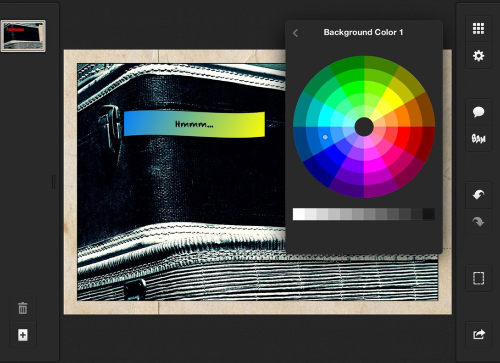
Clicking on Color 1, I chose a blue from the color wheel.
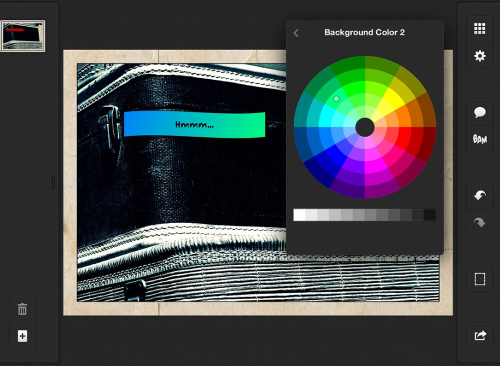
Likewise, clicking on Color 2, I picked a green from the color wheel.
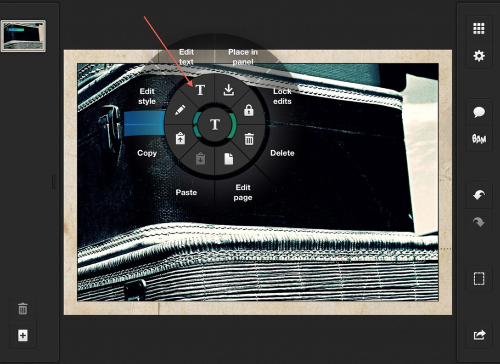
This all done, I tapped on the bubble to bring up Radial Menu and this time clicked on the Edit text icon.
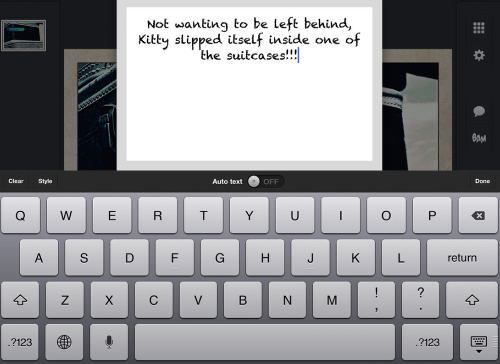
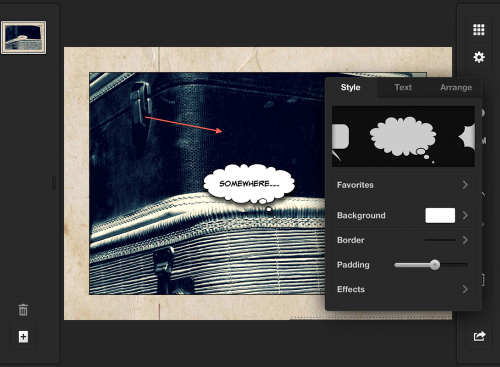
A keyboard and screen will appear…and I typed in my banner text to set the mood for my story.
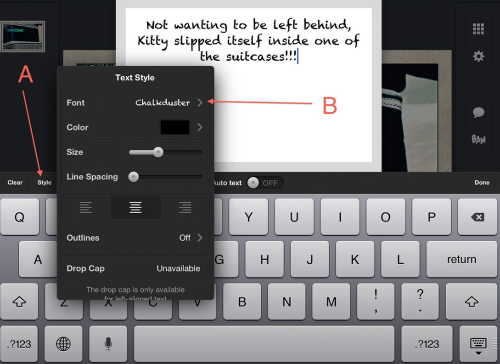
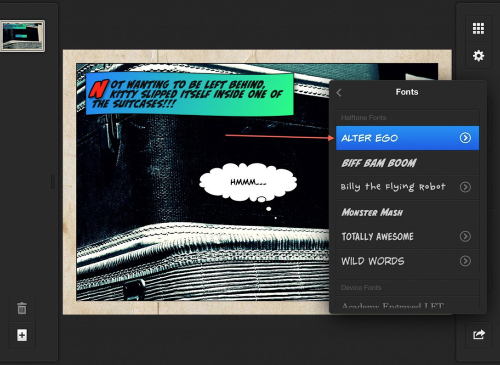
After double-checking my text, I clicked on “Style” (A) to bring up the Text Style menu. I then clicked on Font (B) to change that style.
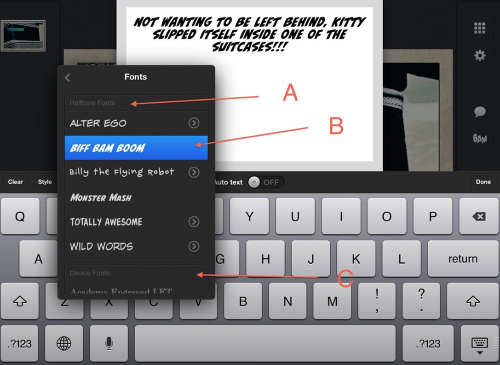
Halftone 2 comes with its own set of Fonts (A) from which I picked Biff Bam Boom (B). You can also use one of your Device Fonts (C).
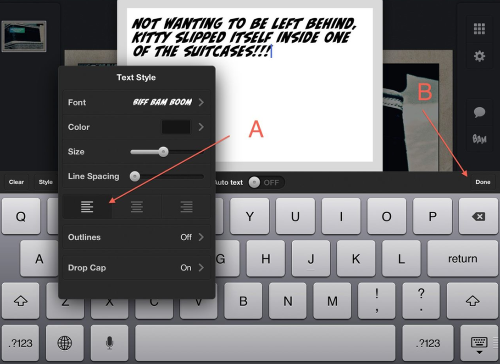
Staying in this menu, I also change the line justification to right justified. All finished, I clicked on Done. (B)
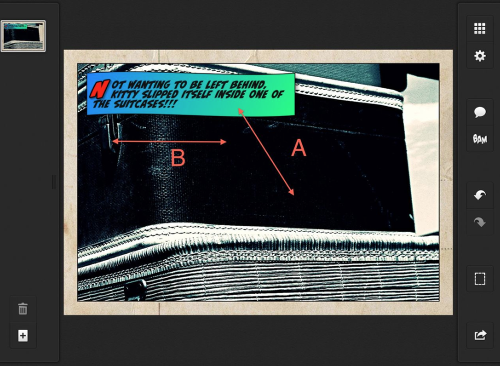
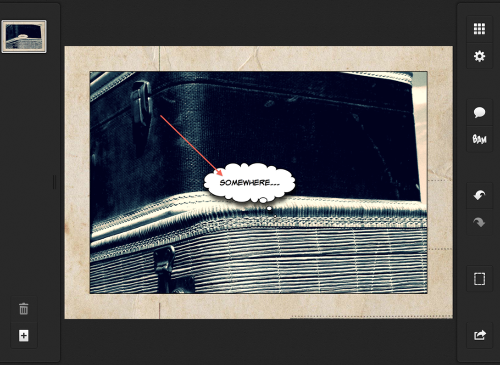
While it’s hard to show this in a screen shot…. one of Halftone’s video tutorial does this much better…I moved the banner to the top left corner by the one finger touch/hold/drag method (A). I also adjusted its size by using the two-finger pinch method. (B)

Almost done! Only a few more things I want to show you! (I did warn you that this tutorial was a bit long…)
Remember that “thought” bubble I deleted. Well…I decided I needed one after all! Clicking on the Bubble icon again, I put one back in my panel! Notice that my banner background now has become the default. I’ll need to change this!
So I did using the same sequence I showed you before.
I change the font style while in this menu rather than waiting to do this in the Text edit screen…
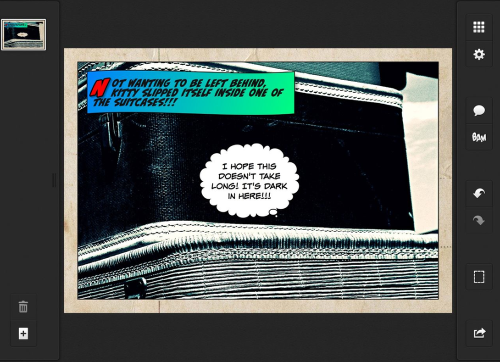
I did open the Text edit screen…and changed the text…
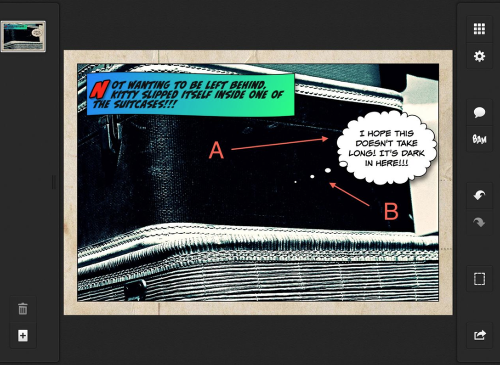
I then moved this bubble (A) and change the direction of the tail (B) using the same methods as above.
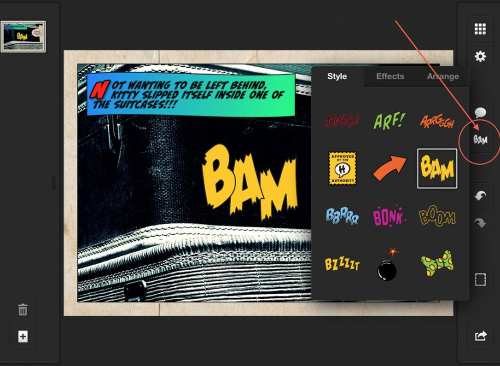
Needs a stamp. Yep. Wouldn’t be a comic panel without one. So click on the Stamp icon “BAM”!
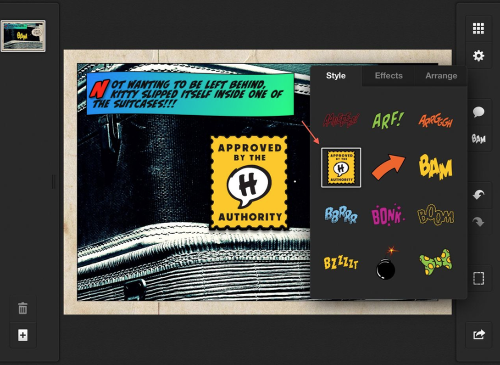
After deleting the “BAM”, decided on the “Seal of Approval” stamp. I didn’t apply any “Effects” as they would lost in my panel. Next time!
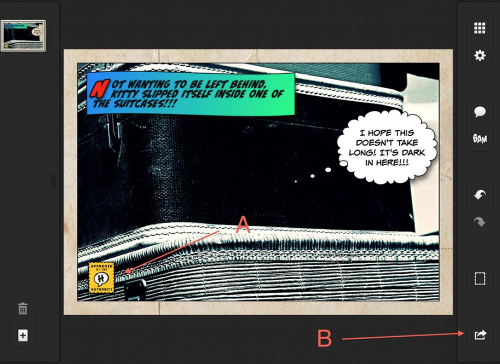
Using the same move/resize finger controls as before, I moved the stamp to the left hand corner. Now I’m done! Time to preview and save. Click on the Save icon (B).
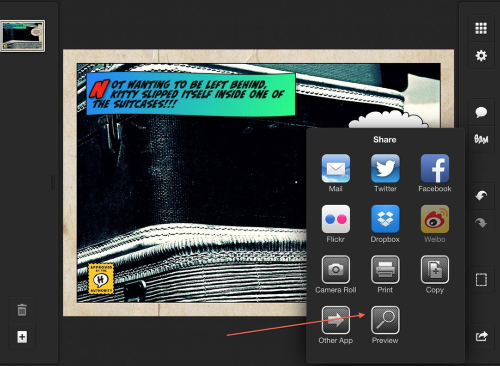
While you don’t have to preview your panel before saving, it’s always nice to take one final look. Click on the Preview icon…
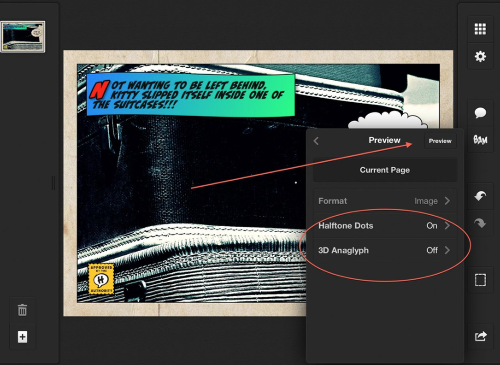
In the Preview window you can chose to view with or without halftone dots…I did want the dots so I left this control set to “On.” The 3D Anaglyph option is something I’ll show you next…so I left that at “Off”. Click on Preview to see your panel in all its glory!!
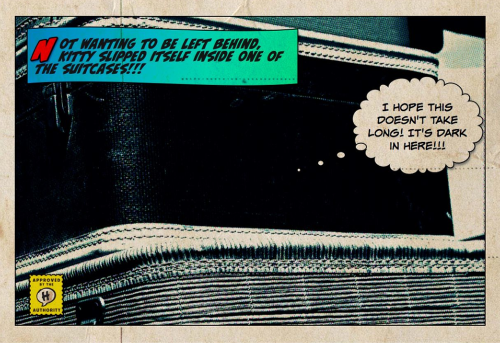
Here it is! Isn’t it wonderful!!! Liking it, I tapped on the screen to close this window and take me back to the Save screen.
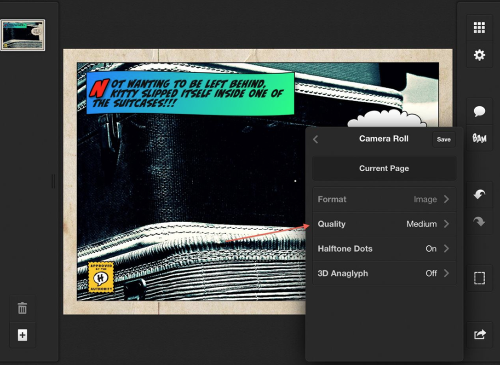
In here, I clicked on the Camera Roll icon…and this screen appears giving you several options including Quality that is preset at Medium. I clicked on this…
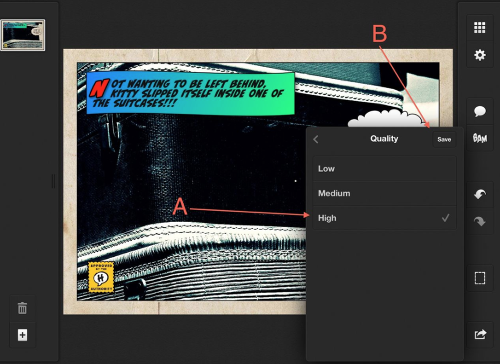
…and changed it to High. (A) Clicking on Save (B) put my panel into my Camera Roll at a resolution of 2253×1536.
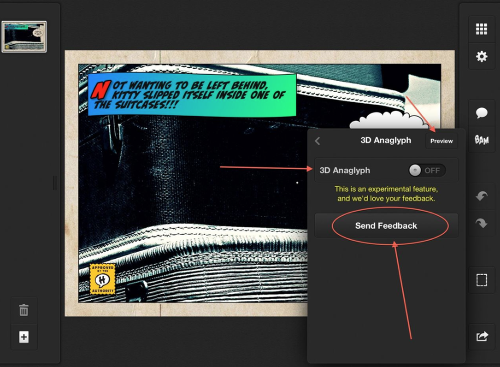
Before ending this article, let’s take a quick look at the 3D Anaglyph option. Juicy Bits has another great app called 3D Camera and they’ve incorporated some of its features into Halftone 2. (In the screenshot I also pointed out their request for feedback. When you try out this function, do send them your feedback. I did and heard right back from the developer. They really do want to hear from you!!)
I went back to the Preview menu and this time clicked on 3D Anaglyph. Moving the control button to “On” and clicking on “Preview”…
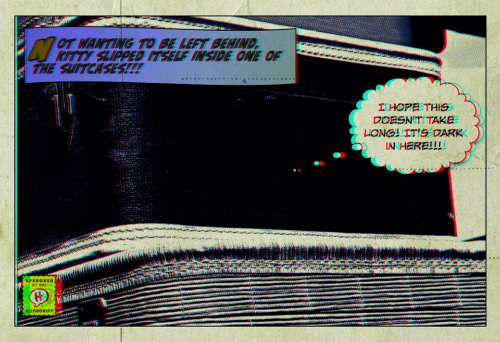
…creating a 3D version of my panel. Grabbing my 3D glasses I took a look…and it works!!! Pops right out….very cool!!
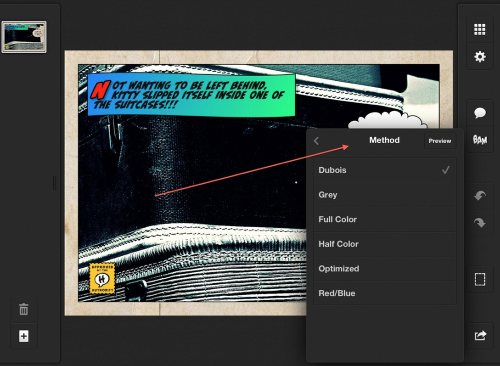
If you happen to be a 3D aficionado, then you’ll want to play with the other available settings…otherwise just leave it at the preset Dubois. Works just fine!!!
So there you have it. A overview on how to use Halftone 2. This is such a great app to use…I certainly would say it’s a keeper…and a frequent user!!
Juicy Bits is working on a free update of Halftone 2 that makes it a Universal app. It’s expected to be released within the next few weeks’.
David Hayes
David is Head of Technical Tutorials here at theappwhisperer.com and this role adds to the many things David has done in his life…some of which he considers more significant than others. Yet, he feels all have made him the artist he is today. He’s been a cook at a truck stop, a janitor at a military base, worked in advertising, been a banker managing other people’s money, and an elementary school teacher. Trained as a photographer as an undergrad, he’s recently returned to these roots and now considers himself foremost a photographer and secondly a mixed media artist. You can find David’s work on many other popular websites including his own: http://www.clearerreflections.com.
2 Comments
Pingback:
Pingback: