iOS Black & White iPhone Photography Technical Tutorial by Paul Brown
We’re delighted to publish Paul Brown’s black and white iPhone Photography workflow tutorial. This iPhoneography workflow focuses on black and white photography. It touches on a combination of manual processes and quick automated processes via some powerful apps.
We have published several of Paul Brown’s workflows recently. Please take a look at our Paul Brown archive here. Over to you Paul (foreword by Joanne Carter)…
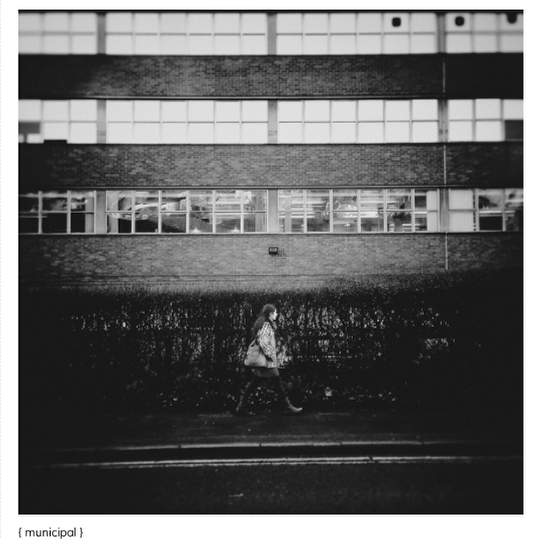
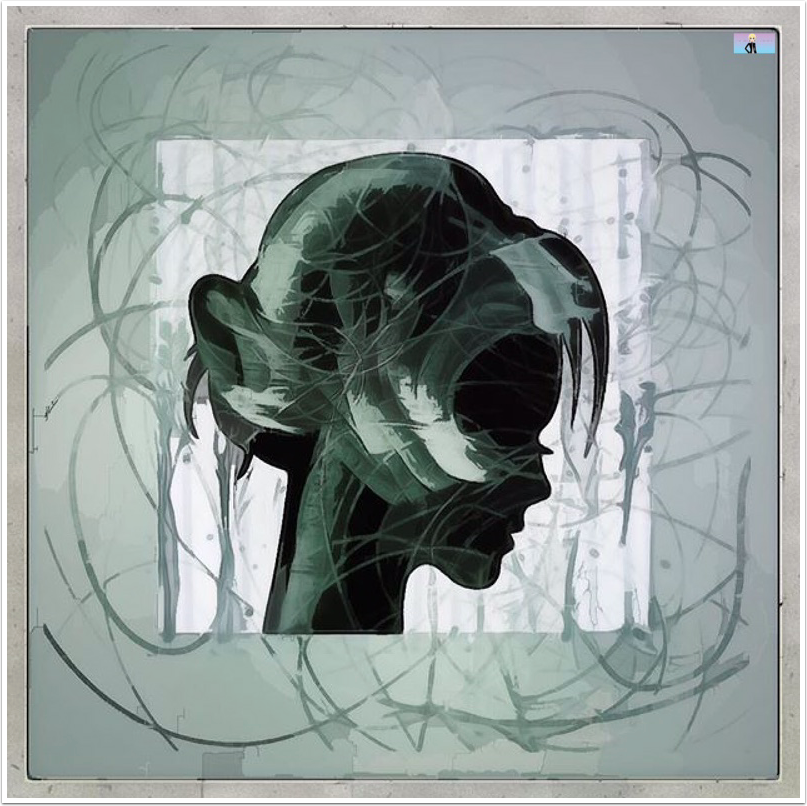
“Looking at black and white iPhone photography using my street image ‘municipal’ as an example.
Is that an old master giving us license to go crazy in post processing or is he referring to skilled composition and exposure at capture? The answer I think is both. The rules around the initial capture are universal and the subject of any number of text books. The difference of course is that what Ansel Adams did with his hands and his chemicals, iPhone photographers do with apps and touch screen technology.
This iPhoneography workflow focuses on black and white photography. It touches on a combination of manual processes and quick automated processes via some powerful apps..

Adjustment
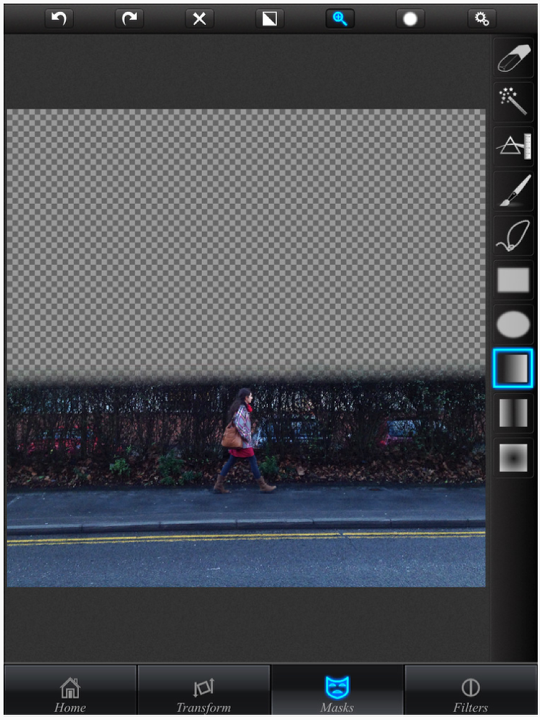
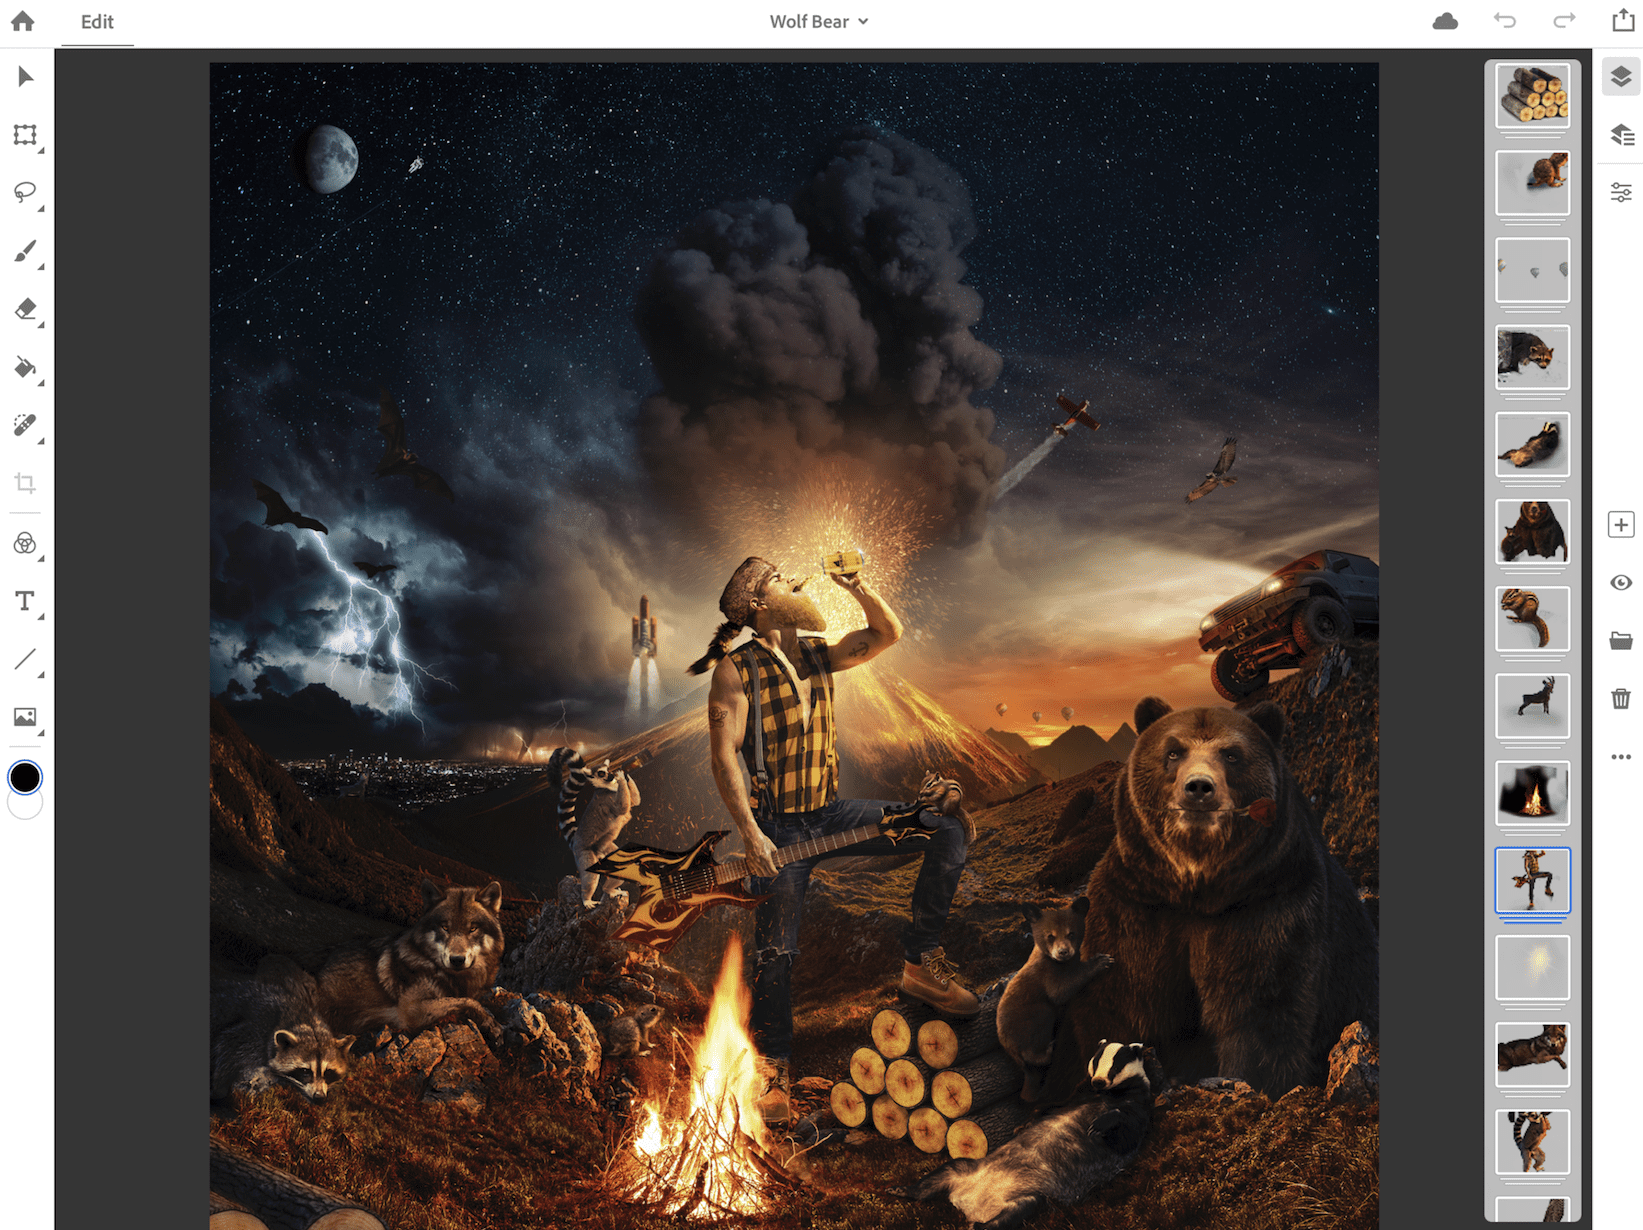
Superimpose app.
I wanted to adjust the exposure of the foreground part of the image (the hedge and the figure striding). The following process was adopted:
- Import the previous image into Superimpose as both foreground and background:
- Mask the area of the foreground I do not wish to edit. As this is a very uniform linear image, I use the linear masking tool to draw a shallow linear mask
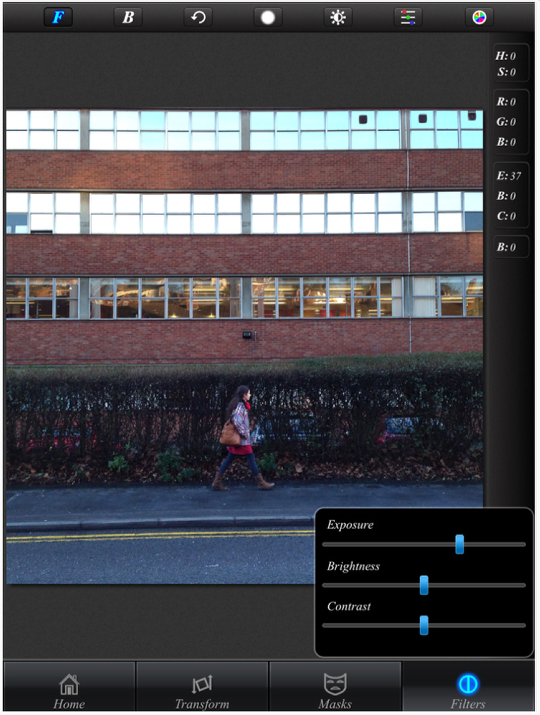
I wanted to boost the exposure of the unmasked section. This was done in the filters section. The result was saved with a ‘normal’ blending method.
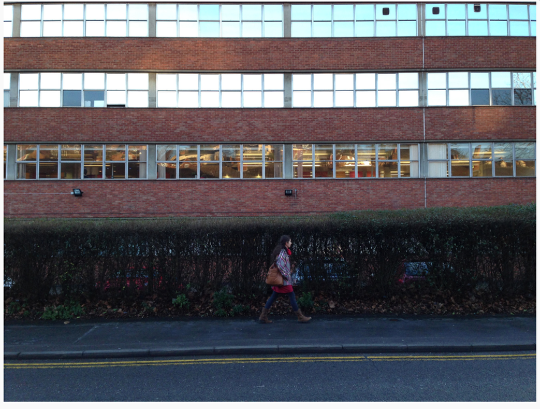
This is my base iPhoneography capture and at this point I can make my decisions about how I would like to convert the image to black and white. I can use either manual or automated processes or a combination of the two. Initially, I am going to focus on automated conversion processes. I liken these options to Photoshop Actions.
There are a wide range of iPhone photography apps providing this functionality but for the purposes of this article I am just going to focus on the three that I use the most at this moment in time:
AUTOMATED IPHONE PHOTOGRAPHY BLACK AND WHITE CONVERSION:
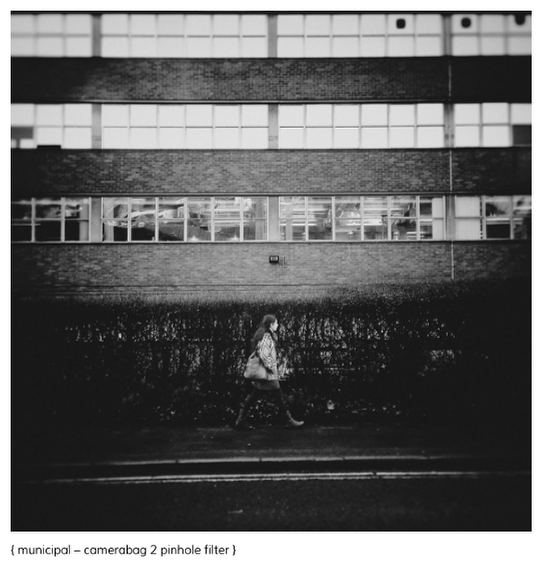
CameraBag 2 Mobile includes dozens of adjustable photo styles (with new ones added regularly for free download in the Online Style Library within the app), the ability to save customized looks, and the ability to import advanced styles hand-made in CameraBag for Mac and PC. There are a number of black and white conversion filters included. My own favourite is Pinhole and this iPhoneography image was processed using it:
Hipstamatic / Oggl
Hipstamatic use the strap line ‘digital photography never looked so analog.’ The idea is that with a huge array of virtual lenses and films you create combinations to your taste and to suit the scene you are capturing. Hipstamatic itself requires that the lens and film combination be selected before you capture the image and it’s a favourite camera replacement capture app of mine, but useless for editing.
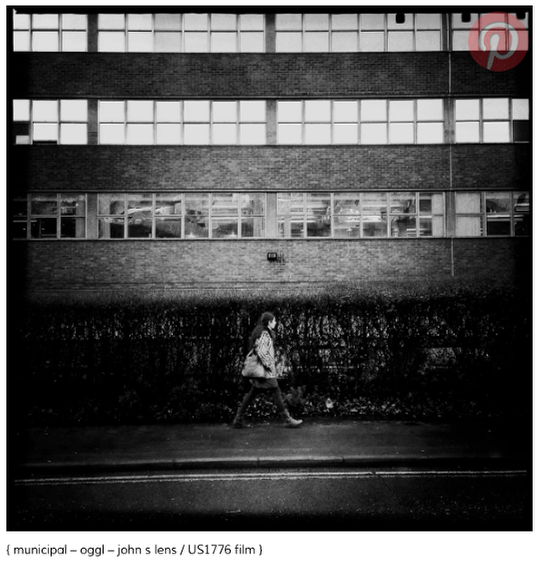
Oggl however is a different beast. Using the same lenses and films (your Hipstamatic purchases can be imported into Oggl) you can import an image captured on your favourite camera replacement app (ProCamera7 in my case) and apply the lens and film combination in post processing. The lenses each have a unique signature and all are colour as you would expect. The films provide further processing variations with a wide range of black and white options available. This version was processed using the classic John S Lens together with the US1776 black and white film.
VSCOcam
Like CameraBag 2, VSCO has it’s origins in the desktop editing environment providing plugins and actions for packages such as Photoshop.
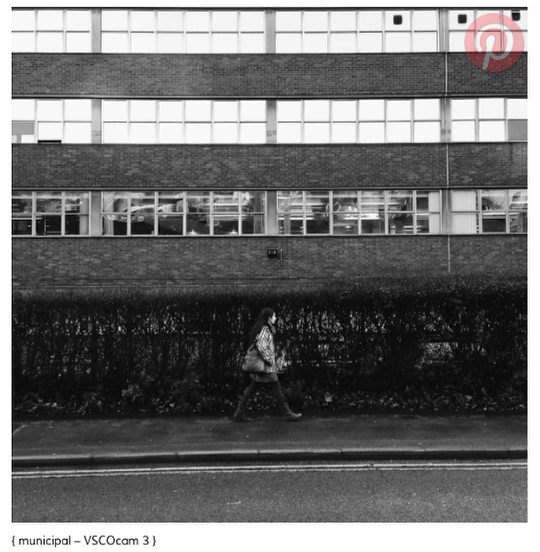
They transfer that knowledge and skill into an app boasting a wide range of actions which they categorise into groups such as ‘vibrant’, ‘moody’, ‘fade’, … Within those categories each preset can be adjusted and there are a wide range of black and white actions available. This version was processed using the VSCO original action number 3.
MANUAL IPHONE PHOTOGRAPHY BLACK AND WHITE CONVERSION:
Dramatic Black and White app link
Whilst Dramatic Black and White has a wide range of excellent presets, it gives full reign to manually control all aspects of the black and white conversion process. Along with Snapseed, Dramatic Black and White is my choice for manually converting iPhone images from colour to black and white.
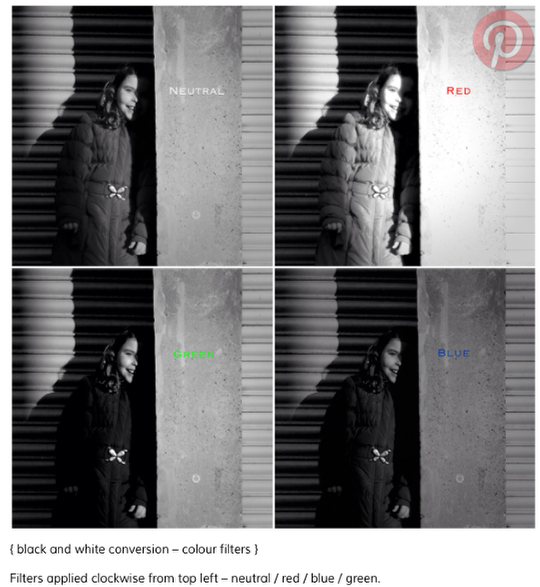
Aspects such as vignette (spotlight), grain (texture), brightness, contrast, etc can all be adjusted as you would expect. However, the key area to consider when converting a colour image to black and white is the colour filter. This is where Dramatic Black and White just beats Snapseed. Dramatic Black and White includes red, green and blue filters which can be applied in combination to a total value of 100pct. For example 100% red, or if you prefer include all three but with weighting you define.
The images below of my daughter creating a freaky (optical illusion) shadow demonstrate the significant effect the filters have before brightness, contrast and other adjustments are considered. For reference her coat is red:
Colour filter theory
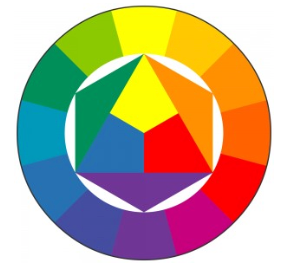
This is the Itten Color Wheel.
The theory typically applies to colour filters on analog cameras with black and white film. In simple terms the filter lightens its own colour and darkens its complimentary colour (the opposite colour on the wheel). In all forms of digital photography there is no real reason to use physical filters as the effects are simulated in post processing.
Typical uses:
- Red: known as the landscape filter because it adds dramatic contrasts to cloudy skies.
- Green: often used for flora / tree photography where the greens are lightened and highlighted. Also used in portrait photography where the complexion is suitable.
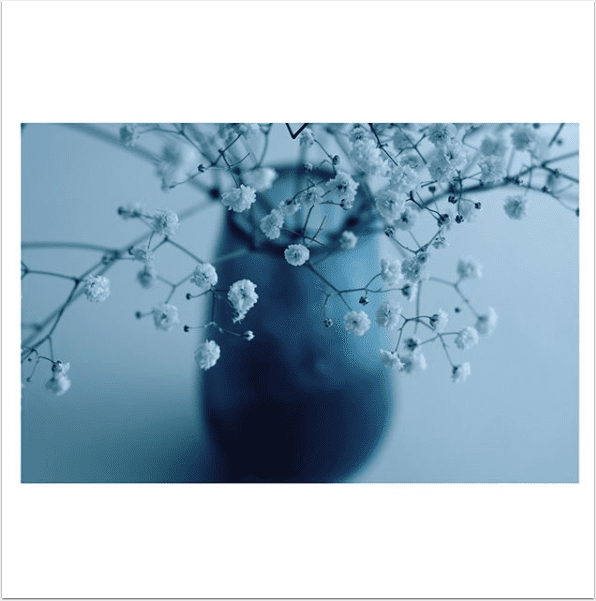
- Blue: quite often regarded as a niche filter (probably why it is excluded from Snapseed). It tends to reduce contrasts and give images an old fashioned vintage feel
CAPTURING IN BLACK AND WHITE DIRECTLY:
Some people prefer to avoid post processing completely and capture the image in black and white. There are numerous specialist apps for this purpose.
MPro app link
This camera replacement app has a single purpose, to capture the best possible black and white images. There are various film emulation choices and brightness adjustments. Neutral, red, green, blue, yellow and orange colour filters can be applied and all the settings are reflected in the preview screen (the world is viewed in black and white through the colour filters you select). Images can be saved in full resolution TIFF format for maximum image quality.
645 Pro Mk II app link
This is not a specialist black and white camera replacement app but shares much of the functionality of MPro. In fact it has many more film emulation choices available (not just limited to black and white) and many more filters available including neutral density and many many others all of which can be applied at a range from 0% density to 100% density. As with MPro, all the settings are reflected in the preview screen (the world is viewed in black and white if you select a black and white film and through the colour filters you select). Images can be saved in full resolution TIFF format for maximum image quality.
Thirty Six App link
As with other black and white apps the preview screen shows the world as the film sees it. This app is slightly different in that it is less about individual images and more about a collection of images. It is the iPhone photography equivalent of a roll of film. There are various colour and black and white ‘films’ to choose from some at 12 exposure square format and others at 36 exposure ’35mm’ format. Once all the exposures on the film have been taken the app ‘develops’ the film, presets you with a contact sheet together with the ability to save all or selected images to the camera roll.
Hipstamatic App link
Hipstamatic probably gives you the most authentic analog experience. It’s results are much less pure and technical in terms of colour filters, etc than MPro or 645 Pro Mk II. Additionally, depending on the lens and film combination you select, it’s results can be much more highly processed and random. However, the iPhone preview screen does not show what the image will look like once processed. It shows the real world colour view in exactly the same way as an analog camera loaded with black and white film would”.
Paul Brown
Paul Brown (known as Skip to most), is an exhibited and prize winning iPhone photography from Lincoln, England. He is a member of the global ‘AMPt Community’, a managing member of Lincolnshire based regional mobile photography Group ‘InstaChimps’ and a founding artist at ‘New Era Museum’. He also runs his own personal blog at http://skipology.com where he shares many of his processes with step by step guides for some of his most popular images and will shortly begin blogging about iPhone photography for iPhone and iPad Life Magazine. London exhibitions include images at ‘My World Shared’, ‘mObilepixatiOn’ and ‘Pixel This’ a curated charity exhibition where he exhibited alongside celebrities such as Stephen Fry, Ruby Wax, Peter Capaldi and Alexander Siddig. Skip was a finalist in the Photobox Motographer of The Year 2012 with his image ‘Skipping’ and is currently preparing for the InstaChimps second mobile photography exhibition due to take place in Lincoln later this Summer.
4 Comments
Jeffrey Simpson
Nice work Paul always a pleasure.
Skip
Thank you Jeffrey
Tracy Mitchell Griggs
Great tutorial – was a little unclear on what control to use -blending-back in Superimpose. The Photoshop references were beyond me as I have no knowledge of it or other digital graphics software. Otherwise, great tutorial – the good news is that I own all of these apps. My absolute weakest skills are everything to do with masking, blending, layering and compositing-your tutorial encourages me to attempt some of these processes.
Cheers!
Skip
Hi Tracy, thank you. Photoshop actions are a bit of an irrelevance so that’s nothing to worry about. They’re just a series of automated stages to apply various edits to an image without having to do them individually or manually.
Re Superimpose, having created the mask and adjusted the exposure (filters menu and select the sun like symbol at the top) normal blending method is standard so you can then just save the image without doing anything else. I do have a few more detailed Superimpose tutorials on my blog – this one for example… http://skipology.com/iphoneography-workflow-violin-girl-surreal/ shows all the screens in more detail and includes a video.