Mobile Photography Tutorial – Diana – When a Little Mix-Up is a Good Thing
We are delighted to publish Jerry Jobe’s latest mobile photography/art tutorial for our reading and viewing pleasure. This week Jobe takes a look at the mobile photography app, Diana. Read his thoughts as he puts it through its paces (foreword by Joanne Carter).
Diana is a free app and you can download it here
“If you have ever spent any time cooking, you should know the feeling of getting to the point in the recipe when you should be adding an ingredient you were certain you had, but it’s not there. “No sage! Coriander? Rosemary? Whatever!” Sometimes the result is wonderful, sometimes it’s not – but it’s never quite what you expect.
Diana is an app that randomly picks two images from your Camera Roll and slams them together. It can also apply one of the 40 available filters at random, or allow you to choose. The results can be wonderful, or a mess. But, just as with happy mistakes in cooking, the results can inspire you to try new techniques, new combinations of images. If nothing else, Diana can serve to stir your creative juices.
The reason I use the phrase “if nothing else” is that Diana is an app that does not give the user the level of control necessary to tweak the results of the mix. It can be a frustrating app in that way. But if you have some time to spend with it, it can be worthwhile. Sometimes I can try a dozen or two random combinations, and not come up with something useable – but I leave the session with several ideas. That’s gotta be good – right?
The splash screen for Diana is a silhouette. The developers of Diana stress how well silhouettes work with their app. They certainly do work well. Unfortunately, I don’t have a lot of silhouettes on my Camera Roll (probably under .05 percent), so you won’t be seeing any in this tutorial. I will show you where you can see some examples of Diana’s use of silhouettes, however”.
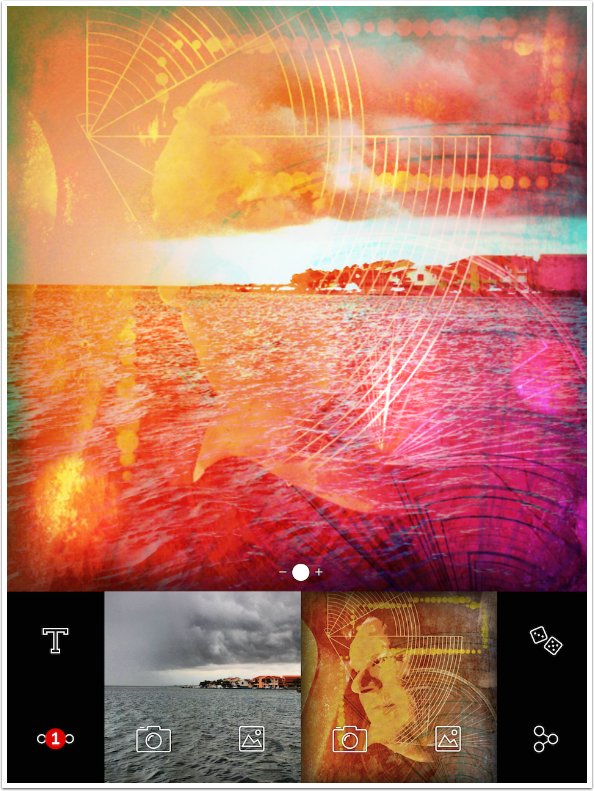
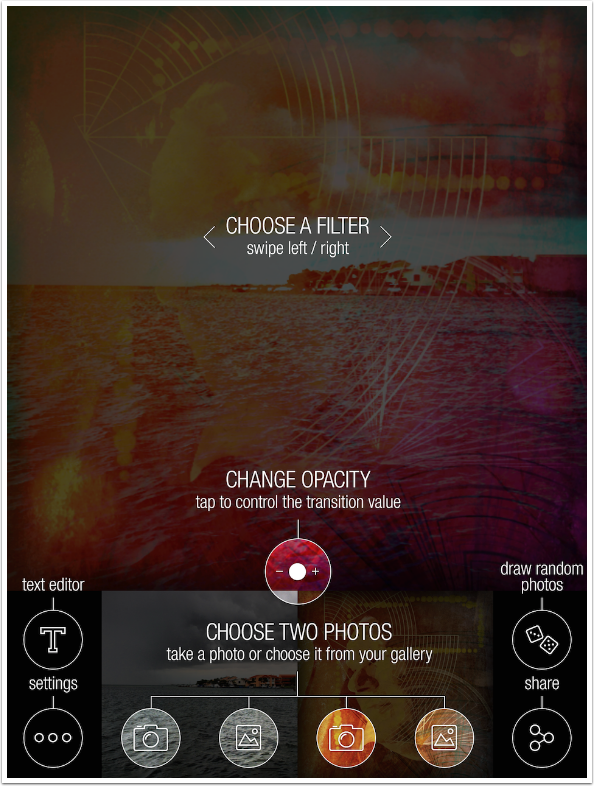
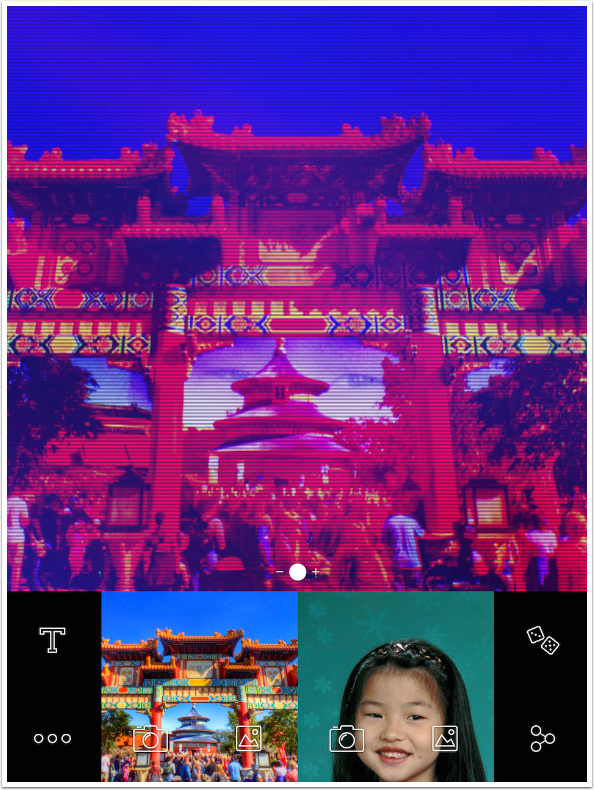
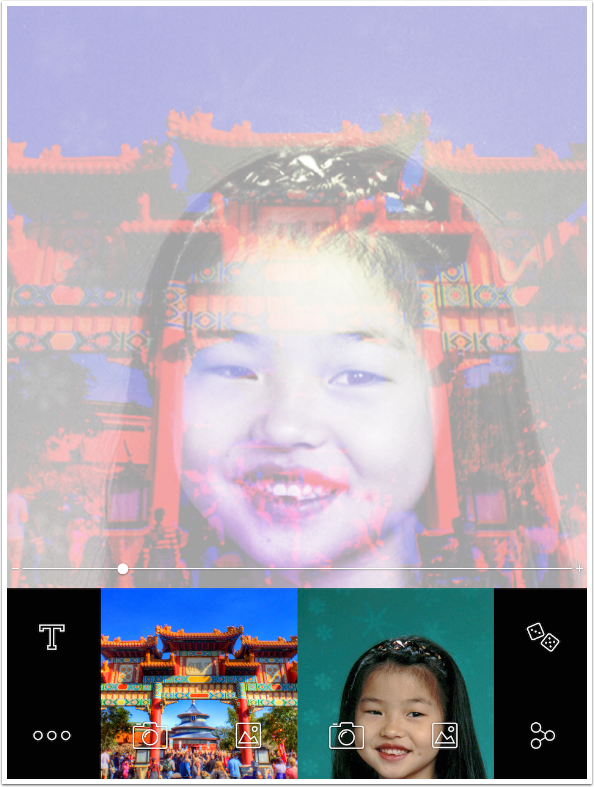
The main screen in Diana shows the blended image at the top, and thumbnails of the two images that are blended at the bottom. The screenshot below shows the iPad version (Diana is a universal app), which has four buttons to the sides of the thumbnails: Text and Settings to the left, and Random and Share to the right.
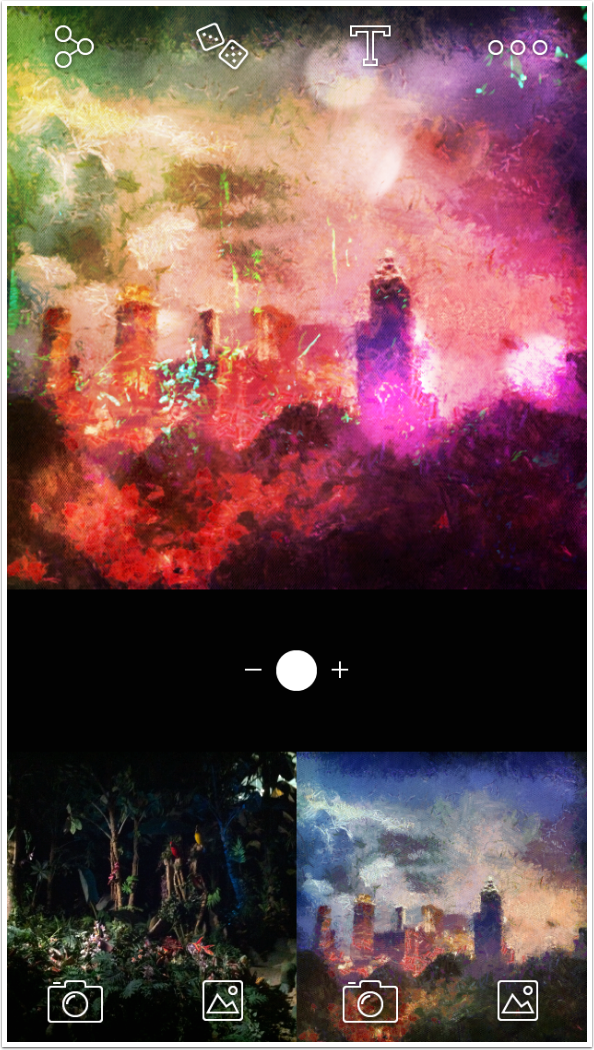
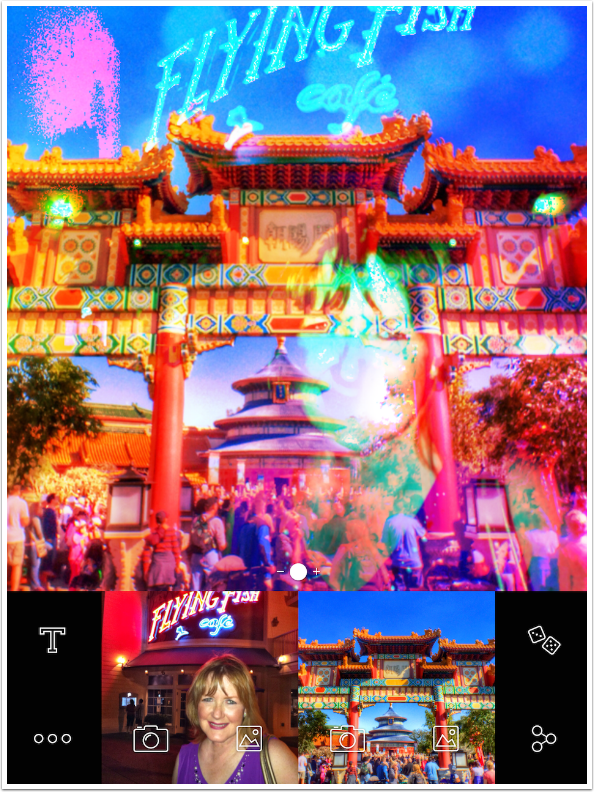
The iPhone version shown in the next image has the four buttons across the top of the blended image: Share, Random, Text and Settings. It operates the same as the iPad version; only the placement of the buttons changes.
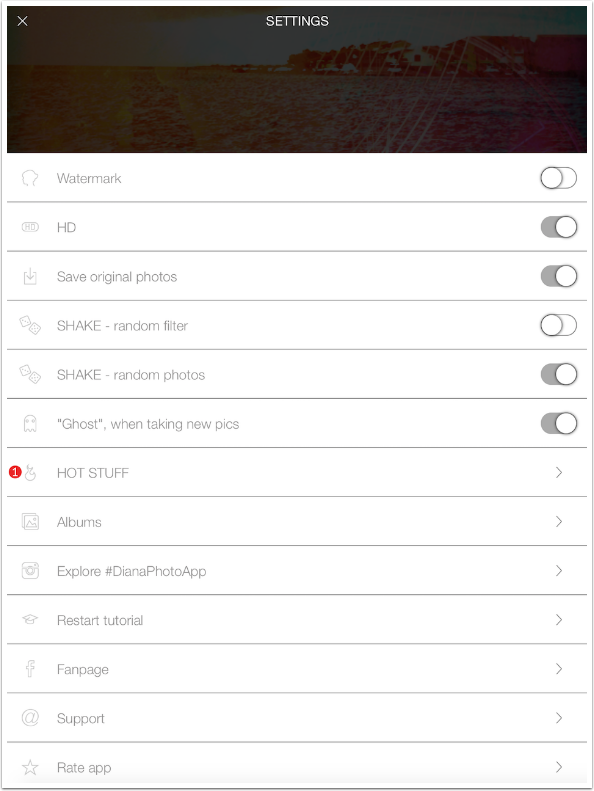
Next we will take a look at the Settings, shown below. Watermark should be turned off, unless you like to advertise the app you use. I’ll show you an example of the watermark in a moment. HD should be on, since you always want the highest resolution possible. “Save original photos” refers to the images you capture if you use the Camera as your source rather than your Camera Roll. The two “Shake” options allow you to shake your device rather than press the Random button; I like to have Random change the images, but not the filter. “Ghost” when capturing images is a handy feature, and one I leave on.
Hot Stuff, Explore, Fanpage, Support, and Rate App are not settings, but sites for seeing examples, tips and support. “Albums” allows you to include other albums on your device in addition to the Camera Roll when Diana randomly selects images. “Restart tutorial” will put explanatory overlays on the screen, which can be cleared by tapping anywhere.
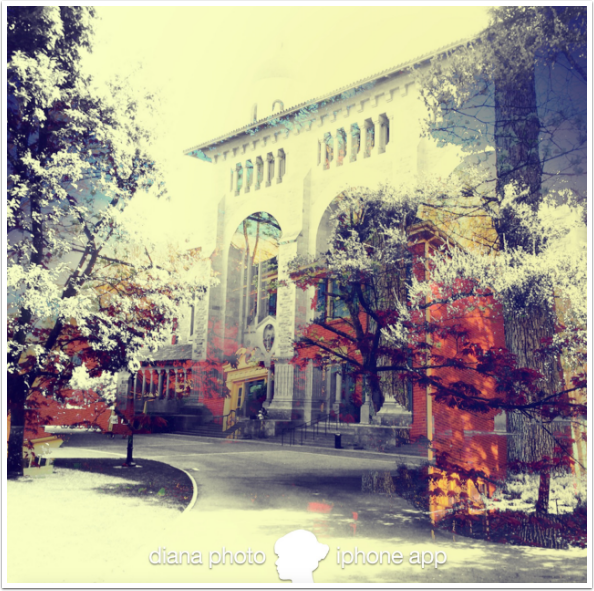
Below you’ll see an image with the Watermark. It’s obnoxious and intrusive, in my eyes, and should be switched off.
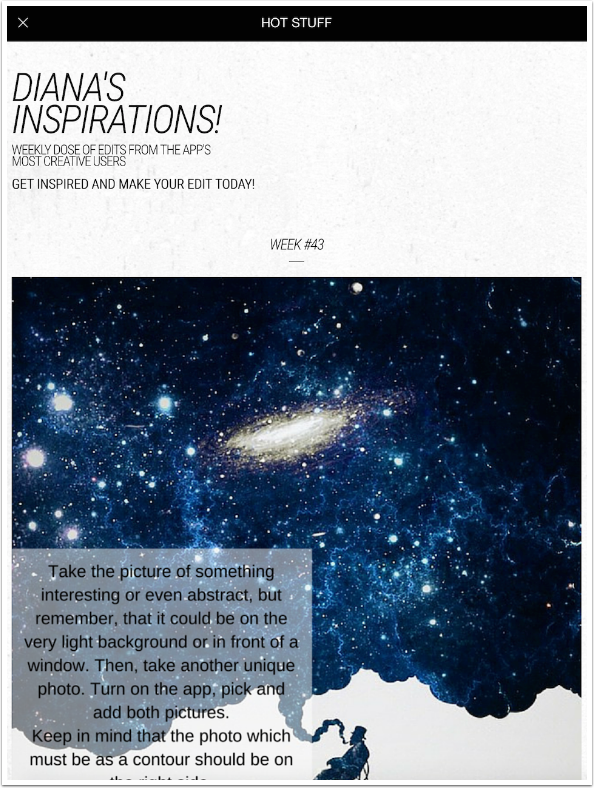
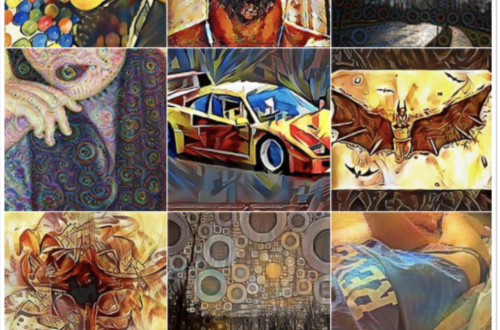
Hot Stuff shows examples from users of the results from Diana. This is where you’ll see the use of silhouettes or “contours”.
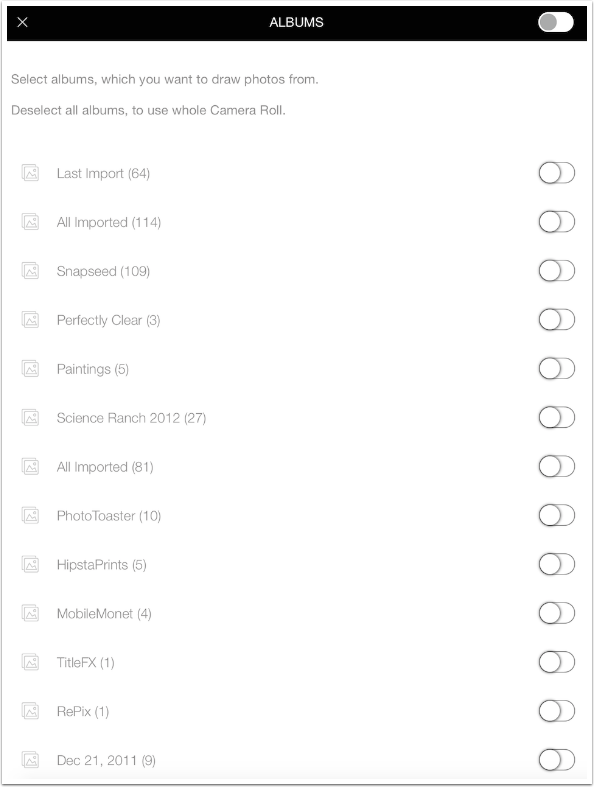
Next you’ll see the “Albums” screen, which allows the Random function to choose from albums other than your Camera Roll. The switch in the upper right corner selects or deselects all of the albums.
Below you’ll see the overlay that is produced when you choose to “Restart tutorial”.
Each of the thumbnails shows two buttons: a Camera and an Import button. When you choose Import, you can select the image from any of the Albums on your device. I am going to replace the left image.
I’ve chosen an image of my daughter and the overlay shows me the buttons on the Crop screen. Ghost Mode is on. Return cancels the new choice; Crop cuts the image to a square and returns you to the main screen; Image Rotation rotates clockwise in 90 degree increments.
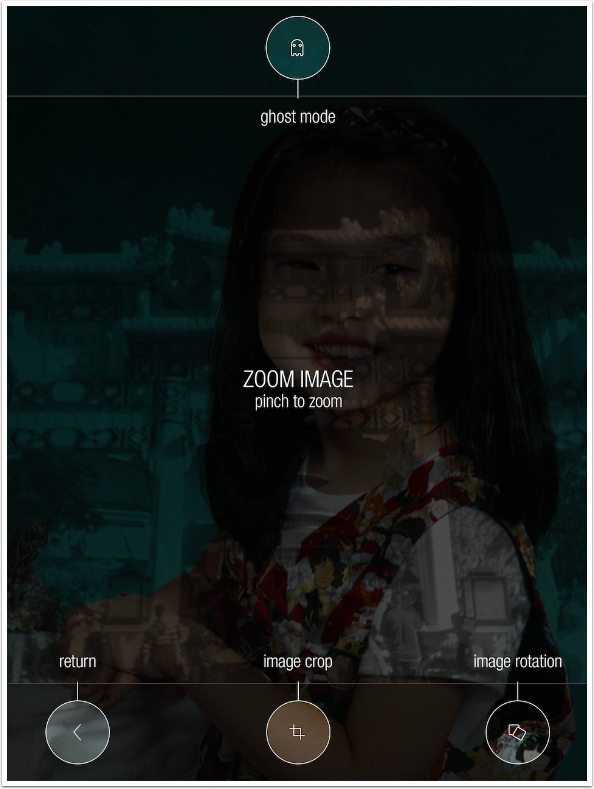
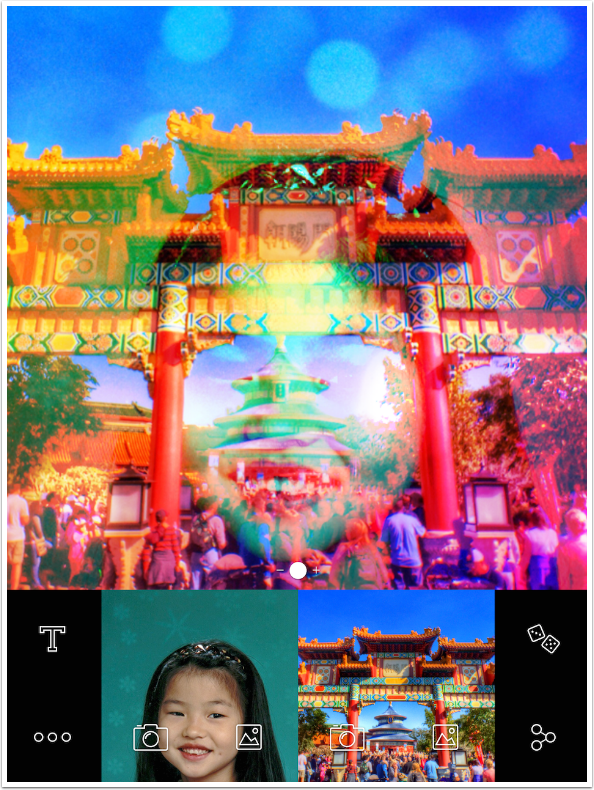
Below I’ve used the “pinch to zoom” before cropping, which allows me to place my daughter’s eyes into the empty sky below the arch.
This kind of placement is only possible when you choose the image yourself; it’s not available for the Random image. In order to move or zoom a Random image, you would have to find the image and re-import it. This is extremely difficult for me, since my Camera Roll is now close to 10,000 images. A welcome improvement would be a method to crop/zoom/rotate the randomly selected image.
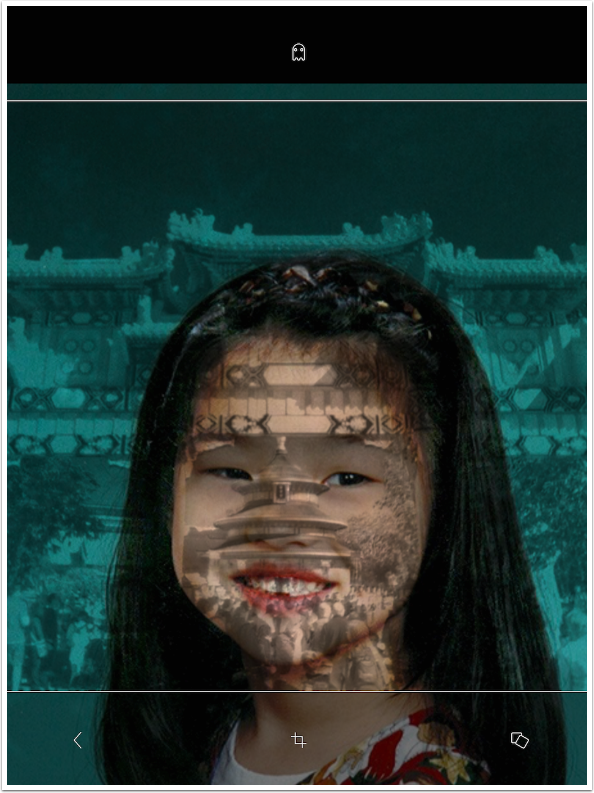
When I tap the Crop button, I return to the main screen with a thumbnail for the new image (cropped) replacing the old on the left.
Many of the filters will give you different results based on which image is on the right and which is on the left. You can switch the images by dragging the left thumbnail to the right or vice versa. Also, if you tap-and-hold a thumbnail a lock will appear. You can then hit the Random button and only the unlocked image will change. Tapping-and-holding a locked image will unlock it.
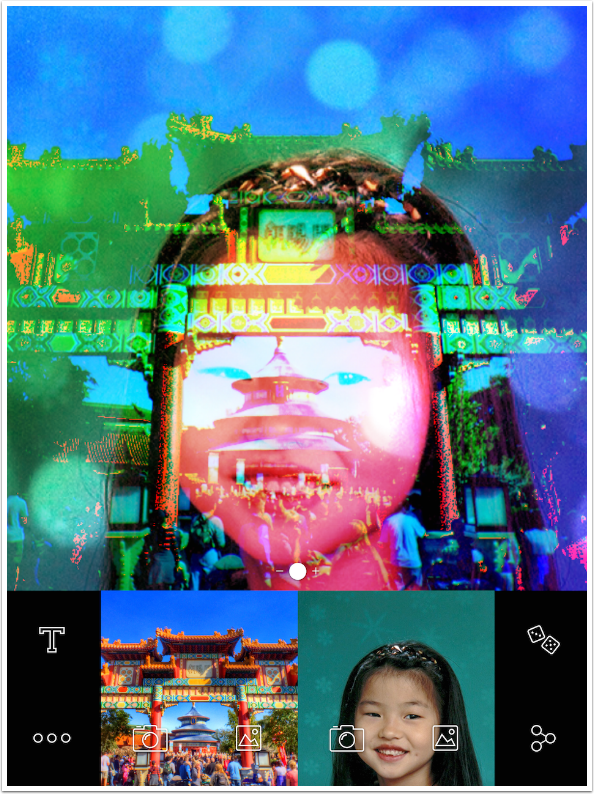
Below I’ve chosen the Camera as my input source. Because ghosting is turned on, I can see the camera output overlaying the image of the arch. This allows me to more precisely place the second image for the blend.
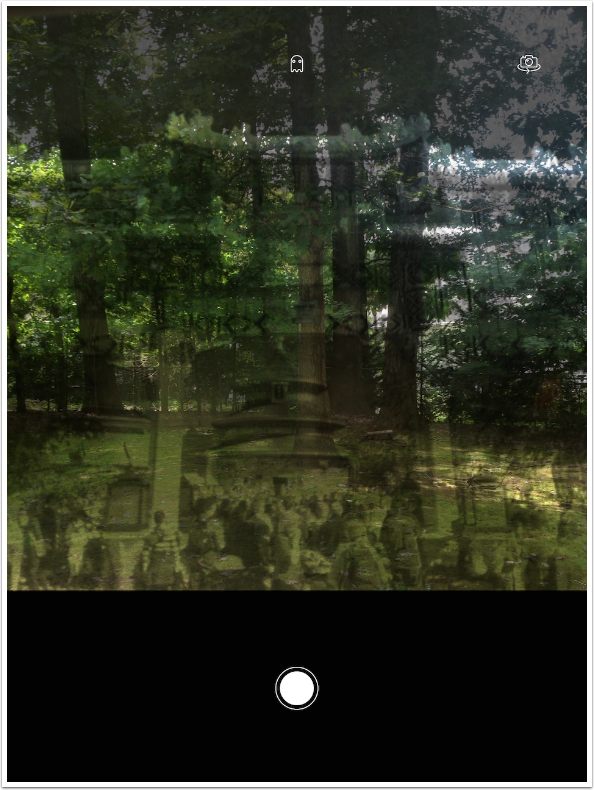
I must have twitched, because this is the image that was saved and blended. It’s an “occupational hazard” when you’re trying to press the buttons to capture the screenshot as well as the shutter button!
Below is the resulting blend. It would have turned out better without the window sill in the picture.

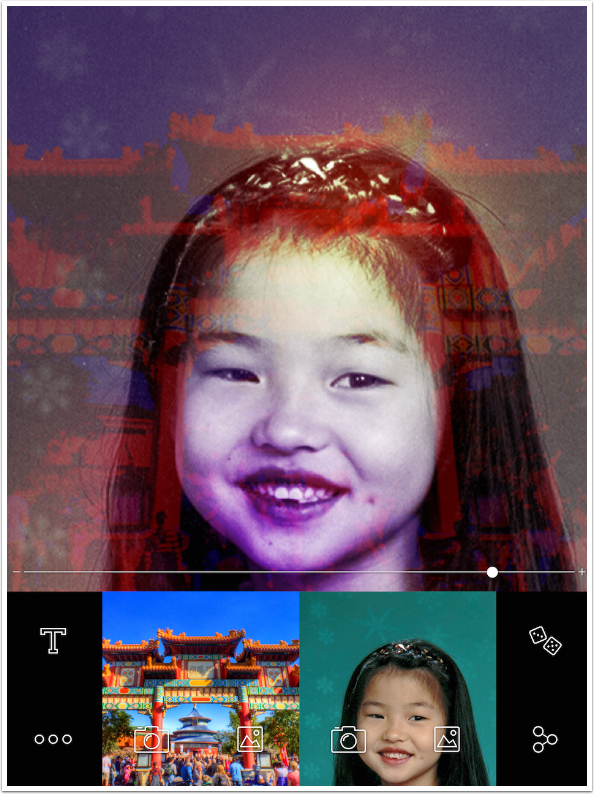
Swiping left or right on the image changes the filter that is applied. The one shown below is VHS. The names of the filters are briefly displayed over the image as they are changed. (I’ve switched back to the image of my daughter to help you see the blends more easily.)
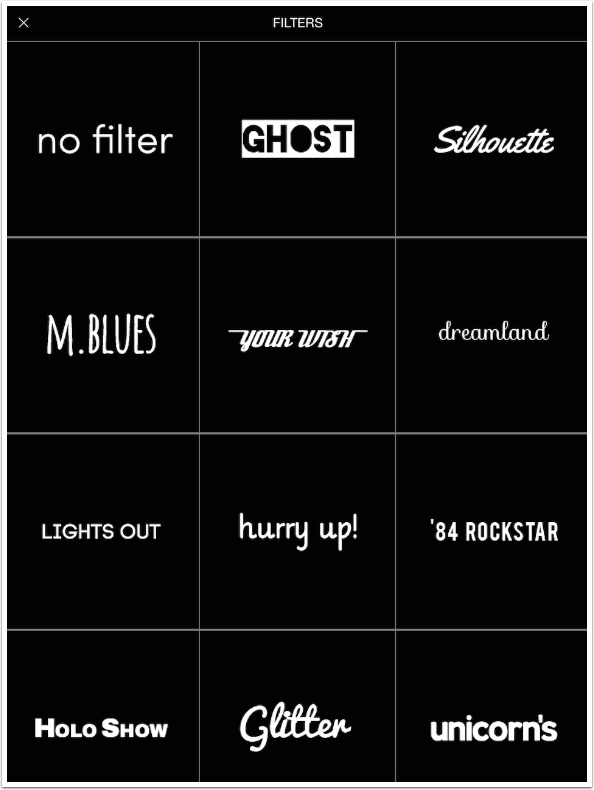
Tapping and holding on the blended image will bring up a list of the 40 filters (including “no filter”) so that you may choose them directly. This list does not show the entire name of the filters. For example, “M. Blues” is “Morning Blues” and “hurry up!” is actually “hurry up! we’re on fire”. Scroll vertically to access the other filters.
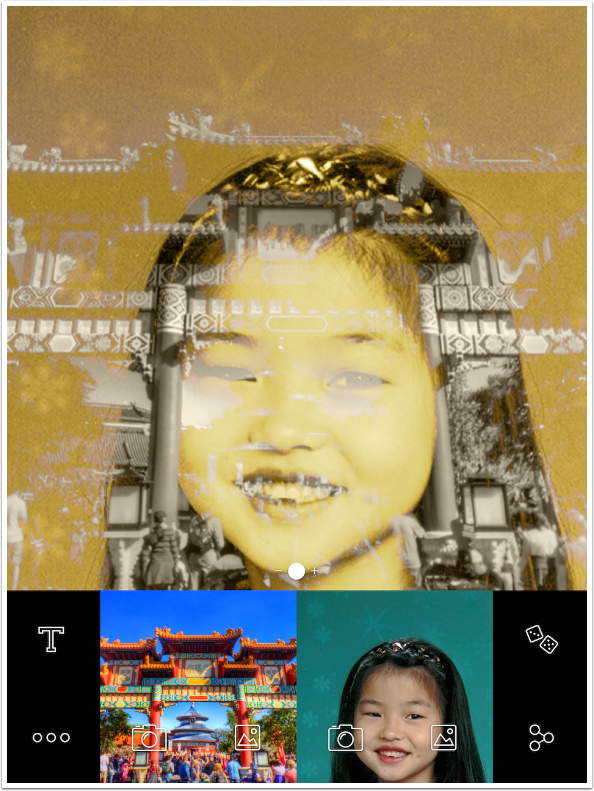
The filters don’t just plop an overlay over the blended photos. They also change the blend. “VHS” barely showed the image on the right, but “Silver Sepia”, shown below, allows the girl to shine through.
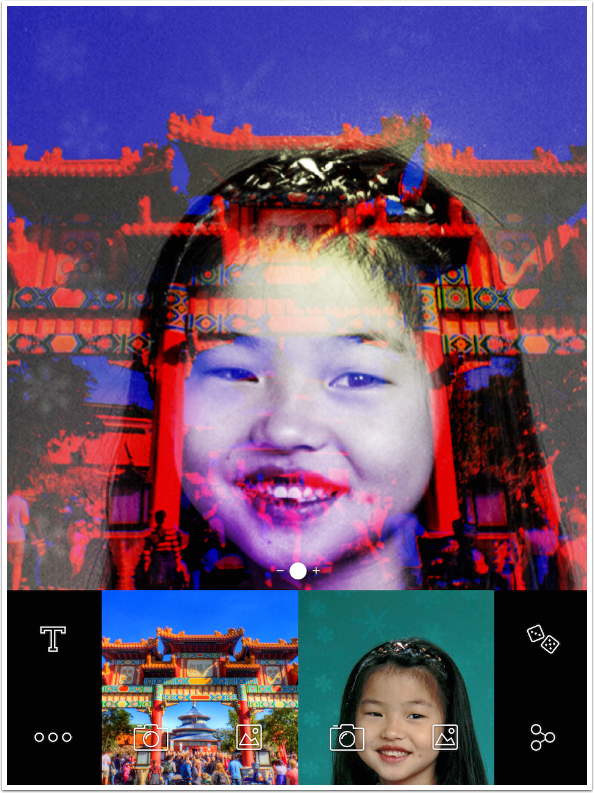
It is not always possible to tell what blend mode is being used as part of a filter. This filter, “Rave On”, may be using a color burn blend mode. I just can’t tell.
The slider accessed by tapping the white dot in the center bottom of the blended images is not a strength slider for the filter. It allows you to bring more of the left image or the right image into the blend. That’s useful with certain blend modes, but with the current image, moving the slider to the left whites out the image.
Moving it to the left gives me an oddly-colored portrait. So the slider, I have found, is only useful in small amounts if at all, due to its unpredictability.
Next we’ll look at the Text tool. Spoiler: it’s not very useful, and I would recommend a dedicated text app like Phonto, Over or TitleFX. Choosing the Text tool gives you a box with “Tap here to edit text” or the last thing you typed centered in it.
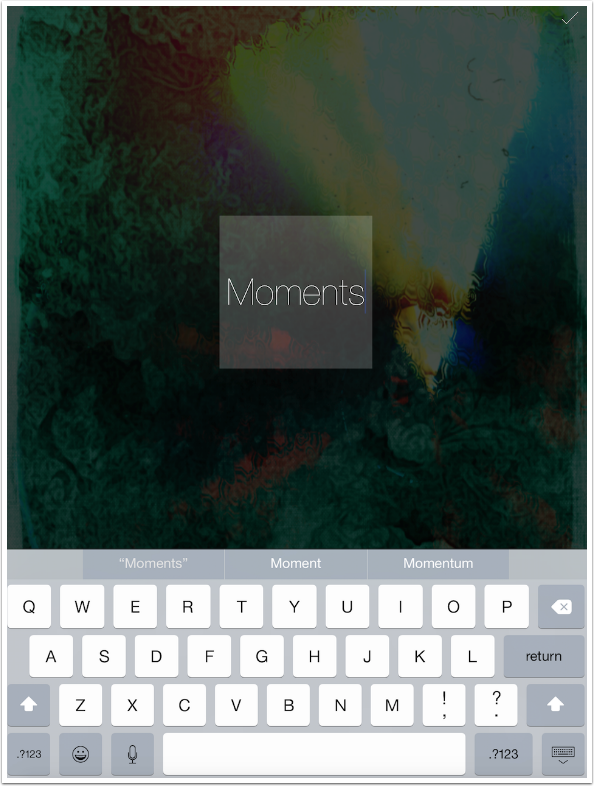
Tapping the text brings up the keyboard to allow you to change the text. Font and color are NOT changeable.

The white box is a text boundary box, meaning that the text will not fall outside the box. When I increase the size by holding the large T button, the word “abstract” wraps around within the box.
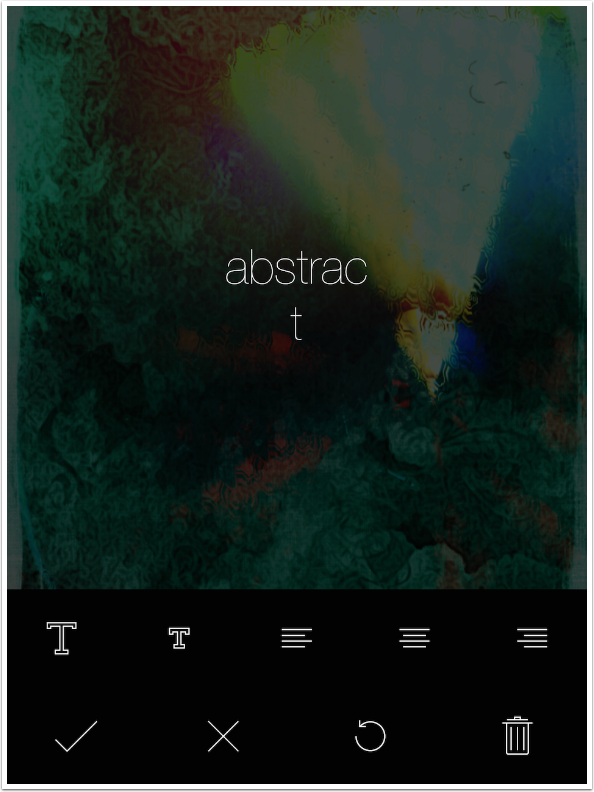
I can increase the size of the boundary box by using a two-fingered pinch.

I can move the text with a one-fingered drag, and rotate with a two-fingered turn. Because both the zoom and the rotate use two fingers, I found myself changing the size of the box when I was trying to rotate.
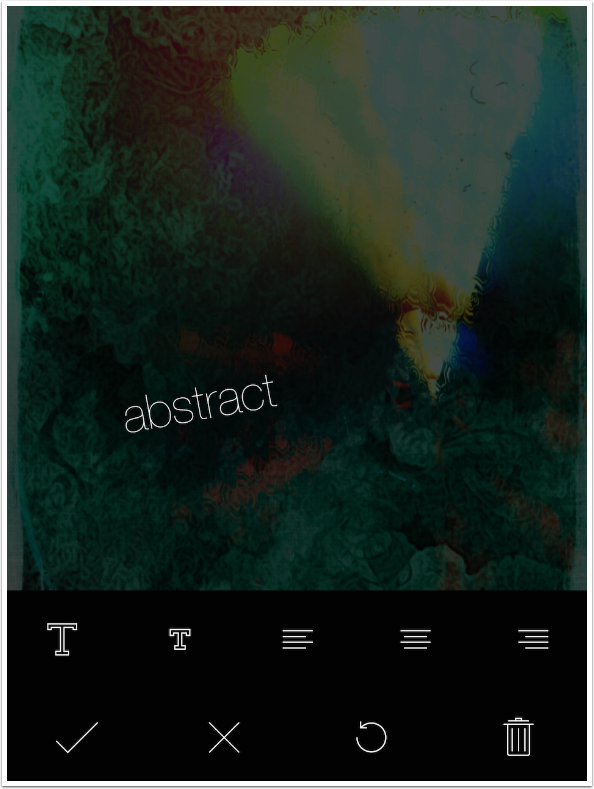
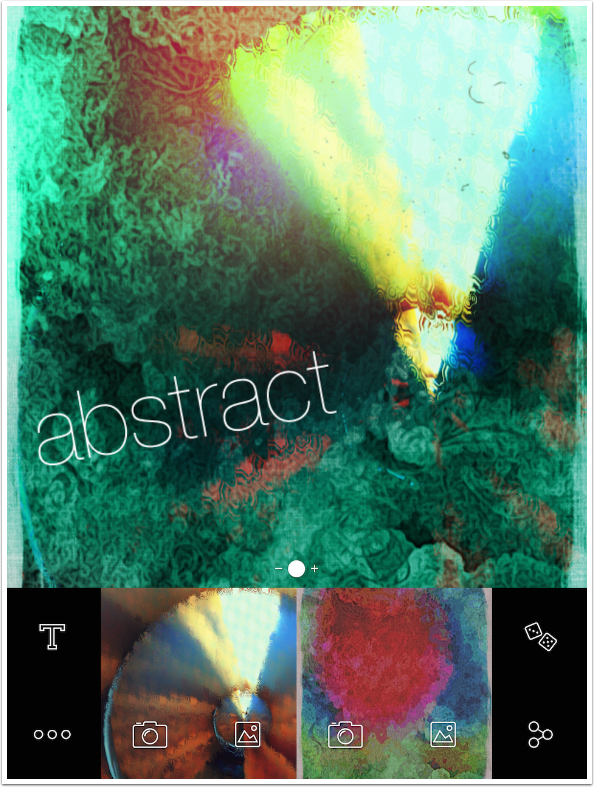
Once I tap the check mark to commit, notice the size and placement of the text. Compare them to the image above. They are not the same! So: you can’t change the font or the color, and any changes you make to size and placement can not be previewed accurately. Avoid the use of the text tool.
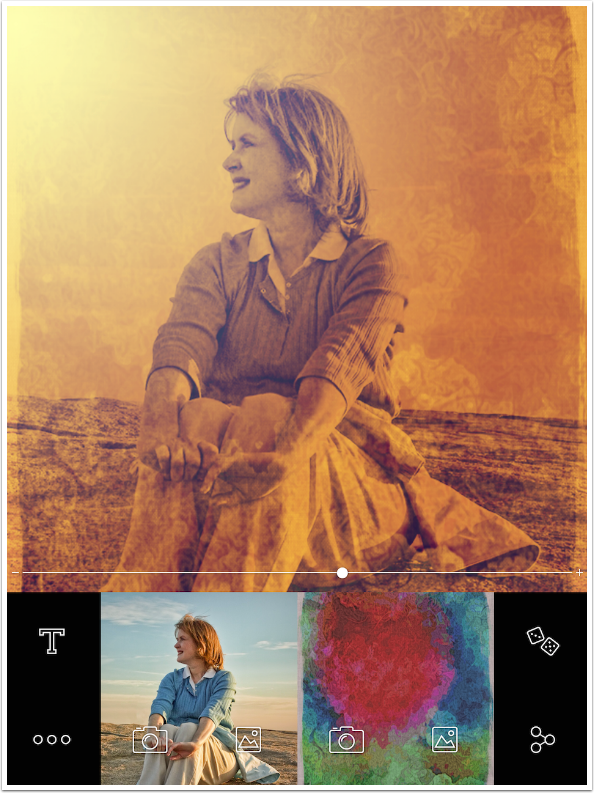
If a texture is used as one of the images, you can get some really nice results. Below I’m using a texture on the right with the Savanna filter. I skew the slider slightly towards the texture.
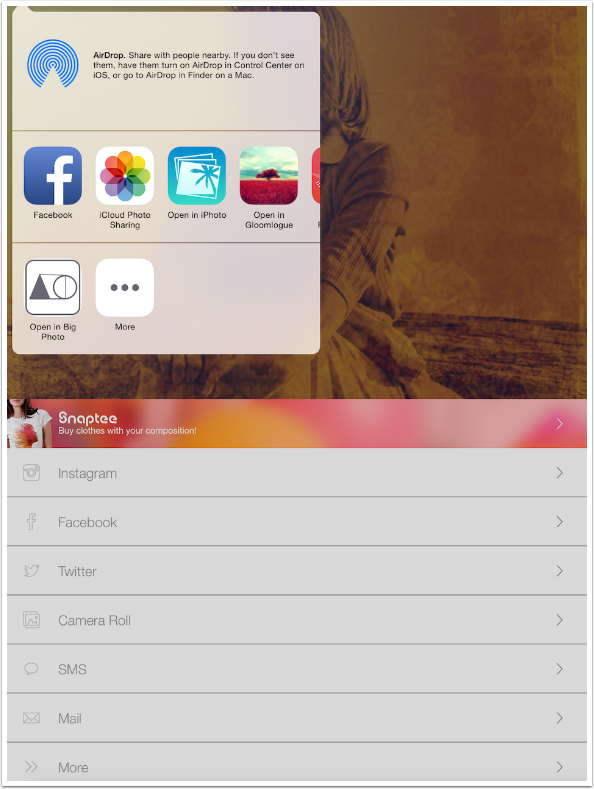
Now I’m ready to save my image. I can tap on the Share button, or I can tap anywhere on the image and the Share selection will come up. You’ve probably seen this yourself; an inadvertent tap rather than a swipe or a hold, and Diana will want to Share your image. That’s not a good idea in my opinion.
You might have to scroll down to see all eight options.
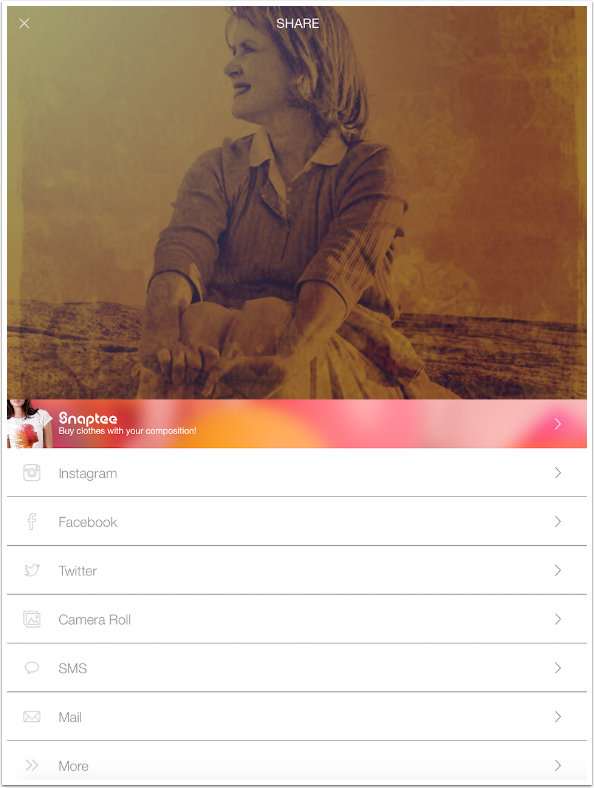
The last option is More, which brings up the iOS “Open in…” dialog.
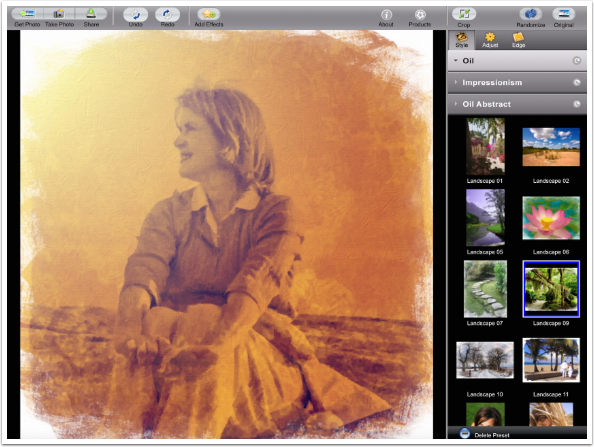
I opened it in Artista Impresso, and applied the Landscape 09 preset.
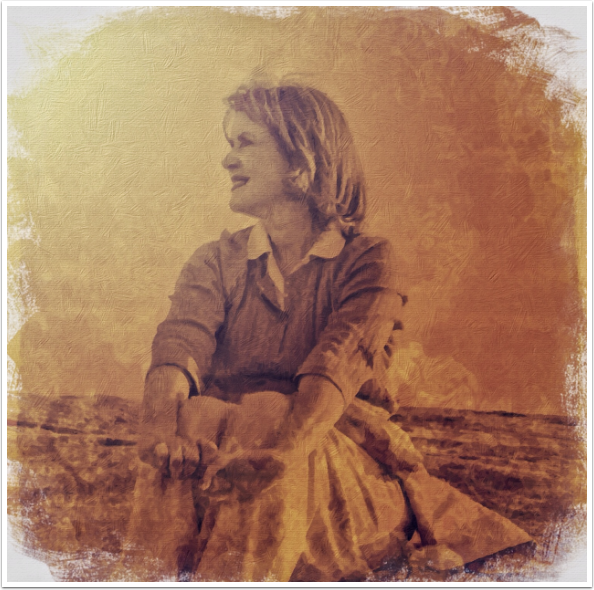
I then took it into Snapseed to desaturate and sharpen.
I prefer more control in my apps than I see in Diana. I’d gladly trade out the useless and annoying text function for the ability to resize and rotate the random images. But I’m not sure I would ever think to blend a portrait and an abstract in quite this way, without Diana.
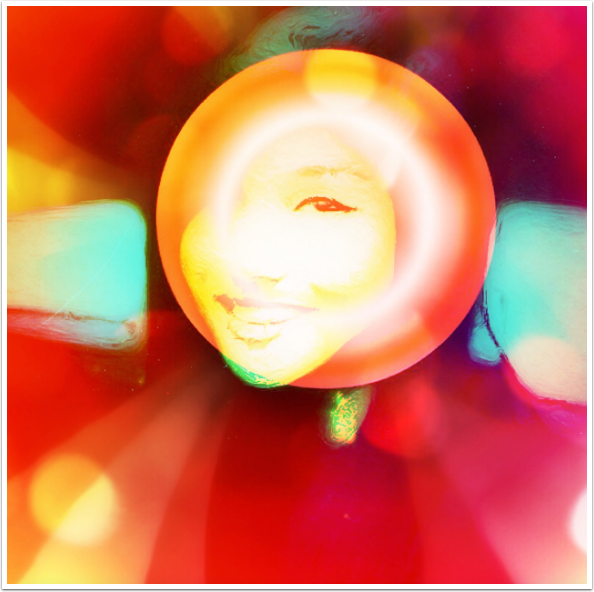
In the end, the “happy accidents” that Diana gives me are worth the aggravation. Sometimes Diana can even cook up something that needs no further seasoning!
Jerry Jobe
Never content with just scratching the surface of what an app can do, Jerry Jobe decided to pass on what he learned about imaging apps to others. He’s constantly trying to figure out just what tools other artists have used, and trying to incorporate them into his own work, in an attempt to find his style. He’s written tutorials on over 145 apps so far, which you can find (along with his Song of the Day entries) at http://enthusiasmnoted.wordpress.com/ He lives near Atlanta, Georgia, where he also finds a creative outlet in acting and directing in community theater.

3 Comments
Diana Nicholette Jeon
I love Diana, I always have. In fact my image of the day for TAW on Monday was created using it. I do hate that some of the filters are SO OBVIOUS that the work totally appears that it could only be made with that app if they are used, and that the resolution, though recently improved, at least for the 6, if not the earlier phones, is still not that high. I end up taking screen shots of good combos it made randomly and combining them in better rez apps. I agree on the text and resizing though I have a work around on the latter.
Monica Smith
This is the best tutorial on here for anyone like me who is totally in the dark. This app was used in an art class. ( I only use ipad for watching video) and I wanted to use it for an image. Not quite there yet as all my images are in google / microsoft have to now find how to get Diane to go to Google photos. Thanks tI now have a source to find how to use this.
Susan
Helpful tutorial, Jerry. I didn’t know about resizing or rotating the images I import so that alone gives me a little more control over what is happening. It is a fun app to use when I want to “play” and give my creativity a boost!