iPhone Photography Tutorial – ‘How To Create A Breathtaking Still Life Using Mobile Photography’
Our new mobile photography tutorial section is in full swing and we’ve received much acclaim from the mobile photography community, thanks to all. If you’ve missed our previous tutorials you can catch them here.
We recently interviewed the creator of this tutorial, Irene Oleksiuk for our A Day In the Life of … series, if you missed that you can read it here.
We also published a previous tutorial by Irene entitled ‘How to create a stunning flower shot with artificial rain’ – if you missed that you can read it here.
Irene impressed us with her contemporary flower and plant iPhone photography, her images are simply stunning and so well executed.
In this tutorial Irene goes through the steps necessary to enable you to capture the stunning still life plant image below. Basically, Irene set this image up with some figs she had brought home from the grocery store and the grass seed heads are a native grass that grows in her back yard. Irene arranged them and shot away, she had a vague idea of what she wanted the finished image to look like. An old artistic painting with glow and darkness. She certainly captures that in ernest.
Read this easy to follow tutorial and see if you too can create a similarly stunning shot. (We have put links to the iTunes app store of every app that was used, just in case you feel inspired enough to download them).
Final Image
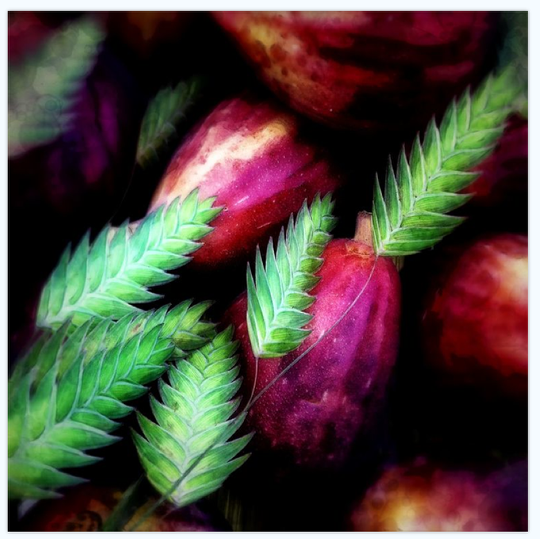
The image above is the final image, the one that we are going to show you how to recreate.
Original Image
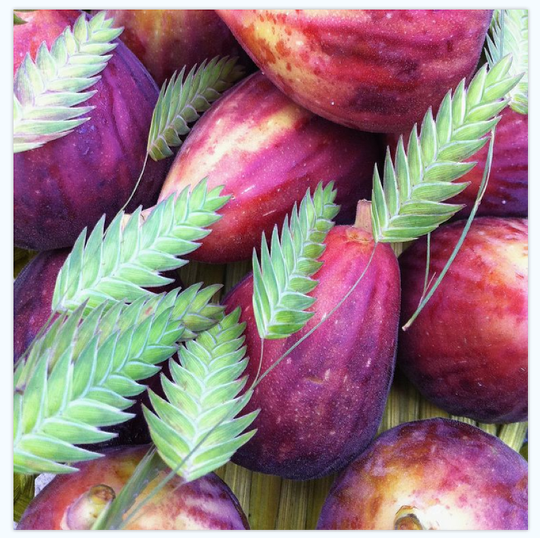
This is the original unedited photograph, Irene staged this image herself, with future thoughts focused on an image of an old artistic painting with glow and darkness.
Snapseed
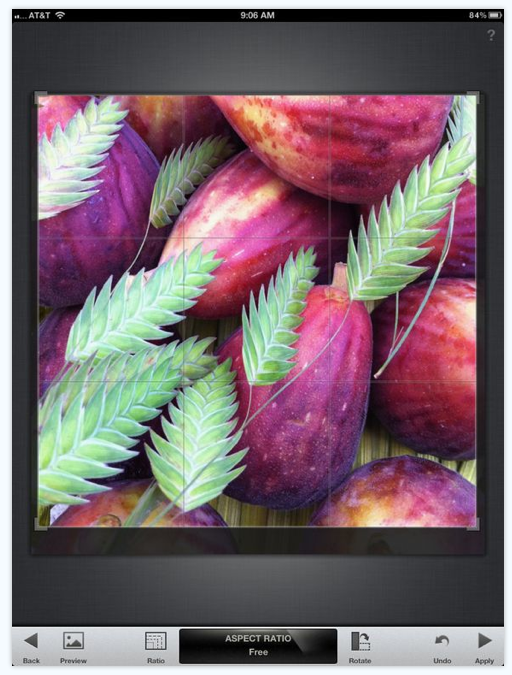
Firstly, Irene opened the image in Snapseed and selected Crop to shape to ensure she kept in the shot what she wanted.
Contrast

Next, whilst still in Snapseed, Irene added some Contrast to the image to help define it a little more.
Selective Adjust
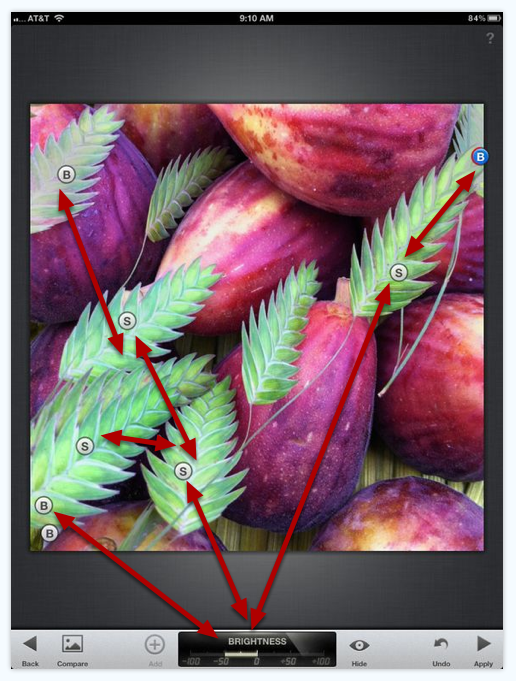
Next, again still in Snapseed, Irene used Selective Adjust to add control points to areas she wanted to enhance, with either brightness, contrast and saturation.
Tune Image
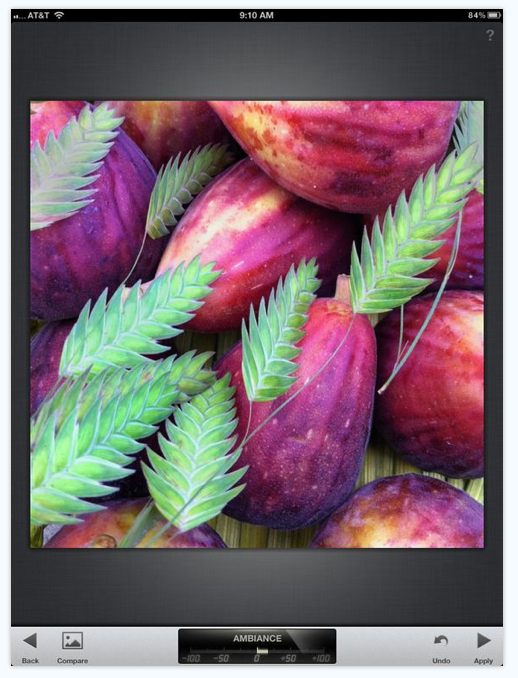
Next still In Snapseed, Irene headed to Tune Image and used ambiance to give the image a bit of warmth. You can find ambiance by rolling your finger over the image which will give you the choices.
Sharpening or Structure
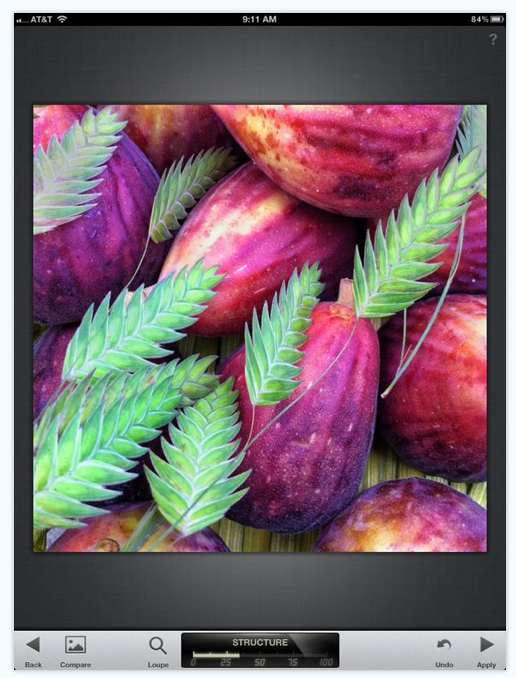
Centre Focus
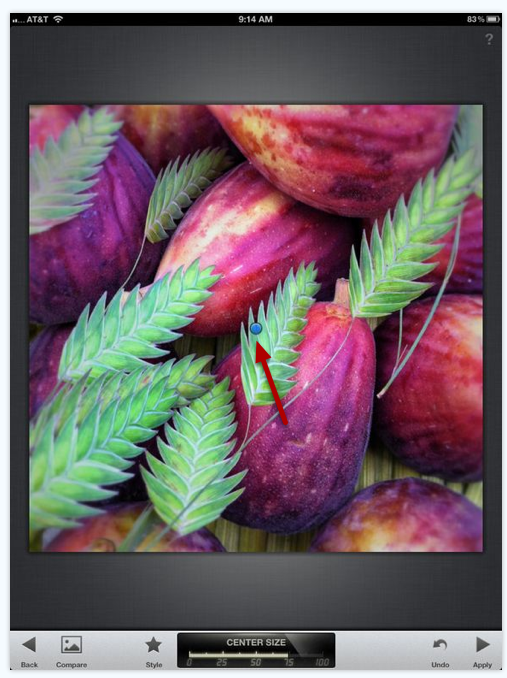
Still within Snapseed, Irene selected Center Focus. This will blur out some areas. A little blue dot appears when you chose Center Focus and can be moved around to where you want the center to be. You can use your fingers to make the size of the center bigger or smaller.
Blur
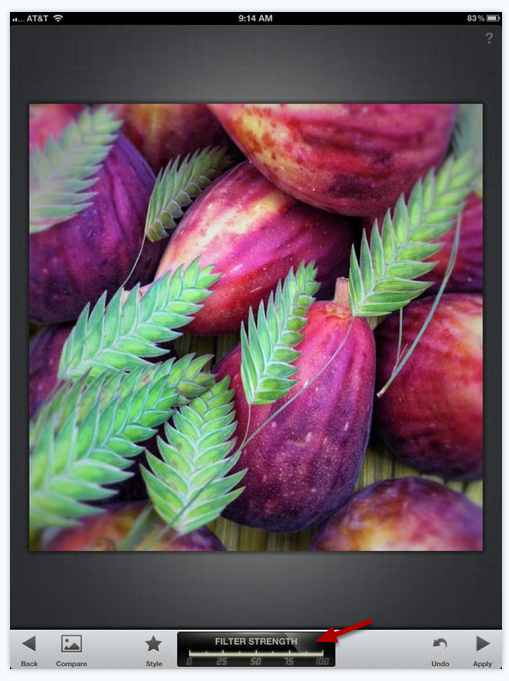
Whilst still in Center Focus. If you slide your finger up and down on image, you get some choices, either center size or the blur filer strength, here Irene chose to go all the way to 100% for the strength.
Style
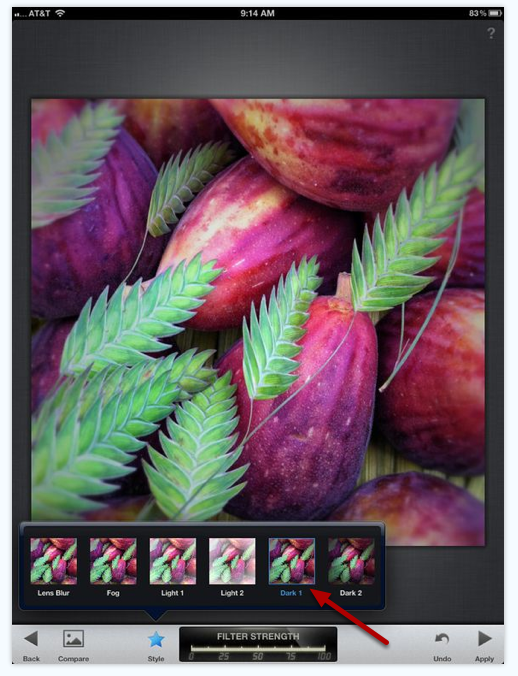
Right next to the word Filter Strength, there is a star with Style written, if you click on Style you get more choices. Here Irene chose Dark 1. It gave her the darkness and moodiness she was looking for. Irene saved the image.
Photo FX Ultra
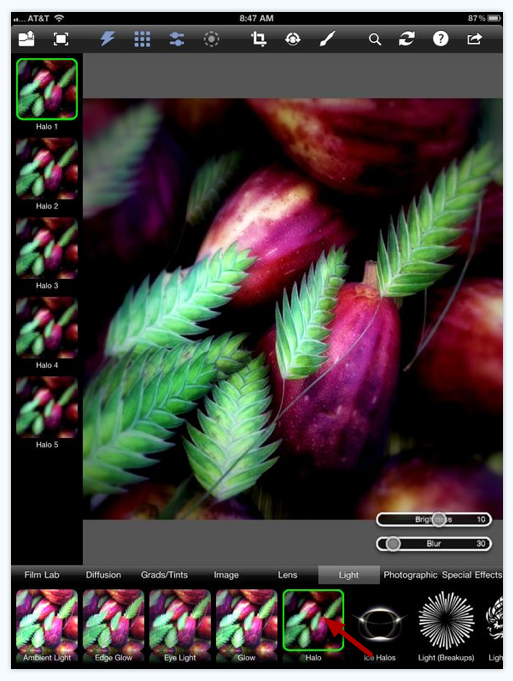
Next, Irene selected the Photo fx Ultra app, she was looking for a glow. Irene went to the Light area and chose Halo 1 and then saved the image.
Touch Retouch
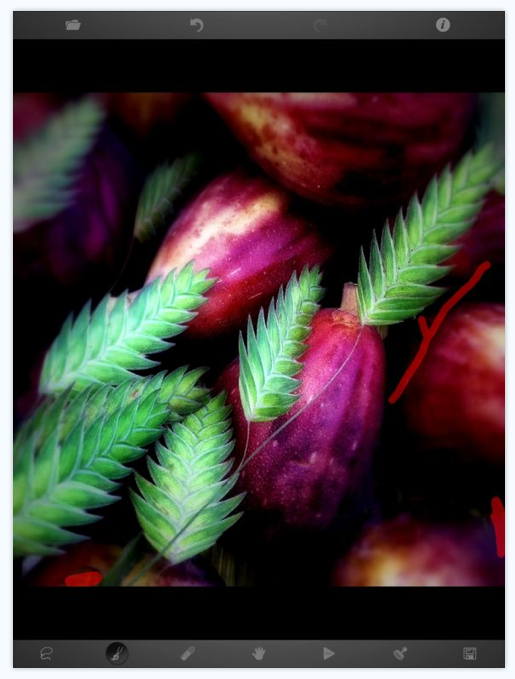
Next Irene opened the Touch Retouch app. The glow created a few overly bright areas, which she thought were wrong for this image. Irene used the brush to eliminate these areas, Irene then saved the image.
Paint Styles
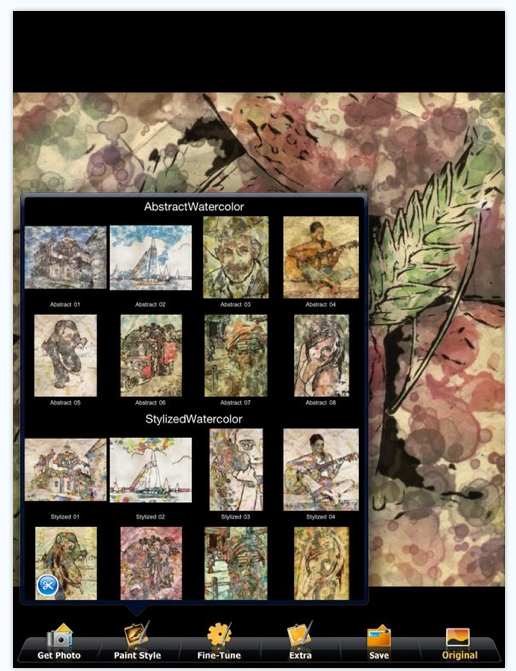
Next Irene opened the image in the PhotoArtista Haiku Hd app. The screen grab above shows the Paint stye choices, Irene picked Abstract 06 as its always fun.
Fine Tune
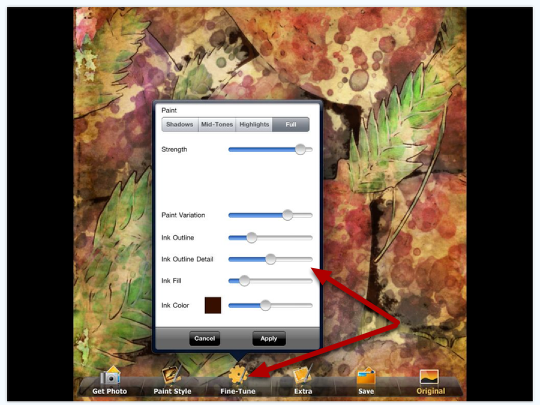
Next to Paint Style is Fine tune and here you can play with the sliders to get a different look.
Blender

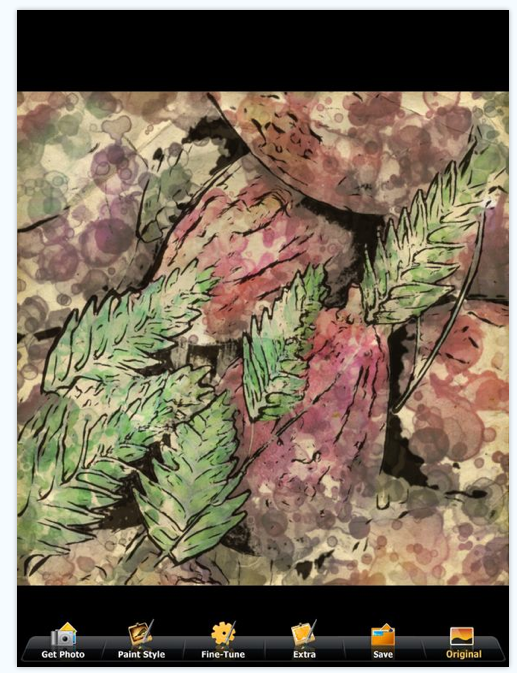
Finally, Irene selected the Blender app and blended the saved version after the Snapseed work with the PhotoArtista Haiku Hd version.
Irene used the Soft Light blend mode. Here again it is good to try out all of the blend modes to see which one appeals to your eye.
Final Image
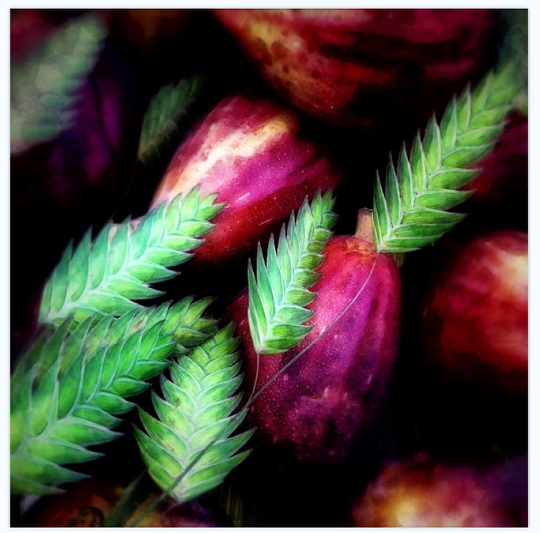
And here is that awesome final image again. We hope you successfully managed to follow that tutorial, please send us your similar examples, we’d love to take a look.

Joanne Carter
Joanne Carter is a British photography journalist, editor, curator, and the founder of *TheAppWhisperer.com*, one of the world’s leading platforms dedicated to mobile photography and art. Since its launch in 2009, TheAppWhisperer has become an international hub for artists of all levels to discover, learn, exhibit, and engage with contemporary photographic practice.Built on principles of inclusivity, accessibility, and artistic excellence, Joanne has spent almost two decades championing mobile photography as a serious artistic medium. Through interviews, critical essays, exhibitions, competitions, and education, she has helped shape and document the evolution of mobile art on a global scale.Her work has taken her internationally, lecturing on photography and mobile art at institutions and events including the Museum of Art in Seoul, South Korea, alongside appearances in the UK and Europe. She has served as a juror for international photography and mobile art awards across Portugal, Canada, the United States, South Korea, Italy, and the UK.Joanne is also the founder of *TheAppWhispererPrintSales.com*, one of the first online galleries dedicated exclusively to collectible mobile art, connecting artists with collectors across Europe, the United States, and Asia.Before founding TheAppWhisperer, Joanne worked extensively in print journalism and photographic publishing, including roles at a paparazzi photo agency and as deputy editor of a leading photography magazine. Her freelance journalism, criticism, and commentary have been published widely in both the UK and the US, with bylines in *The Times*, *The Sunday Times*, *The Guardian*, *Popular Photography*, *NikonPro*, *DPReview*, *Which?*, *Vogue Italia*, *LensCulture*, the *BBC*, and more recently, the *Financial Times*, where her published letters on photography continue to contribute to wider conversations around the medium.Alongside her editorial and curatorial work, Joanne’s own photographic practice has been exhibited internationally across the UK, Europe, South Korea, and the United States. Her work increasingly explores themes of grief, loss, death, memory, and the body.Her current research interests centre on grief, death, and poverty, with forthcoming postgraduate study leading towards doctoral research in these areas.Joanne is currently developing new long-form writing and photographic projects and is available for commissions, editorial projects, speaking engagements, and collaborations.Contact: joannetheappwhisperer@gmail.com)
2 Comments
michael n sutton
Fantastic tutorial, and great to see another artists sharing their techniques with the rest of the community, very very much appreciated and well deserved of a re-share on Google+, Facebook and Twitter.
THANK YOU.
Regards
Michael Sutton
Cronulla Beach, Sydney, Australia.
Leah
Loving these tutorial articles – seeing how other people use photo apps really helps me decide which ones to buy, and it’s also fun to see different uses for apps I already own.