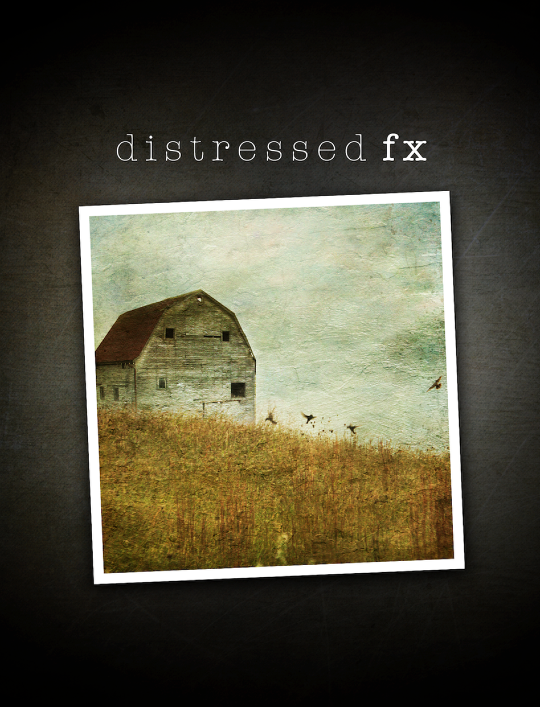
Technical Tutorial – DistressedFX – By Jerry Jobe
We’re delighted to published this wonderful tutorial by Jerry Jobe on the very popular effects app for iOS photography, DistressedFX. This app brings quite a sophisticated look to your art and we’re quite sure you will find this tutorial invaluable. Over to you Jerry (foreword by Joanne Carter).
“There are times when the perfect finishing touch for an image is a bit of grunge. I’ve already covered two grunge apps that make the image look as though the image was taken through a haze of dust, scratches and light leaks – ScratchCam and Mextures. But there’s a different category of grunge that has a more artistic quality. In this category are Grungetastic, which I’ve already written about, and today’s app, DistressedFX. The idea for this app started as a collection of textures created by Cheryl Tarrant, which proved so popular that it was turned into an app by We Are Here Limited. There are not nearly as many textures in DistressedFX as there are in Mextures or Scratchcam, but they are of such high quality that DistressedFX is in constant use on my iDevices.
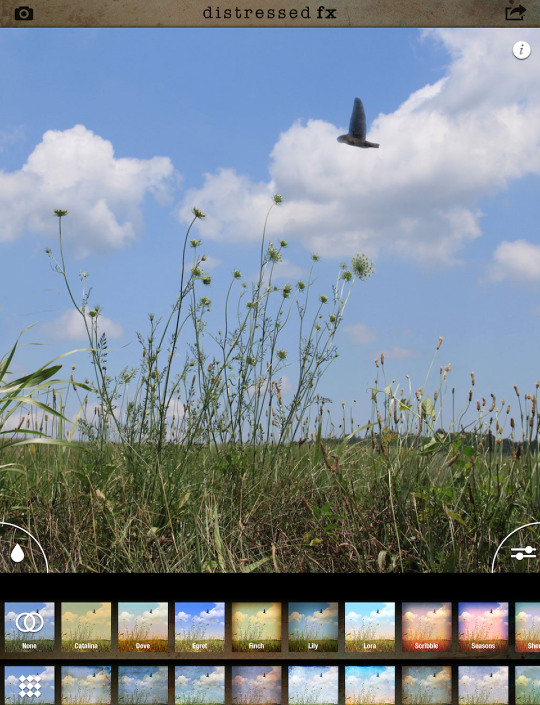
The screen shots for today’s tutorial were grabbed from the iPad, but they are similar to the iPhone because the app forces you into profile mode; DistressedFX does not work in landscape mode. The app opens with a very nice splash screen.
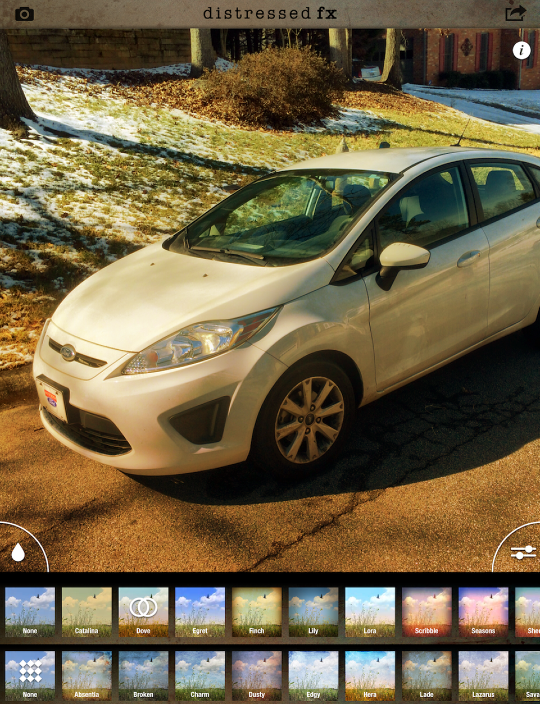
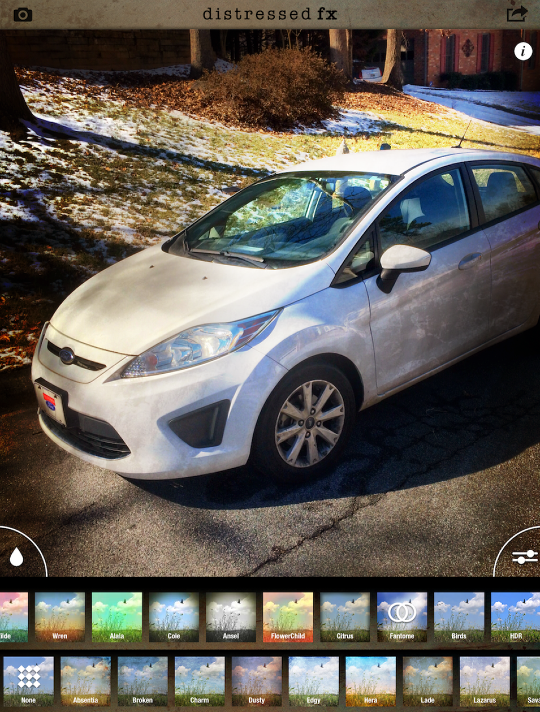
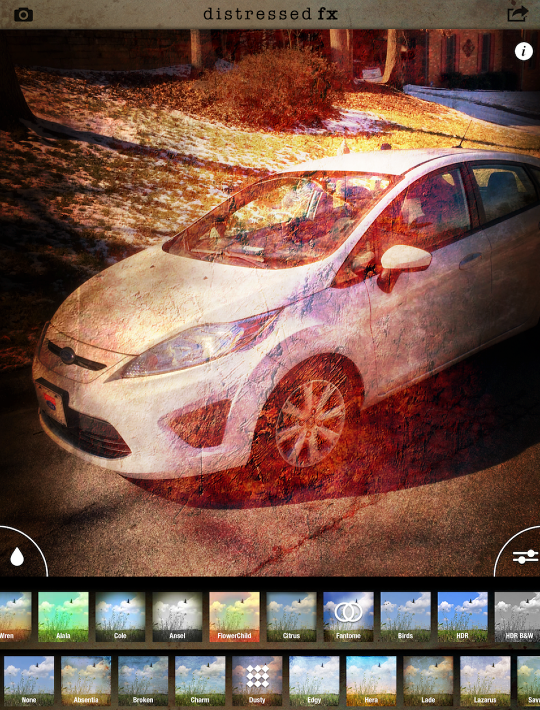
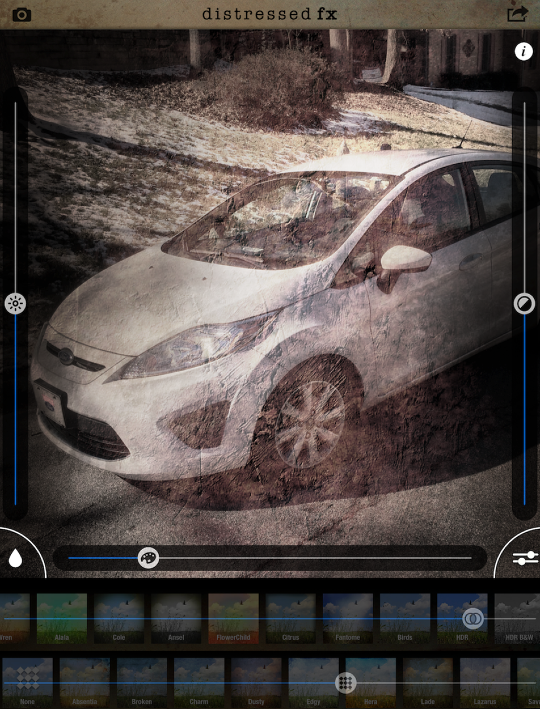
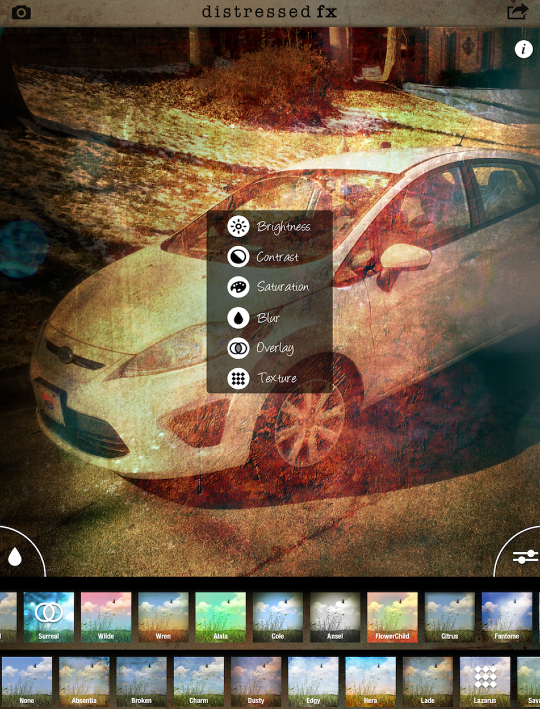
The interface is very simple. At the top are a Camera button to load an image, and the “box with an arrow” icon for saving the results. The image you’re working on fills the top of the screen, and there’s an “info” icon at the top right of the image space that provides help. At the bottom of the image are two icons – a drop for adding blur and sliders for adjusting the strength of the added grunge. At the bottom of the screen are two rows of boxes. The top row (for the most part) adds color “gels” or overlays to your image, while the bottom row is the textures.
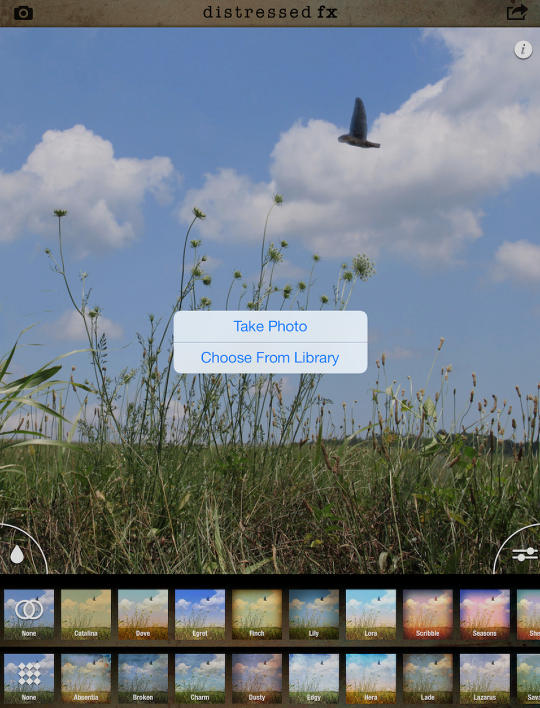
When you tap the Camera icon, you get to choose between taking a photo with the standard camera or loading an image from your photos. Do I really need to tell you that you should use other apps to take your pictures?
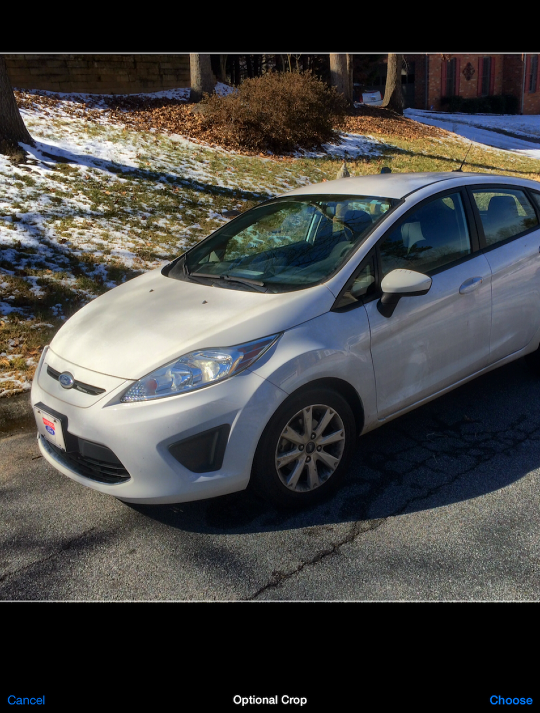
The image I’m going to be working with is a photo of my daughter’s late, lamented automobile. You are presented with an opportunity to crop your image into a square – DistressedFX offers no other crop ratios. As a matter of fact, the first release would force a square crop. Now, if you want to keep the original ratio, you just tap Choose at the bottom right.
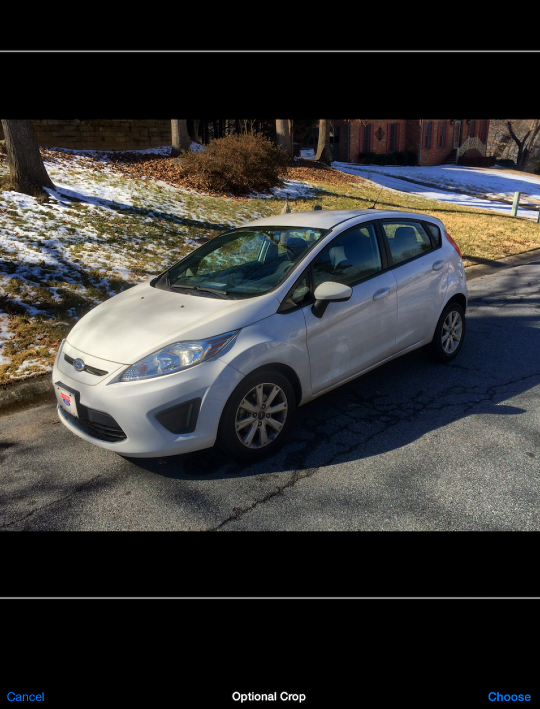
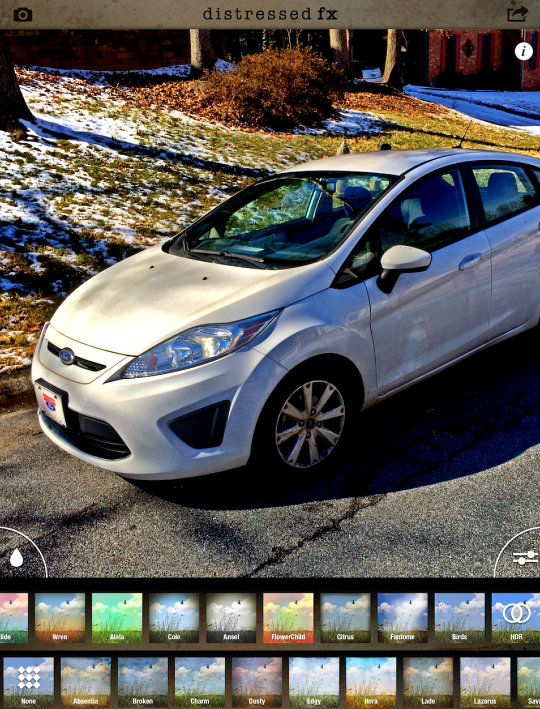
The typical pinch-and-drag will allow you to “zoom in” on the photo until it fills the square box. Tapping Choose at this point will apply the square crop.
The top row of thumbnails is the choice of Overlays. The first one I tried here is Dove – the linked double circles indicates the chosen overlay.
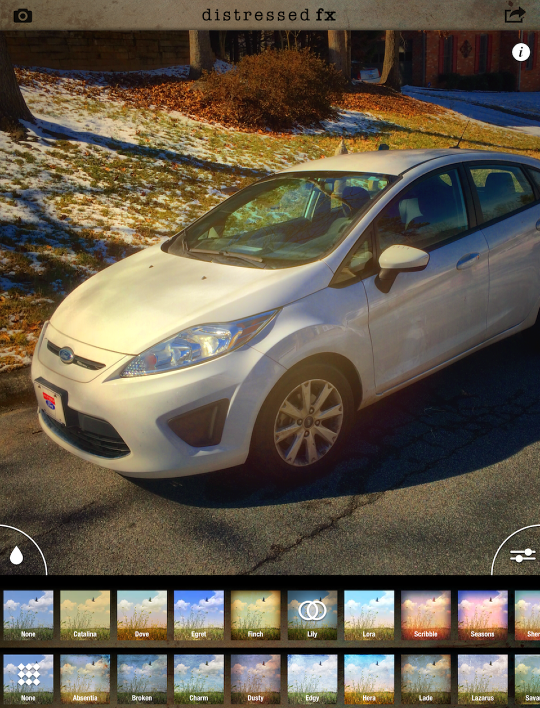
Below you’ll see I’ve changed the Overlay to Lily.
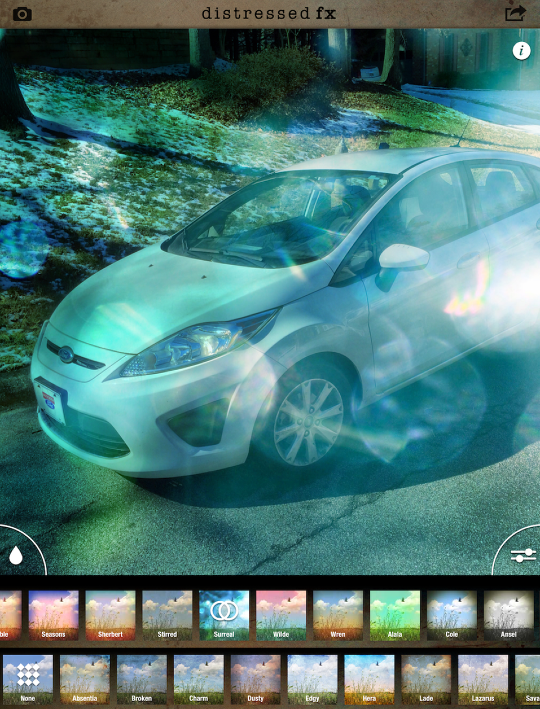
In addition to the color effects which look like colored gels, there are a number of stronger and more specialized effects included with the Overlays. The Surreal setting below is a series of light flares.
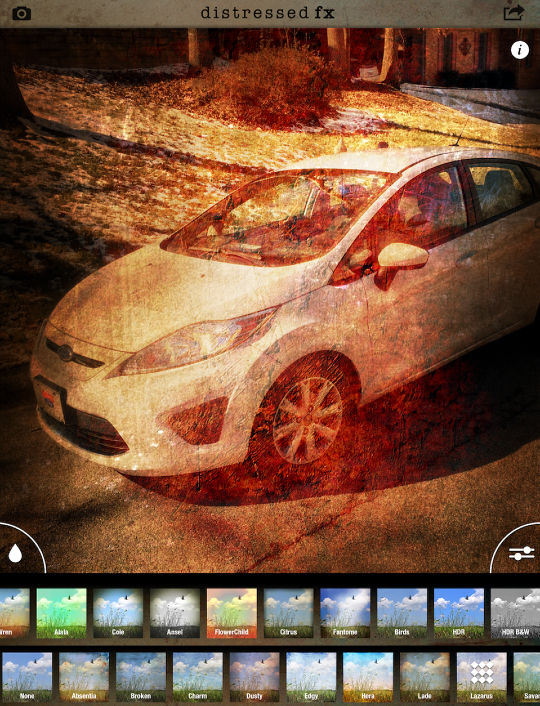
Fantome resembles a light leak diagonally across the center of the image.
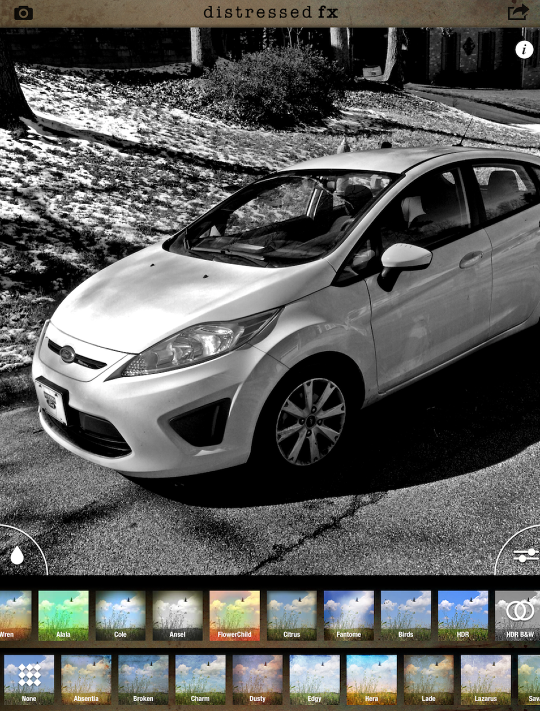
At the end of the Overlays row are two HDR settings – color and black and white. Below you’ll see the normal HDR setting. The settings (other than opacity) cannot be changed when creating an HDR image.
Here’s the HDR B&W setting.
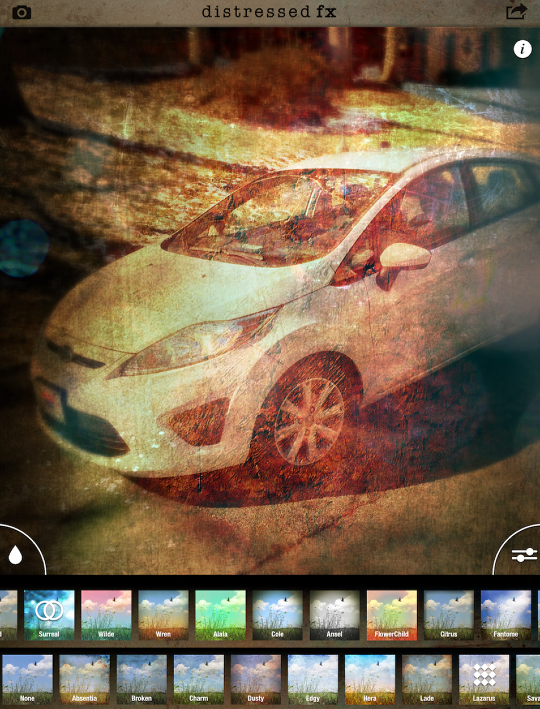
I go back to the Fantome setting on the Overlay row and move on to the bottom Texture row. The first of these is Absentia. The chosen Texture is indicated by a square of nine diamonds.
There are 17 textures in all, along with a Custom option at the end that allows you to load your own textures. I move on to Dusty. Take a close look at that texture – it’s complicated! But it’s a little strong. How do we tone it down?
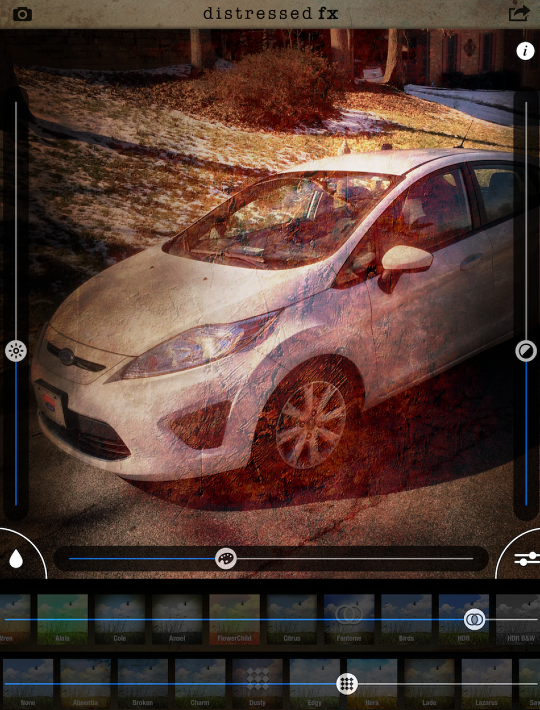
When you tap the Sliders icon at the bottom right of the image, five sliders appear. The two at the bottom control the opacity of the effects. The circles control the overlay, and the diamonds control the texture. I lower the opacity of the Dusty texture by about a third and the Fantome overlay slightly.
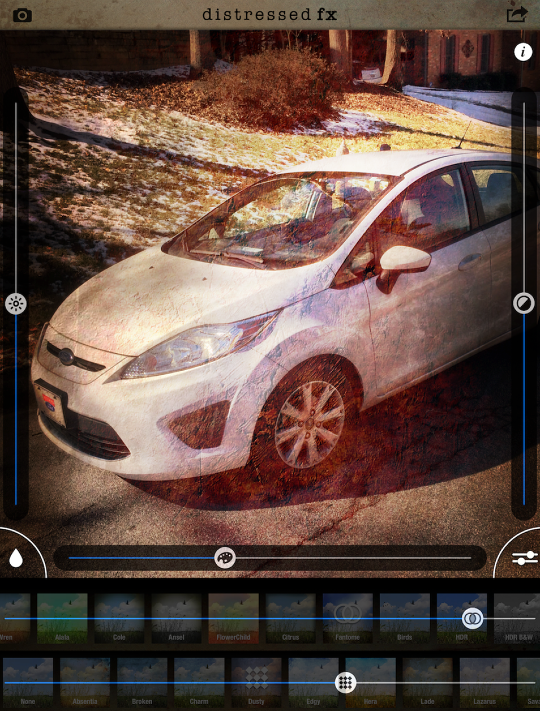
The remaining three sliders affect the underlying photo, but don’t touch the added overlay or texture. The one on the right is Contrast. I’ve lowered it slightly in the image below. I’ve also lowered the Saturation, which is the palette slider at the bottom of the image. Notice that the texture is still just as yellow around the front tire, since the saturation slider only affects the original photo.

Lowering the contrast made it a little too light for my taste, so I lowered the Brightness slider on the left to compensate.
Unlike Mextures, there is no capability built into DistressedFX to rotate the Overlays or Textures. But variation can be achieved by layering multiple effects. This layering is not the robust layering of an Adobe Photoshop, Filterstorm or Leonardo. Instead, layering in DistressedFX works as it does in Fragment or Tangent – the image is flattened and becomes the new base image, ready for more effects. In DistressedFX, you flatten the image by pressing and holding anywhere in the image. The following dialog box pops up.
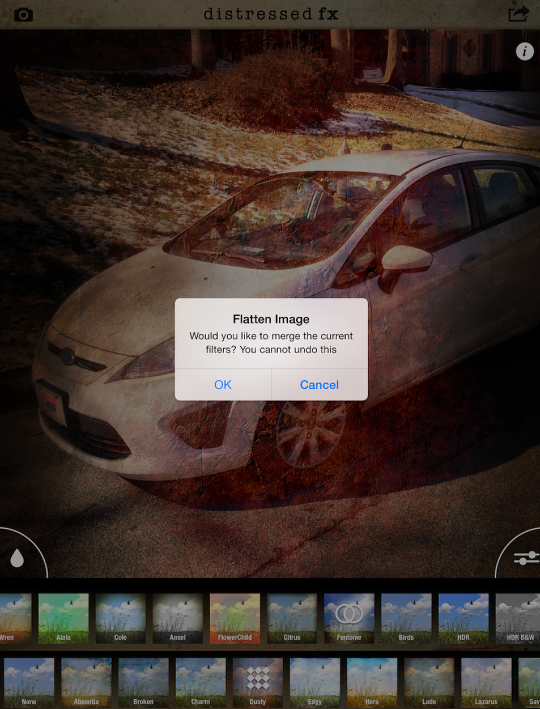
Once you’ve merged them, you can continue. The previous texture now becomes part of the underlying image, which means that the Brightness, Contrast and Saturation sliders will now affect the original image AND the texture. Below I desaturated the underlying image, which also removed that yellow color from the texture around the tire.
I add the Lazarus texture, and the image is beginning to look painterly, just from the addition of a couple of nice textures.
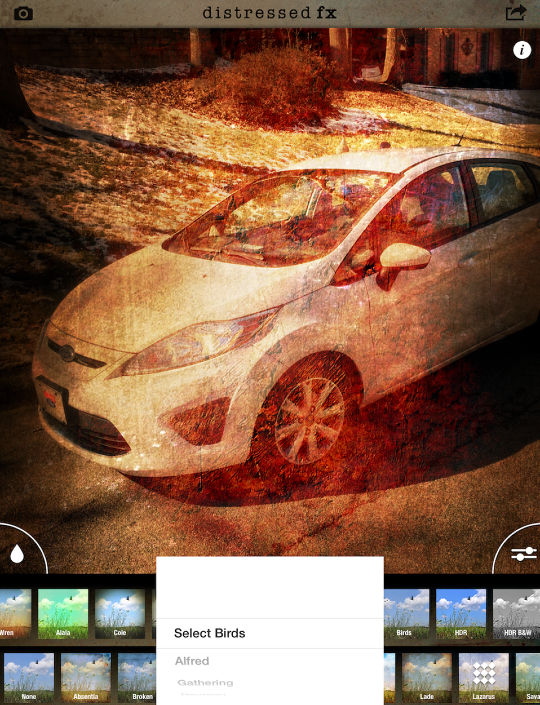
One of the “signature” looks of DistressedFX is the bird silhouettes which can be added to your image. You get to those in the third thumbnail from the end of the Overlays row. Selecting Birds brings up a scrollable list of different combinations of birds, from one or two to whole flocks.
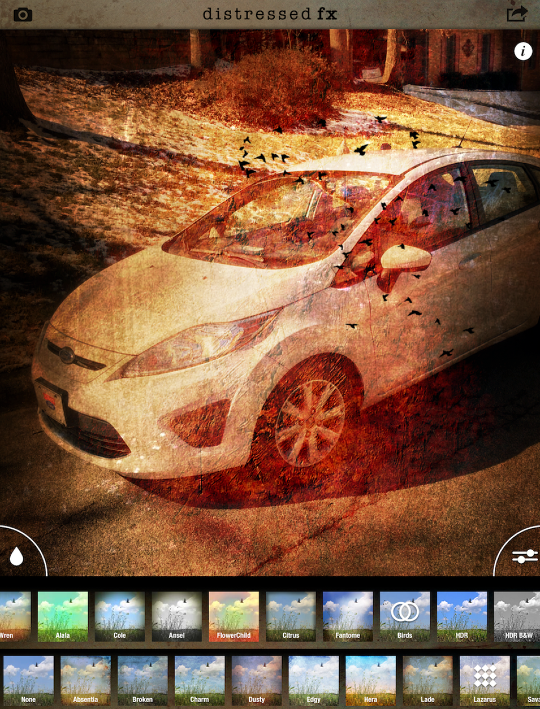
Below I’ve added a “Gathering” of birds to this photo, where they are wildly out of place. Remember: just like the other textures and overlays, they are not moveable. If they aren’t in the right place, there is nothing you can do within DistressedFX to place them elsewhere.
If you wish to add blur to your image, that can be done with the Blur option. Tapping the Drop button at the lower left of the image brings up a dialog box that asks if you want the blur masked in a straight line, a circle (or oval if your image is not square), or no blur at all.
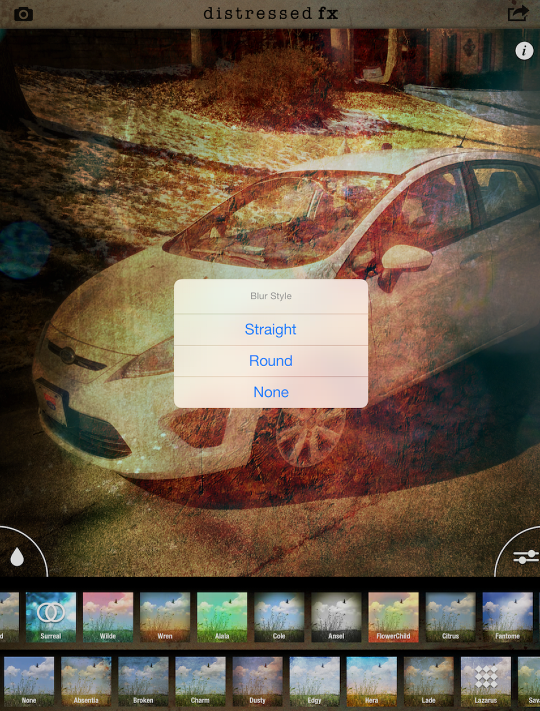
A two-fingered pinch and drag allows you to move, rotate or expand the mask. The light part of the mask will be blurred, while the darker part is not affected.
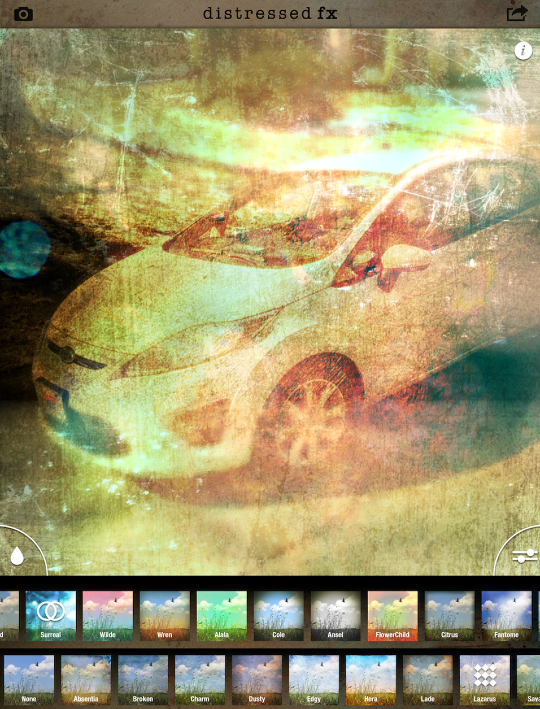
The added blur is very noticeable in the bush at top center. That can not be modified at the present time; there is no slider to change the amount of blur. There is also no slider to expand the transition area. Look at the difference between the top and bottom of the tire and how sharp the transition is. That may work for you, and it may not, but you won’t be able to change it. There are other apps that handle blurring better.
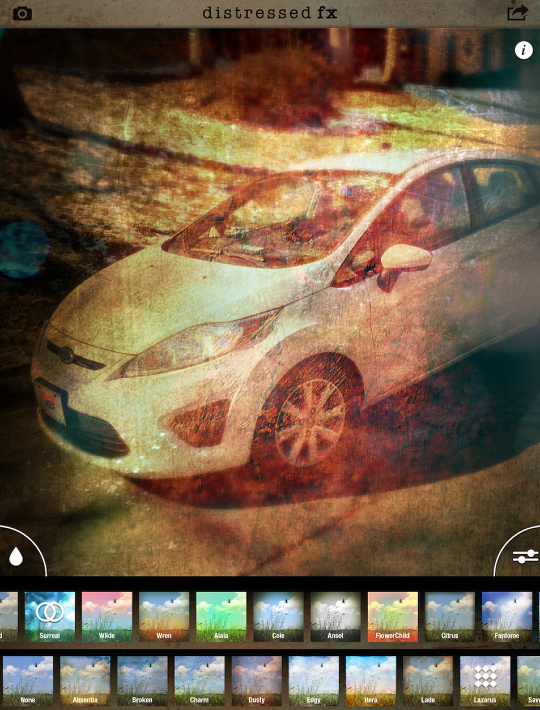
Round blur is handled the same way – the lighter areas around the edge will be blurred.
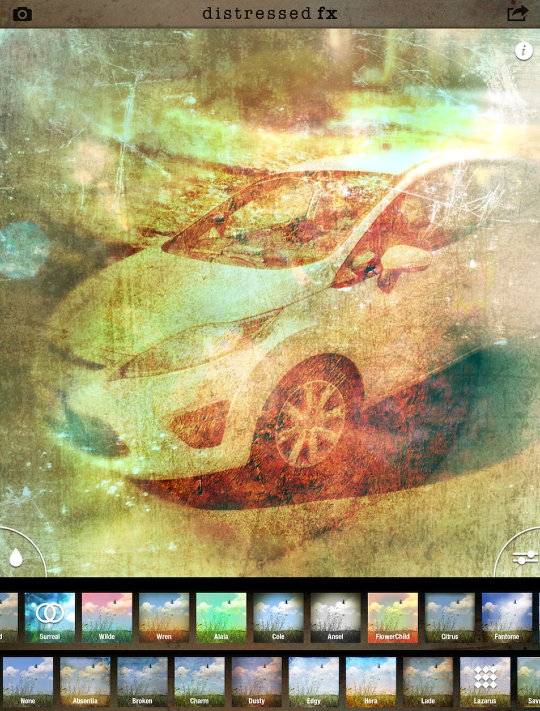
And here’s the result of the round blur.
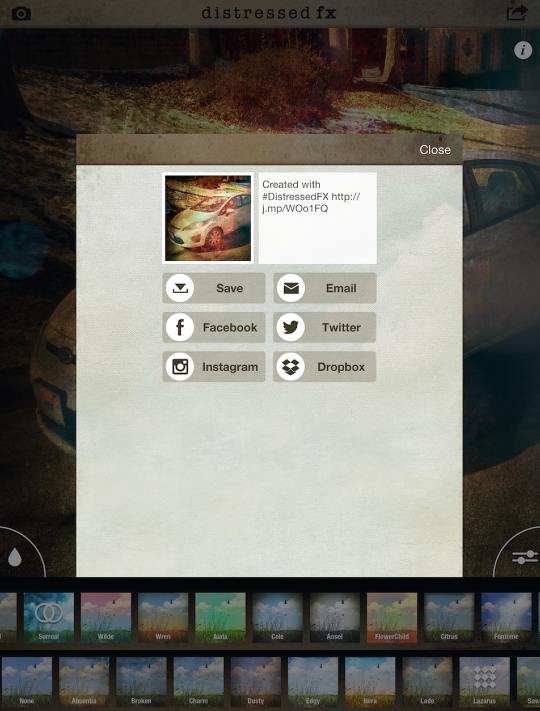
Here are the save options available in DistressedFX.
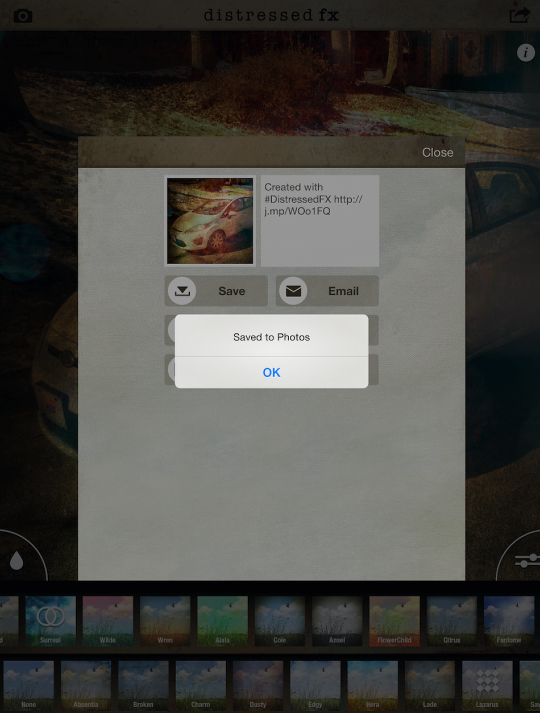
You will get a confirmation dialog box that your image has been saved, as seen below.
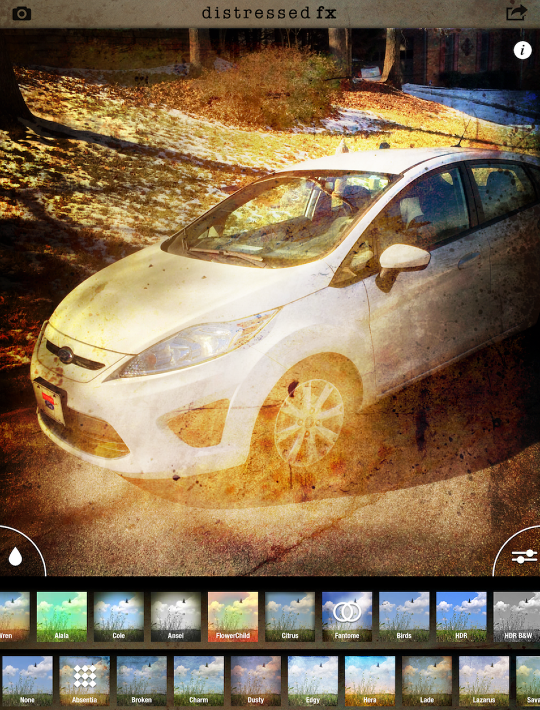
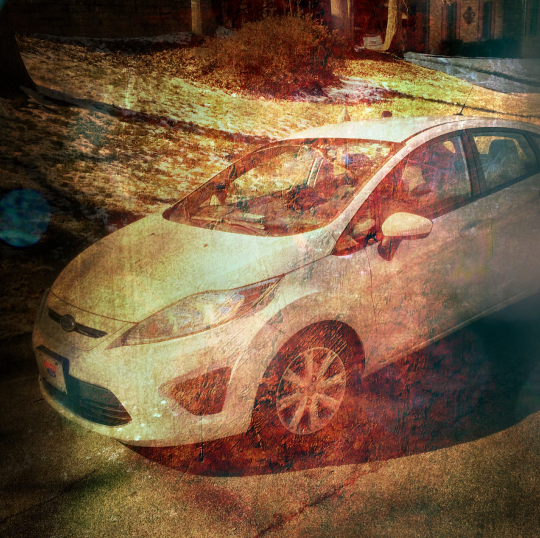
And finally, here’s my finished image, with one Overlay (Fantome) and two Textures (Dusty and Lazarus) added.
The help in DistressedFX is rudimentary. Below you will see the Quick Help; the advanced help (“More Information”) takes you to their website.
I’ll finish, as usual, with a few examples. Since DistressedFX is known as “artistic” grunge, I like to use it with iDevice “paintings”. Here I took an image, and made it a painting using iColorama. Then I took it through DistressedFX (Fantome) and then back into iColorama for the border and canvas texture.
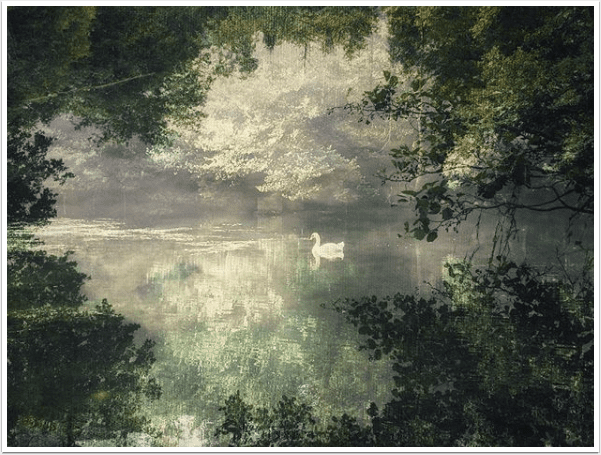
Here’s an image you might remember from an earlier tutorial. I must have layered 4 or five textures on top until it looks really old.
Here’s an image taken through Tangled FX to make it look like a carving before using DistressedFX.
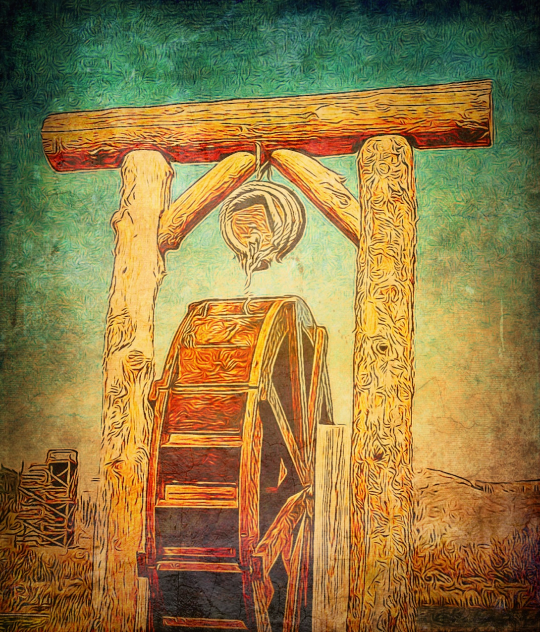
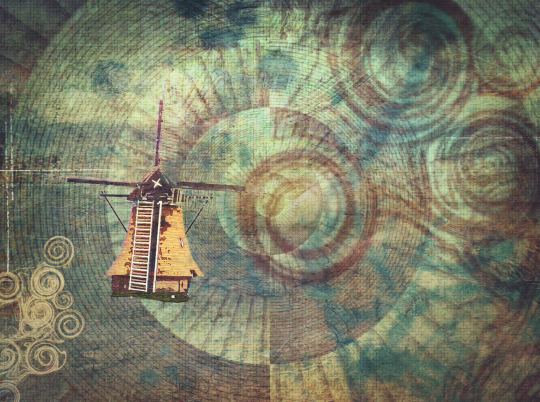
Grunge can help bring a composite image together. My flying windmill here really stuck out from the background, and the background was rather flat. But the mottling of DistressedFX applied over the entire image brings a cohesiveness.
There are many changes I would make to DistressedFX. The ability to rotate/move the effects would be my first wish list item. Fixing the blur feature in the way I described above would be another. But I like the included textures so much that I find myself using the app all the time; and isn’t that all that you could need from an app? Enjoy!
Jerry Jobe
Never content with just scratching the surface of what an app can do, Jerry Jobe decided to pass on what he learned about imaging apps to others. He’s constantly trying to figure out just what tools other artists have used, and trying to incorporate them into his own work, in an attempt to find his style. He’s written tutorials on over 145 apps so far, which you can find (along with his Song of the Day entries) at http://enthusiasmnoted.wordpress.com/ He lives near Atlanta, Georgia, where he also finds a creative outlet in acting and directing in community theater.
6 Comments
Jennifer
Another great tutorial – thank you so much. Please keep them coming. Would be wonderful to see the changes you suggest in a future upgrade to Distressed FX. Hope app developers read this site too!
tracy mitchell griggs
Good overview and callouts for improvements. Seems this app has a lot of heavy rotation in many mobile artist’s workflow. It is such a popular app, it would surprise me if they did not have a working artist focus group or beta team- the suggestions you make for improvement would only increase its popularity.
Denise
Love seeing the workflow here. Fantastic editing! It’s very interesting to see how others progress through their edits to get to their final masterpiece! Thank you!
lee atwell
wonderful! i enjoy using this app but didn’t know about the blur function – thank you jerry!
David
I see no information regarding maximum file sizes usable for Distressed FX. I am having a problem with “constrain” for a large file and am wondering if this has to do with size. Any thoughts?
Lynn
When I email the image to my computer it is only 1 Meg- how can I save at original size for prin??