iPhone Photography Tutorial – Blurring, Blending, Masking, Croping and More…
We’re really enjoying our new iPhone Photography Tutorial section here at theappwhisperer.com and we understand you are too, which is even better.
In this tutorial with help from Lene Basma, who we recently covered ‘A day in the life of…’ , we look at her work with post processing images of mannequins. The images are stunning but she openly admits ‘ seldom do I know where it is headed before I start, I just dive into it and see what happens’.
In this tutorial Lene started out with blurring out the background in BlurFX, she then goes to to blend, merge and create the most incredible shot. Read the rest of this easy to follow tutorial and see if you can too create a similarly stunning shot too.
(We have put links to the iTunes app store of every app that was used, just in case you feel inspired enough to download them).
Final Image
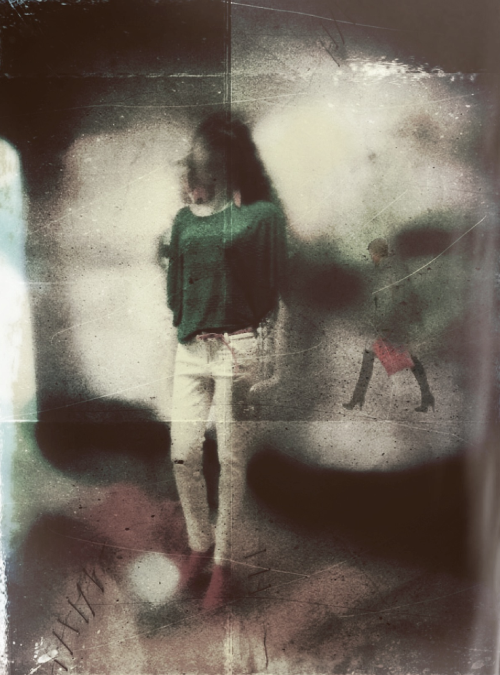
Copyright Image ‘It’s Ok, You Can Walk Away’ by Lene Basma
The image above is the final image, the one that we are going to show you how to recreate.
Original Image A

This is the first (A) original unedited initial image.
Original Image B
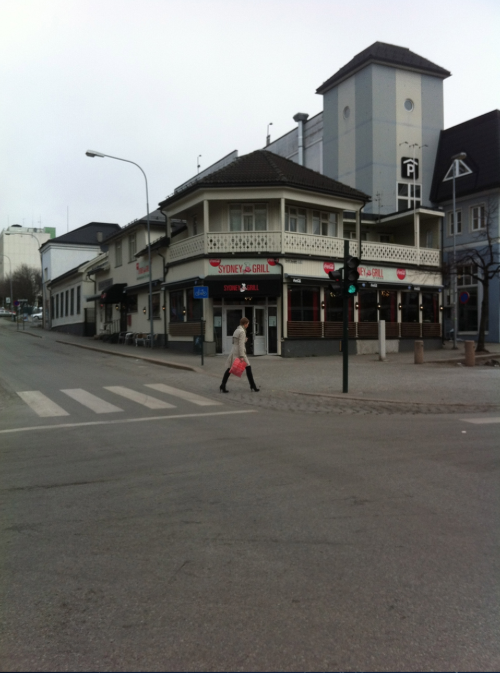
This is the second (B) original unedited inital image.
Blurring The First Time
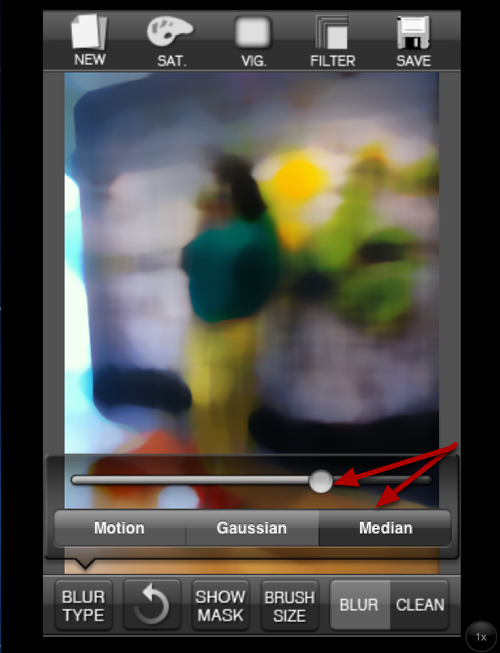
First of all Lene opened Image A in Blur FX and selected the Median Blur Type, set to about ¾ strength.
Saturation
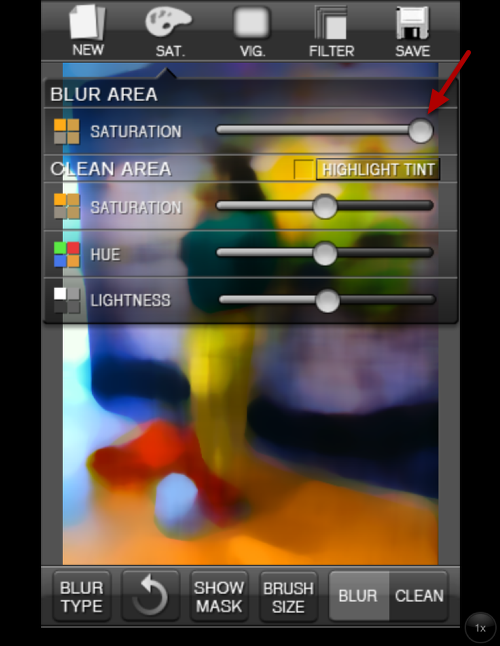
In this particular shot Lene kind of liked the bright colors, and in order to enhance them, she opened up the Saturation Menu and pulled the saturation on the Blurred area to the max.
Opaque

With the opaque brush Lene cleaned out the figure, leaving her face blurred. As Lene knew she wanted to grunge and layer this image, she wasn´t too particular when doing the cleaning.
Final Image of Blurring
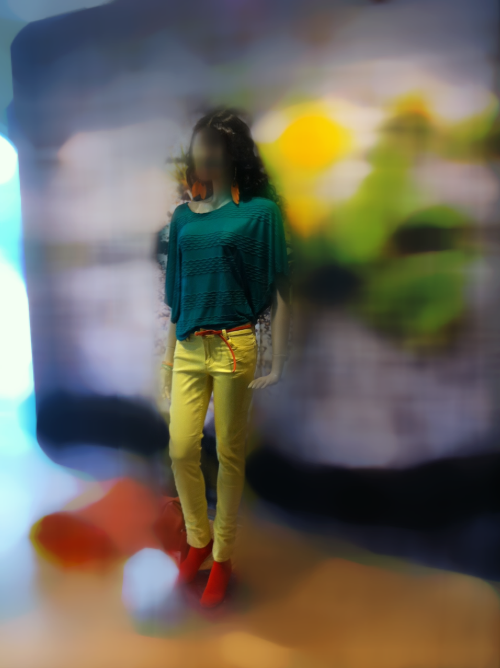
The result at this stage looked like this.
Grunging The First Time
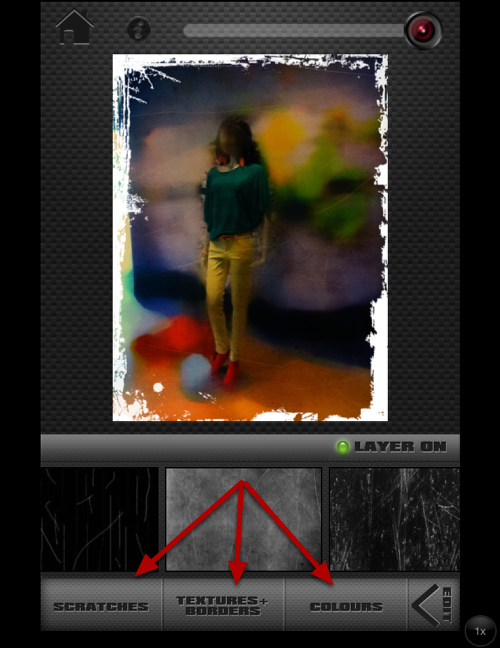
After saving the blurred image Lene opened it in ScratchCam. Lene often uses this app as part of her exploration process, just hitting the random button over and over, and then going to the edit menu to do the fine tuning when she sees something appearing that strikes her fancy.
In this first step Lene used the Scratches, Texture+Borders and Colors Combination shown in the images below.
Step 2
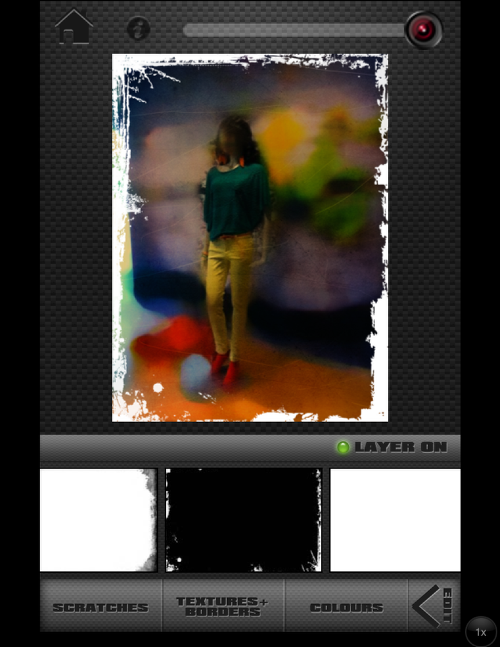
Step 3
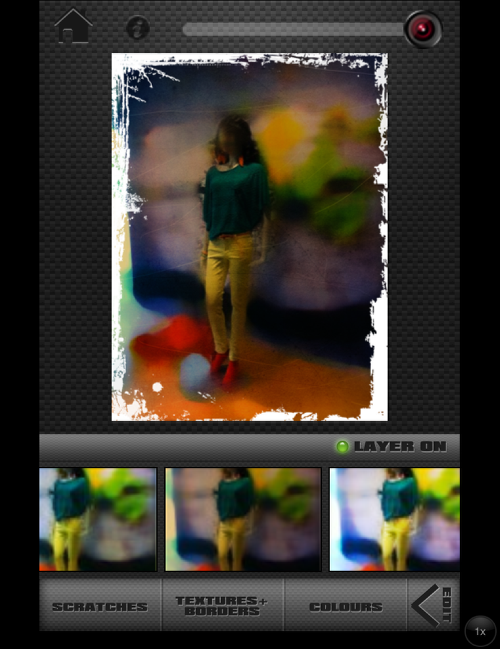
Step 4
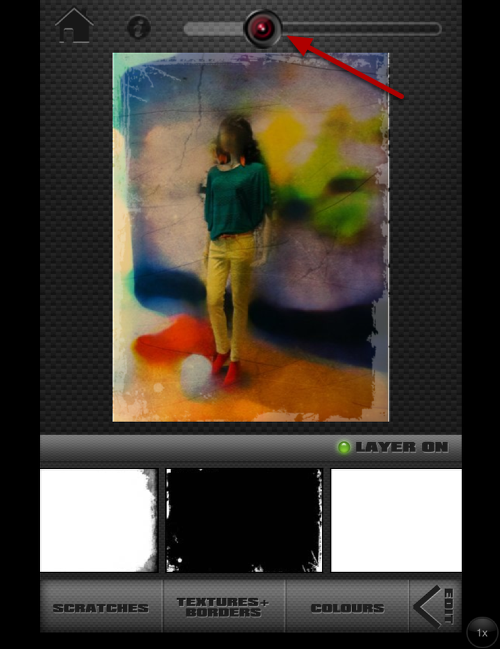
To reduce the Impact, Lene turned down the effect to about 25%.
Final Grunge

After that, the image looked like this.
Blurring The Second Time
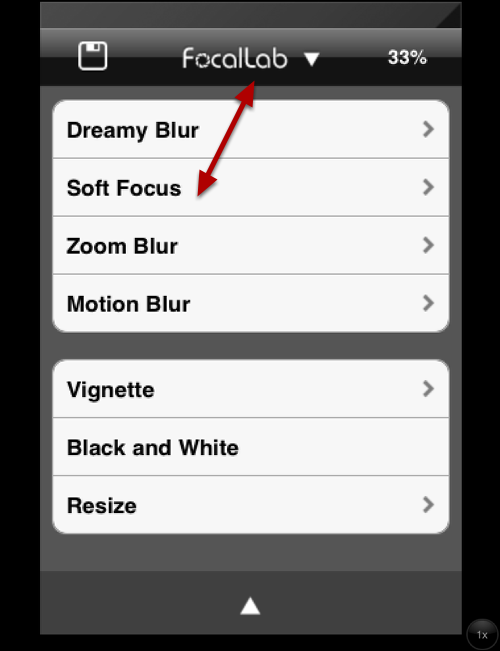
Next, although Lene cannot explain it, she often finds herself doing additional things to her images, in this case for example, for some reason or other, Lene decided to blur it some more. For this she used the app FocalLab and the Soft Focus option
Step 2

Next, Lene starting reducing the blur as shown in the image.
Blurring The Second Time – Final Image
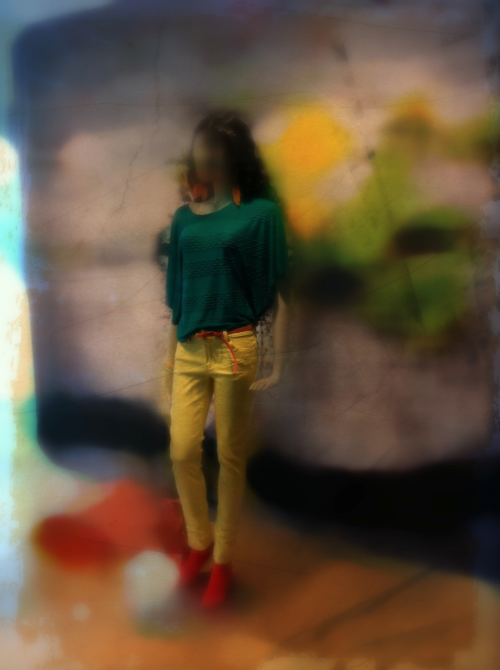
The image then looked like this.
Grunging the Second Time
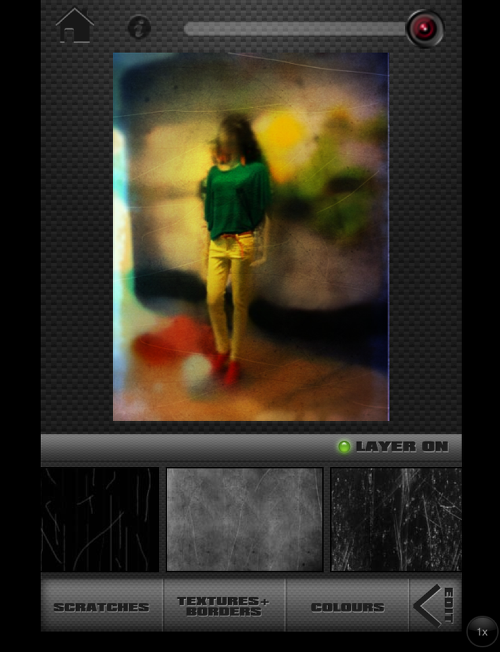
Next Lene then opened the image in ScratchCam again. Choosing a different set of effects shown in the images below. This time Lene left the effects at full strength.
Step 2
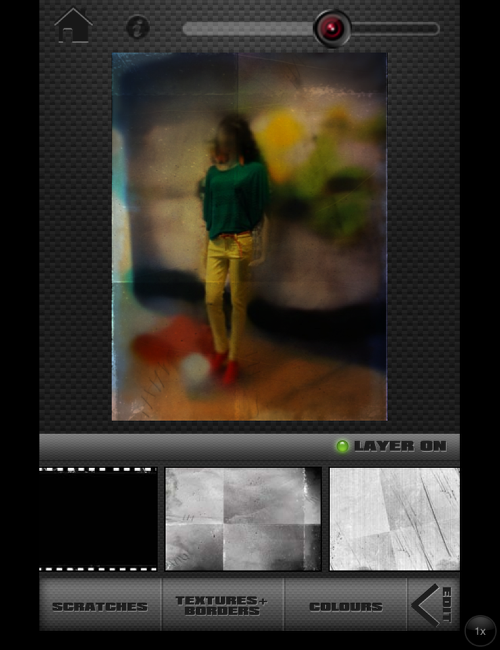
Step 3
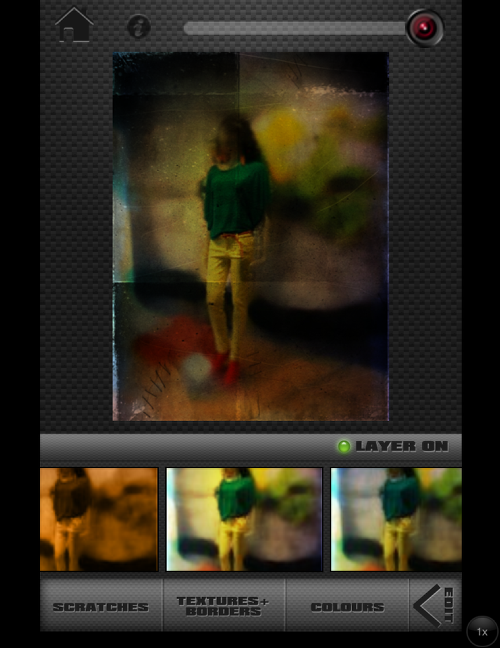
Final Second Stage Grunge
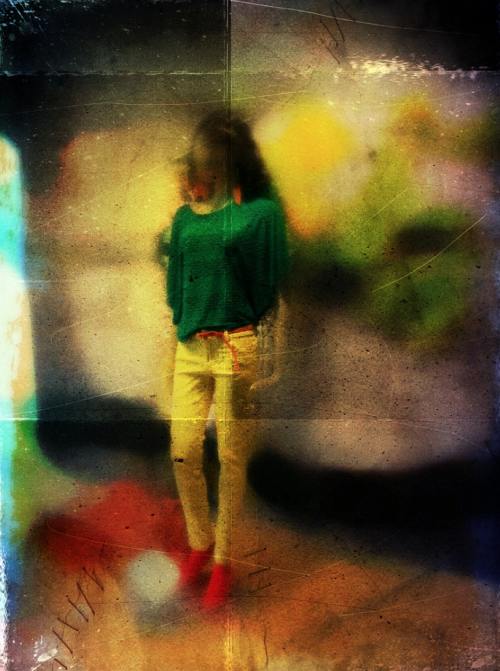
The final image then looked like this.
Muting the Colors and Adding Some Light
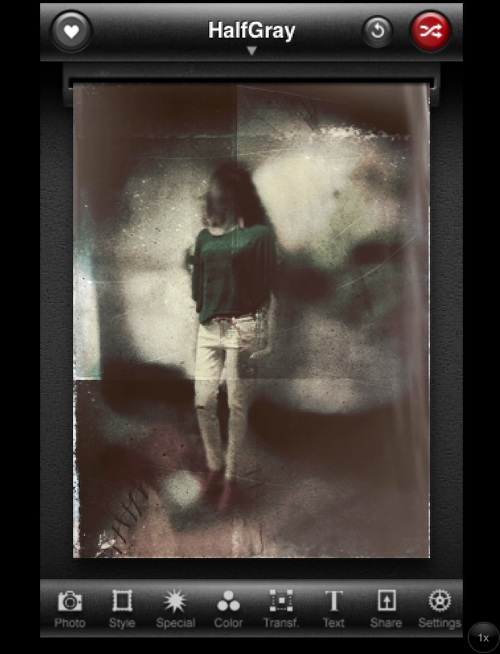
Again, this post-processing process is like a game to Lene, and then she decided to try out a different favorite app of hers, PictureShow, to see what it would do to the image. After trying out different options, I decided to go for the HalfGrey Effect.
Step 2
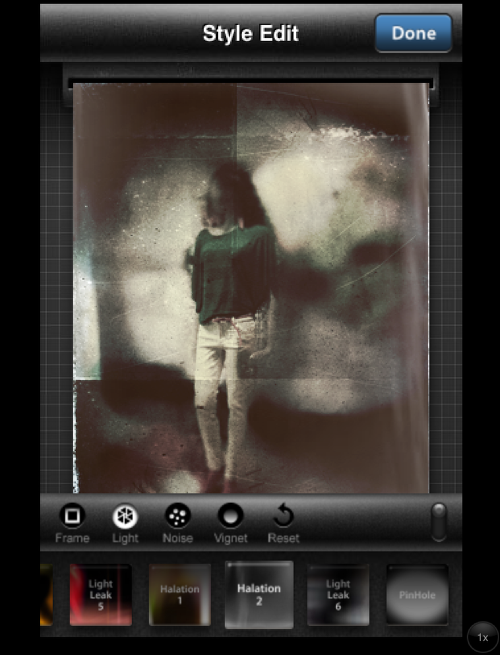
And then added Halation1 in the Style Menu.
Step 3
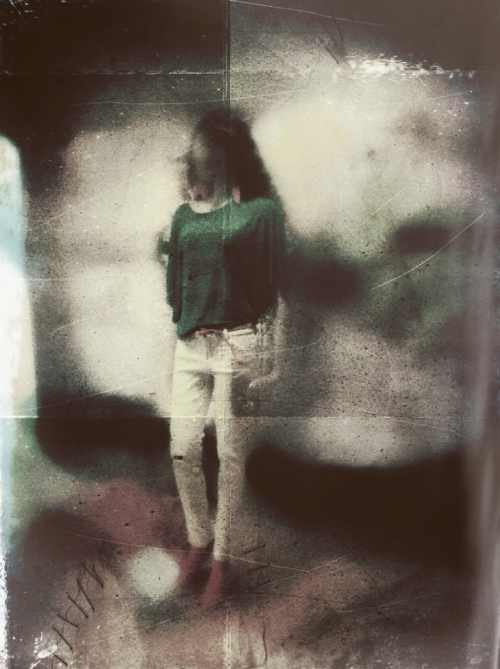
Lene now liked what she had, the colors and the feeling that the mannequin had come to life on one level or another… She looked like she was walking or turning away from something or someone.
Looking at the colors and the theme, Lene remembered a street picture she took of a woman walking with a red bag on that same day, and decided to try to blend the two images.
Flipping
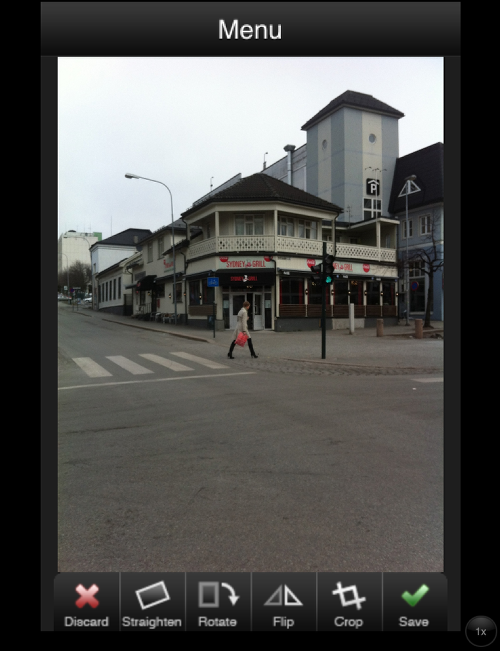
When Lene looked at the second image again, she saw that the woman was walking the wrong way, she wanted her to walk into the image and not out of it, so Lene opened CropSuey.
Step 2
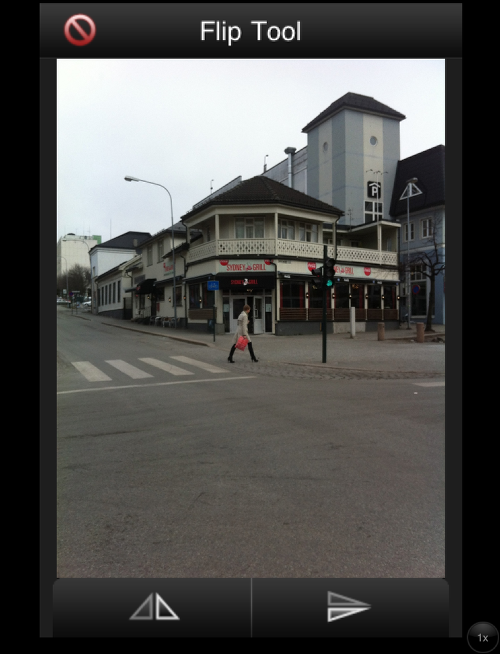
And selected the Flip option,
Step 3
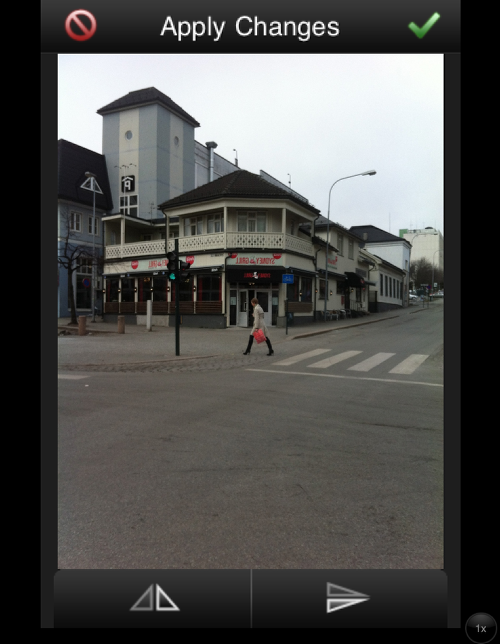
Lene flipped the second image horizontally.
Step 4
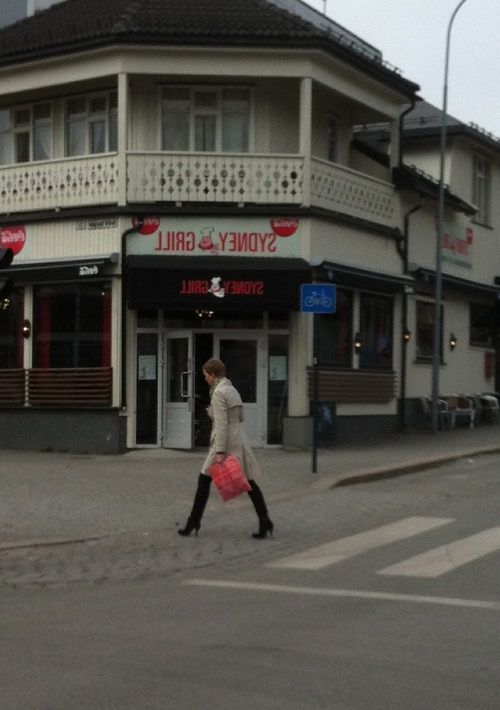
Ending up with this final photo of Image B .
Blending

Then for the last step… Lene opened Blender, tapped the first image icon and opened the Mannequin Image, tapped the second and opened the flipped image of the woman walking.
Step 2
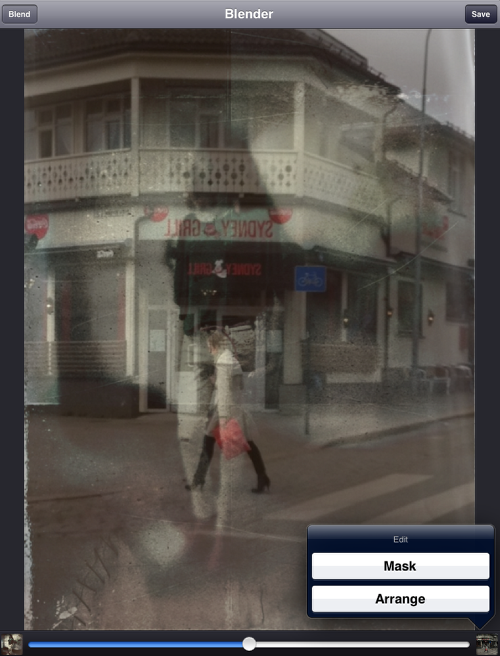
When Tapping the image once, Lene accessed the arrange function and positioned the picture of the woman where she wanted it.
Step 3
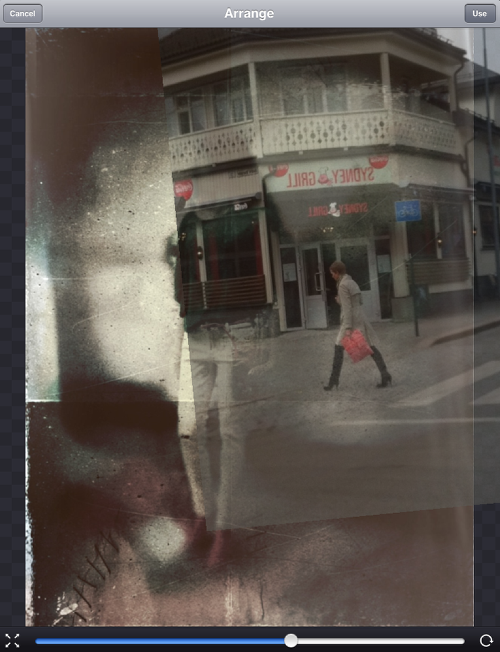
Step 4
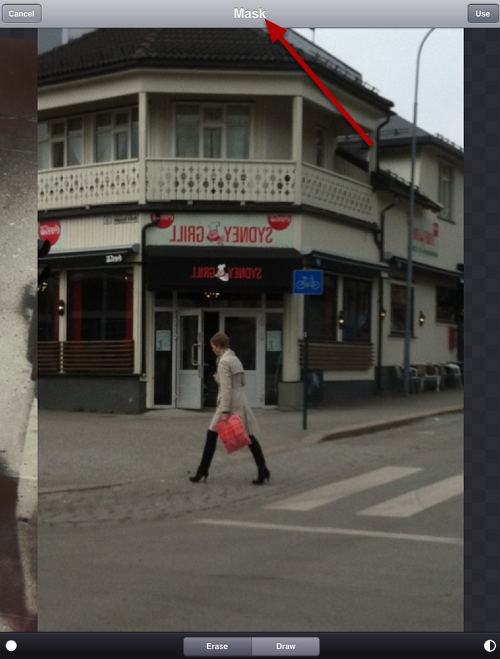
After confirming the use of the position, Lene tapped the image again, choosing the mask option. Using the hard Brush she masked out the woman carefully, zooming in with pinch zoom to get the accuracy she wanted.
Step 5

Finally Lene chose the Hard Light Blending Option, because it brought out the red in the bag the lady was carrying.
The Final Image
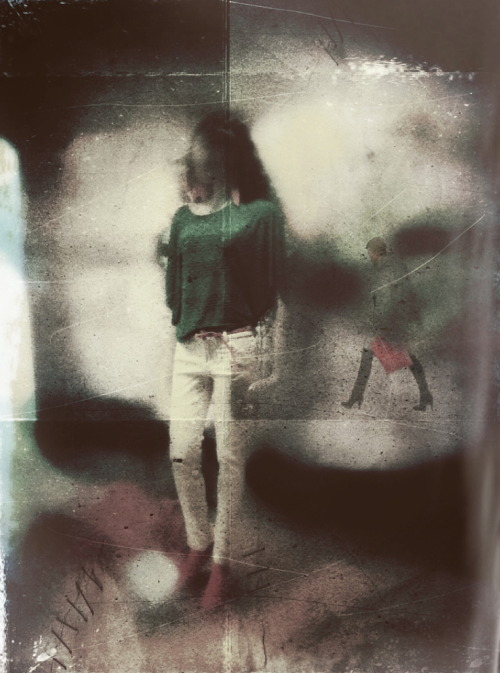
Copyright Image ‘It’s Ok, You Can Walk Away’ by Lene Basma
And then the final image was born. We hope you successfully managed to follow this tutorial, please send us your similar examples, we’d love to take a look.

Joanne Carter
Joanne Carter is a British photographer, photography journalist, editor and curator and the founder and editorial director of TheAppWhisperer.com, an independent international photography publication established in 2009.Her journalism, criticism and commentary have appeared in The Times, The Sunday Times, The Guardian, Financial Times, BBC, Vogue Italia, LensCulture, Popular Photography, Android Magazine, NikonPro, DPReview, Which Digital Camera and Which Camera. She has lectured internationally on photography and mobile art, served as a juror for international photography awards, and exhibited her own photographic work across the UK, Europe, South Korea and the United States.Alongside her editorial work, Joanne's photographic and postgraduate research explores death, grief, memory, representation and social inequality through contemporary photography, participatory practice and visual research methods, with the longer-term aim of developing this work through doctoral research.Through TheAppWhisperer, she continues to publish independent photography journalism spanning contemporary photographic practice, mobile imaging, photographic apps, computational photography and emerging imaging technologies.Joanne is available for editorial commissions, photography projects, judging, curatorial work, speaking engagements, consultancy and selected collaborations.
6 Comments
Veevs
Wow this is an amazing tutorial Lene! Definitely going to try it out!
Lene
Thanks Veevs, it is rather whimsical, but this is how I work :)))) Glad you enjoyed it and look forward to seeing the results of your experimentations!!!
Laurence Zankowski
Lene,
You layed out the whole reason I have stopped using photoshop. Great insight in how to use these tools. Experimentation, curiousity brings out such great work. Plus, it seems that you really are having fun while doing these.
Looking forward to moe tutorials.
Laurence
Lene
Thank you so, so much glad you enjoyed it! I used to work in Photoshop too (www.lne-artandME.com), and I enjoy doing these you are perfectly right 🙂
LynneM
I followed along and I’m pleased with my results. Very nice.
Lene
That is great!! Glad it was of use!!!