iPad Tutorial Of The Day – How To Restore Your iPad – 06/28/10
I am writing a great new ebook all about the Apple iPad and it is so exciting that I wanted to share some excerpts with you along the way. This tutorial explains how to Restore your iPad to its originals settings. You may need to do this if you are experiencing some problems with your iPad or if you want to sell it. This Restore function will remove all your data and apps so it is a good way to protect you from identity theft. Here’s how you do it.
Go To iTunes
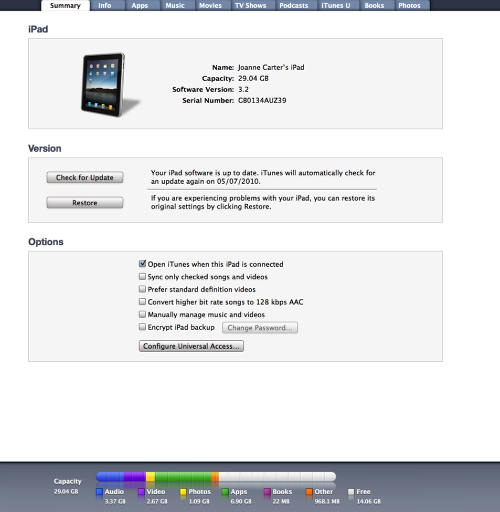
Connect your iPad to your Mac computer and go to iTunes. Go to the Summary page for your iPad and you will see the above menu, or very similar. Under the Version heading you need to select Restore.
Confirmation
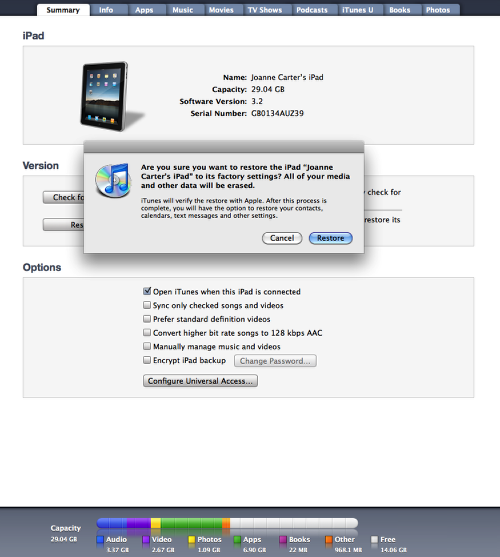
A message will then appear on screen, asking if you really do want to do this. If you are certain that you do, just click on Restore once again.
Important Information
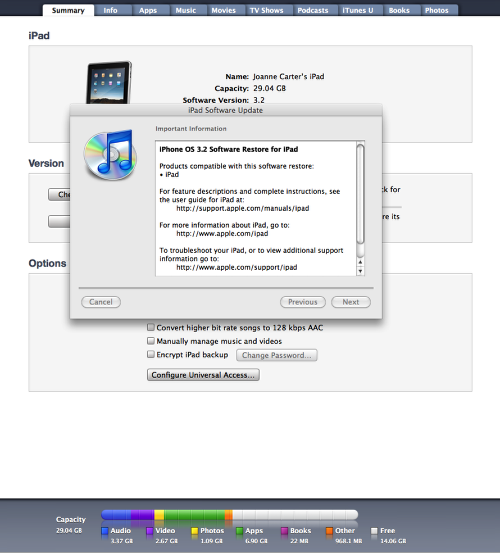
Another standard message will appear on screen, this one is explaining what version of iPhone OS will be used to restore the iPad. Just click on Next.
License Agreement
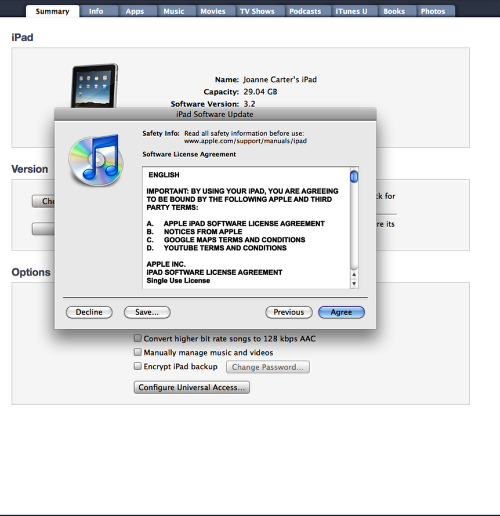
The License Agreement text menu pops up, just select Agree.
Downloading
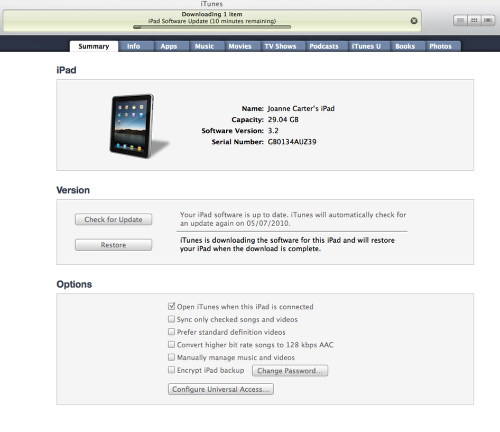
iTunes will then start downloading the Restore software from iTunes, this usually takes around 10 minutes.
Preparation
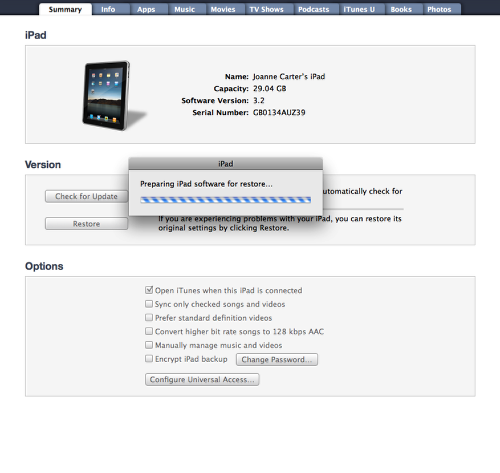
Once it has downloaded this software it then automatically goes straight to Preparing iPad software for restore.
Restoring
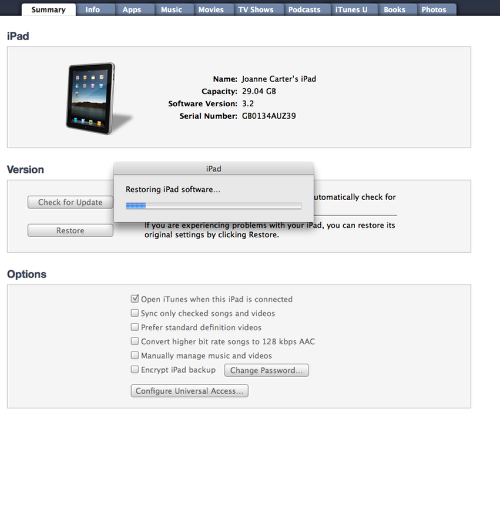
Another menu pops up and you can check the progress of the Restore.
Verification
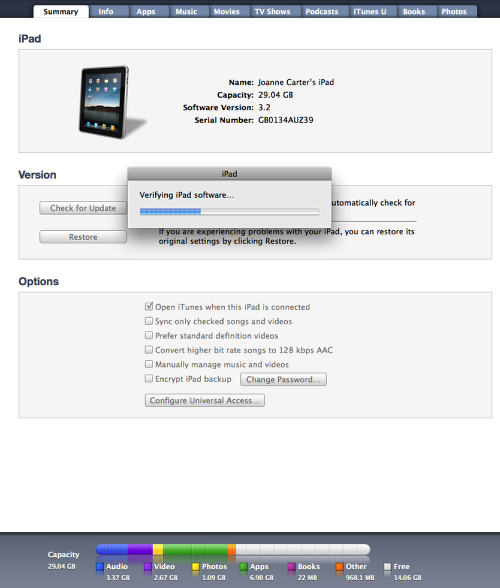
Your iPad with then need to verify the iPad software, this is usually carried out quite quickly.
Restore
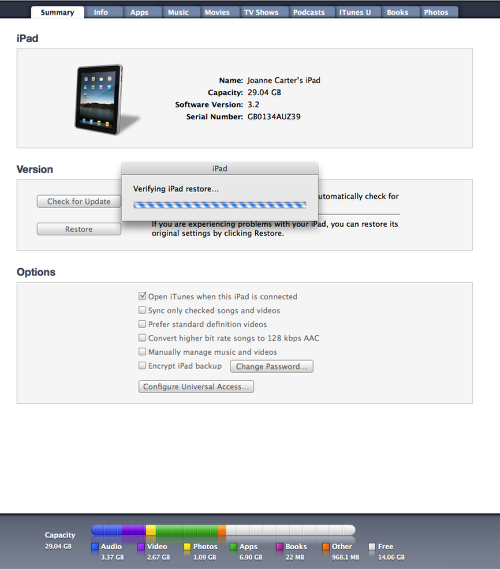
As the iPad comes to the end of the verification process the blue bar changes to a broken blue/white line, as above.
Firmware
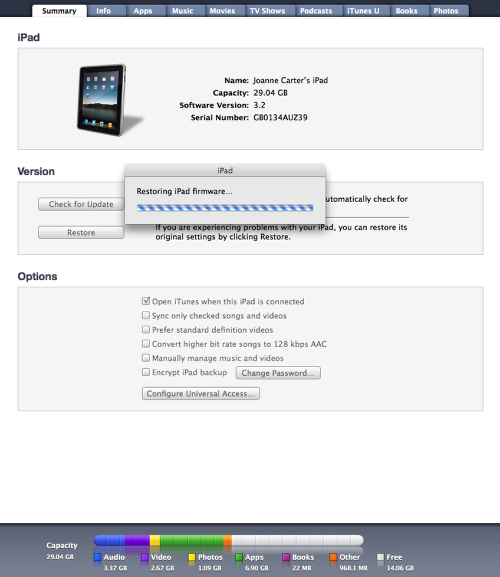
The final menu you will see within iTunes will state Restoring iPad Firmware. That’s it your iPad will now be restored to the original factory settings. You will need to reconnect your iPad to iTunes, to start using it again, just as you would of done when you first opened your iPad.

Joanne Carter
Joanne Carter is a British photographer, photography journalist, editor and curator and the founder and editorial director of TheAppWhisperer.com, an independent international photography publication established in 2009.Her journalism, criticism and commentary have appeared in The Times, The Sunday Times, The Guardian, Financial Times, BBC, Vogue Italia, LensCulture, Popular Photography, Android Magazine, NikonPro, DPReview, Which Digital Camera and Which Camera. She has lectured internationally on photography and mobile art, served as a juror for international photography awards, and exhibited her own photographic work across the UK, Europe, South Korea and the United States.Alongside her editorial work, Joanne's photographic and postgraduate research explores death, grief, memory, representation and social inequality through contemporary photography, participatory practice and visual research methods, with the longer-term aim of developing this work through doctoral research.Through TheAppWhisperer, she continues to publish independent photography journalism spanning contemporary photographic practice, mobile imaging, photographic apps, computational photography and emerging imaging technologies.Joanne is available for editorial commissions, photography projects, judging, curatorial work, speaking engagements, consultancy and selected collaborations.