
Mobile Photography Tutorial – Snapseed 2.0 in Depth: Part 1 – TheAppWhisperer
We are delighted to publish Part 1 of a new three part series with the upgraded Snapseed app tested by Jerry Jobe. This is an extensive tutorial and series and we are sure you are all going to enjoy this. (Foreword by Joanne Carter).
“Snapseed 2.0 is even more powerful than its predecessor. If you haven’t watched the video overview posted last week, you should take ten minutes to get a quick look (here) at manoeuvring around the new interface. Video is good for seeing the tools in action, but for a more in-depth look at features I find the traditional text-and-screenshot method to be a more effective presentation”.
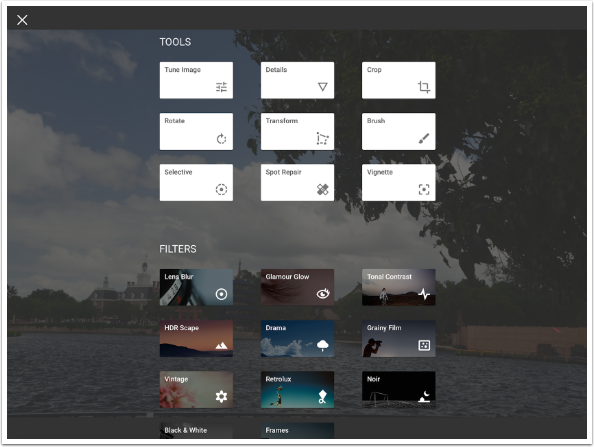
Even by dividing the tutorial into three parts, there’s a lot to cover in each part. In Part 1, Tools will be covered. In part 2, Filters will get a walkthrough. Part 3 will go through the ins and outs of the Stack.
Tools and Filters are accessed by tapping the white Plus button at the bottom right of the screen. This is true whether you are using the iPad or iPhone version of the app. Because the iPhone screen is smaller, you will have to scroll down to see the Filters.
Tune Image
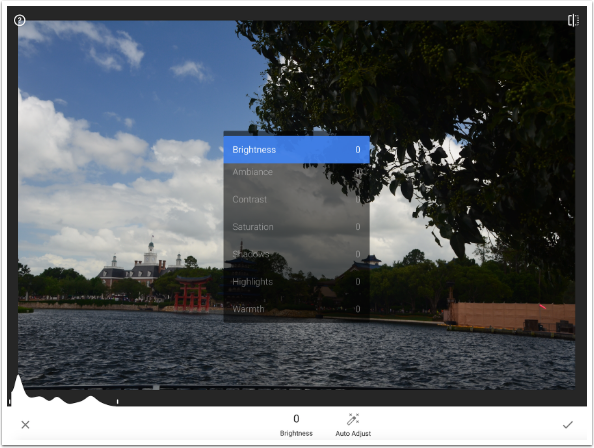
The first Tool is very familiar to longtime users of Snapseed: Tune Image. This is the main tool I use in Snapseed. As a matter of fact, the vast majority of the time it is the only tool I use in Snapseed. The options available in Tune Image (accessed by swiping up and down on the image) are Brightness, Ambiance, Contrast, Saturation, Shadows, Highlights and Warmth.
There are two things you should notice on this screen. The first is that Auto Adjust, once a separate tool, is now included within Tune Image. Auto Adjust will give you a starting point for your changes now, moving the various options. You can then move the individual option sliders to increase or decrease the changes made by Auto Adjust.
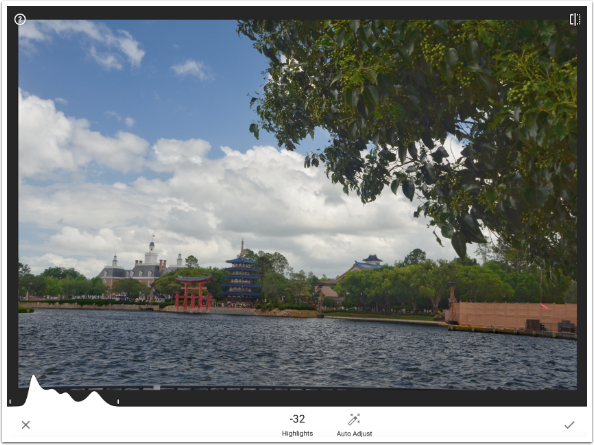
The other new feature is the Histogram at the bottom left. A histogram is a graphical representation of the amount of pixels that fall within the various tonal ranges of the photo. That histogram will change as you tune your image. In the image I’m working on, most of the pixels are to the left of the histogram, telling me that the image is too dark. That means that most of my work will be with the Brightness, Ambiance and Shadows sliders.
I start with the Shadows slider by swiping up until Shadows is highlighted. I then swipe to the right to change the Shadows setting from 0 to 69. You can see the value down at the bottom center. (While swiping, the value for the current slider is also shown at the top center.) That moves the pixels from the left side of the histogram to the middle, and allows you to see more detail in the darker areas of the trees and bushes.

The Highlights are not blown out in the image. In other words, the histogram does not have a spike at the right end, This is good, because the Highlight slider cannot recover detail in blown-out highlights. But by choosing Highlights and swiping to the left, I can add a little more detail to the clouds – the brightest areas of the image.
Ambiance adjusts both shadows and highlights, pulling pixels to the center of the histogram. It’s easy to overdo Ambiance, but I like the look it gives this image. I will increase contrast slightly to tone down the Ambiance.
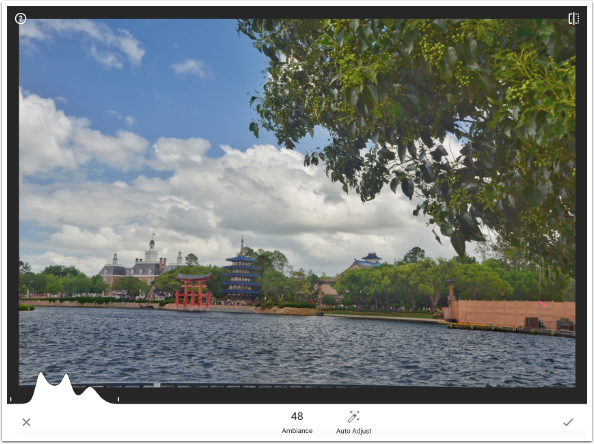
Below you’ll see my final settings for Tune Image. In addition to the settings I’ve shown above, I increased the warmth slightly to compensate for the very blue sunlight. Remember, at any time you can tap the divided square at the upper right to see the “before” image, then take your finger away to see the “after” image. I tap the check mark at the bottom right to accept the changes. (If I wanted to discard the changes, I would tap the X at the bottom left.)

Details
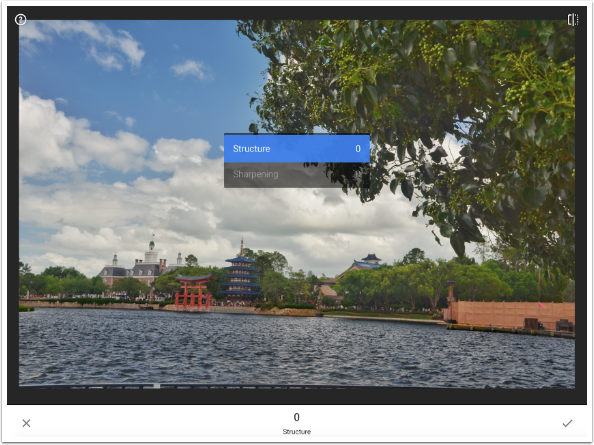
The next tool, Details, has two sliders – Structure and Sharpening. Sharpening sharpens every pixel, including any noise in the image. Structure attempts to determine where the edges are in the image to sharpen them without sharpening the noise.
There are very few images that can’t use a dose of Details. I find that a setting of 20-30 on both Structure and Sharpening helps my images pop.
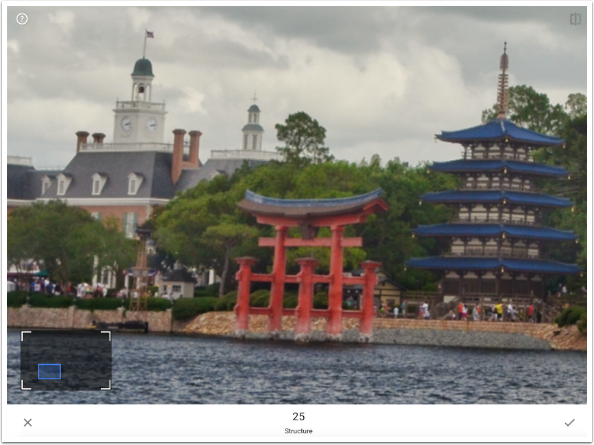
Below I’ve zoomed in using a two-finger pinch (a feature unavailable in previous versions of Snapseed) to show you a setting of 25 in both Structure and Sharpening.

Compare that to the “before”, shown below. Details can make an impressive difference, just as long as it is used in moderation.
Crop
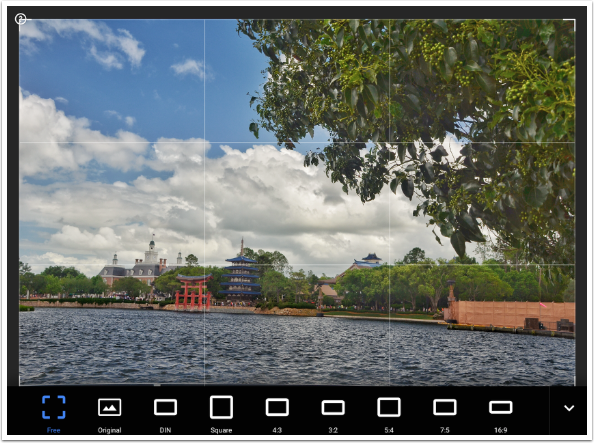
Crop was shown in the video. It works just the same as in most apps. Below I’ve tapped the Format button, which shows the different ratios available. (With the ubiquity of Facebook these days, I wouldn’t mind a 8:3 setting to use for cover photos.)
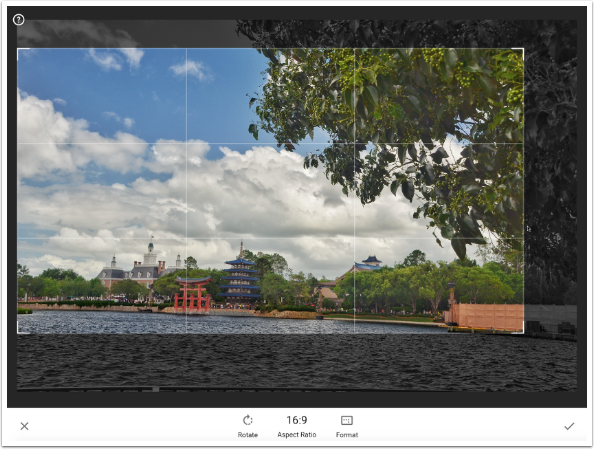
Once you’ve chosen a format (in this case, 16:9) cropping is a matter of moving the corner handles to get the desired crop. Notice that there is also a Rotate button that rotates the cropping mask to a portrait ratio, with the long side on the vertical.
Rotate
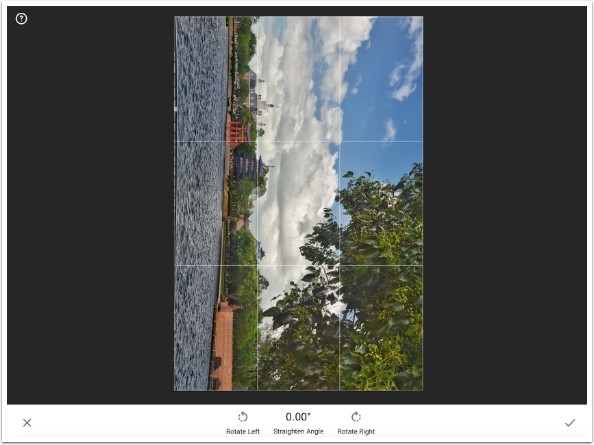
The Rotate tool rotates the image rather than the cropping mask. There are Rotate Left and Rotate Right buttons that allow you to rotate the image 90 degrees with a single press.
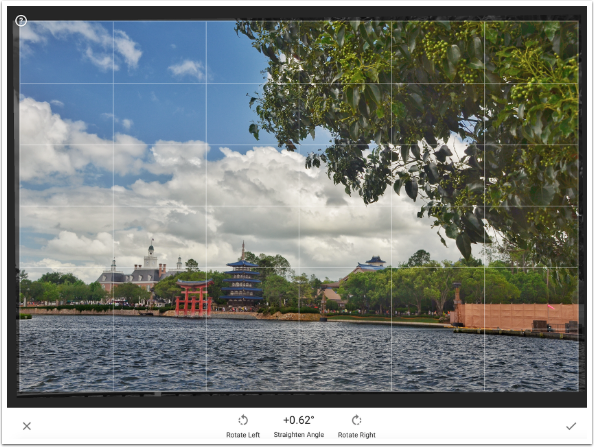
Conversely, you can tap and drag a side to rotate in smaller increments. When you do that, a finer grid appears over the image to allow you to make horizontals or verticals absolutely accurate down to the fraction of a degree. Below I’ve rotated the image a mere .62 degrees, which brings the verticals on the buildings in the background closer to true.
Transform
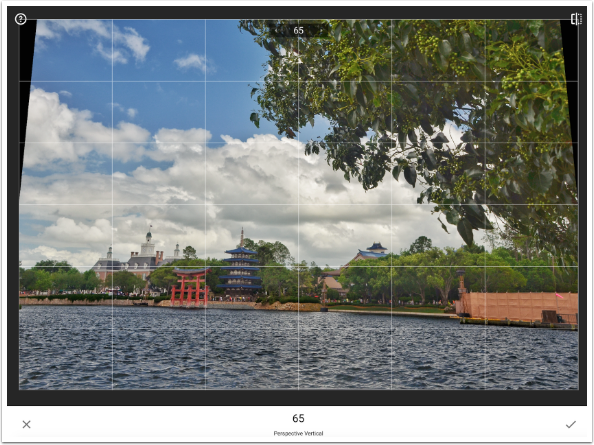
Transform is a new tool that allows you to correct problems with perspective. Taking images of buildings can show this problem, with buildings shot from street level seeming to fall away from the viewer as they go up. The three options are Perspective Vertical, Perspective Horizontal, and Rotation.
If I swipe from side to side while using the Perspective Vertical option, either the top or the bottom of the image will seem to fall away from me. A positive value, as shown in the image below, will make the top fall away.
Notice how the top of the image is now narrower than the image area, with black triangles showing in the upper corners. Transform will actually fill in those black triangles with a copy of the surrounding pixels (the sky in the upper left and the tree in the upper right).
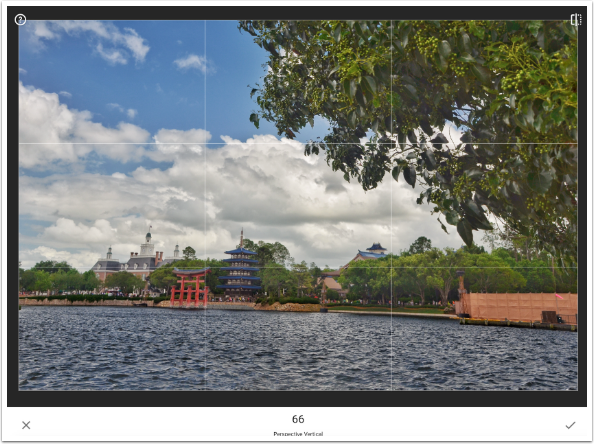
It does a pretty good job, as seen below. As always when using an algorithm to determine which pixels should be copied, sometimes the results are not so good. In that case, sometimes the results can be improved by discarding the current edit and retrying.
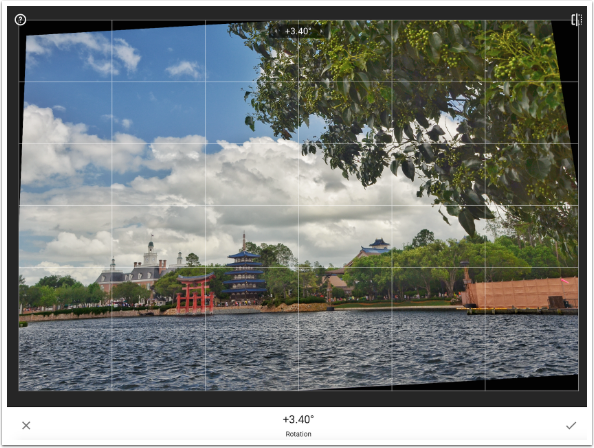
The Rotation option of Transform works in a different way from the Rotate tool. The Rotate tool will move in the bounding box, trimming off parts of the image. The Rotation option will allow the black triangles to appear, letting Snapseed fill them in. Notice below that the pixels added with Perspective Vertical have disappeared, and are recalculated when you perform more than one option under the Transform tool.
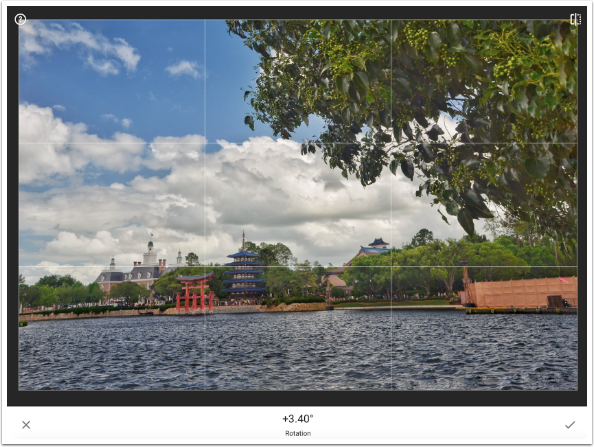
Below you will see how Snapseed fills the areas. At the bottom right, there is an unrealistic chop to the water that you either notice right away or don’t. Make sure you look for those artefacts; it’s much worse to see those for the first time after you print the image.
Brush
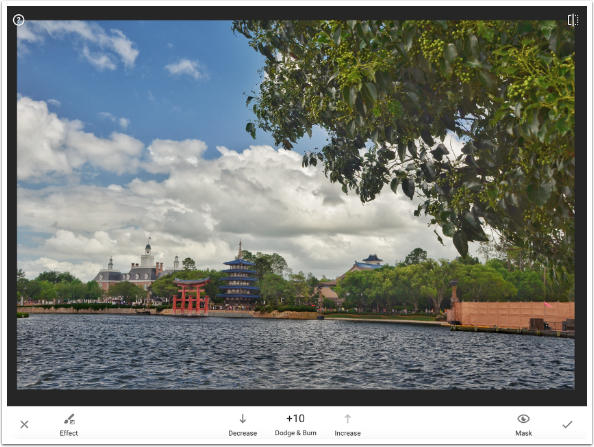
I discarded the Transform changes by tapping the X at the lower left and moved on to the Brush tool. Both the old and new versions of Snapseed have Selective Adjustments; Brush gives a new way of applying targeted changes. Down at the bottom on the screen is an Effect button; a value indicator with buttons to increase or decrease the value; and a Mask button. The default effect is Dodge & Burn. A value of +10 is the maximum Dodge (brighten) value. As the Decrease button is pressed, the other permitted values are +5, Eraser (0), -5 and -10 (maximum Burn).
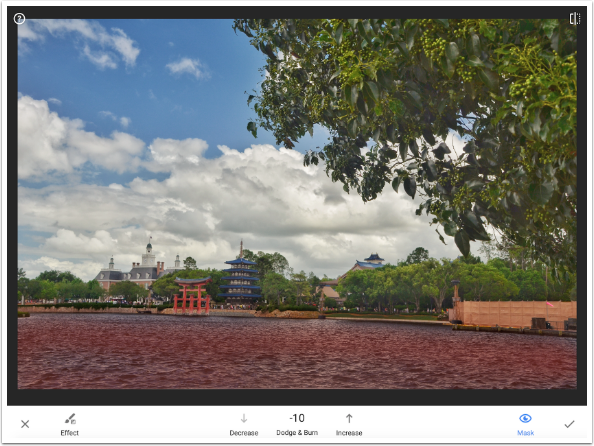
Below I’ve changed the value to -10, turned on the Mask button, and brushed the water. The brush stays the same size relative to the screen – in order to make the brush smaller, you have to zoom in. The red overlay shows where I have brushed.
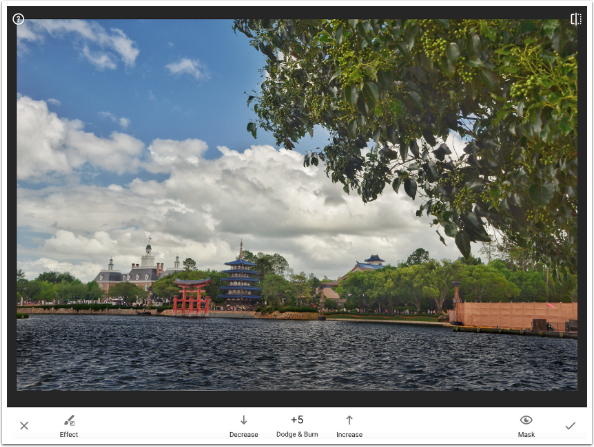
Dodge & Burn are additive. If I increase the value to -5 and brush again, the brushed portion will become darker, not lighter. If the effect from having the tool is too dark at -10, then you can erase it entirely by using a value of Eraser, or lighten it partially with a value of +5, as shown below.
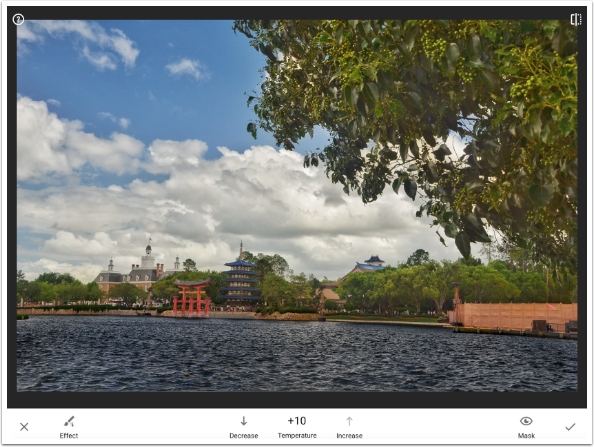
The four effects available in the Brush tool are Dodge & Burn, Exposure, Saturation and Warmth. You can add any combination of effects; each effect will have its own brushed mask.

Below I’ve taken a single swipe with the warmth tool across the center of the image, then filled in the leaves at the upper right as well. The effect is subtle, even with the value set all the way to +10.
Selective Adjust
This tool can be tricky for those who have never used it before. It is a method of applying a targeted adjustment, but without brushing. A control button is added to the image. A two-fingered pinch is used to expand or contract the area of adjustment, and a mask appears to show the pixels that will be adjusted (based on the pixels underlying the crosshairs at the center of the area). Below you will see that I have zoomed in to the red Japanese structure and placed a button over the center. The default option for the button is Brightness (B), but can be changed to Contrast (C) or Saturation (S). The loupe that appears shows that the crosshairs are over the red pixels.
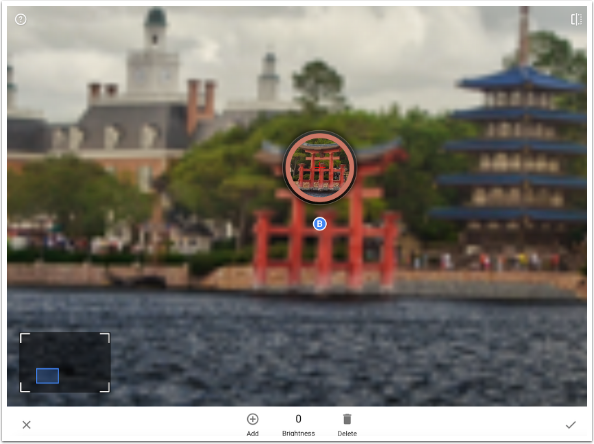
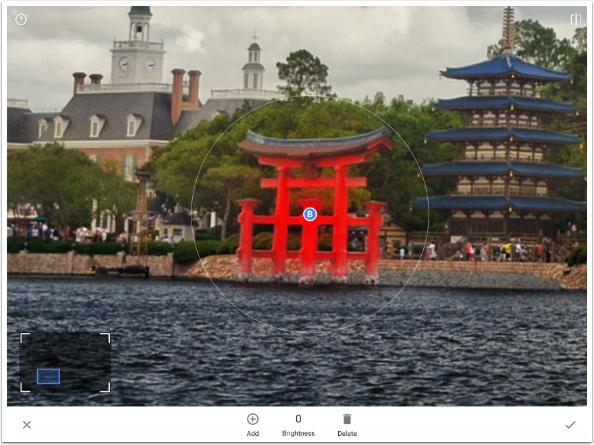
A two-fingered pinch will adjust the circular “area of influence”. Notice that the red overlay only applies to the red structure within the circle, and not the surrounding trees, rocks or people.
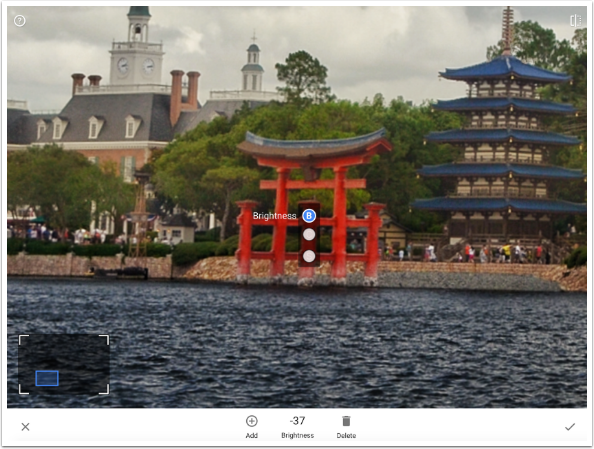
A swipe to the left lowers the Brightness setting to -37, and a swipe up allows me to change the control from Brightness to Saturation. You will see the change when we return to a full view of the image.
There does not seem to be a limit to the number of buttons you can add to your image, allowing you to make as many Selective Adjustments as you need. Each button can be revised by tapping it and changing the values. Buttons can be deleted by tapping first the button, then the trashcan at the bottom.
Spot Repair
Another new feature is Spot Repair. I would stress that it is truly spot repair; taking out a long line such as a telephone wire is nearly impossible to do cleanly with this tool.
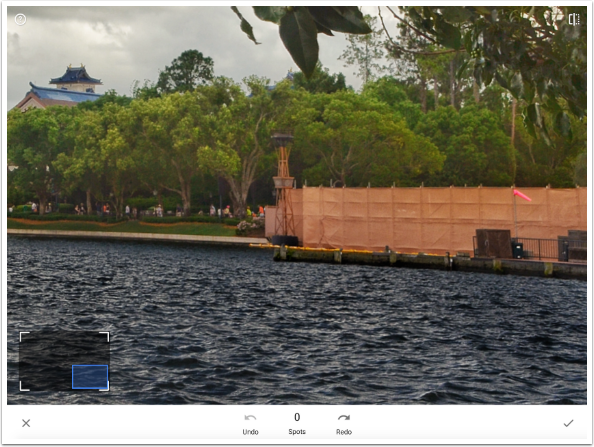
I didn’t really have any spots to remove in this image, but I will take out a few wispy clouds to show how it works. Below I’ve zoomed in on the area with the wisps.
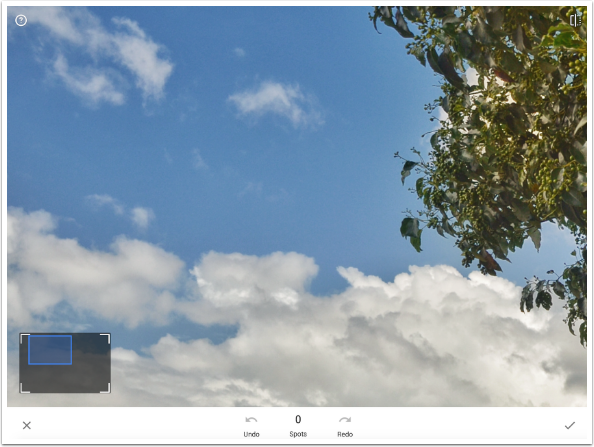
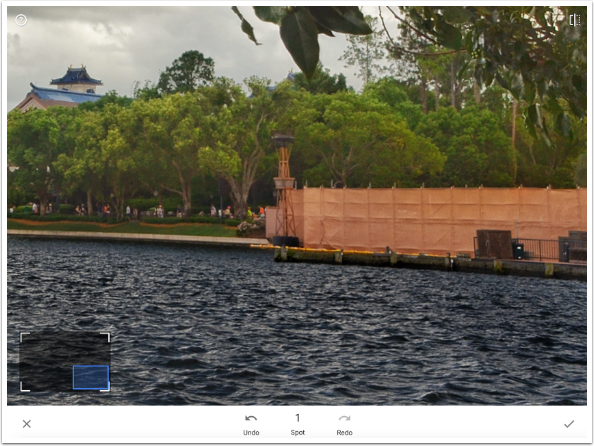
I tap once on the wisp nearest the top of the image. It disappears, and the Spot total at the bottom of the screen increments.

Just as with Transform, the pixels that are used to fill in are not always the best choice. I am going to attempt to remove the pink windsock at right center.
A tap removes the pink sock, but now there’s a somewhat obvious mismatch on the verticals in the wall. The top of one vertical jumps over a couple of feet in the middle.

By undoing and tapping again a few times, I finally get a result that’s closer to natural.
Vignette
The final tool is Vignette, which can be used to add a dark or light edge to your image. The vignette is not merely a black or white overlay, but a darkening or lightening of the underlying pixels. A dark vignette will not completely overlay a streetlight or the sun with black; neither will a light vignette overlay the darkest shadow with white.
The two controls for the Vignette tool are Outer and Inner Brightness, referring to the areas inside and outside a control circle.
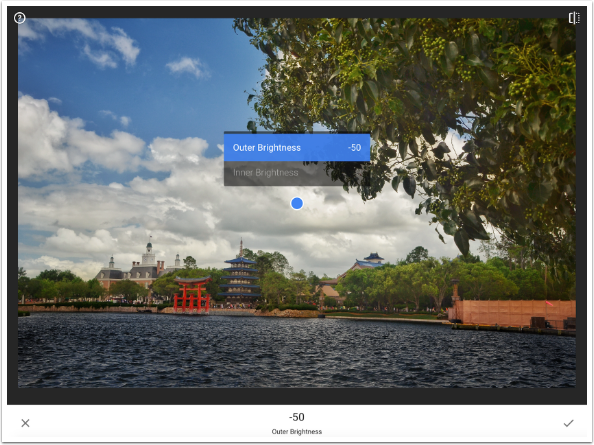
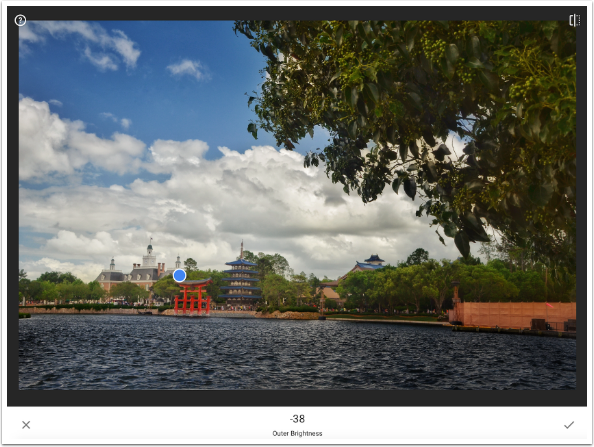
Below I’ve lowered the Outer Brightness from the default value of -50, and increased the Inner Brightness to 16. By default, the vignette is placed in the center of the image.
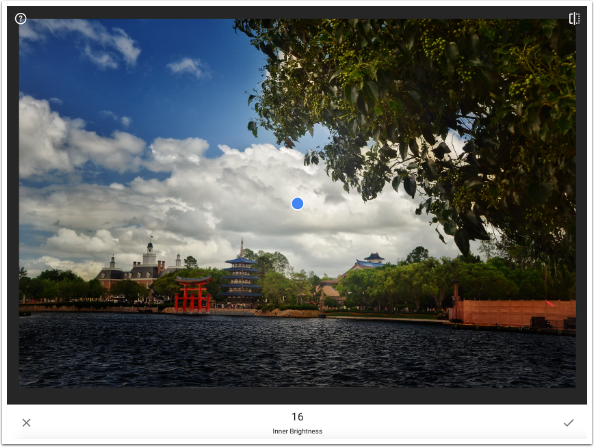
The interesting thing about the vignette, however, is that it need not be placed in the center. If you are using a vignette to draw attention to a portion of your image that’s not in the center, just drag the blue dot to your area of interest.
Conclusion
Each time I commit a change, the app returns to the main screen. Just as with the original Snapseed, I can see the “before” image by tapping and holding the image. Below you’ll see the “before” image, with no changes applied.

I remove my finger from the screen, and I see the “after” version. At the top right you can see a box with the number 7. That 7 reflects the number of tools I used on the image – everything but Crop and Transform. When we discuss the Stack in part 3, we’ll see how to manipulate those changes that have already been made.

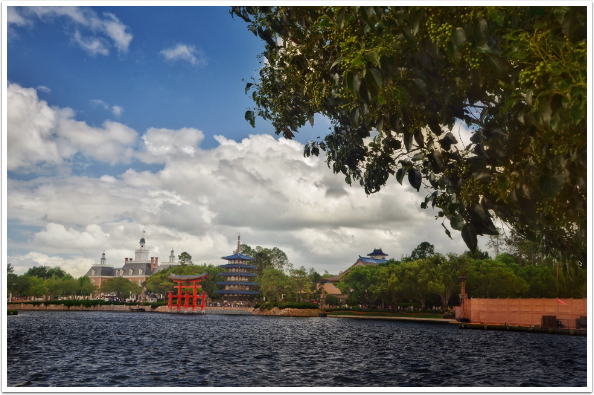
And here’s the finished image. Quite nice, and a real improvement on the dark original.
Next time I’ll cover the Filter tools in Snapseed. Until then, enjoy!
Jerry Jobe
Never content with just scratching the surface of what an app can do, Jerry Jobe decided to pass on what he learned about imaging apps to others. He’s constantly trying to figure out just what tools other artists have used, and trying to incorporate them into his own work, in an attempt to find his style. He’s written tutorials on over 145 apps so far, which you can find (along with his Song of the Day entries) at http://enthusiasmnoted.wordpress.com/ He lives near Atlanta, Georgia, where he also finds a creative outlet in acting and directing in community theater.

5 Comments
Chris
Great, thorough article and thank you for writing. Learned a few new things that I generally didn’t touch, especially the Ambiance tool.
What brought me here was a search for selective sharpening within Snapseed. The last version allowed certain areas to be sharpened rather than the entire image, Same idea as the brightness and contrast selective still there. Any thoughts on hoe to achieve sharpening on specific areas of an image?
Again, great work with the article and your thoughts on photography overall.
Jerry Jobe
The new masking features in Snapseed allow you to “target” each modification to your image, including sharpening. Actually, the prior version of Selective Adjust in Snapseed only allowed you to target Brightness, Contrast and Saturation.
Deanna Segrave-Daly
fantastic posts- I’ve learned so much through your snapsneed tutorials – thanks!
Julie
Absolutely love Snapseed- I bought an iPad Pro just to be able to edit my iPhone photos on a larger screen using the updated Snapseed app-
William Gill
One of the most useful sofware tutorials I have ever used. Very comprehensive and practical. Before and after images very easy to follow