
Tutorial: From conception to birth, a walkthrough of one of my photos by Dilshad Corleone aka Italian Brother
We recently interviewed Dilshad Abdulla aka Italian Brother in our A Day In The Life series, if you missed that, please go here. We were so impressed with Dilshad’s iPhone photography that we asked him if he would write a tutorial for us of one of his amazing images. Fortunately for us all, Dilshad was more than happy to oblige. Over to Dilshad…
(foreword by Joanne Carter)
‘A lot of my friends and fellow instagramers often ask me how do I do it, or what do I use to edit my photos. So here we go: this is a step-by-step tutorial of one of my favorite photos’…
Introduction
Instagram: @italianbrother
Flickr: http://www.flickr.com/photos/italianbrother/
Facebook-Fan-Page: https://www.facebook.com/DilshadCorleone
Tumblr: http://italianbrother.tumblr.com (work in progress, watch this space!)
About.me: http://about.me/italianbrother (coming up shortly)
Original Image
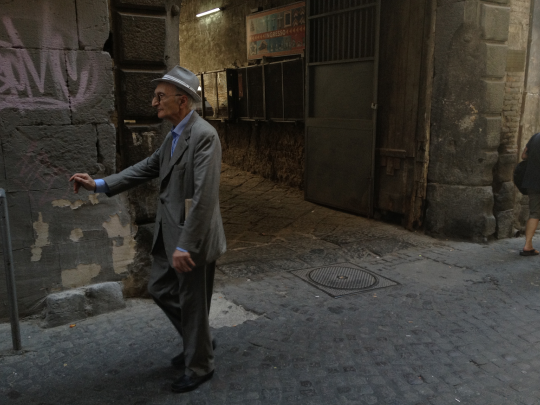
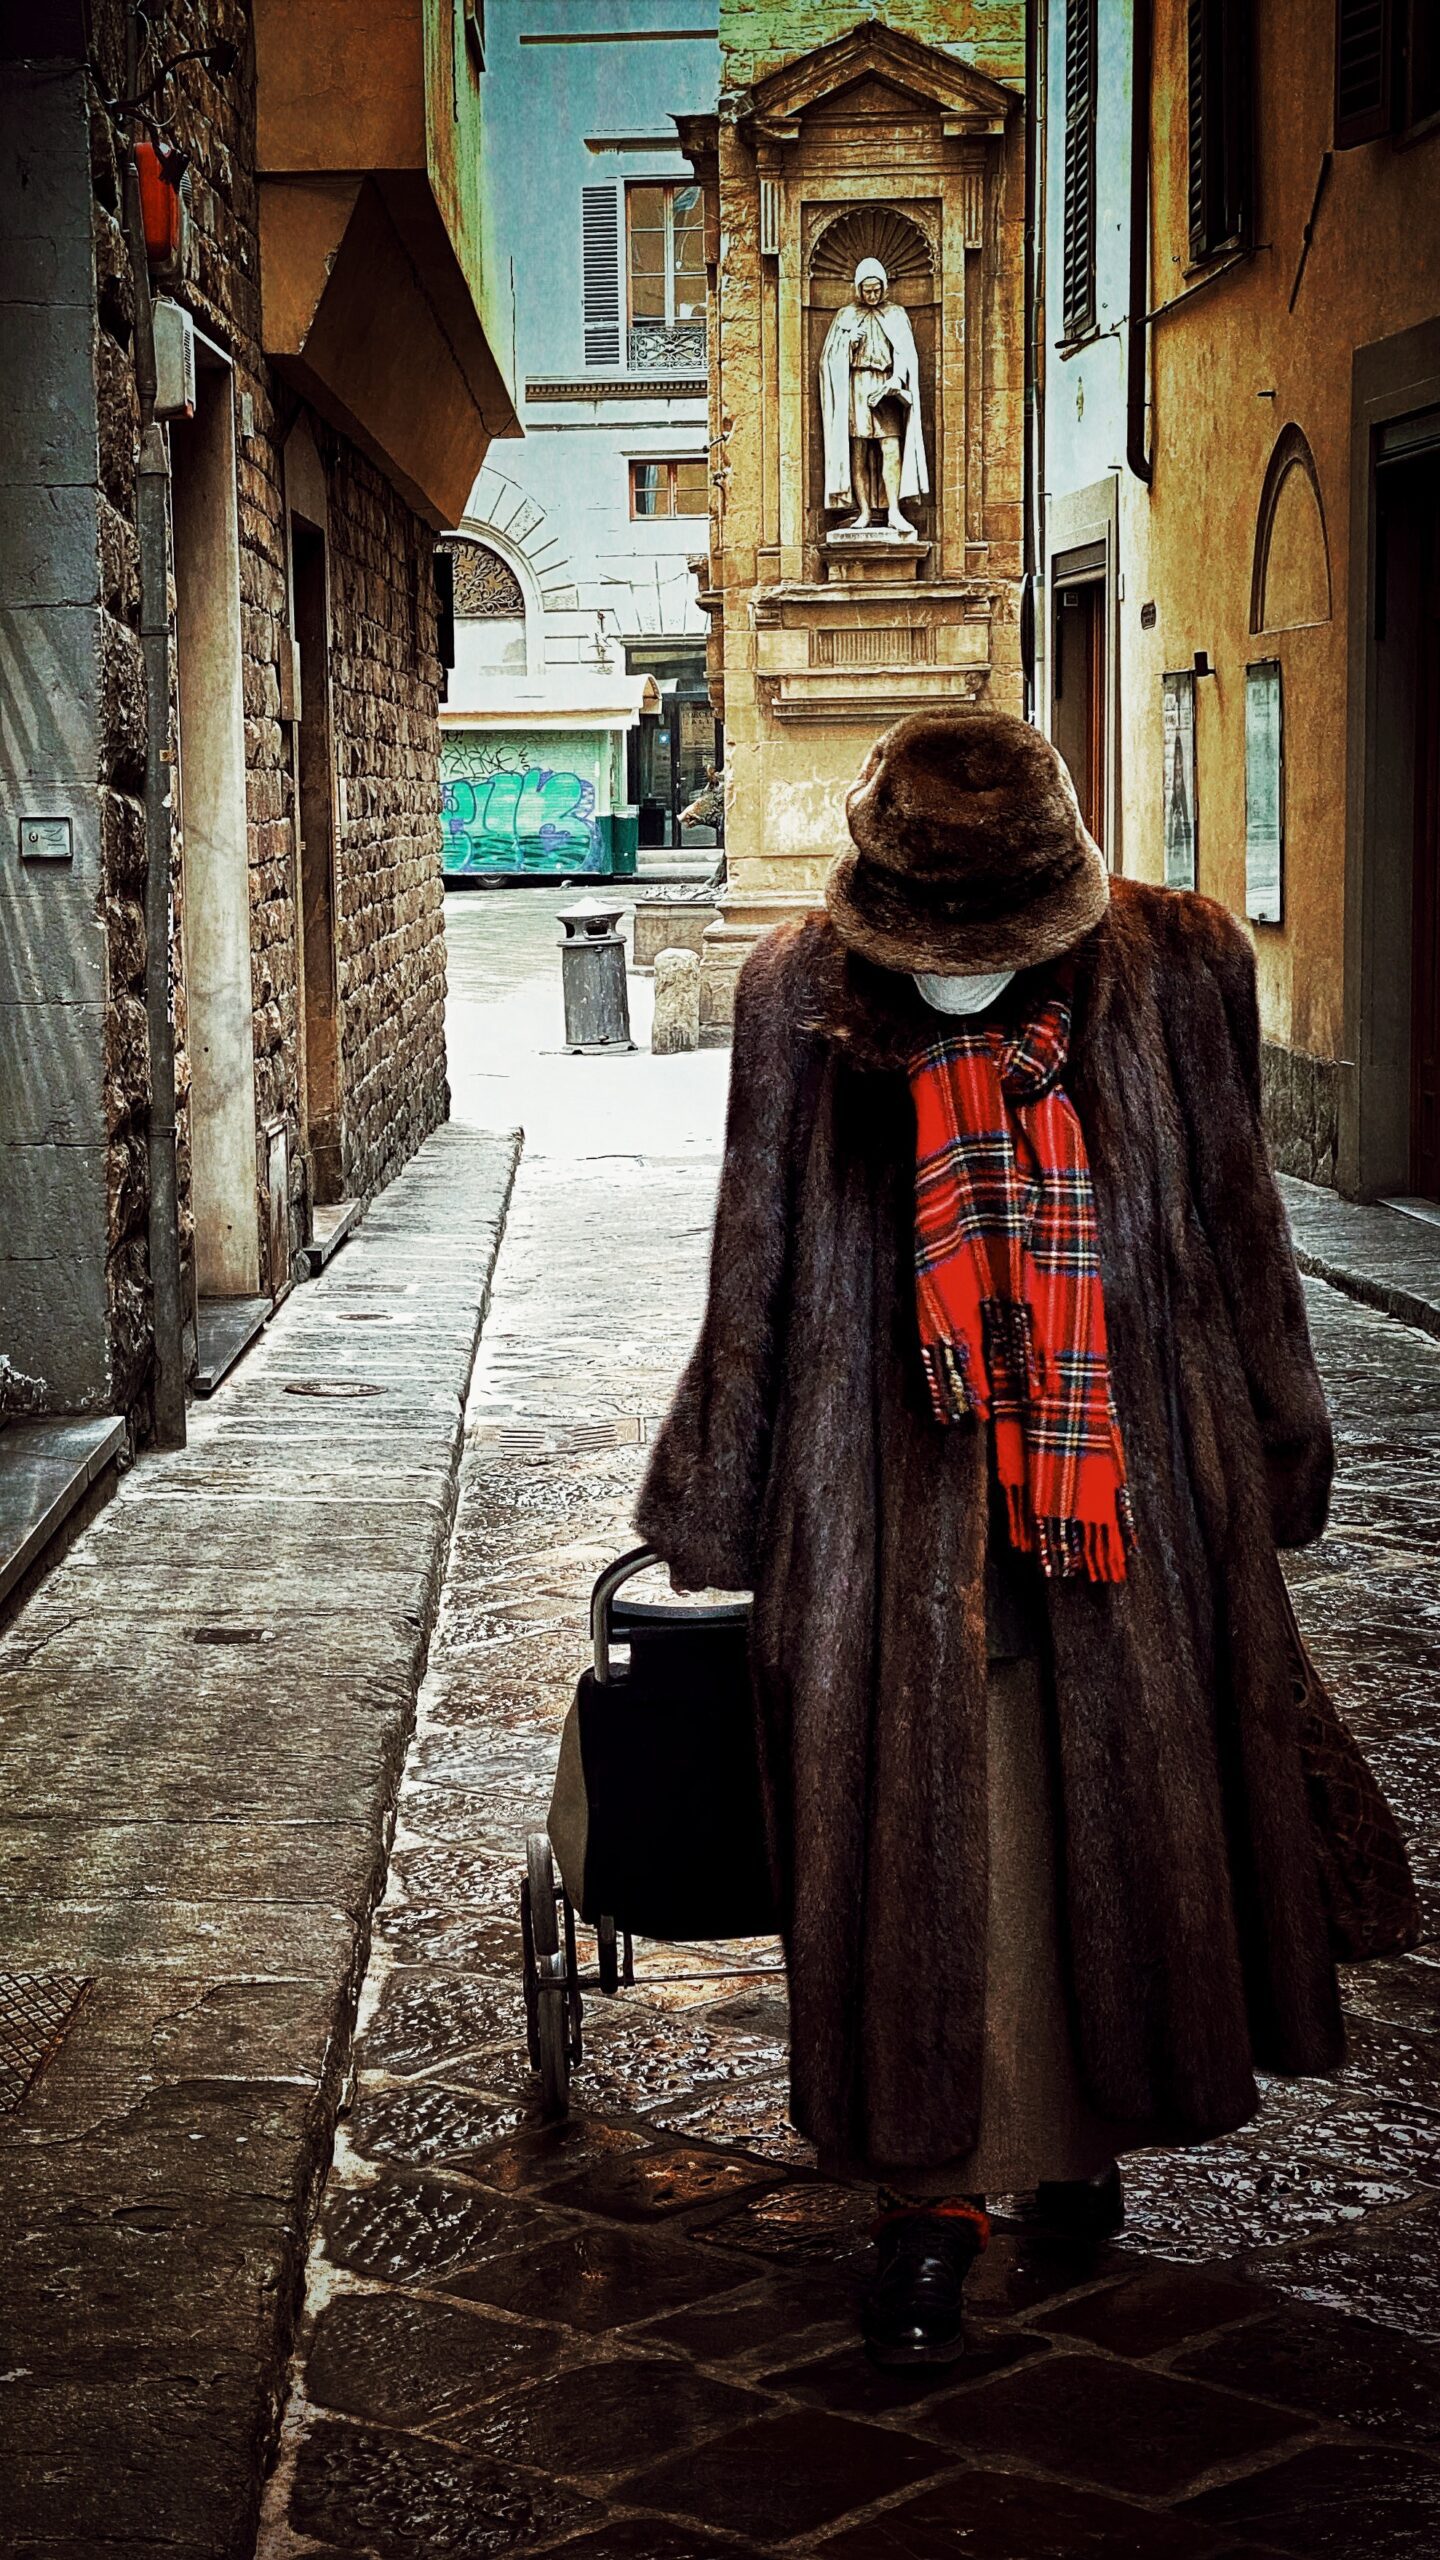
Pulicnella, was taken in Naples. His characteristic and peculiar way of walking had caught my eye, so I decided to snap him and I used the native iPhone’s photo app to photograph him. I then transferred the photo onto the iPad and used Camera+ ($0.99/£0.69 on a special offer, just for a limited time), Big Lens ($0.99/£0.69), Scratchcam ($1.99/£1.49) and Snapseed ($4.99/£2.99) to edit the photograph with.
This image was taken in a dark alleyway with very little light and buildings on both sides. I needed to bring the colors out and to brighten it a bit.
Step 1

When camera+ is first opened you have the option to take a photo directly using this app or to pull one from your photo library, as I already had the image I wanted to work with, I just clicked on Add Photo and choose my Camera Roll from the list, where Pulcinella was saved.
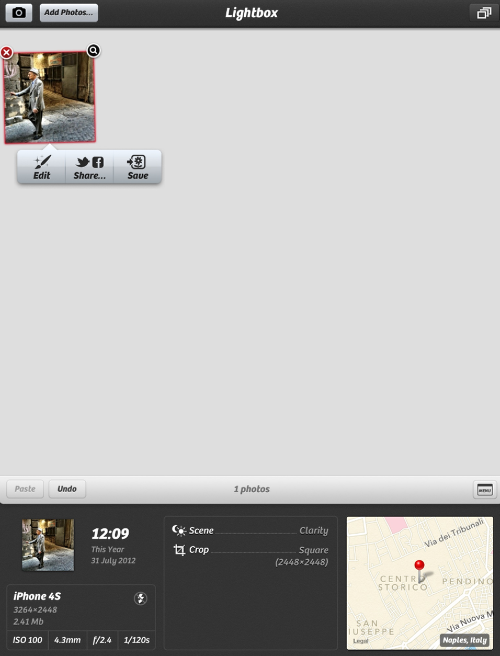
Step 2

The photo chosen will appear in the Lightbox of Camera+, where you will be able to see all the information available about your photograph, i.e.: where was it taken, when was it taken, with what device was it taken, the iso, the aperture and the size of the photograph. Once you are ready just click on Edit.
Step 3
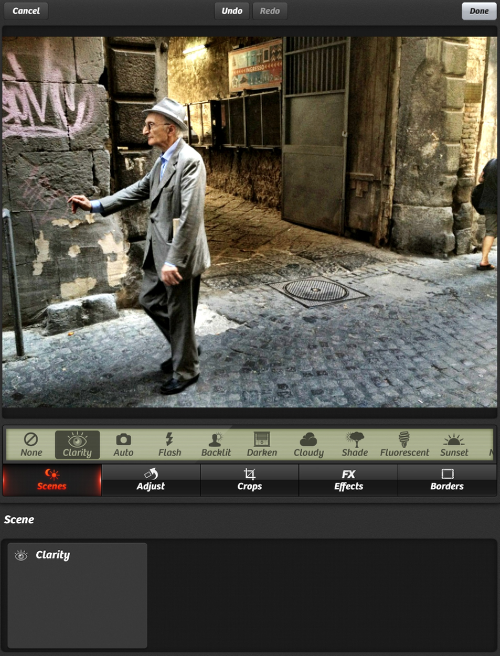
You will then be able to choose from different options. I usually start with Scenes, where I can decide what feel I want; Clarity is my favorite but I do try all the others as well, sometime you might just want something a little bit subtler. As you can already see, now I’ve got all the light I need.
Step 4
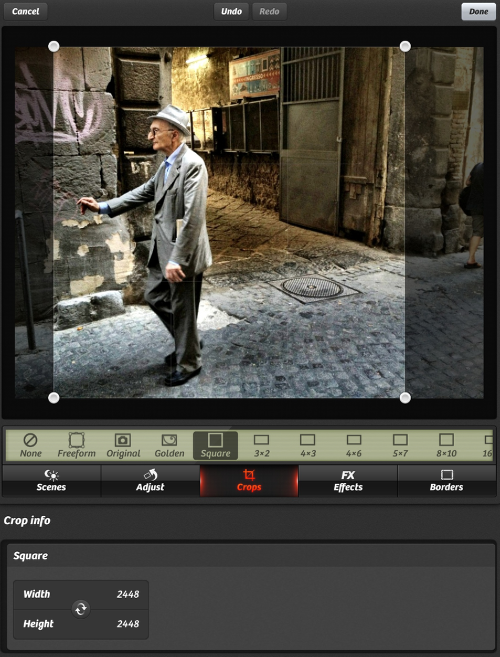
The next Step is a lovely squared crop, so that I will be able to uploaded it to instagram once the editing is all done. The Crop option allows you to choose from a variety of crops: from Frefrom, to Golden crop or prefixed size crops. As I said I will choose the square crop for instagram.
Step 5
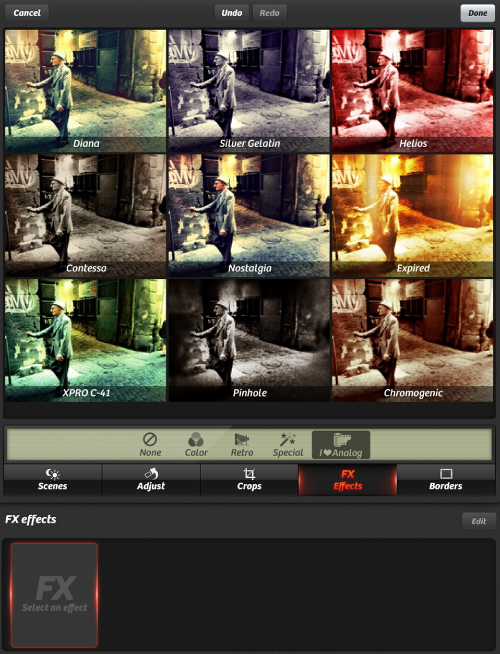
Camera+ also allows you to add special effects and borders. You can find these under FX Effects and Borders. I, personally, tend not to use any of these, but there are some very cool ones, give it a go.
Step 6
Once you are happy with the results, just press done on the top right hand corner and you will go back with the edited photograph to your Lightbox, and then just press save and your newly modified photo will be saved in your Cameraroll.
Step 7
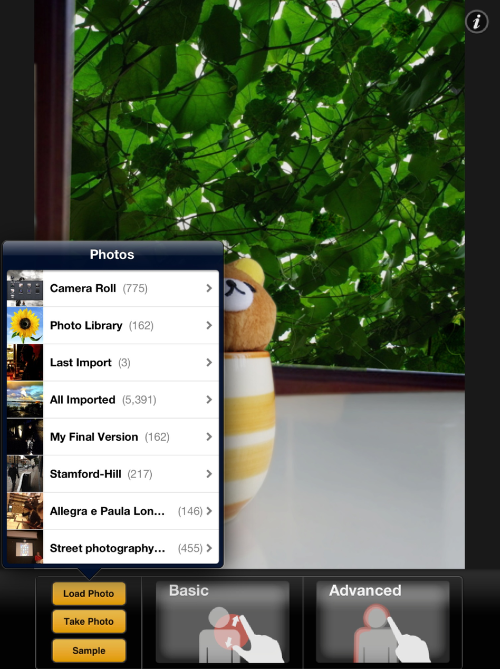
I then start the process of app-staking, which means that once you have saved your edited photo you can open it in a few other apps. Next in line is BigLens. Big lens is a very powerful app that allows you to play with focus and blurs and it gives a professional feel to your photo, as if you had set the aperture before taking the photograph. When you open BigLens, it is very similar to Camera+, you can choose if you want to take a photo or to load one, choose the Load Photo, and then from you Camera Roll select the saved photo, and select Advanced in BigLens; this will allow more control on the area that you want to blur.
Step 8
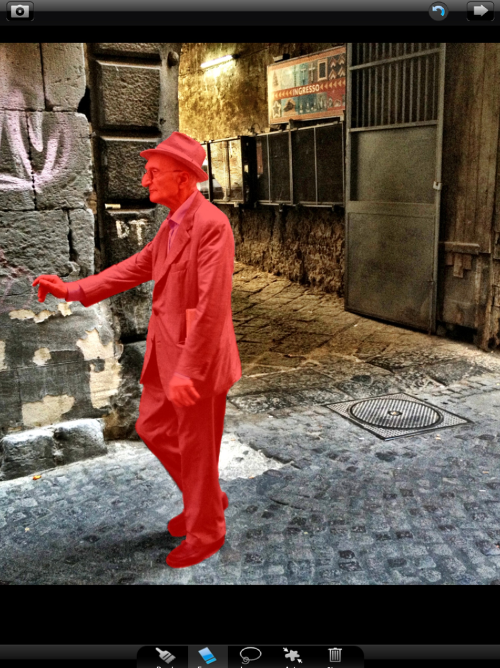
With your finger or with a stylus, mask the area that you don’t want to blur. You can select the size of the brush and you can erase if you spill over. This process can be a bit tedious, however the more precise you are the better the results…;) I am interested only in the man and I want the rest to be nicely blurred. Once the masking is complete and your satisfied with the results, press the arrow on the top right hand side corner, which will take you to the next step.
Step 9
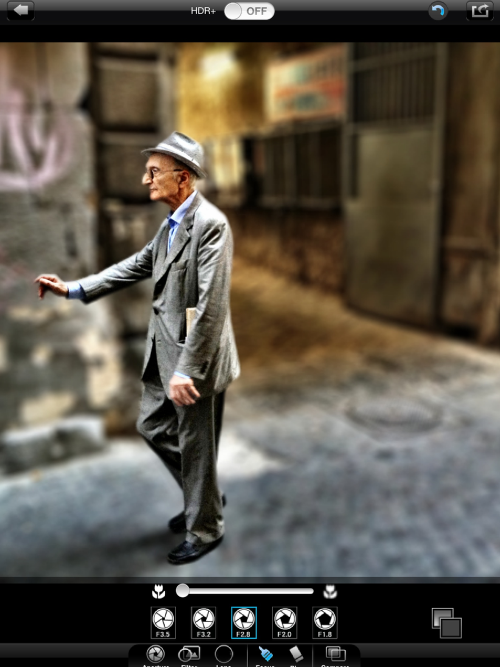
As you can see, all around my subject is nicely blurred. You then click on aperture, bottom left, and drag the blur bar completely to the left, so the whole outline is homogeneously blurred and there are no spilling. In the same menu you can decide the strength of the aperture, which can vary from f3.5 to f1.8, you decide what kind of effect you want to give to your photo; in this case I want something in the middle, not too much, and yet something that can be noticed so I go for the f2.8.
You can also, then, choose to add a different color or black and white filter by selecting Filter and a noisy or a Bokeh feel through Lens. Once you are happy with what you have achieved, just click on the top right hand corner arrow to save your work to your camera roll.
Step 10
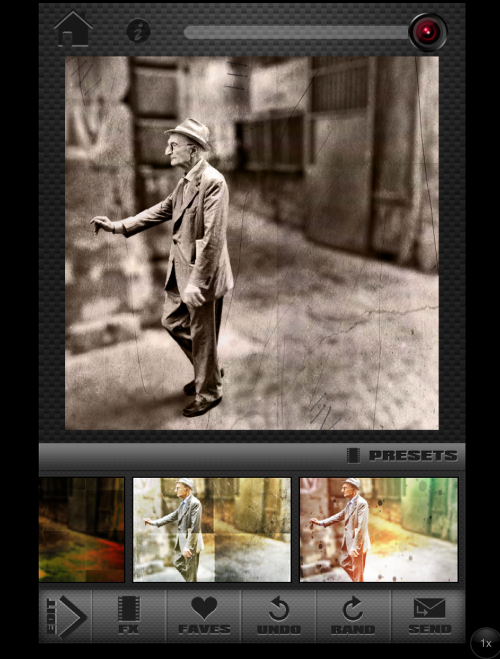
Now we move into Scratchcam, to give it a bit of an aged feel to your photo. Once you have opened Scratchcam, and selected your photo from the the album option, Scratchcam, automatically loads your photo with a pre-set edited version of it. You have many more default versions that you can choose from in the FX area, or you might have already saved one into your FAVES folder. I usually go into EDIT, so that I have more freedom to select what color, texture and scratches I want to give to my photo.
Step 11
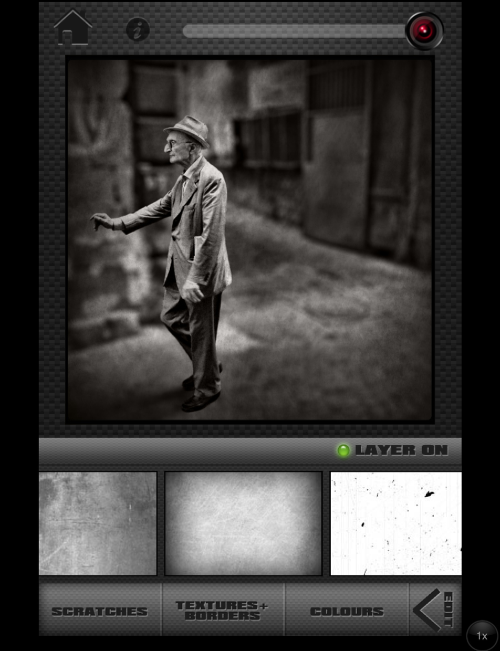
Now that I am happy with what I have done with this I can also decide the strength of these filters by sliding the bar at the top, I usually keep it at full strength, but sometime one might like to just have it a little bit more subtle. When you are happy, just click again on EDIT, bottom right and then on SEND and on Save to Album.
Step 12
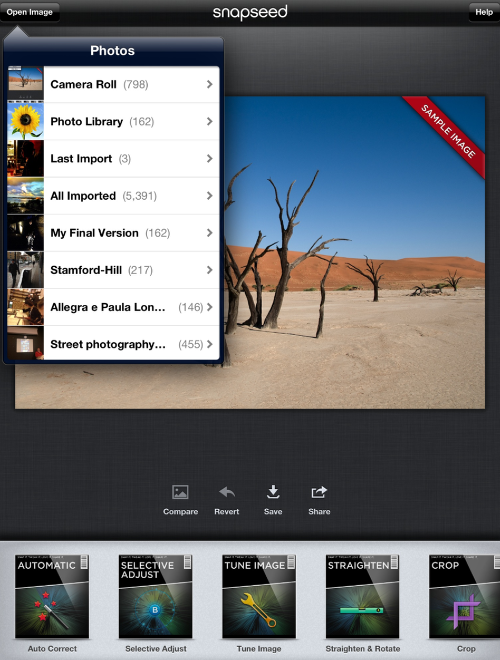
Finally, I open Snapseed and start with Automatic, but sometime it just blows the light and saturation to levels that I really don’t want, so I’d rather do it myself and choose the Selective Adjust.
Step 13
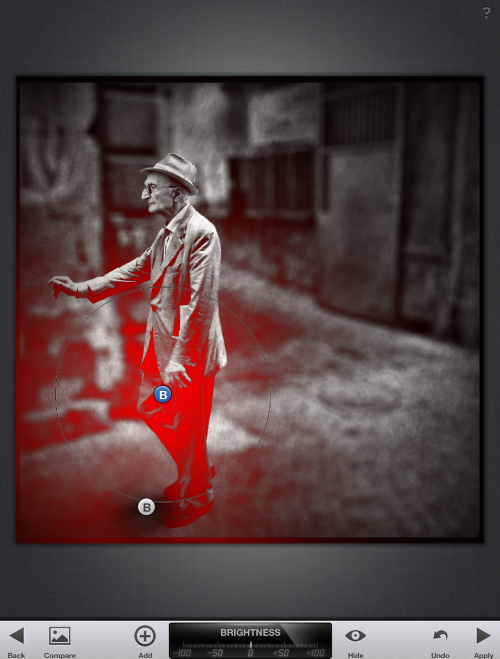
By selecting Selective Adjust and then clicking on the little plus sign or Add button, and touching an area of the photo that you want to adjust, a small circle will appear. You can then pinch inwards or outwards to decrees or increase the area that will be affected by and you will be able to see this, for it will be highlighted in red (as shown). You have three choices now, you can adjust the brightness, the contrast and the saturation of that particular area, in this case I will just play with the brightness and I will darken that specific area.
Step 14
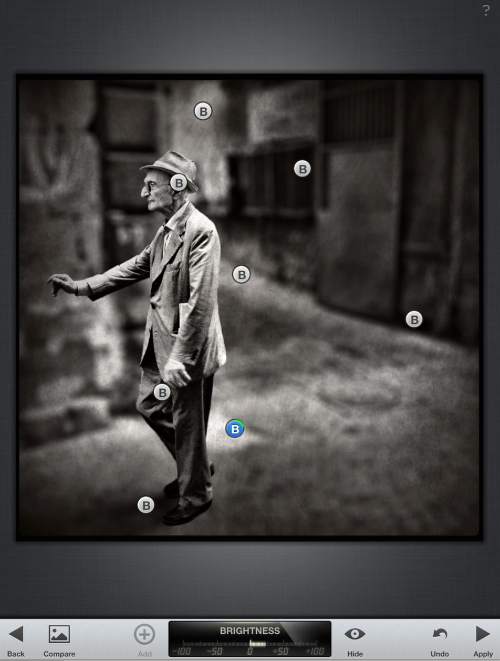
You can apply a selective adjustment to more than one area of the photograph, up to a maximum of seven per session. Once you have brightened or darkened to your hearts content just press Apply, in the bottom right corner. If you are not happy you can always Undo or just press Back and it will take you back to where you started.
Step 15
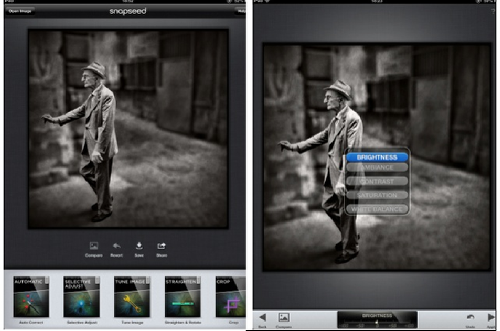
When I finish with the Selective Adjust I usually play with Tune Image, where I can change the brightness, ambience contrast, saturation and the white balance by just sliding my finger up and down on the photo. After that I do look the other options that Snapseed offers me, and when I am quite happy with what I have achieved I save it, by pressing the save icon, third one beneath the photo.
Final Image
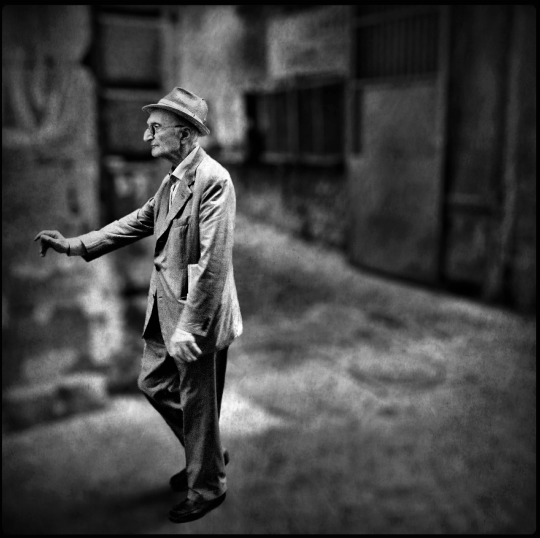
Here it is! The final version. I am quite happy with this one. Now it’s your turn to go and play with these lovely apps! Thank you very much.
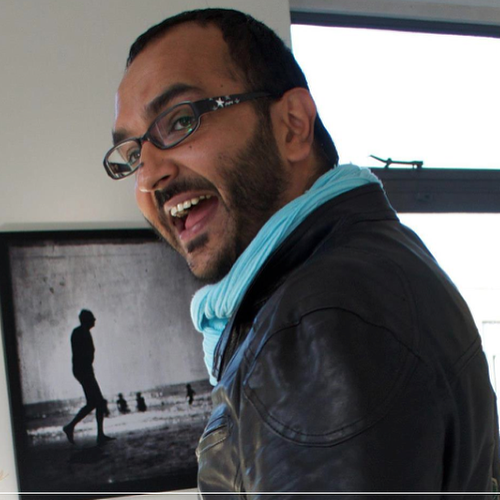
Dilshad Corleone
Dilshad Corleone aka italianbrother on Instagram, albeit in love with the photography of Henri Cartier-Bresson and his 35mm format, considers himself to be a true iphoneographer. His street photography has been exhibited at the Vyner Studio in London for the Photomonth East London (October 2012), at KCC Chelsea in London A collective Iphoneography Exhibition (November 2012), at the Truman Brewery in London for the Iconic London Exhibition (December 2012), at the Unit24 Gallery in London MobilePixation Mobile Arts Exhibition (December 2012), At the Laboratorio de Artes Variedades, Guadalajara, Mexico for the Dreams Without Borders Exhibition (December 2012 – January 2013), at the Garden Gate Creativity Centre in Berkeley, California and at the Galerie OutOfMyMind in Bremen, Germany as part of the Third Wave Iphoneography Exhibition (January 2013), at MacWorld International Conference in Los Angeles as part of the Mobilmasters Exhibition (Januarry/February 2013), Soho Gallery For Digital Arts in New York as part of the Mobile Photo Award Exhibition (February 2013). Dilshad’s work is gracing the wall of private owners in London, Italy, France, Spain and the USA, and he is a columnist for Theappwhisperer.com. Dilshad has travelled widely all over the world, especially in East Asia, Africa and recently in Iraq where he worked in an orphanage as a volunteer. His Iphoneography have a strong feel of the old 1920’s 1930’s photography and he loves the grunge, the dirt, and the grit. Dilshad is also fond to portray the unspoken London, the untold London, with heavily blurred background, men with big, long beards, hats and characteristic and peculiar faces. Iphoneography and Street-photography has given him the power to tell his stories, what he sees and what touches him.
22 Comments
Susan Carroll-Seger
Nice work flow. Thanks Dilshad
Dilshad
Thank you so much, really glad that you liked it!!! there will be more to come!
Mike Paschall
Very nicely done. Easy to follow. Off to the App store:)-.
Thanks,
Mike from New Mexico
Dilshad
ahah!!! so happy that flows well I try to keep it easy and simple! HAppy shopping!
Rinkey
Great tutorial, thank you Dilshad!
Dilshad
Why thank you so much!!! so happy you enjoyed it! let me know if I can be of any help!
Rinkey
Thanks I will! The apps you used here are some of my favorites!!
Dilshad
Really glad that you liked it!! These are my favourite apps too!!!
melia
great recipe. thanks for gifting us your vision
Dilshad
I know, right! I love cooking too, and the ingredients are fundamental! especially the dosage…;) many thanks!
Geri
Aha the secret is out! Thanks so much brother Dilshad for sharing your process. I love what you do, but of course you know that ♥
Dilshad
Love you too sis!!! Your support truly means The world to me!!!
Spiritual_Scientist
Nicely done. Inspiring. You’d make a great prof ;). Keep rising Brother.
Dilshad
That’s so sweet! thank you lovely!!!
Tracy Mitchell Griggs
Thanks for giving us a peek behind the scene – now I need something similar for compositing, layering, masking and blending 🙂
Cheers!
Dilshad
My pleasure and really glad that you liked it!! let me know how it goes!
Ian
Ah. The secret recipe is out. I’m off to try and bake one myself. Thank you master chef Dilshad (aka ItalianBrother or Godfather of IG).
Dilshad
ahahah My pleasure, sir! Welcome into the Family, as we say… 😉
sara McCracken
thanks so much for this detailed yet easy to understand tutorial!
Dilshad
Brilliant!!! like that it is easy! would love to see what are the results! let me know! 🙂
Eitan
Incredible shot and edit! My edit methods are quite the same, but there’s always more to learn, and I thank you for that 🙂
Great tutorial, love this site 🙂
Dilshad
Thank you for reading and commenting!! I would love to know your editing style and see how you do it!