
Layover Tutorial – Putting It Through Its Paces!
For a long time there were only a couple of apps that everyone seemed to use when they wanted to blend layers. Apps like Iris, Image Blender, and Juxtaposer. Each of these have their strengths and are quite dependable blenders. However, you can only blend two layers at a time when using these which can slow you down if, you’re working with more than two layers while building your image.
In my first tutorial on the app, Layover, I gave you a quick overview…just enough to get you started. In this tutorial, I’d like to show you how easy it is to use Layover’s layering and blending tools to create a simple digital collage.
Hopefully, this tutorial will inspire you to try Layover for yourselves. You can download it here, it retails for $0.99/£0.69/download.
Step 1

Opening Layover, you’ll get this work screen. Hopefully from my first tutorial, you’ll remember what all the sections of the screen can be used for. No problem if you don’t, as it will be easy enough to pick up on things as I proceed!
Step 2
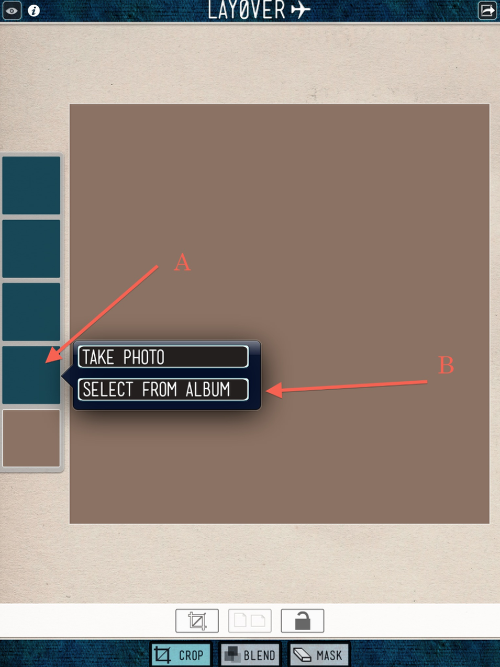
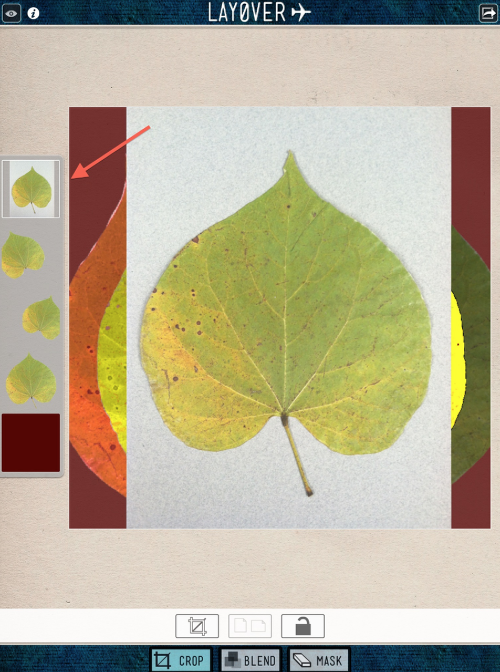
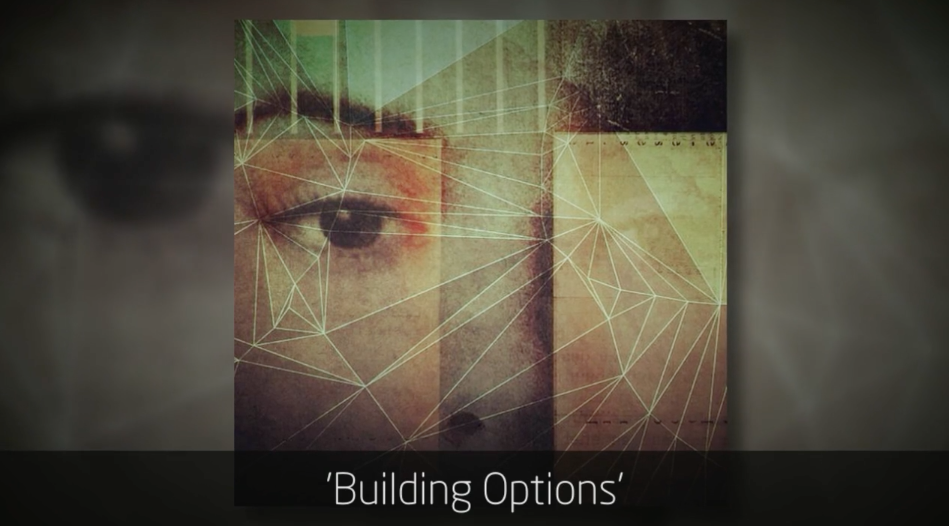
Going into this project, I knew I wanted a square 1:1 format so I left the default ratio in place. (Check my first tutorial to see how to change this.) I did want a different color blending base to work with, so I clicked on “Blend” (A) and then used the slider bars (B) to come up with a color that seemed to work for the base.
Time to bring in my first image layer. I clicked on “A” which brought up the pop-up screen you see. I then clicked on “B” to access my camera roll.
Step 3
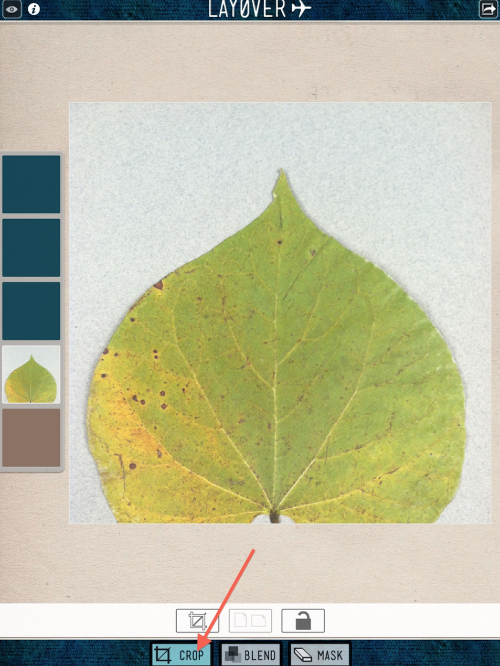
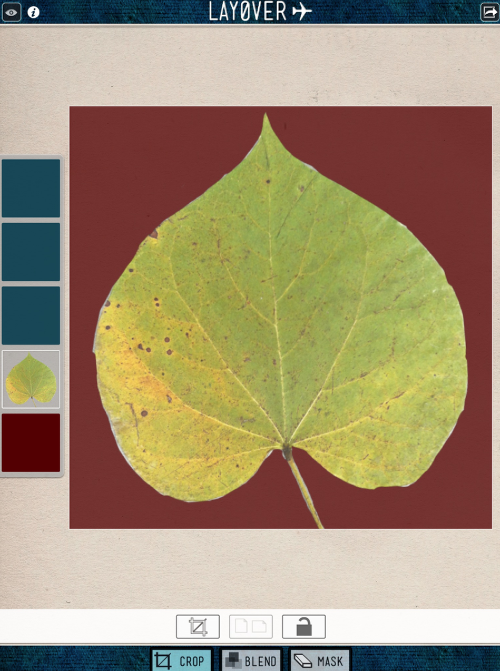
Choosing this leaf image from my camera roll, Layover brought it in for my first layer. (I’ll be using the same image in each of my layers…just so you know!) Since it’s not where I need it on my work surface, I clicked on “Crop” and used the standard two-finger squeeze and drag to place/size the leaf to my liking.
Step 4
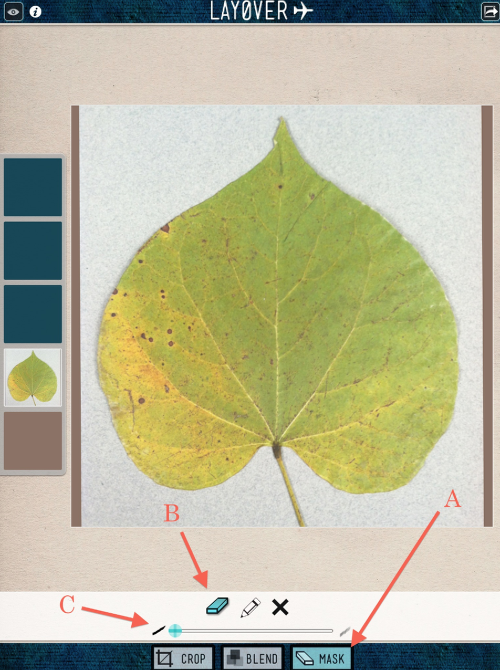
With the leaf centered/sized to fill the screen, it’s time to mask out the background. I clicked on “Mask” (A), made sure the “Eraser” icon (B) was active as well as the brush opacity (C) on full. Time to mask!
Step 5
I find masking to be a bit tedious at times, but also very meditative if I take my time. Generally I’ll start with erasing the large areas fairly rapidly…this is the fun part! I’ll either use my fingertip for the big areas then switch over to a stylus when I need to move in close.
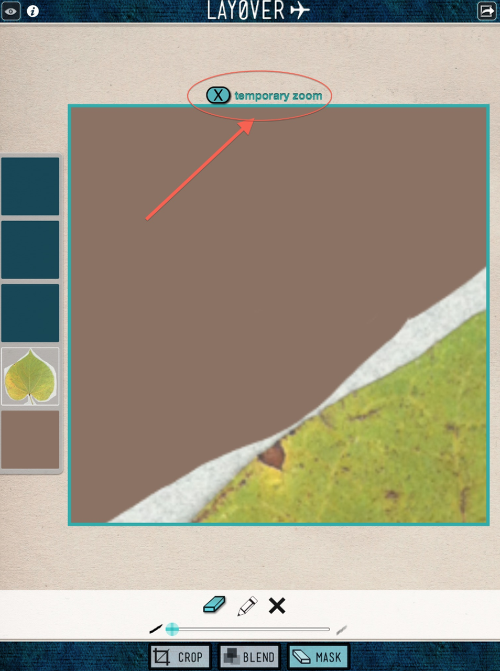
Like here! Using the two-finger touch and drag, you’ll activate the “temporary zoom” that will allow you to isolate areas to do your fine-tuned masking. When you’re done with an area, you can drag the image to a new spot or just click on the “X” to turn off the zoom.
Step 6
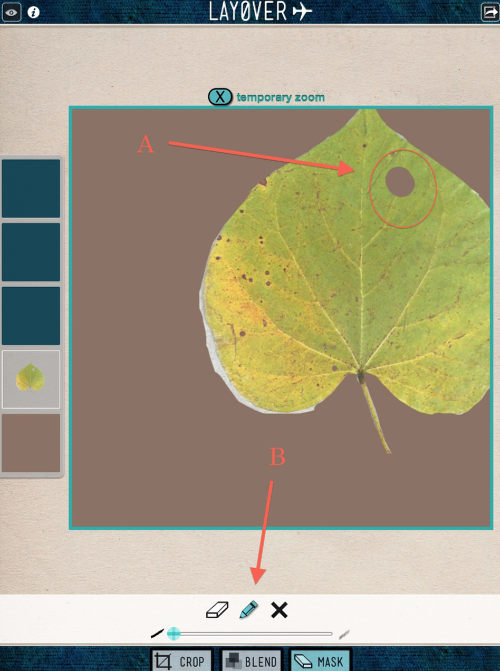
I wanted to take a moment to share a “problem” I have with using the “temporary zoom” feature. I’m just a little heavy-fingered at times and don’t get both fingers down at the same time. When this happens, I’ll erase a fingertip-sized area (A) on my image! A bit of a nuisance…but one that’s easily fixed. I just click on the “Pencil” icon (B) and paint in that area. Simple enough!
Step 7
Masking done! I didn’t show you all the zooms in and outs…or all my re-do’s. Suffice to say, I did get better as I went on. Practice makes perfect!!
Step 8
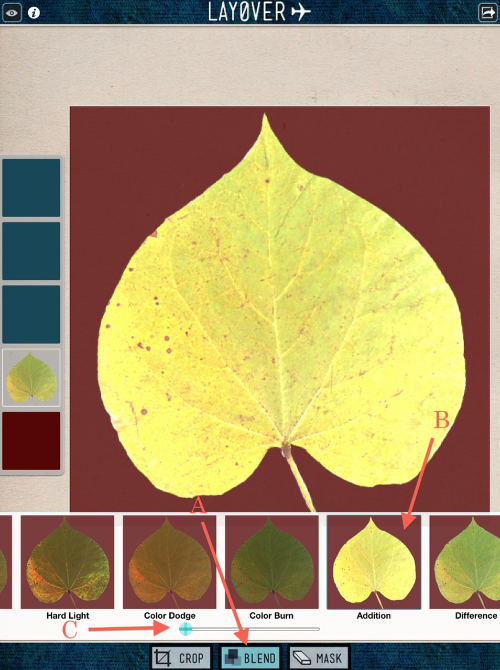
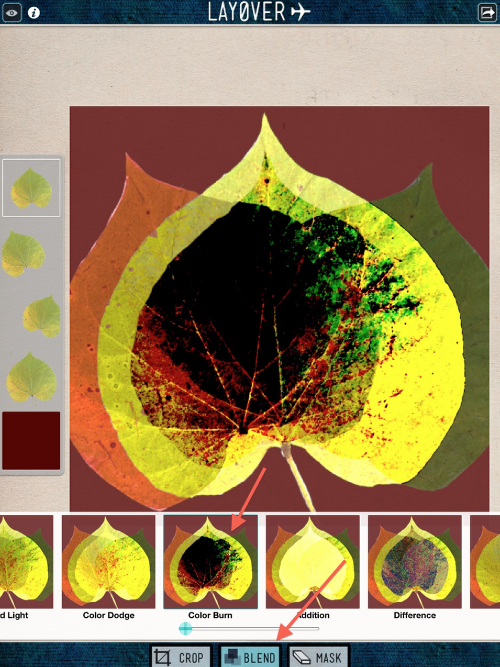
Time to blend! I clicked on “Blend” (A) and then tried out all 15 of Layover blend effects before deciding on “Addition” (B). I also decided to leave the opacity of this blend at 100% (C).
Step 9
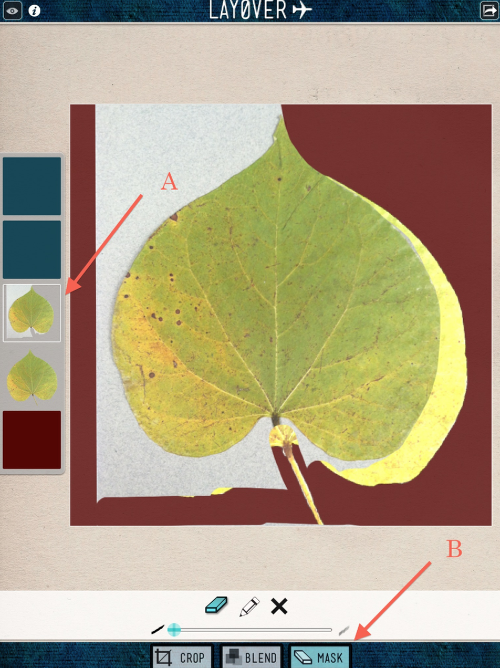
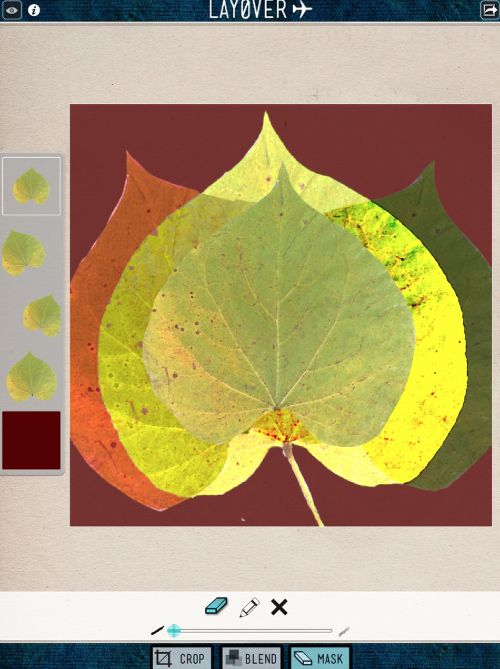
Blending base done! First image layer done! Moving on to the second layer, I brought in the leaf image once again (A) and started my masking (B). In the following steps, I’ll be moving through each pretty quickly as the sequencing in the workflow is the same for all layers.
Step 10
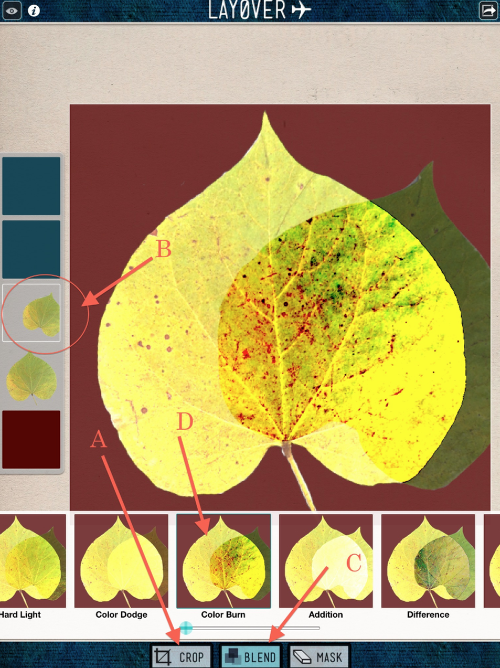
After finishing the masking of this layer, I clicked on “Crop” (A) to position/size the leaf where I needed it. You can also see this positioning in the layer numb nail (B). This done, I clicked on “Blend” (C) and chose “Color Burn” (D) to finish this layer.
Step 11
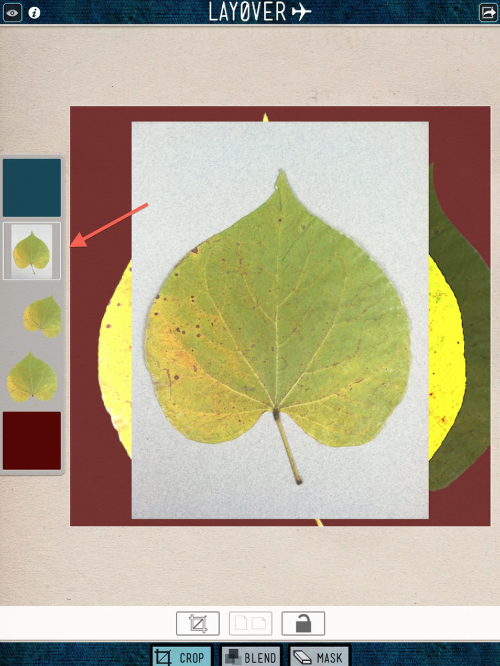
Repeating the sequence, I again brought in the leaf image into Layer 3.
Step 12
In this screen shot, I’ve already masked the layer and just finished using “Crop” to move/size the leaf as in the last layer.
Step 13
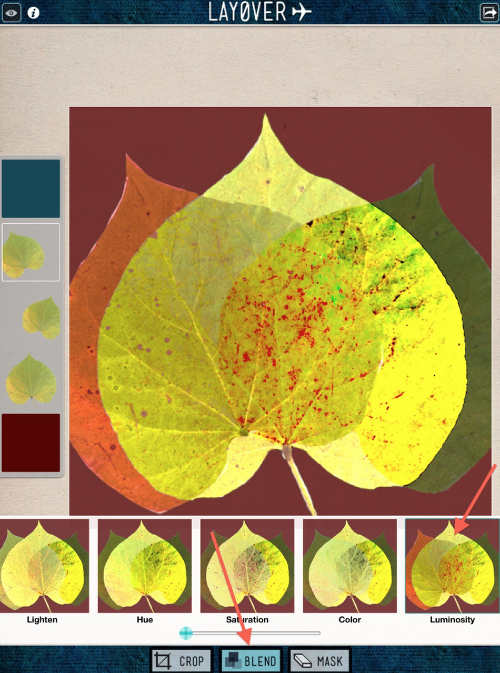
I clicked “Blend” but then I had a hard time deciding what blend effect I wanted to use with Layer 3, so it was with much trial and error that I finally decided to use “Luminosity” at 100%.
Step 14
All right! One last layer to apply!! Are you starting to see where this is going? Hope so!! Yep, the same leaf…and the same work sequence…
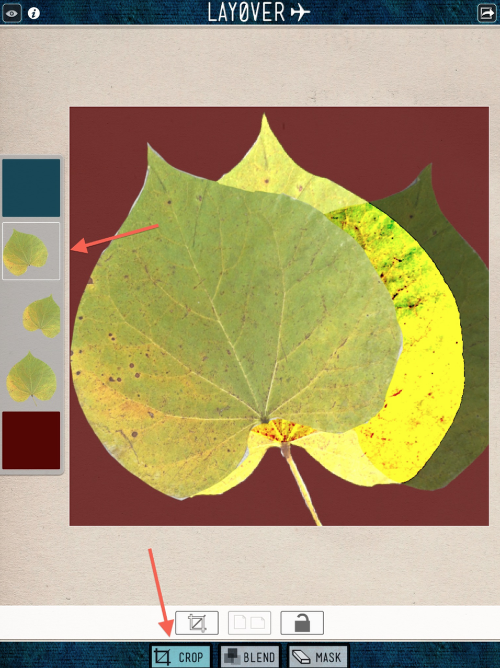
Step 15
Here’s Layer 5 masked and cropped, ready for its blend effect.
Step 16
As with Layer 4, after clicking “Blend” I had a hard time finding a blend effect that I felt worked. Finally, I picked “Color Burn” at 100% once again liking how this tied everything together.
This finishes up this workflow. The next step is showing how to save the image. What I didn’t show you is that you can touch-and-drag each layer numb nail to a different position, changing how each layer interacts with the other. When you do this, the layer will retain its original blend effect, however, you can change this by making sure that layer is active. Play around with this on your own…it can be very interesting!!
Step 17
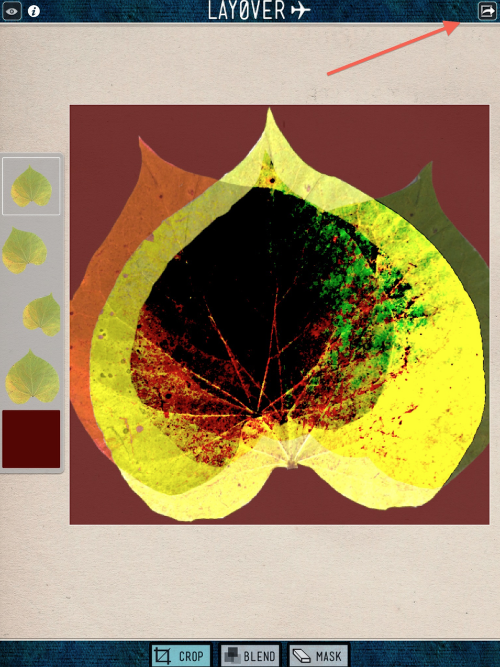
Saving an image is a cinch! You don’t have to go through any “flattening” steps…just click on the “Save/Send” icon in the top right corner.
Step 18
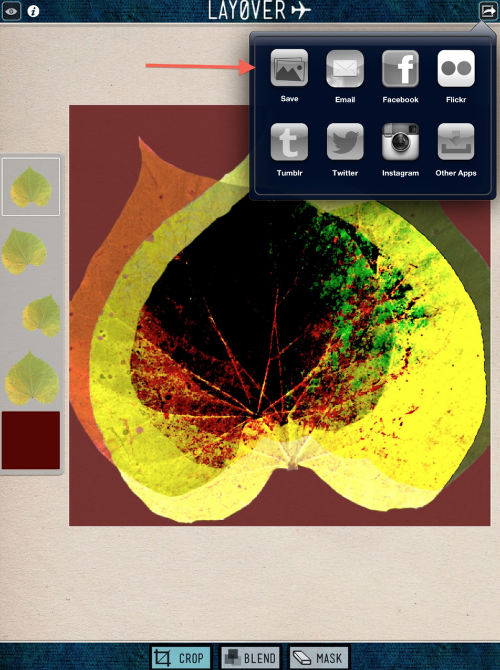
Then, click on the “Save” icon in this pop-up screen…and you’re done. You can also share you image by clicking on any of the other icons in this screen.
Step 19
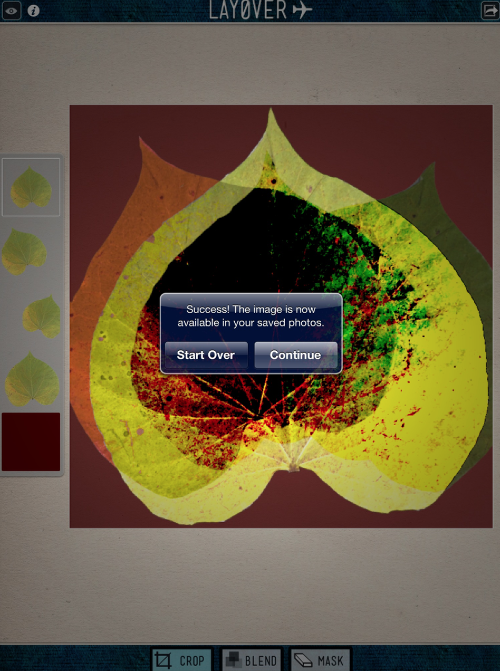
Once the “Save” is completed, you are given the option of starting over with a new project or continuing on with your current work. This option comes in handy!!
Step 20
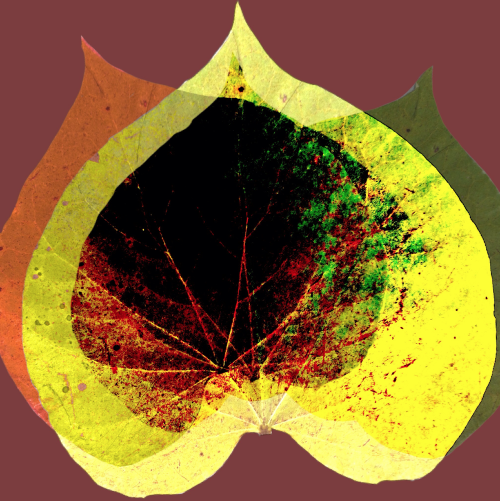
Here’s the final image! Not bad…
As always, thank you so much for taking time to read this tutorial. I hope you found it both informative and enjoyable. Please do not be shy with your questions and comments, as I love hearing from you!
David Hayes
David is Head of Technical Tutorials here at theappwhisperer.com and this role adds to the many things David has done in his life…some of which he considers more significant than others. Yet, he feels all have made him the artist he is today. He’s been a cook at a truck stop, a janitor at a military base, worked in advertising, been a banker managing other people’s money, and an elementary school teacher. Trained as a photographer as an undergrad, he’s recently returned to these roots and now considers himself foremost a photographer and secondly a mixed media artist.You can find David’s work on many other popular websites including his own: http://www.clearerreflections.com.

7 Comments
Mark Schnidman
Great tutorials on an intresting app. As always, a real nice job. Thanks.
David
Thanks, Mark! Glad you liked it. I do appreciate hearing from you!!
Carol
Excellent, Dave! You make the steps clear and followable.
Janine Graf
OMG thank you David! I am a true blue Juxtaposer fan, but it does have its limitations. Heading over to iTunes store now to download Layover. Well done good sir! 😀
David
Janine ~ the more I use Layover, the more I like it. I’ve been a trueblue Blender fan, but Layover is starting to win me over! Glad you liked my tute!
David
Carol ~ Thank you for the feedback! I’m glad you like the tutorial!!
Tracy Mitchell Griggs
I’m a layering newbie and have found it especially challenging working on the small screen real estate of the iPhone. Hopefully an iPad is coming down the road. Good tutorial and I’ve acquired this app for my blending/layering folder. Cheers~