Technical Tutorial – ProCam – Another Look!
When I first looked at ProCam I was still working with an iPhone4….and it was several versions back. Since then, I’ve picked up an iPhone 5…and ProCam has just come out with its latest update. Time to take another look at this great camera app!
ProCam retails for $0.99/£0.69. If you haven’t downloaded it yet, you can pick it up here.
I won’t be covering everything this app is capable of doing in this tutorial…just enough to give you a get-started taste. Future tutorials will dig deeper. I promise!!
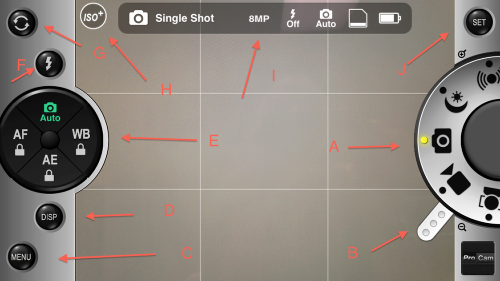
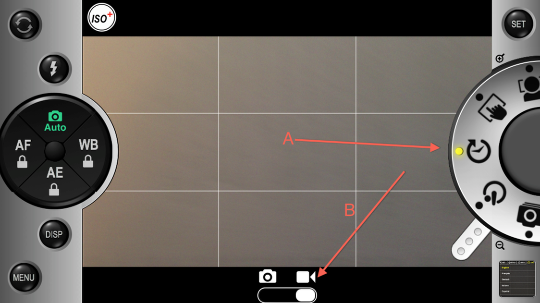
Let’s start with a quick tour of ProCam’s interface. Beginning at the right hand of the screen…and going in clockwise fashion…is its rotatable mode dial (A), which will take you to the different camera options. Right now it’s set on “Single Shot” mode.
Moving to (B) you’ll find it’s zoom knob which, when rotated will digitally zoom to 6x. This will work both for still picture capture and video recording. Skipping over to the left, the Options Menu can be accessed by pressing the “Menu” button (C). Pressing the “Disp” button (D) will turn off/on the Status Bar (I).
The rotatable dial (E) at left center gives you your choice of Auto mode for exposure, focus and White Balance, lock/unlock AF or Auto Focus, lock/unlock AE or Auto Exposure, and lock/unlock WB or White Balance. Moving from here, (F) gives you a choice of Flash functions. In the upper left corner, (F) is the front to back camera selector.
A new function for ProCam is its ISO Boost. When this function is on, the boost feature ups the iPhone 5’s ISO from 800 to 3200.
At the top center is the Status Bar (I) that lets you know shooting mode, frame rate, resolution, flash status, exposure settings, disc space indicator and a battery status indicator. These last two come in handing when shooting video!
Finally, in the top right corner, is the Setting button (J). I’ll talk more about that in a bit.
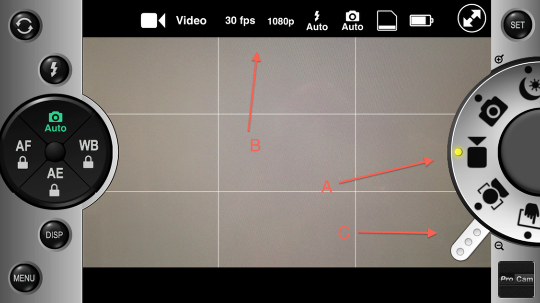
Okay! Let’s move around the rotatable mode dial for a quick tour of all the camera functions. Moving counter-clock wise is the video camera (A), zoom knob (C) and its own Status Bar (B) that gives you film speed and resolution.
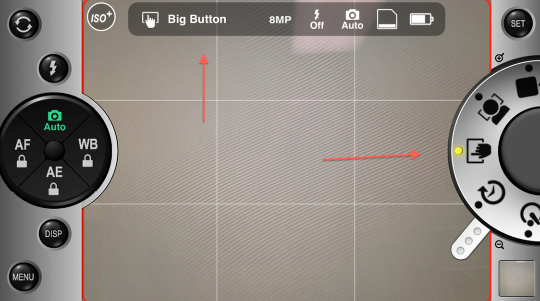
The next mode is “Big Button” which will turn your screen into one big shutter button! Comes in handy from time to time…
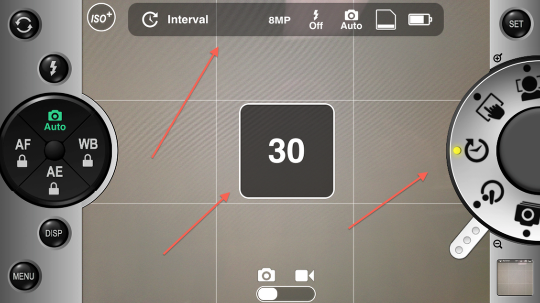
In Interval mode, ProCam will take pictures as a set interval of 1-60 seconds until you stop it. The settings for this mode are done in the Settings menu.
Now here is a mode that’s a bit “hidden”! When you’re in Interval mode (A), move the slider (B) from camera to video. This activates Time Lapse mode. Very cool! To set up your Time Lapse sequence, go to the Settings menu.
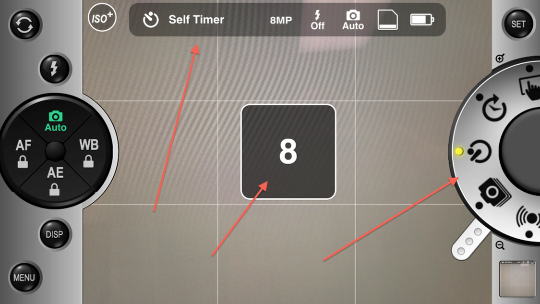
Self-timer mode does just that…counts down before taking a picture. Your duration is 1-60 seconds and is set up in the Settings menu.
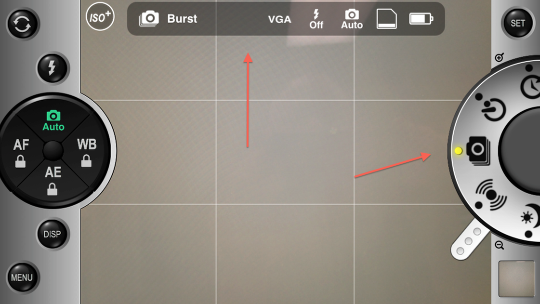
Need to take a lot of exposures, quickly. Then the “Burst” mode is for you. Pushing the shutter down, ProCam will takes photos in rapid succession…until you release the button. Given its speed, there are only two resolutions available in this mode…, which are picked in the Settings menu.
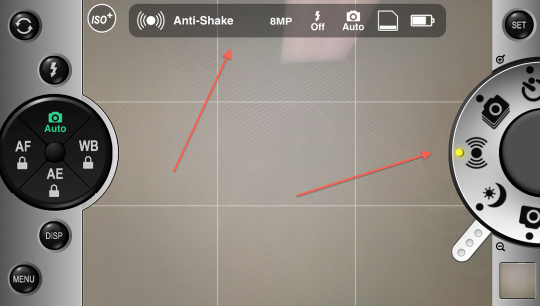
Anti-shake mode will only allow pictures to be taken when your iPhone is not shaking! You can set the sensitivity of this by also going to the Settings menu.
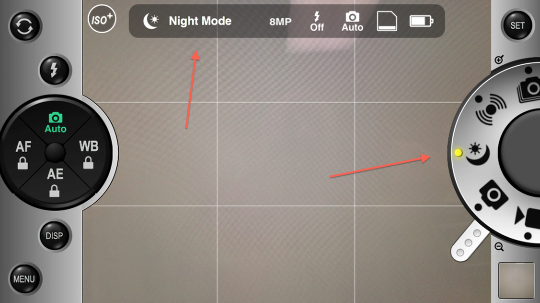
Here’s another brand new mode…Night Mode! When using this mode, you can reduce the shutter speed when working with low light or what to use some blur in your composition. There are four shutter speeds: 1/8 sec., 1/4 sec., 1/2 sec., and 1 sec. These can be set up in the Options menu.
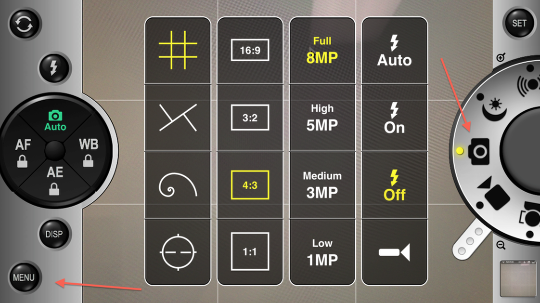
That completes our quick tour of the different camera modes. I’ll spend more time on each of these modes in future tutorials. Now…let’s take a look at the Options menu! Clicking on the “Menu” button brings up this screen. Here you can pick your Composition Alignment Grids based on the Golden Ratio: Rule of Thirds, Trisec, Golden Spiral, and Horizon. Next to this is your choice of Aspect Ratios, followed by Image Resolution, and finally, Flash settings.
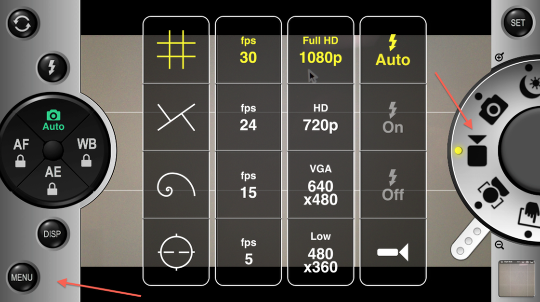
There are also different Menu options for several of the camera modes…which I will talk about in future tutorials, but I did want to show you the Options Menu for the video function where you can chose the film speed and resolution for your videos.
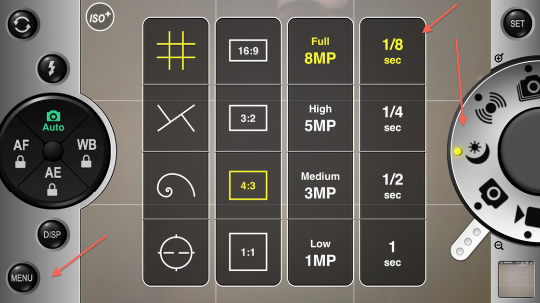
Night Mode also has it’s own Options menu that allows you to pick the shutter speed for your exposures while in this mode.
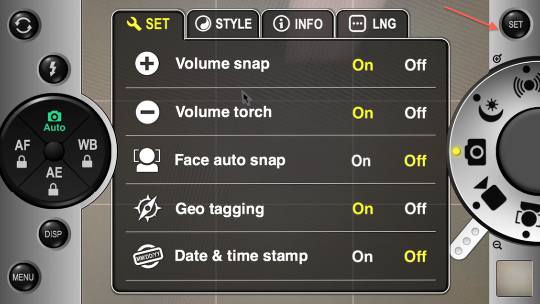
Taking a quick look at the Settings menus, clicking on the “Set” button brings up this screen. In the first tab, Set, you have 28 different settings available to customize your use of ProCam. I’m not going to discuss each of these in this tutorial but do take a look at them all…most are self-explanatory.
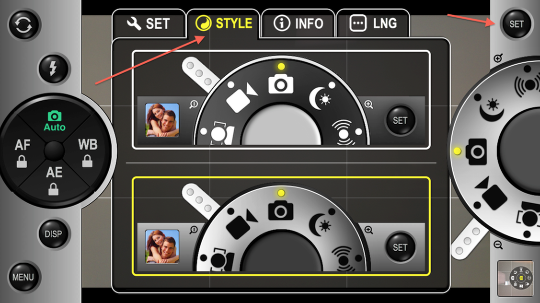
Clicking on the “Style” tab gives you the choice of two free UI color themes…and if you scroll down, you’ll find eight more color themes that are available as in-app purchases for $0.99 each.
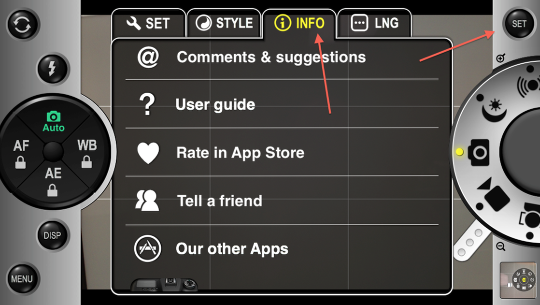
The “Info” tab accesses several different elements including their User guide. The guide doesn’t open in-app but will download to such sources like Dropbox and iBook where you can either read it or print it out for future reference. It’s worth the download as the User Guide does give more detailed info on each of the modes discussed in this tutorial.
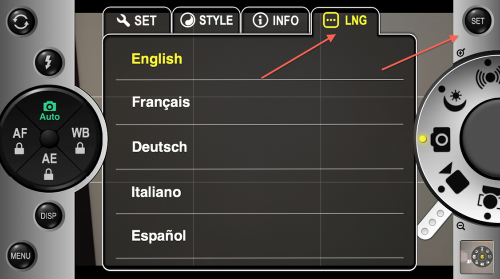
The final tab gives the choice of 10 different languages: English, French, German, Italian, Spanish, Portuguese, Chinese, Japanese, Korean, and Arabic.
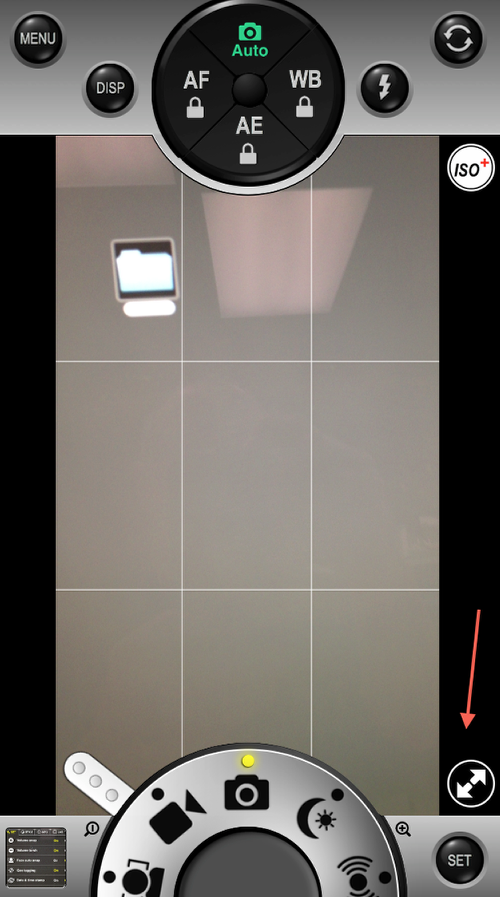
One last thing to mention….and that’s ProCam’s Full Screen Mode which clears away all the sidebars and the such. This mode will only work if you are using either a 16:9 or 3:2 aspect ratio. (You’ll need to go into the Options menu and choose one of these.) To activate Full Screen Mode, click on the “double arrows” icon just above the Set button (upper right hand corner).
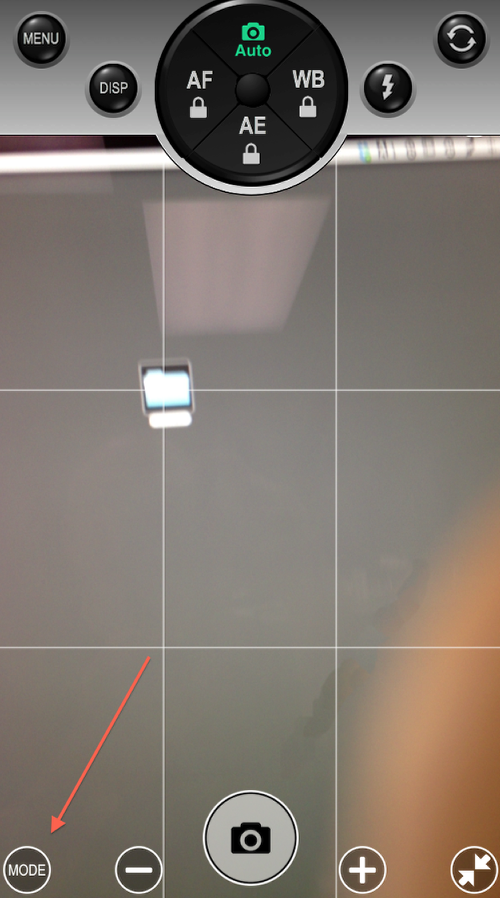
To switch between shooting modes while in Full Screen mode, click on the “Mode” button in the lower left corner which will bring up…
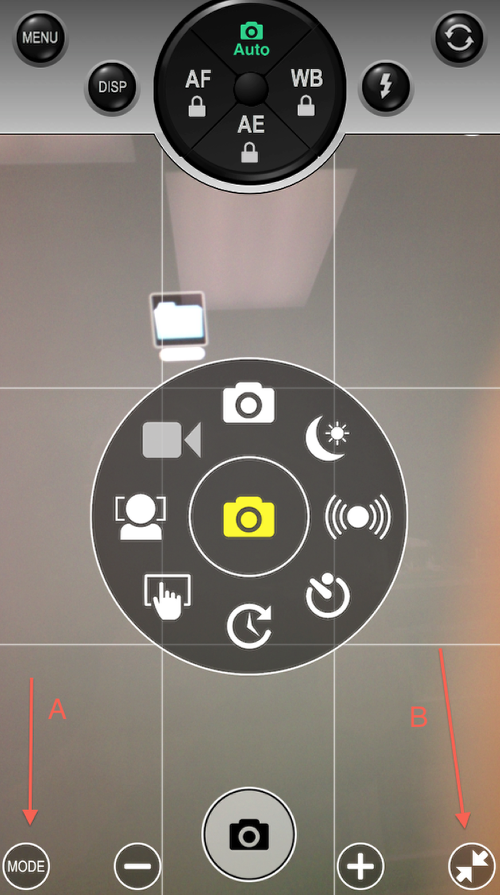
…this screen! To close this pop-up, simply click on the Mode button (A) again. To come out of “Full Screen Mode”, click on (B) which will return you to the original screen.
Alright! That concludes my quick tour of ProCam. I hope this was enough to get you started using this camera replacement app. It’s my plan to go into many of the modes in much more details in future tutorials…so stay tuned!!
David Hayes
David is Head of Technical Tutorials here at theappwhisperer.com and this role adds to the many things David has done in his life…some of which he considers more significant than others. Yet, he feels all have made him the artist he is today. He’s been a cook at a truck stop, a janitor at a military base, worked in advertising, been a banker managing other people’s money, and an elementary school teacher. Trained as a photographer as an undergrad, he’s recently returned to these roots and now considers himself foremost a photographer and secondly a mixed media artist.You can find David’s work on many other popular websites including his own: http://www.clearerreflections.com.