iPhone Photography Tutorial – ‘Urban Dweller – Street Workflow’ – By Paul Brown
We’re delighted to publish Paul Brown’s Urban Dweller Street iPhone Photography workflow tutorial. This tutorial focuses somewhat on ‘covert’ capture methods with some very interesting editing techniques and at the end some great Mobile Street Photography Tips.
We have published several of Paul Brown’s workflows recently. Please take a look at our Paul Brown archive here. Over to you Paul (foreword by Joanne Carter)…
Street iPhone photography gets me out of my comfort zone and I’m finding capturing day to day life more and more rewarding. I’ve said before that a mobile phone is pretty much the ultimate urban camouflage. I discuss a few best practice tips I’ve picked up through experience at the end of this iPhoneography workflow.
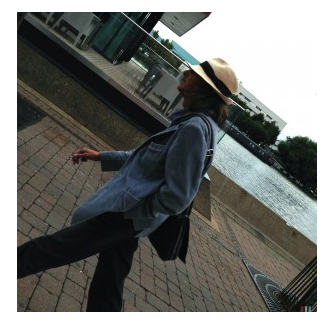
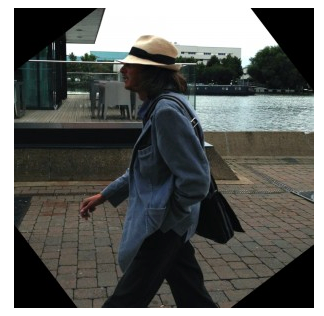
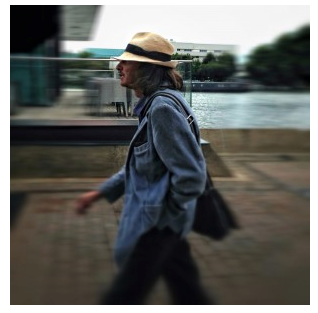
This iPhone photography tutorial looks at an image I captured when shooting ‘from the ear’ at the last minute. It was very badly captured mainly because I hadn’t spent much time practicing the technique. As always though I regard my iPhone images as a raw material. Converting something I find interesting in to something I am willing to share is a huge part of the challenge of iphoneography for me.
‘Urban Dweller’ – Apps used: AfterFocus • Alt Photo • CameraBag 2 • Filterstorm • Handy Photo • Oggl • Snapseed • Superimpose
Process and apps used
Oggl ~ initial capture. This combination is Hornbecker Lens / Blanko Freedom film:
I think the problem with this iPhoneography image is immediately obvious!
Whilst the problem is immediately obvious, the solution is a little more involved. Clearly, a better capture would solve a whole heap of trouble. That has to be the biggest learning point (although it would render much of this iPhone photography tutorial pointless). For me the idea of ‘shooting from the ear’ is something I continue to practice. For this image (which I like) I need to either bin it or straighten a chronically crooked image with limited canvas.
There are two fully automated methods:
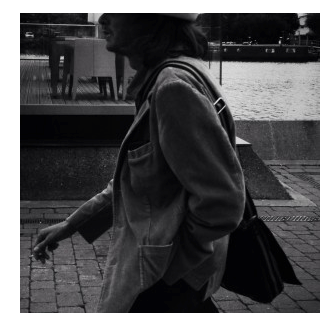
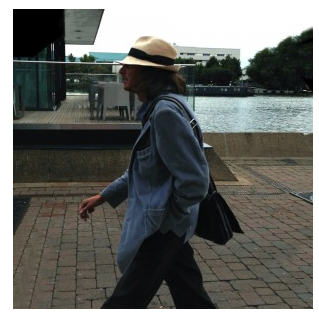
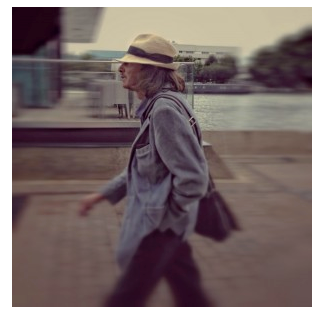
1. Snapseed ~ I’ve used Snapseed in this example but any iPhone photography app capable of straightening or freely rotating an image could be used. Normally Snapseed is a great option for straightening because whilst it has to crop the image as part of the process it also re-sizes it at the same time. Therefore the resolution of the image after straightening is the same as before. Other apps will simply crop the image without re-sizing as part of the process and therefore reduce resolution:
Clearly a straight forward straightening process is not the answer for this piece of iPhone photography!
2. Handy Photo ~ A much better solution in this case is Handy Photo and its magic crop functionality. By importing a piece of iPhoneography and dragging up or down outside of the image it will rotate. The joy of this is that whilst it may clip some of the image it automatically clones new areas. The rotate therefore adds canvas to the photograph and does not simply rotate within the available canvas:
Handy Photo is an app I’ve owned for some time but the capabilities of its magic crop functionality are new to me. It may well be that I would have adopted this approach had I known about it at the time I processed this image. Unfortunately I didn’t and so I adopted a manual process.
Process and apps used (contd.)
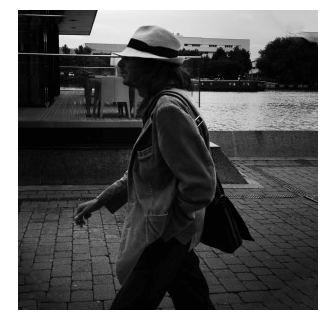
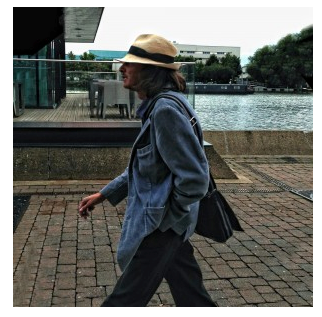
Filterstorm ~ To overcome the cropping issue when straightening the image I had to increase the canvas size. I therefore added canvas all around the image resulting in an increased resolution from 2,448px square to 4,000px square:
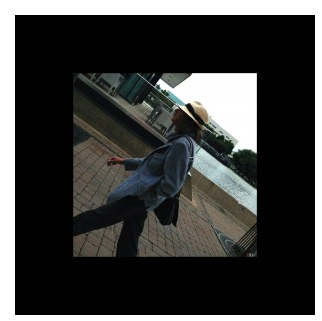
As a side note this is one of the methods I use to square any iPhoneography images that are not a 1:1 ratio for importing in to Instagram. I simply add white canvas to give the shortest side a 1:1 ratio with the longest side whilst keeping the image center (I am aware of apps just to do this but Filterstorm canvas re-sizing is very easy).
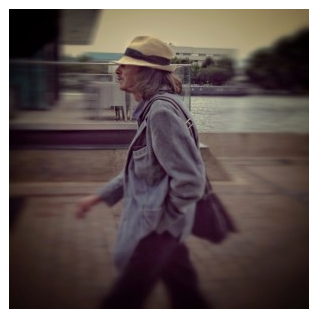
Snapseed ~ Using the straighten tool a number of times (maximum is 10 degrees rotation) I straighten the image (I could have done this in Filterstorm but the maximum straighten in that app is 5 degrees):
Compare this to the image straightened without re-sizing the canvas. You can see that most of the image in this case has been retained, albeit with the addition of some black corners I now have to deal with:
Filterstorm ~ Filterstorm is by far the best app I have come across so far for manual cloning although there are a wide range of capable apps. The beauty of Filterstorm is the ability to zoom in to an almost limitless extent whilst the cloning tools remain unchanged. You would think that would be standard but some of the other apps I have tried zoom the cloning tools at the same time making detailed cloning impossible:
Snapseed ~ ‘sharpen’ and ‘structure’ filters applied to the maximum extent:
This is { image one }:
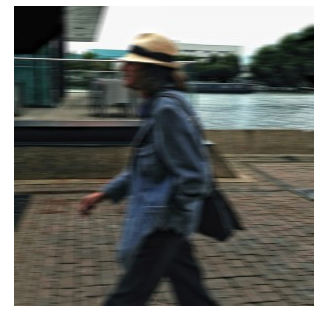
AfterFocus ~ The entire image is moved out of focus using ‘motion blur’:
This is { image two }:

Superimpose ~ image one is layered over the top of image two with linear masks applied to feather the motion blur effect of image two onto image one:
Snapseed ~ center focus ‘portrait 1′ preset added to lighten the center and add further blur around the edges:
CameraBag 2 ~ 1947 filter applied to add a vintage feel to the iphoneography image. This is the first mention of CameraBag 2 in my workflows. It is an app I like and use a lot:
Snapseed ~ center focus ‘old lens’ preset added to further enhance the vintage feel:

Alt Photo ~ Agfacolor Neu filter applied:
Street iPhone photography – some tips
There are 3 techniques I’ve been toying with but I’m sure this is not an exhaustive list:
- Using the headphone volume control to capture images. This works with the native camera app and a selection of third party apps including Camera+ and Hipstamatic. Unfortunately it does not (at the time of writing) work with ProCamera which is a real pity. It’s great wandering around with your headphones in pretending to adjust the volume but actually snapping away. I think this is quite a well known feature now in the iPhone photography world but possibly not to the wider public. The big advantage of this method is that the iPhone can still be moved around freely and the subject being captured can be accurately composed.
- Shooting from the hip. The iPhone set up makes this a reasonable option. Ideally you hold your iPhone in front of you at hip height and either tap the capture button or if the app allows use the volume control on the top or bottom of the iPhone (if you’re holding it landscape). Many photographers like this upward looking angle which adds additional drama. It also emulates to some degree the Rolleiflex cameras used by many of the old masters of street photography. They had the added benefit of averting eye contact and so not distracting the subject but retaining control over composition. With the iPhone the photograph is a little more random. As an even more discreet alternative you can hold the iPhone down by your side while walking if you prefer. The iPhone is ideally set up for this because although it has an aperture of F2.4 (2.2 if you have a 5C or 5S) that is F18 equivalent in traditional 35mm technology. That means the ‘problem’ with creating a shallow depth of field (or depth of focus) becomes our friend because most aspects of the image will be well focused. Best practice when shooting from the hip suggests using a wide angle lens and the iPhone5 comes with a 35mm equivalent lens which is widely regarded as a classic street photography focal length.
- Shooting from the ear. You don’t see too many DSLR photographers trying this one but the iPhone is a phone right? So bang it up against your ear and as per shooting from the hip tap away using any of the capture methods already mentioned. Some apps also allow full screen capture – Hipstamatic and ProCamera to name two. You can therefore just tap pretty much any part of the screen to capture the image in this mode. Of course as demonstrated during this iPhone photography tutorial, results can be random… but as many people say “the more I practice the luckier I get.
My tips when shooting from the hip / ear are:
- Practice lots – it costs nothing.
- Figure out what works for you regarding distance from subject.
- Whenever possible set and freeze focus and exposure points in advance. That said, I do find the iPhone very adaptable during a simple point and click.
- Work with the conditions – good light will give crisp images but don’t be afraid to play in shadow or darker areas where lower shutter speed will create motion blur. The effect can often be interesting.
- I often find my more satisfying images are captured when I’ve found a location I like and then use a little patience to wait until something interesting happens in the space (my fishing analogy – let them come to me). This also gives time to set up exposure and focal points and practice positioning for good composition.
Paul Brown
Paul Brown (known as Skip to most), is an exhibited and prize winning iPhone photography from Lincoln, England. He is a member of the global ‘AMPt Community’, a managing member of Lincolnshire based regional mobile photography Group ‘InstaChimps’ and a founding artist at ‘New Era Museum’. He also runs his own personal blog at http://skipology.com where he shares many of his processes with step by step guides for some of his most popular images and will shortly begin blogging about iPhone photography for iPhone and iPad Life Magazine.London exhibitions include images at ‘My World Shared’, ‘mObilepixatiOn’ and ‘Pixel This’ a curated charity exhibition where he exhibited alongside celebrities such as Stephen Fry, Ruby Wax, Peter Capaldi and Alexander Siddig.Skip was a finalist in the Photobox Motographer of The Year 2012 with his image ‘Skipping’ and is currently preparing for the InstaChimps second mobile photography exhibition due to take place in Lincoln later this Summer.