
iPhone Photography Tutorial – Provoke Camera – Emulating a movement
We are delighted to publish our latest iOS Photography Tutorial by Jerry Jobe. This week Jerry writes about the app Provoke Camera, one that you may find useful to have in your toolbox. (Foreword by Joanne Carter).
Provoke Camera retails for $0.99/£0.69 and you can download it here
iPhoneography is a new movement. It has to be, since it’s based on the introduction of the iPhone. Mobile photography, as a broader movement (different devices), is an offshoot of iPhoneography.
Various apps try to emulate older movements within photography. Most editing apps have some sort of Lomography variant. There are apps such as Hipstamatic and Analog Film (and dozens of others) that try to emulate different film stocks. There are several apps that emulate Polaroid cameras and film stock.
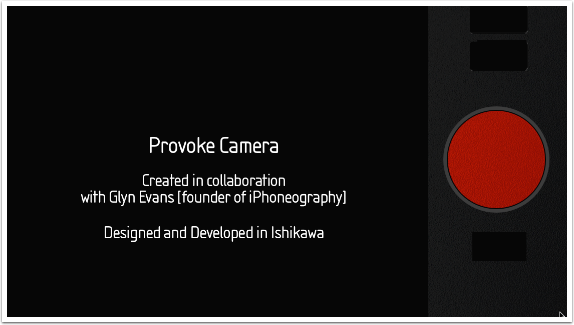
Today’s app brings old and new together. Created in conjunction with Glyn Evans, the man that coined the term iPhoneography in late 2008 and created a blog devoted to it, Provoke goes back to post-World War II Japanese photography for its look. The grainy, high-contrast, sometimes blurry black and white photography was featured in a magazine called Provoke, and the app was named for that magazine.
I have to admit, I’m a sucker for the deep black of high-contrast B&W, so Provoke quickly became a go-to- shooter for me. Let’s take a look at it and see if you agree.
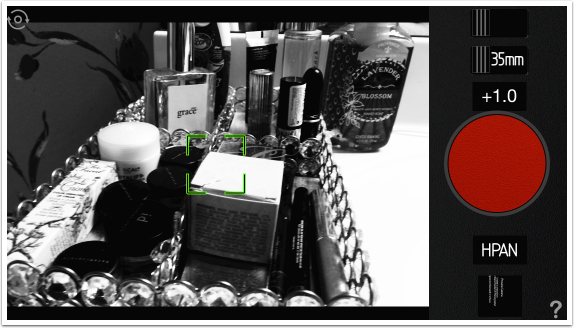
There aren’t a lot of controls, and the ones it has aren’t obvious – except for that huge red shutter release. There’s a “?” icon in the lower right, let’s see what that does.
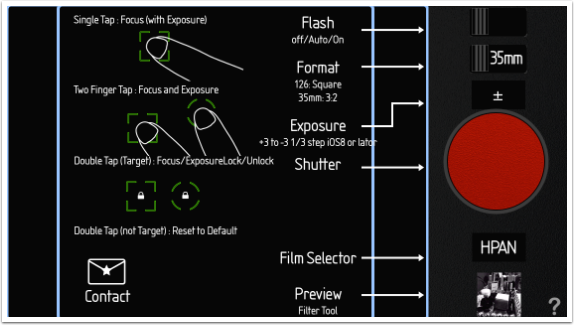
As you should expect, that brings up the help screen. You’ll see an explanation for each of the controls on the right, as well as hints for setting the focus and/or exposure points.
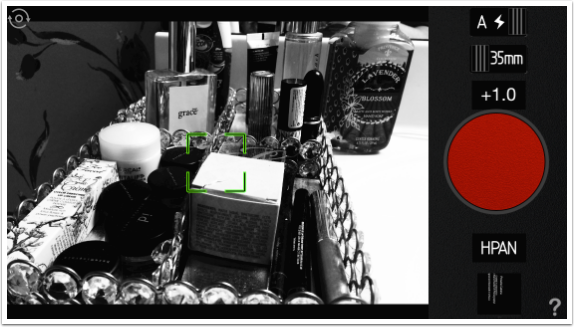
The first control at the upper right is the flash. The default position is all the way to the left, as shown above. Below I’ve moved it one position to the right, which sets the flash to automatic mode.

Moving the Flash slider all the way to the right turns the flash to On mode, where it will always be used when taking photos.
The next slider or button is the film ratio button. Default is “35mm” which is 3:2. Square photos can be taken by moving the switch to the right for “126”.
It’s easier to see the button in the upper left (the circle with the arrows) when the camera is in square, “126” mode as above. That switches between the rear-facing and front-facing cameras. Below I’ve switched them (and gotten out of the way).
The control just above the shutter release is the exposure compensation. The default position is shown below; the control is a plus and minus sign and when it is tapped, a slider appears in the viewfinder with the slider button in the center. Exposure can be adjusted either up or down.
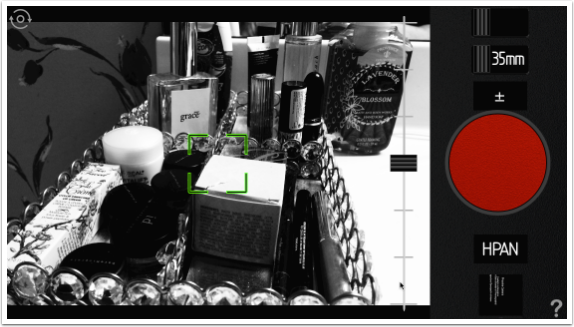
As the slider is moved, the plus/minus above the shutter release shows how much compensation is being used. It can be adjusted up to three full stops in either direction, which is an enormous amount. Below I’ve adjusted the exposure up a full stop.

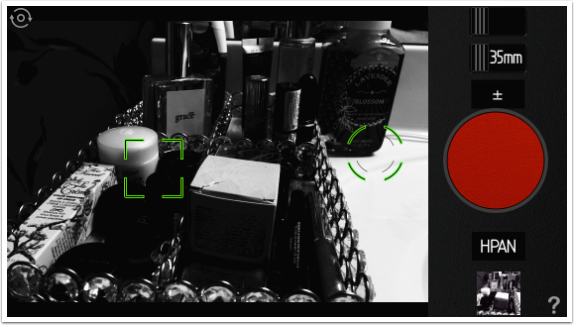
You may have seen on the help screen that you can move the focus/exposure point around within the viewfinder. It is also possible to separate focus (a square) and exposure (a circle) points by using a two-fingered tap on the viewfinder. This is one of the most finicky controls I have ever encountered. You can see below that I managed to get them separated, but it took well over thirty seconds to do so. I’m not really sure how I actually managed to do it. This is a bug, in my opinion.
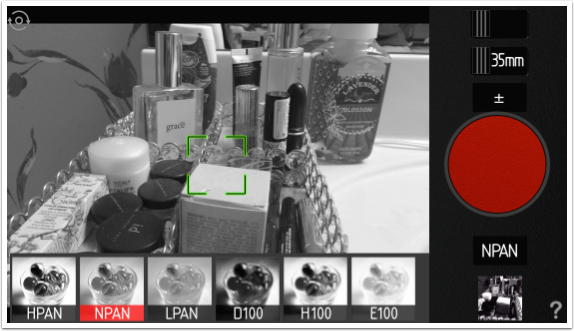
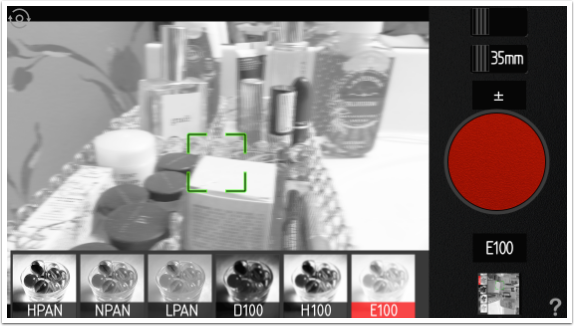
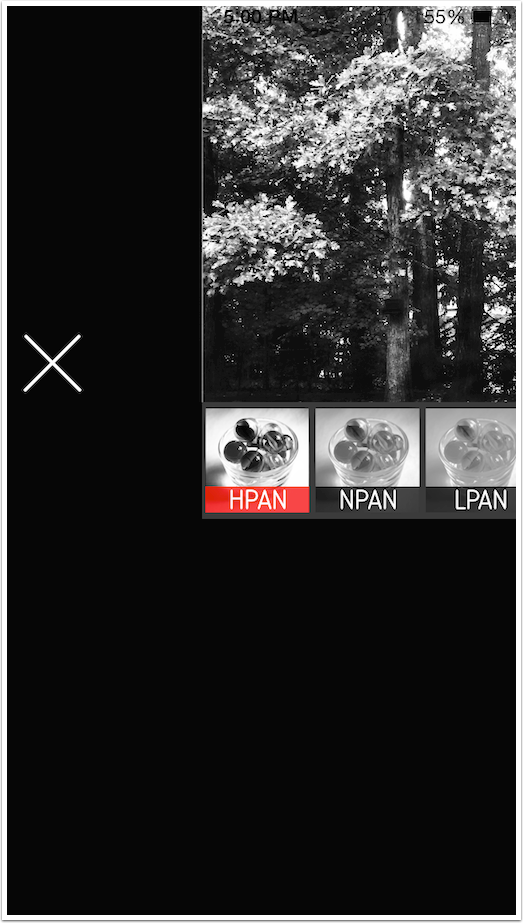
Below the shutter release is the Film Selector control. Provoke has six film types, which appear when you tap the selector. The first is the high contrast setting, HPAN.

The second is NPAN – N for normal contrast.
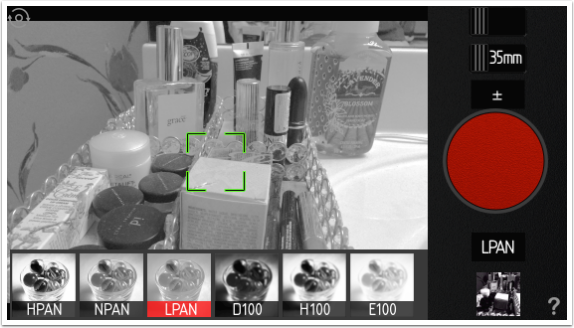
LPAN is low contrast – almost abnormally low. This gets far afield from my preference.
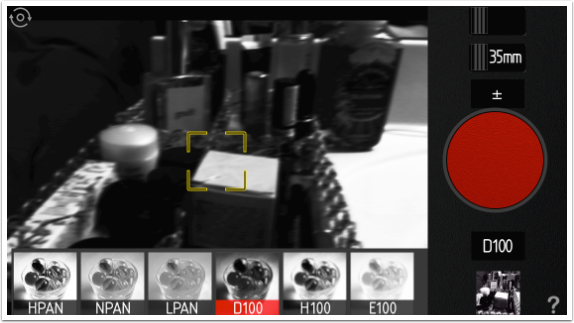
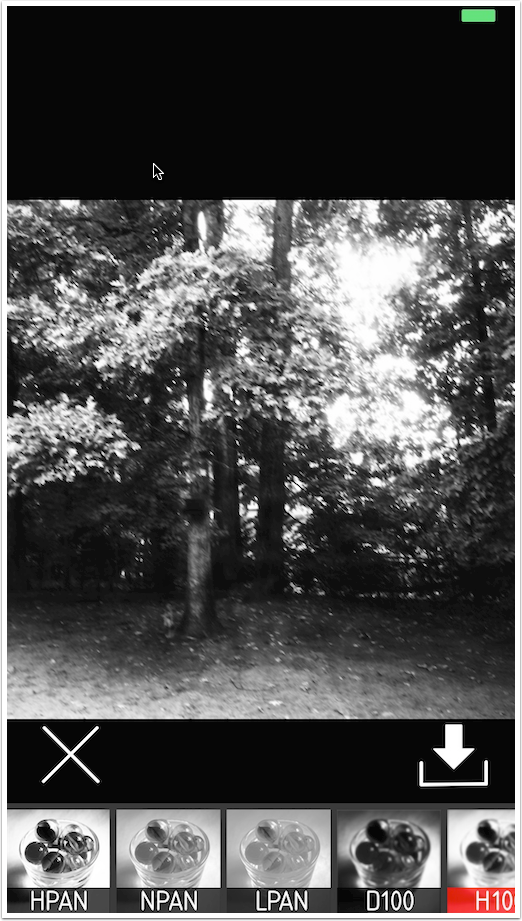
The other three – those with the “100” designation – introduce blur and grain. These would be mostly effective, in my eyes, with a street or industrial scene. The first is the high-contrast D100.
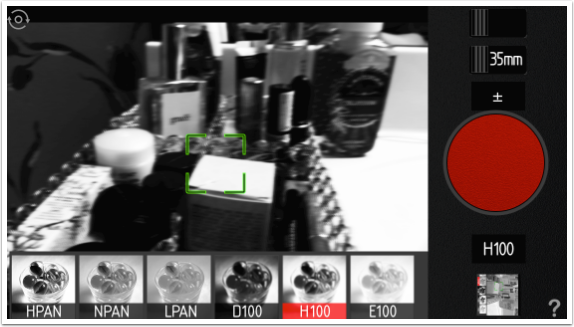
H100 is more normal contrast. Notice how the blur on these “films” is not the typical Gaussian blur, but looks more like a slight motion blur.
Finally, E100 offers a low-contrast alternative.
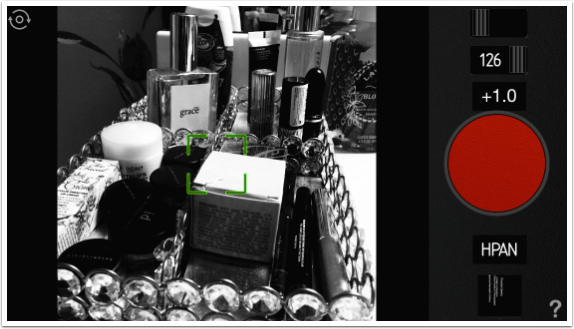
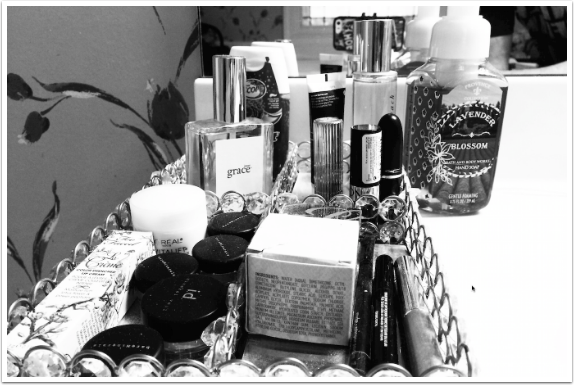
Here’s the resulting photo from my session, using HPAN with a +1.0 exposure compensation. It has a nice, crisp look that I really like. I rarely use anything but the HPAN film.
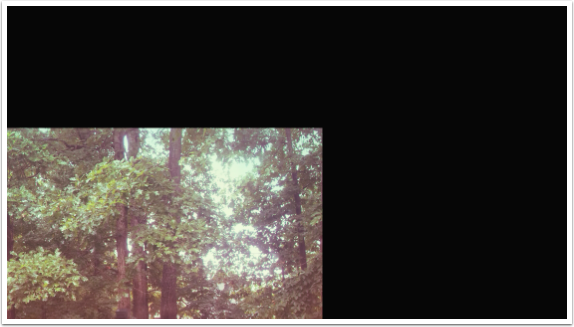
Provoke advertises that it can also apply the same films to images on your Camera Roll (Recently Added album, I suppose, in iOS 8), loading the photo by tapping the thumbnail at the bottom right of the main screen. However, that is not true. I am running Provoke on an iPhone 5S, and when I load the photo and try to edit it, I get the result you see below. I was unable to scroll or pinch the screen in any way.
I tried to move it to portrait mode to see if I could get to any controls that way, and it ended up like this:
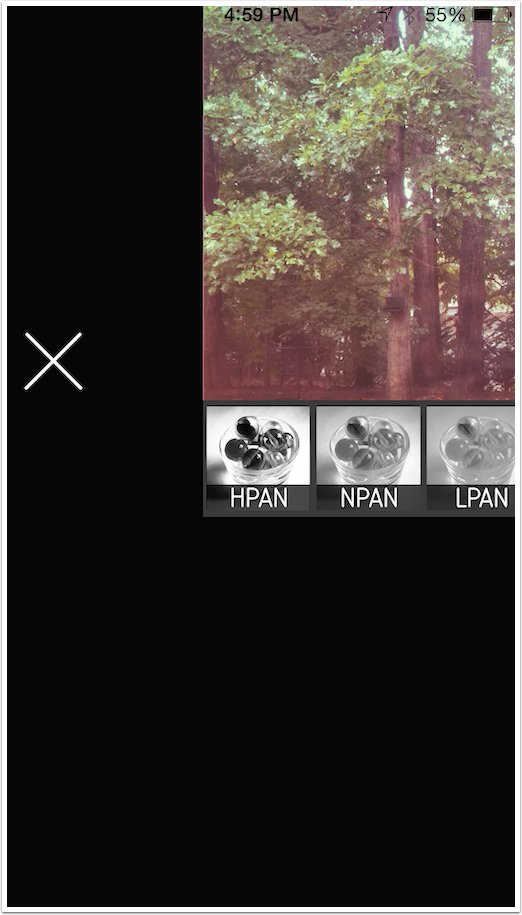
Seeing that I now had controls for film type, I chose HPAN. But there was no control to accept the changes! All that was available now was the X, which cancelled changes and led me back to the image picker.
However, if I turned the phone to portrait mode before accessing the library to load the image, I was finally able to get at all the controls.
This is a major bug. Although you are able to use the capability to use Provoke on images in your albums, it is not explained and it forces you to turn your camera vertically – something many photographers try to avoid.
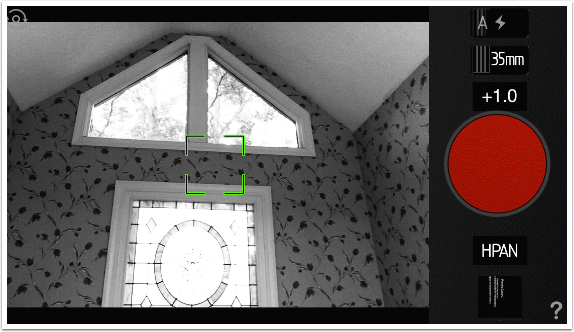
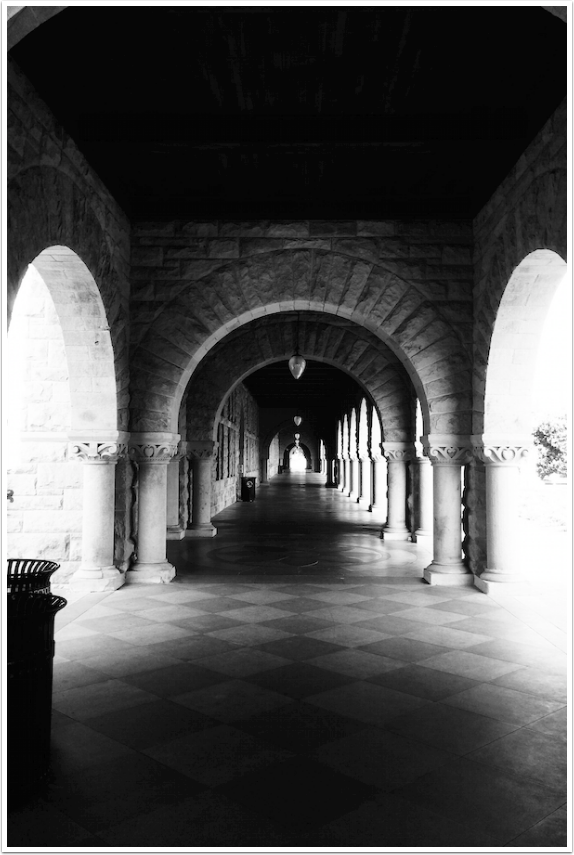
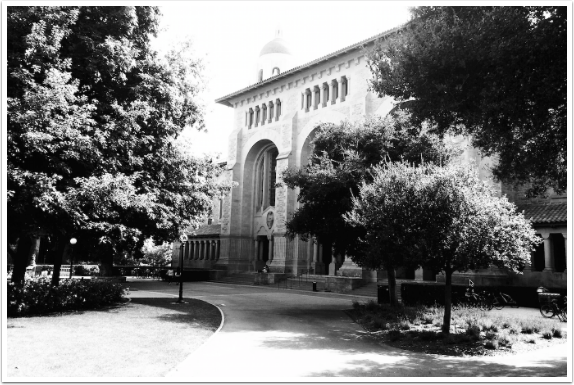
However, it’s still great as a shooter. I’ll finish up by showing you a few shots I took around the Stanford campus when I was out there several weeks ago. First a moody set of arches.
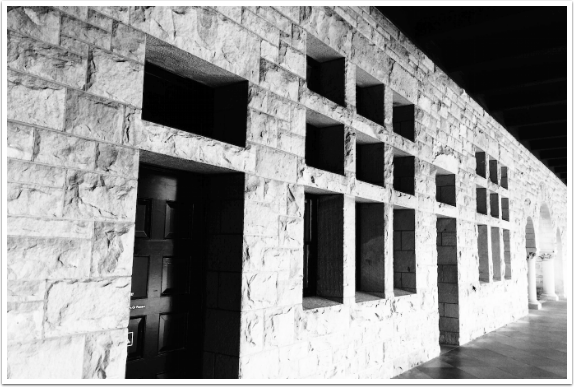
Next, a wall of stone.
A shot taken outside the library.
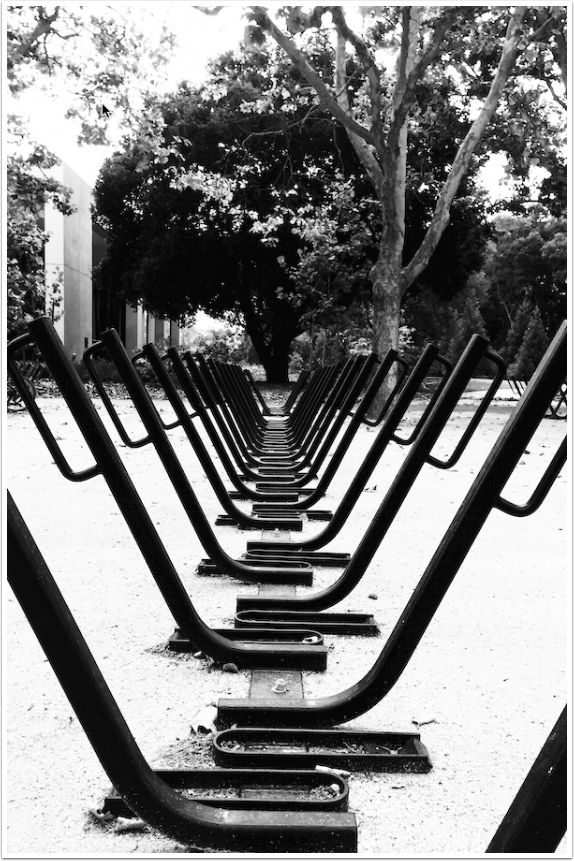
And an arty look at a bicycle rack.
I really do like Provoke. There are some repairs that need to be made to make it everything it is advertised to be, like the separation of focus and exposure and the ability to modify images from your albums, but it does a nice job when shooting.
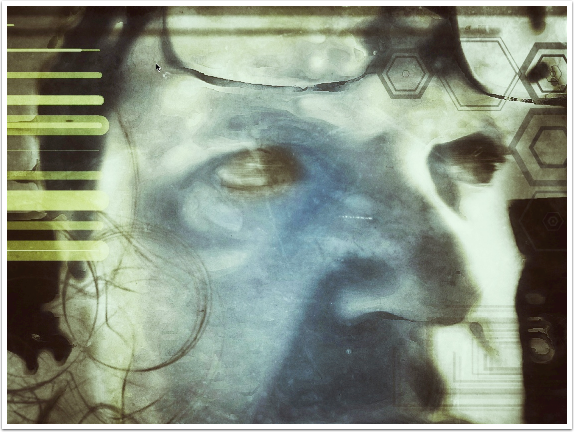
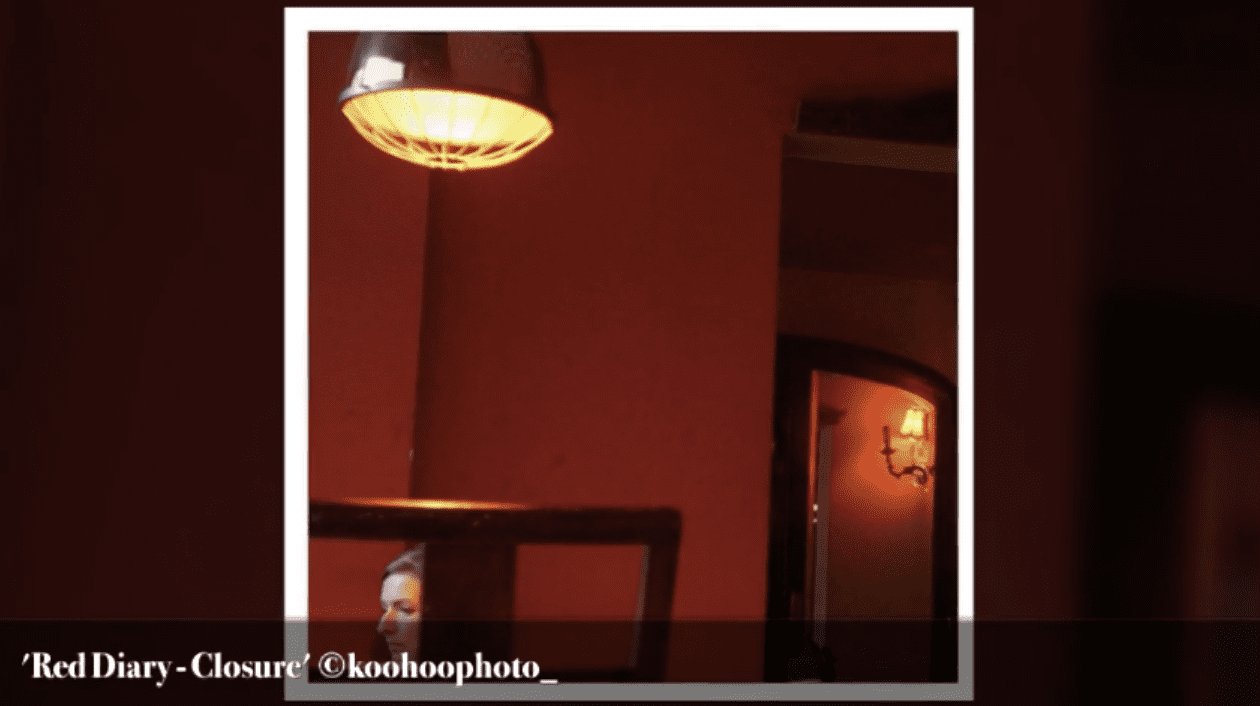
I’ll leave you with a selfie that I shot in Provoke with D100, then took through iColorama, DecoSketch and Snapseed. I call it “Calculation”.
Jerry Jobe
Never content with just scratching the surface of what an app can do, Jerry Jobe decided to pass on what he learned about imaging apps to others. He’s constantly trying to figure out just what tools other artists have used, and trying to incorporate them into his own work, in an attempt to find his style. He’s written tutorials on over 145 apps so far, which you can find (along with his Song of the Day entries) at http://enthusiasmnoted.wordpress.com/ He lives near Atlanta, Georgia, where he also finds a creative outlet in acting and directing in community theater.
3 Comments
Toshihiko Tambo
I’m developer of this app. I fix UI issue. I will release update ASAP.
Jerry Jobe
I’d like to thank the developer for the swift response. Now the UI problems I noted in the article have been cleaned up, and Provoke gets an unqualified full endorsement from me!
Karin Wollina
I found this app only a short time before and it is absolute my go to app for Black and white, just fantastic. Thanks for the tutorial, Jerry and thanks to the Developer