Mobile Photography / Art Tutorial – Catching up: Limitless shapes in Assembly and re-purposing RipPix
We are delighted to publish Jerry Jobe’s latest mobile photography/art tutorial for our reading and viewing pleasure. This time Jobe takes a specific look at the apps Assembly and RipPix. Read Jobe’s thoughts as he puts them through their paces (foreword by Joanne Carter). Take it away Jerry…
Assembly is free and you can download it here
RipPix retails for $1.99/£1.49 and you can download it here
“It should be obvious to anyone who follows my articles (are they reviews, tutorials, or both? depends on who you ask) that I rarely write about an app and then abandon it. If the developers add new features or I find a new use for the app, then I want you to know about it. This article covers both: Assembly has added new features and RipPix, while it hasn’t been updated, got short shrift in my article on a certain use”.
Assembly
I covered Assembly last October, and did a follow-up when Pixite added the ability to change the proportion of shapes back in November. Their latest feature add, the ability to trim and combine shapes to create new shapes that you can then save, really adds exponentially to the capabilities of this vector-graphic app.
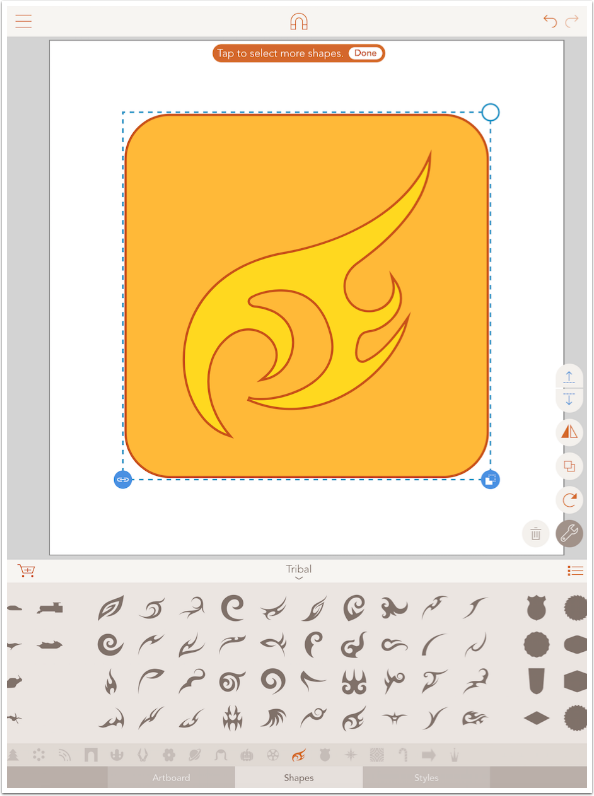
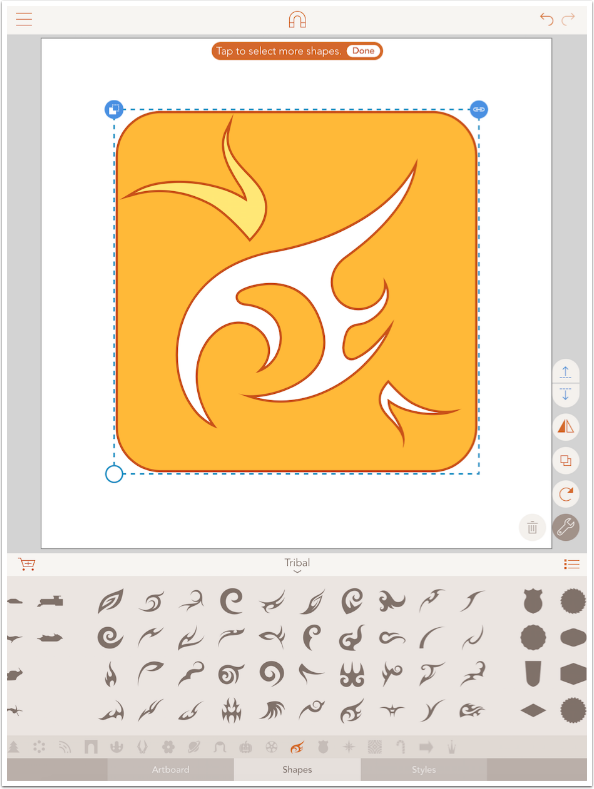
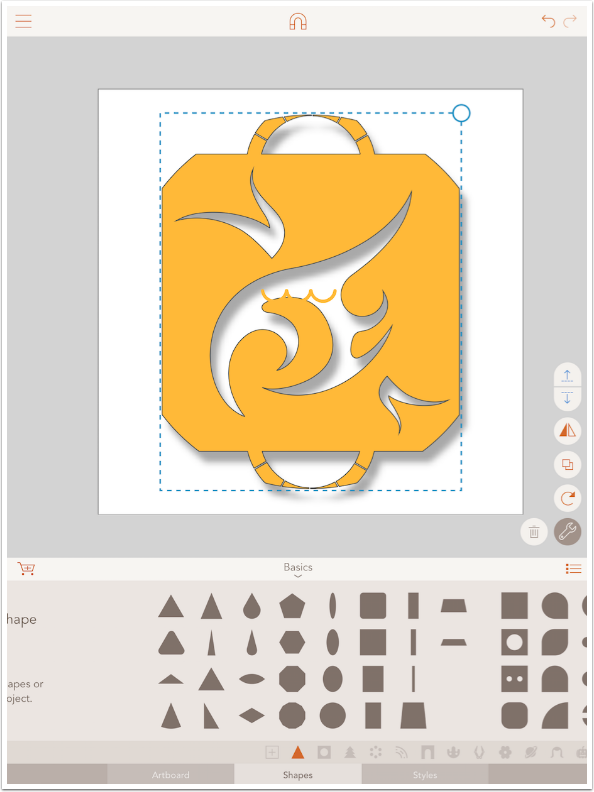
I’m not going to go over the basic operation of Assembly; for that, please revisit my October article. Instead, I’ll jump right into the new capabilities. I’ve added a rounded square figure and resized it to cover most of the Artboard. Then I added a shape from the Tribal pack, one of my favorites.
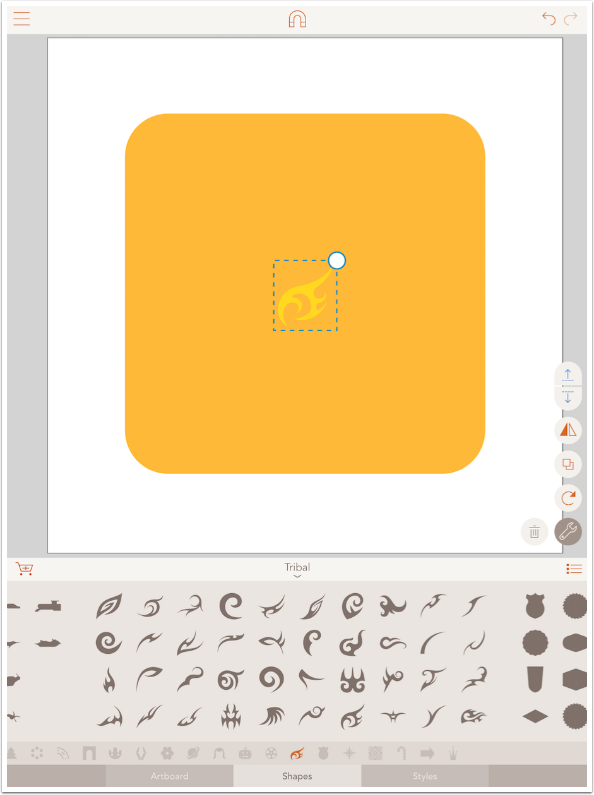
I resized the Tribal element. With the Tribal element active (contained within a bounding box of dashed lines), I pressed and held on the rounded square. That grouped the two objects together. A new blue box, with a dark square overlapping a light one, appears at the corner of the group’s bounding box.
Tapping on that new icon brings up a pop-up menu with three options: Combine, Cut Out and Intersect. We will start with Cut Out, which takes the first shape out of the second shape in the group.
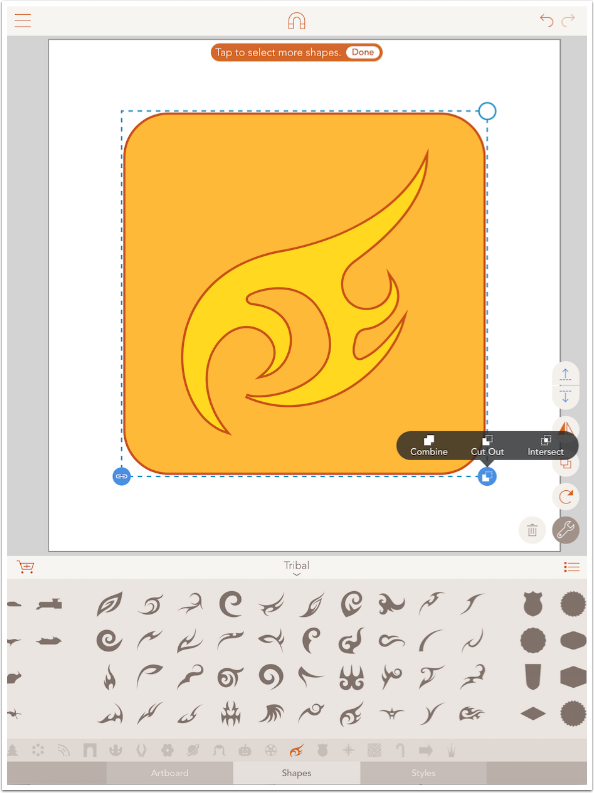
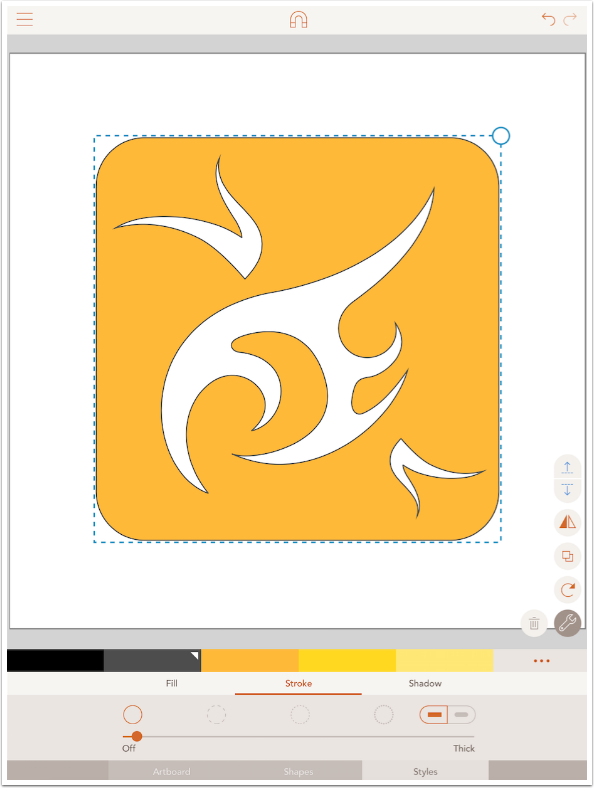
I tapped Cut Out, and the Tribal element is removed from the rounded square, forming a new shape.
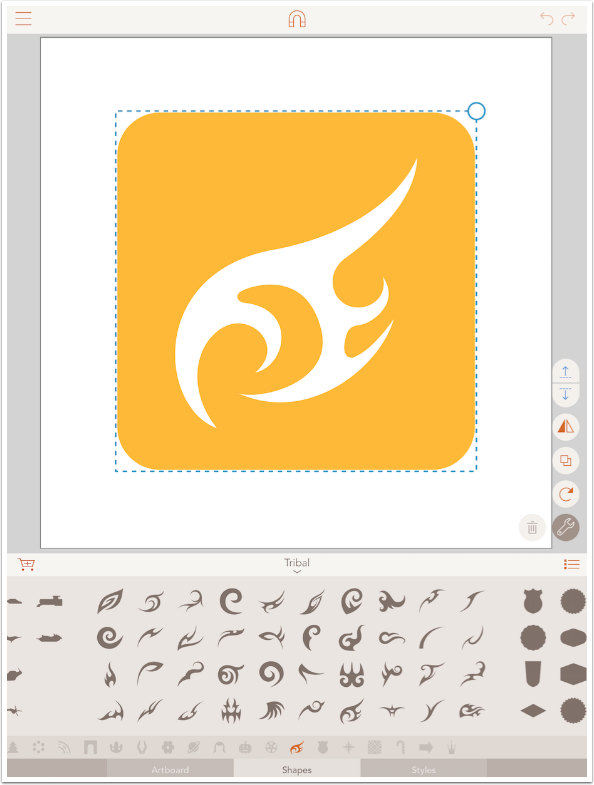
I decide to add another shape, duplicate it, and rotate, resize and reposition it to “balance” the first.
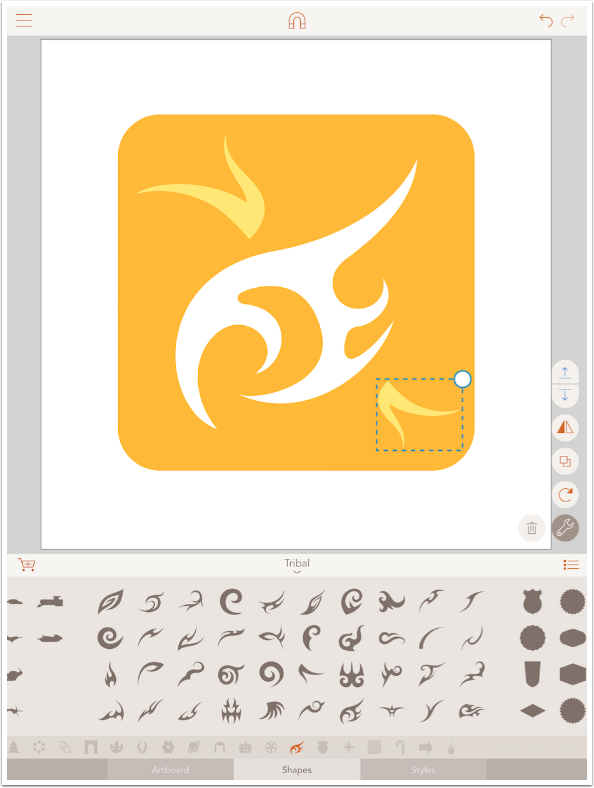
I could select the two top shapes, then the newly created shape, and both top shapes would be cut out of the bottom one. Instead, I do it one at a time: select the top shape, press and hold the bottom one, select the double box icon and then select Cut Out.
Although I don’t show it in this particular set of images, your cutout can overlap the edge of the larger item. It can even split the larger item in two! The two pieces would still be considered to be a single shape.
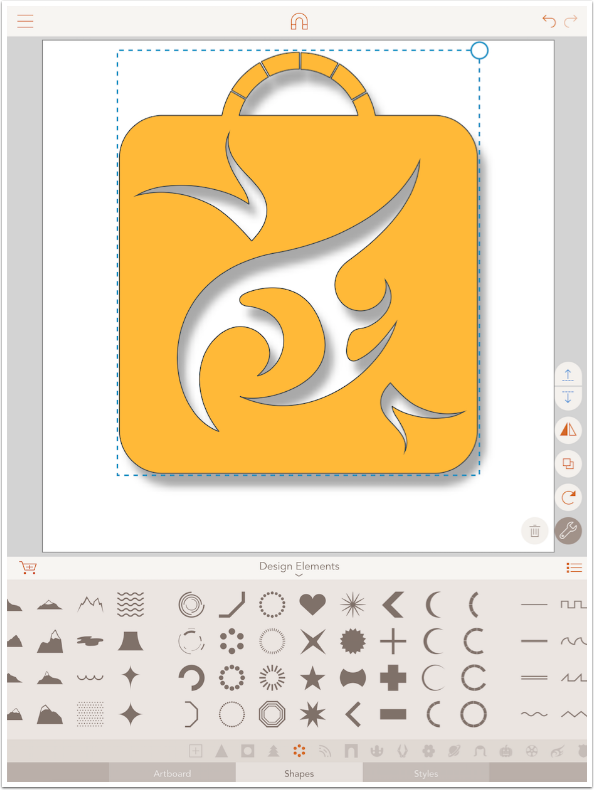
When I’m done, I can add a stroke to the shape to illustrate that it is all considered one shape at this point. The stroke is added to both the inner and the outer edges of the new shape.
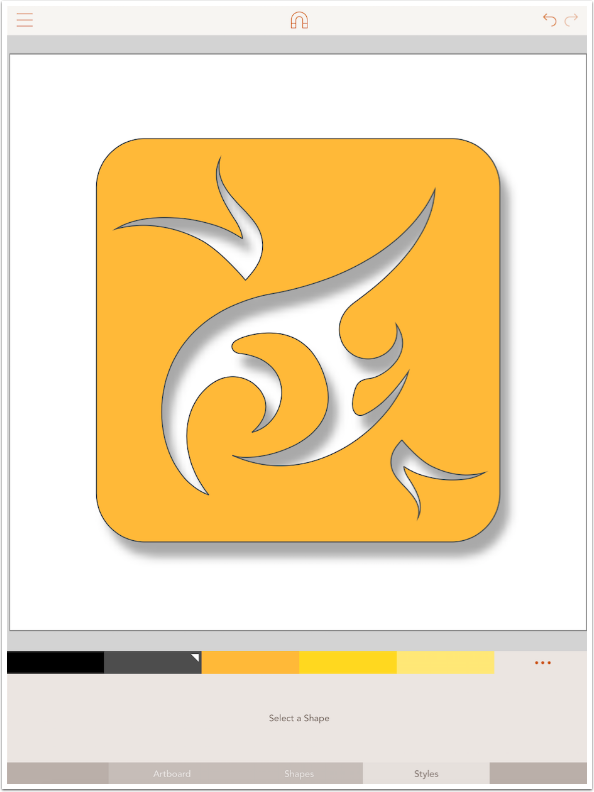
I can also add a shadow to this new shape.
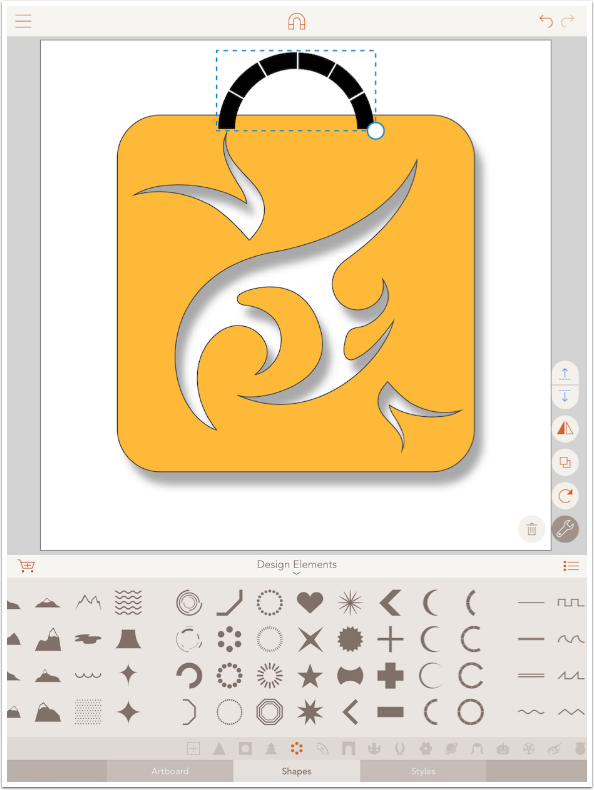
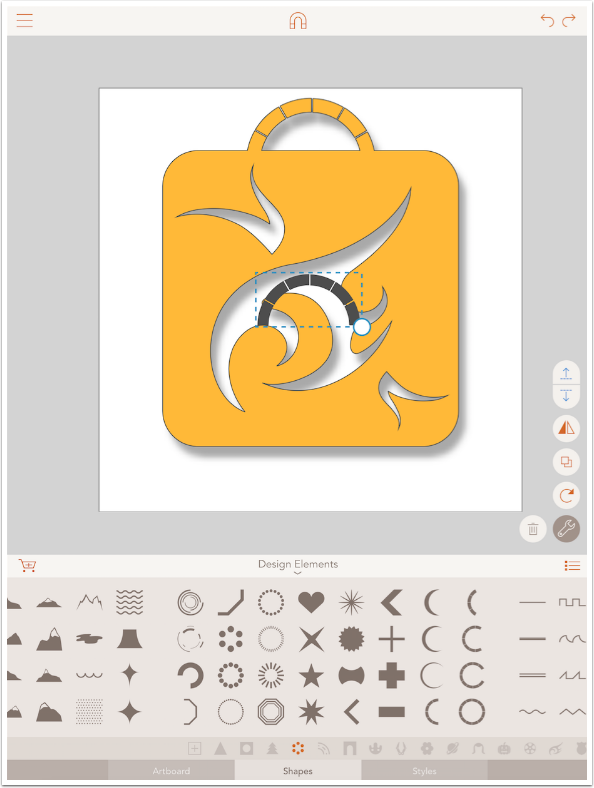
Let’s take a look at combining shapes. Below I’ve added a half-dashed-circle, resizing and repositioning it.
When I group the circle with the new shape and choose Combine, the circle is joined to the new shape – and takes on the Style characteristics of the new shape. The color, stroke and shadow are added to the circle since it is now part of the combined new shape.
I decide to add another half-dashed-circle to the bottom to match. But, after adding it as shown below, I couldn’t make the lower circle match the upper one in size and position. This is a problem when resizing elements.
The solution is to duplicate the resized element rather than adding a new one. I use the Undo button to the point before I Combined the first circle to the new shape. Then I tap the Duplicate button on the right side of the screen. I can then rotate and reposition the duplicated circle to match.

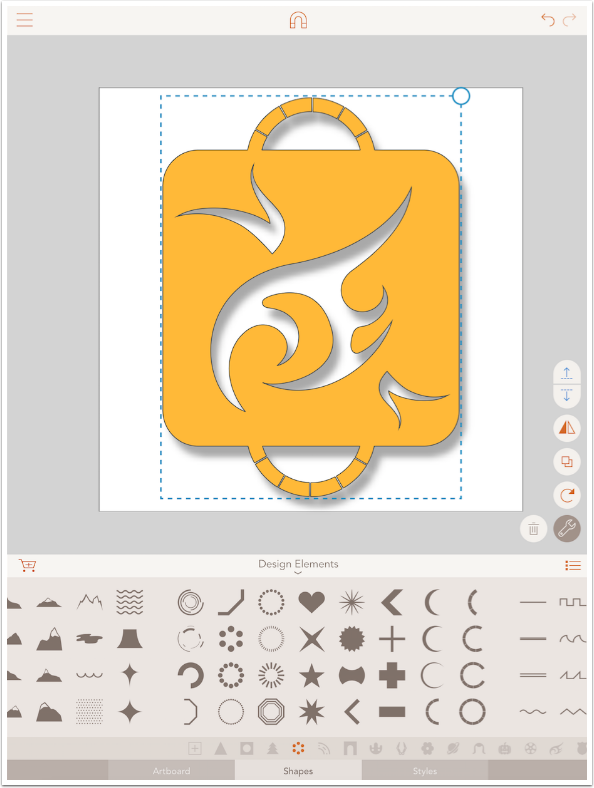
Now when I Combine the three, it is a much cleaner, more uniform shape.
The final new function is Intersect, which includes only the parts of the two shapes grouped together that are in common. In the image below, I’ve placed a circle on top of our shape and grouped them together. There are parts of the circle that fall outside the new shape and there are parts of the new shape that fall outside the circle. All of those parts will be eliminated.
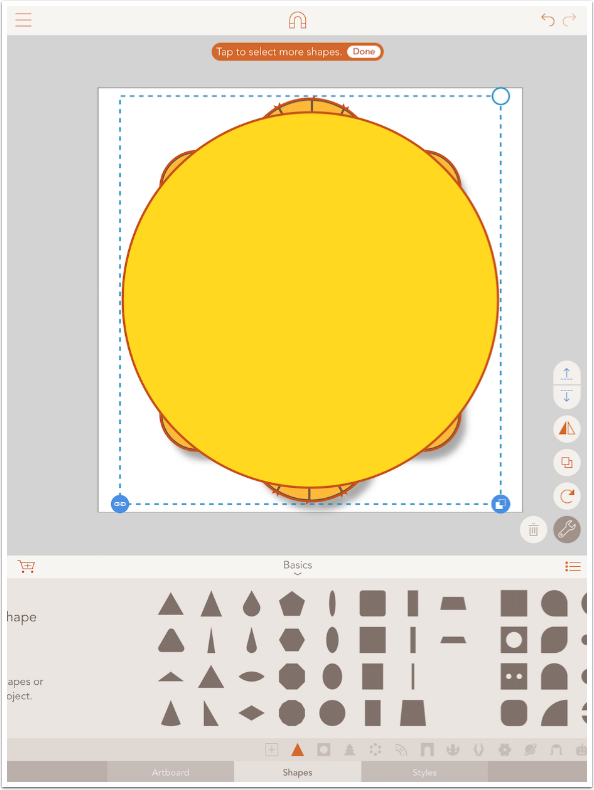
I think it trimmed a little too much off the “ends of the handles” at the top and bottom. (Plus a stray wave shape was added in the middle. How’d I do that?) I’m going to use Undo and try again.
After making the circle slightly larger, grouping and using Intersect, I ended up with the shape below. Notice that the lower right cutout has a stroke, but is filled in. This may be a bug, but it may also be user error.

I used Undo and redid the Intersect. The cutout remained in place this time.

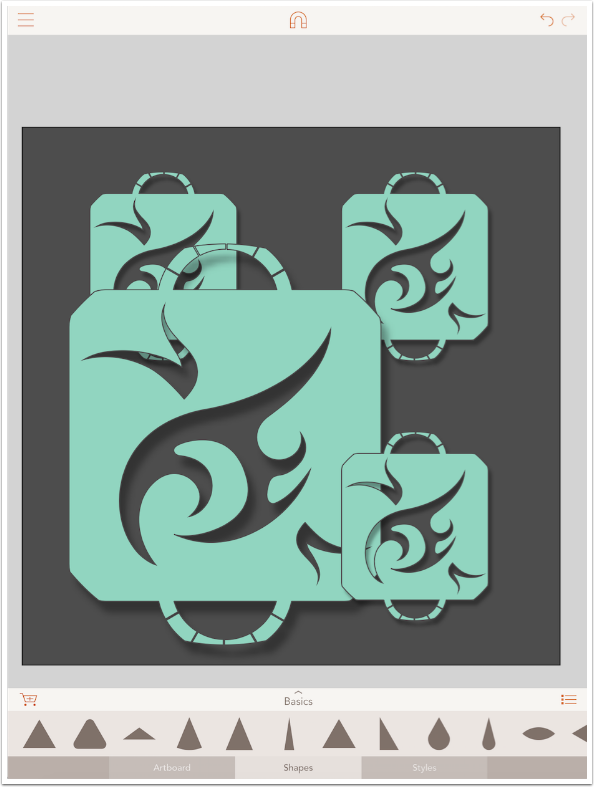
Since this new shape, with all the Cut Outs, Combines and Intersections, is a single shape, you can do many things with it. Below I changed the color of the new shape and the Artboard.

You can also duplicate the new shape, as shown below.
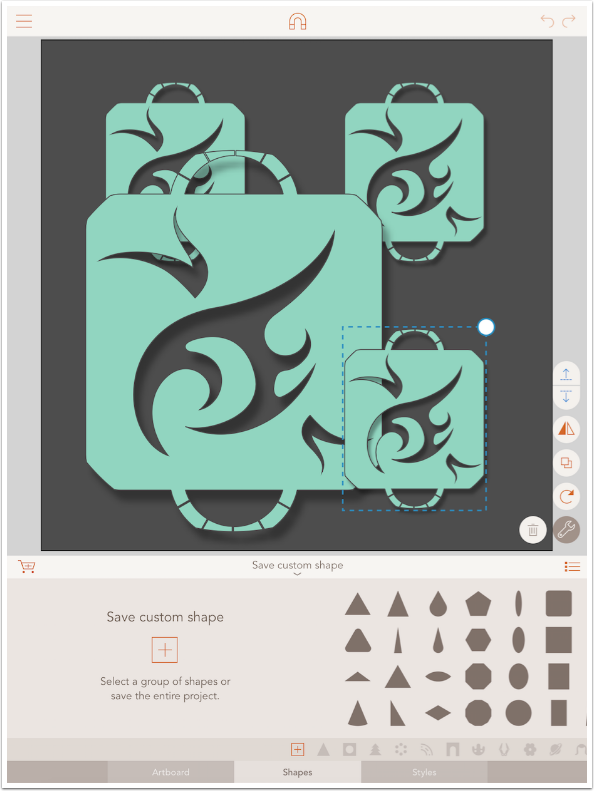
Most importantly, you can save the new shape for use in further projects. At the left end of all the shapes is your Custom Shape palette. I’ve selected one of the iterations of the new shape, and I tap the plus sign in a box to add this shape to my Custom Shapes.
Now, in the Custom Shapes space, you can see my new shape on the right, and the icons for adding new shapes and for editing your custom shapes on the left. The Edit icon allows you to re-order and delete your Custom Shapes.

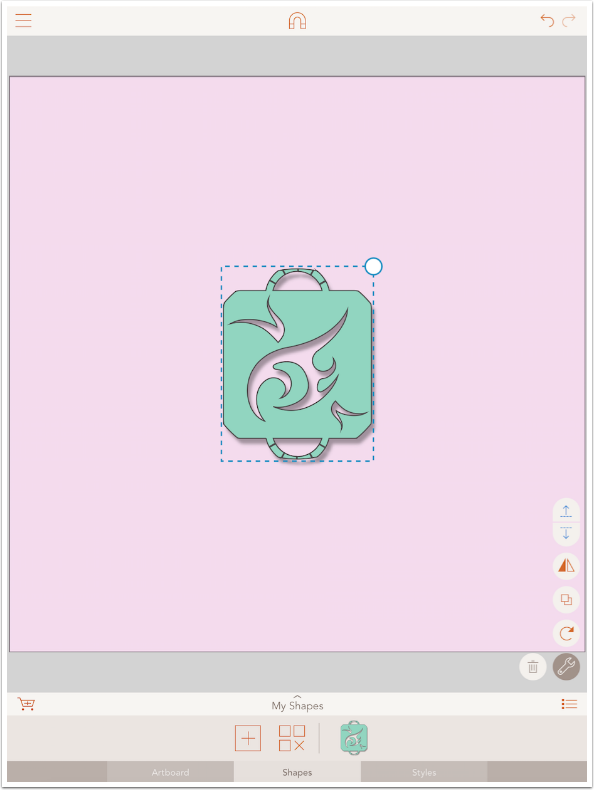
Now, when I start a New Project, my Custom Shape is available to me. The Style characteristics – Fill, Stroke and Shadow – are kept as part of the shape, but can be changed when used in a new project. (You might want to save your Custom Shapes without any stroke or shadow for ease of use in the future).
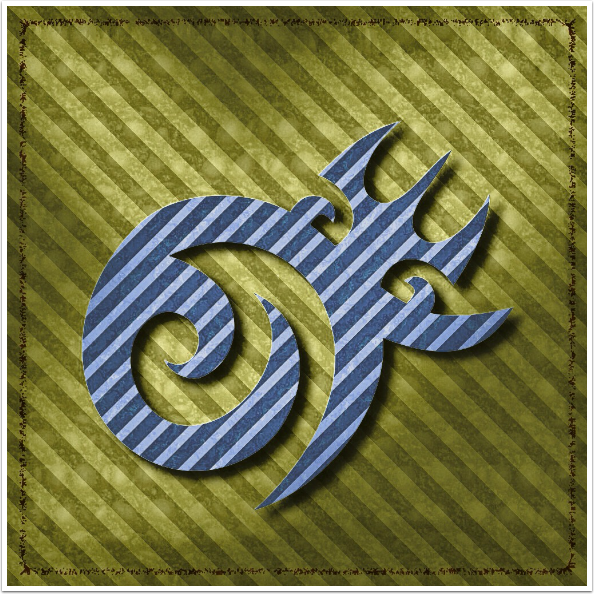
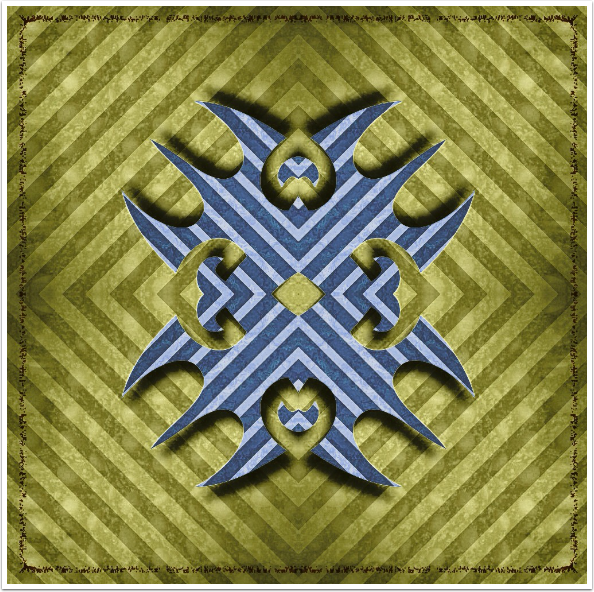
Don’t forget that Assembly can be used to create some very useful masks for use in other apps. I created a new shape by combining two Tribal shapes in Assembly. The shape was black on a white Artboard, perfect for use as a mask in iColorama. All of the following image was created in iColorama using the Assembly mask, except for the twin spotlight effect which came from Jixipix’s Dramatic Black and White.
A Mirror effect in iColorama created this nice variation.
RipPix
I was messing around with my Hawaii vacation photos after getting back home. I was just putting them through various apps, when I came across RipPix, which I covered last September. I thought, let’s see if there’s a rip effect that would work with this image.
I stopped before I even started ripping. The grunge effect added, once I toned it down, was perfect for this image. I should not have been surprised. After all, at the beginning of my previous article on RipPix I mentioned that it was a combination and replacement for two apps by Appnotix, Ripped from Reality and Modern Grunge. But I think I’m not alone in having the “Rip” part of RipPix take precedence in my mind, and blanking out the fact that this is a great grunge program as well.
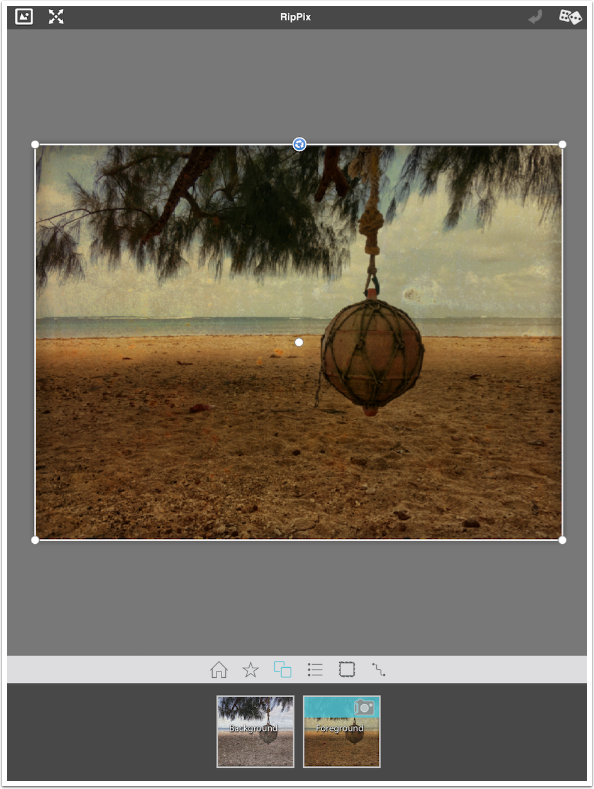
Once again, I am not going to go over the basic operation – see the September article for that. Below, I’ve loaded an image with the “Get Photo” button. (Why do I keep hearing Tom Hanks screaming “WILSON!”)
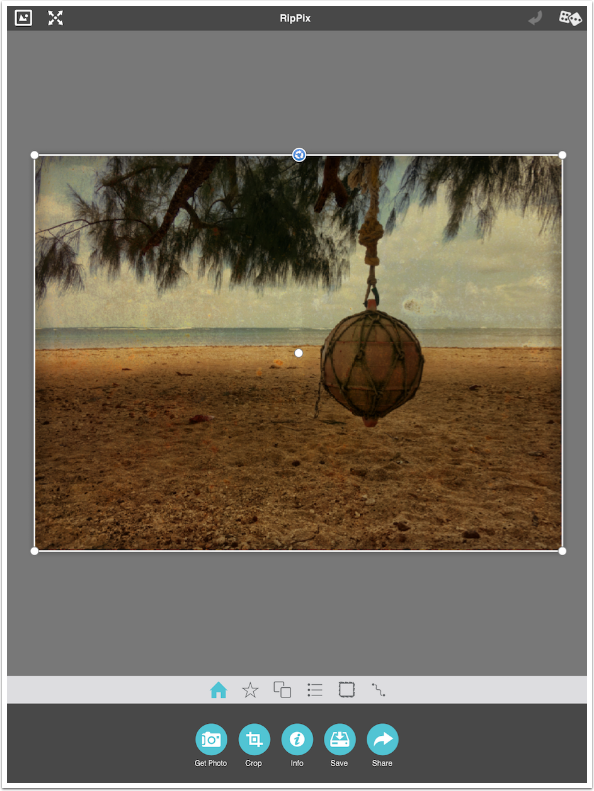
I’m going to ignore the Preset (Star) button, and also the one shown below, which allows you to change images in the foreground or background of your images. We will not be ripping to show the background; we only care about the grunge applied to the foreground.
The “menu” icon brings us to the grunge controls. There’s a Tone Control slider, along with a color picker. There are two grunge selectors, along with a Strength slider for those grunge presets.
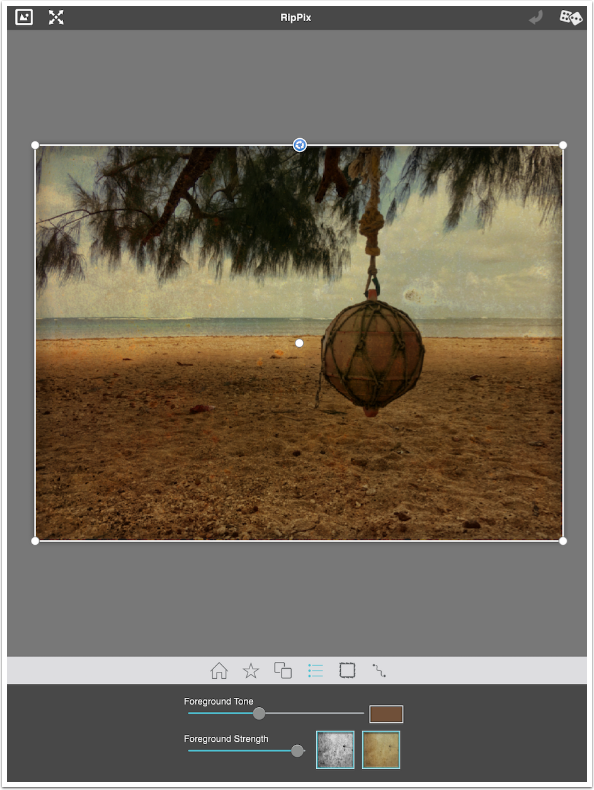
RipPix has a strange tendency to use purple and green as the Tone Color, but I almost always want a subtler brown. I changed the color and reduced the Tone slider below.
Tapping either of the Grunge thumbnails allows you to select grunge appropriate to your image. The first selector has 55 different grunge overlays, and the second has 34. These overlays can’t be rotated; you can’t change the blend mode; and you can’t change the Strength independently. The strength of both is controlled together with the Strength slider.
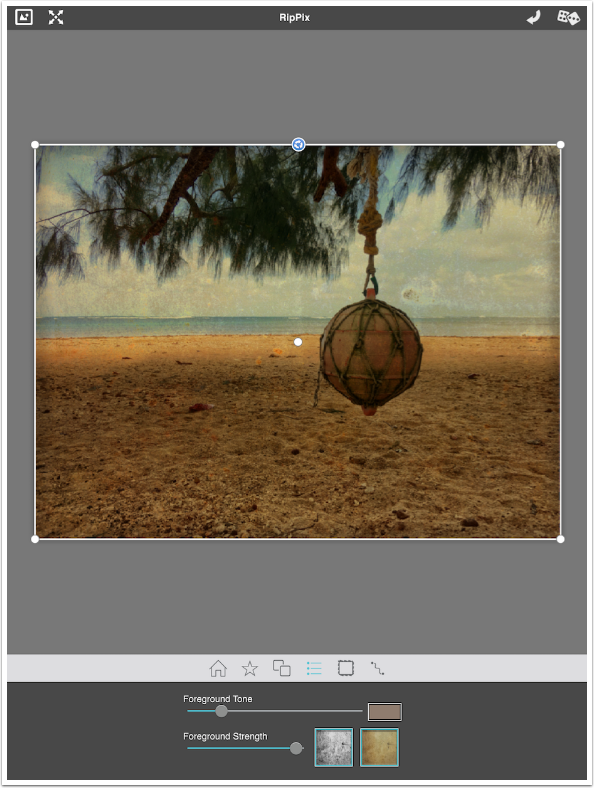
The Border controls labeled Edge Strength and Fade can give you a shaped vignette. Shadow Height and Strength controls do not affect an image which isn’t ripped, like this one.
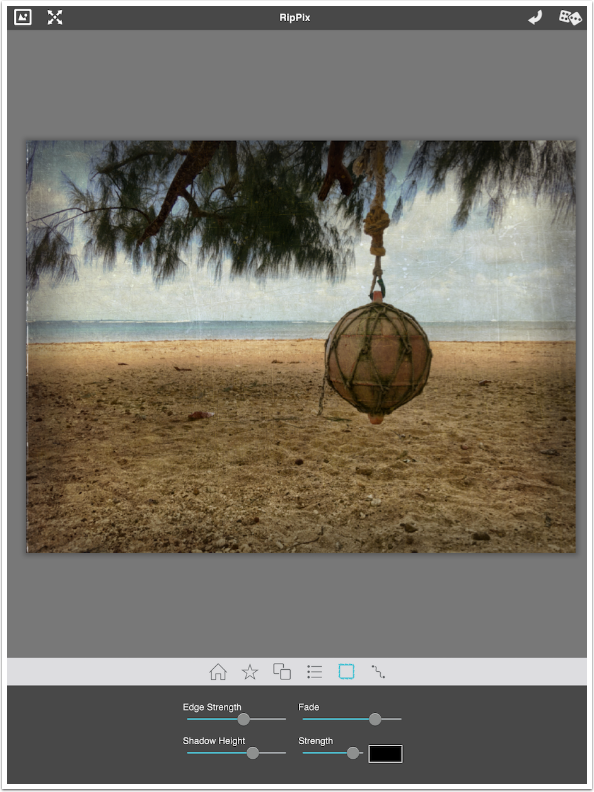
I took the strength of the Edge down because it was too strong for my taste.
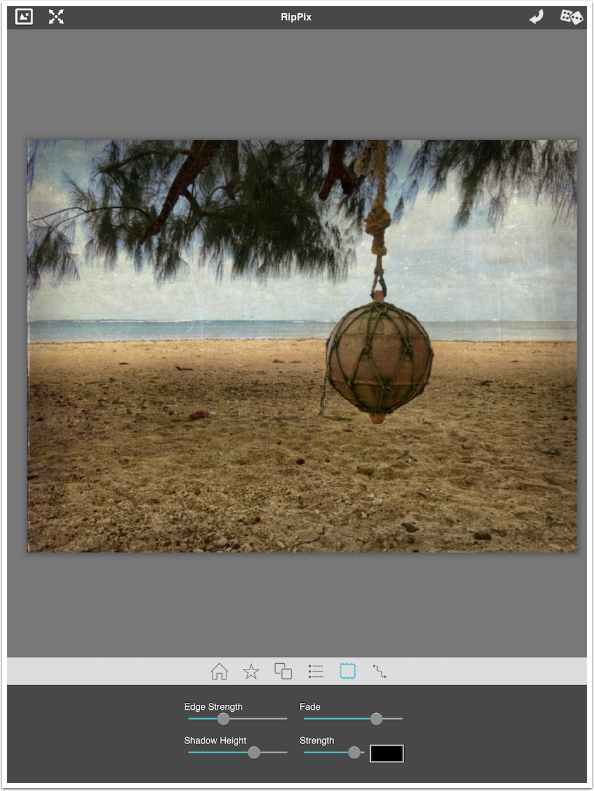
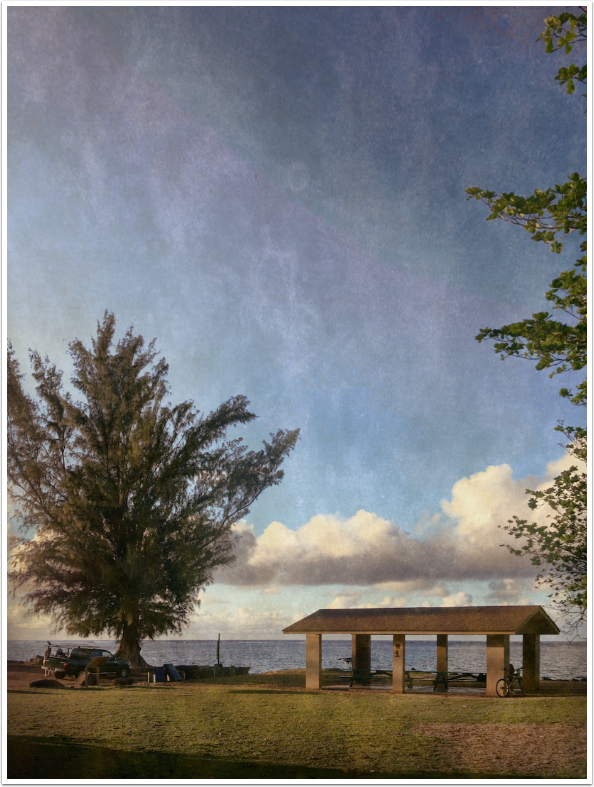
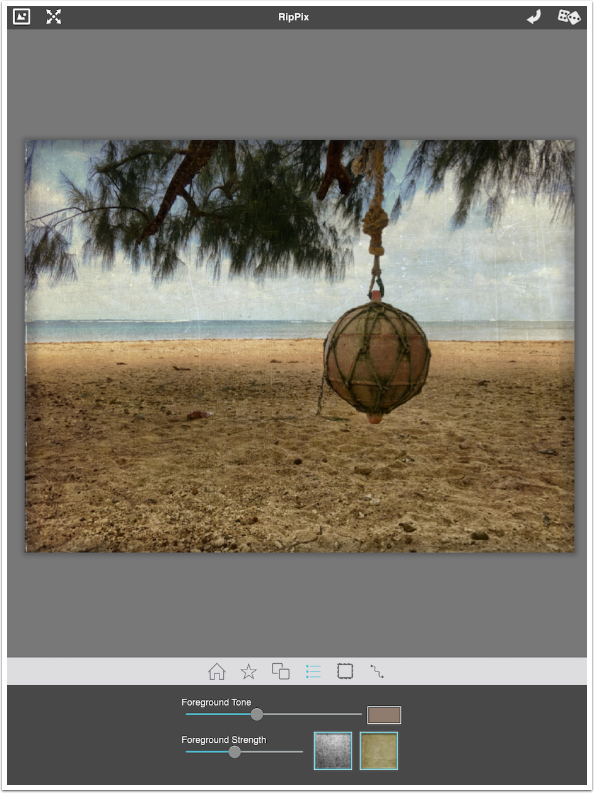
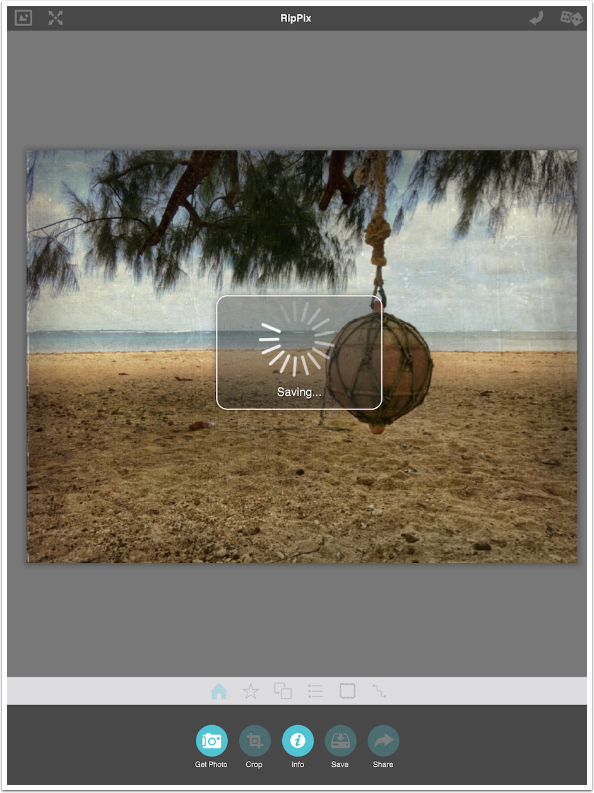
I go back to Home and select Save, which allows me to lightly grunge the image – without a rip.
And here’s my finished image.

Bottom line: get creative! Make new shapes in Assembly! Use the output as a mask! Ignore the name of RipPix and use it as a grunging app! But whatever you do, try something new. Until next time, enjoy!
Jerry Jobe
Never content with just scratching the surface of what an app can do, Jerry Jobe decided to pass on what he learned about imaging apps to others. He’s constantly trying to figure out just what tools other artists have used, and trying to incorporate them into his own work, in an attempt to find his style. He’s written tutorials on over 145 apps so far, which you can find (along with his Song of the Day entries) at http://enthusiasmnoted.wordpress.com/ He lives near Atlanta, Georgia, where he also finds a creative outlet in acting and directing in community theater.