
Mobile Photography Tutorial – Snapseed 2.0 – Learning Curve Not Dangerous
For many iPhoneographers, Snapseed (by Google) is an integral part of their workflow. A few taps and swipes and their images get the adjustments and pop they need. Even digital artists can add sharpening or a pop of color in mere seconds with this free app. When an app is woven that tightly into their everyday work, it’s natural to look at a complete rewrite of the user interface with trepidation.
Luckily, Snapseed’s new version, 2.0, still works the same as it did. It looks totally different, without the large boxes that cut down the amount of workspace. But when it comes down to how you work the controls, nothing has changed.
I felt the best way to illustrate that was through video. I take you through some highlights and some new features, such as the stack and masking. But the main emphasis is to show those of you who use Snapseed all the time that you don’t have to worry about totally relearning the app. All the same gestures will still work. Take a look and see whether you agree.
I will be following this video with 3 or more articles that go into more detail of the new features of Snapseed. One question I will not be able to answer is why Grunge has disappeared. It was a change that has generated a lot of contention. I found the effects to be too strong, but many, many others have said they will abandon Snapseed because of its loss.One problem I allude to in the video is with saving a copy. When you look at the saved image in your Camera Roll, you see the changes applied to your original. When you re-open that edited version in Snapseed, you will notice that changes are applied again. That is because, underneath the hood, Snapseed is saving the original with an extra file that contains the changes. This is obviously a feature available with the latest versions of iOS, since you would not be able to see the image in the Camera Roll (outside Snapseed) with the changes applied, if iOS did not reapply the edits behind the scene.
But if you look at My Photo Stream, which allows you to transfer files between devices, you will find that the transfer only sees the original images, and not the side file with the changes. Therefore, if you take a picture with your iPhone and do a quick edit with Snapseed, then decide to work further on the image on your iPad, you will find two original images and no edited image in the Photo Stream. What is worse, Dropbox works the same way – I only have original files moved to my Dropbox and therefore my PC.
Other apps, such as Photo Transfer, will move the image with the edits applied. I have no way of knowing which apps will see the edited version and which will see only the original without edits. I just know that for me, this is an undocumented issue that requires me to take more steps to write articles about Snapseed. I write my articles on my desktop. When I transfer them to WordPress, I have to have the images on my desktop as well. I use Dropbox for that, but Snapseed’s file format does not allow me to use Dropbox for file transfer.
It is a complicated issue, and not the kind of thing I discuss in my normal tutorials. But I think it’s important for users to know, especially users who use Snapseed for the finishing touches on their images – touches that may or may not be seen down the line.
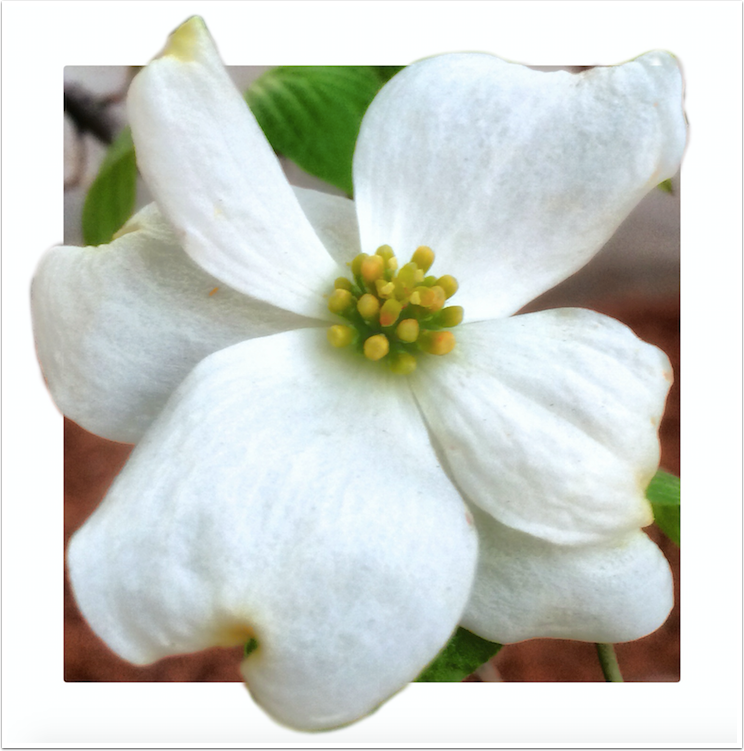
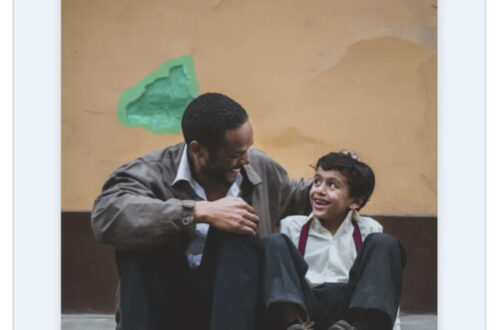
We can hope that it’s an issue that will be solved in the very near future. In the meantime, here is the final image from my video.
Please come back in future weeks for more instalments of my series on the new Snapseed. If you really like video tutorials, Rafael Concepcion at Kelby One has done a fine series on the new Snapseed that I would recommend you watch. As for me, I will be writing rather than recording the other entries in this series. Until next time, enjoy!
Please help us…
TheAppWhisperer has always had a dual mission: to promote the most talented mobile artists of the day and to support ambitious, inquisitive viewers the world over. As the years passTheAppWhisperer has gained readers and viewers and found new venues for that exchange. All this work thrives with the support of our community.
Please consider making a donation to TheAppWhisperer as this New Year commences because your support helps protect our independence and it means we can keep delivering the promotion of mobile artists that’s open for everyone around the world. Every contribution, however big or small, is so valuable for our future.
Jerry Jobe
Never content with just scratching the surface of what an app can do, Jerry Jobe decided to pass on what he learned about imaging apps to others. He’s constantly trying to figure out just what tools other artists have used, and trying to incorporate them into his own work, in an attempt to find his style. He’s written tutorials on over 145 apps so far, which you can find (along with his Song of the Day entries) at http://enthusiasmnoted.wordpress.com/ He lives near Atlanta, Georgia, where he also finds a creative outlet in acting and directing in community theater.
3 Comments
Swimmersuze
Thank you for your informative tutorial. I really appreciated you going over the masking tool and some of the new features of snapseed. I will miss grunge, and hope they return it to the app soon.
Swimmersuze on Instagram
yemaya
The really bad news that it is even worse than what Jerry descibed, regarding the transfer. It is not the real original that get transferred but only Snapseed shrunk version. After wasting few hours editing entire session and left with lower resolution pseudo original only, no edits, I am switching to Enlight, probably for good.
Maria Moscoso
Thank you,very informative. I will be watching more of your tutorials.