Mobile Photography / Art Tutorial – ‘Coming to Terms with Brushes using PaintHack and iColorama’
We are delighted to publish Jerry Jobe’s latest mobile photography / art tutorial for our viewing pleasure. This time Jobe helps you to understand more about brushes and how greater knowledge can lead to greater mobile art. Take it away Jerry…(foreword by Joanne Carter).
“Any time you try to learn a new skill, the first roadblock you encounter is the specialised terms associated with that skill. How are you going to play American football without knowing what a touchdown, punt or offsides penalty is? How are you going to operate a computer without knowing the difference between an icon and an operating system?
Art apps use a lot of terminology borrowed from physical painting with brushes and pencils, charcoals and pastels. However, since you are not actually using these physical tools, but a finger or stylus, then the app has ways to control the output of touching the screen to mimic the physical action. These brush controls are named in similar ways across most art apps.
In order to explain what some of these controls actually do, I am going to be using two apps: PaintHack and iColorama. PaintHack uses a brush engine similar to the one in Procreate, which is commonly seen as the industry standard among art apps. It undeniably gives you the most control over your software brushes. iColorama adds a control that also comes in handy for artists and is not an option in PaintHack or Procreate. It’s used in the example below; can you guess what it is?”
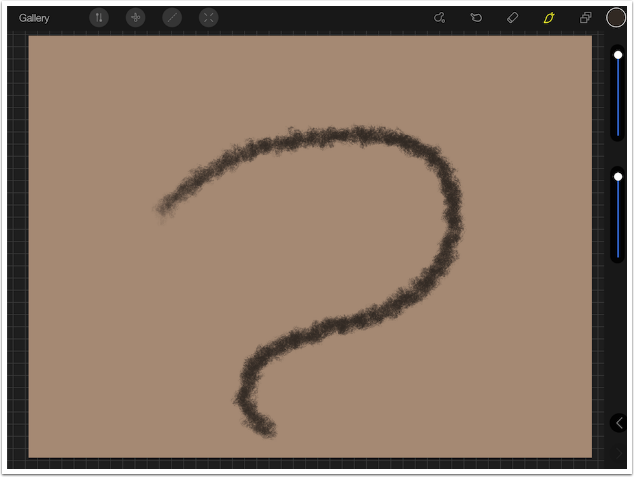
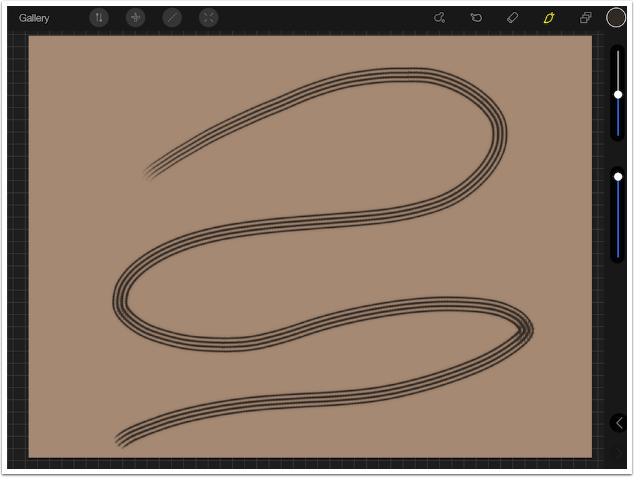
Below I established a tan background in PaintHack. I changed the default paint color at the top right from the default black to a dark brown. I chose one of the default brushes, Rag, and made a stroke on the canvas, just to show what the stroke looks like before changing any controls. The sliders at the right show that the stroke is at full size and full opacity.
I tap on the Brush icon, then tap on the Rag brush icon to bring up controls for that brush. Let’s skip over the Source controls for right now, and take a look at the Spacing controls. There’s one control for Spacing & Scatter, and one for Stroke Taper. You can see an example stroke at the top of the window that will show how changing either control affects the brush stroke.
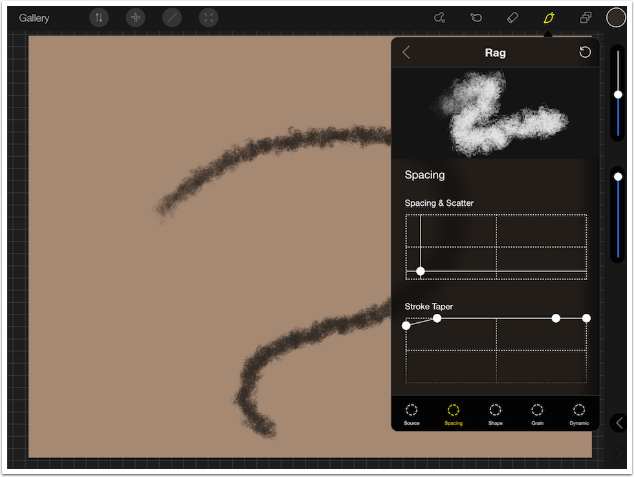
Rather than having two separate sliders for Spacing & Scatter, PaintHack has a graph with an X and a Y axis. The X axis controls spacing. Spacing controls how far apart the dibs, or brush tips, are along the stroke. You can still see the reverse-S shaped example stroke, but the dibs are not run together; they are spaced out.

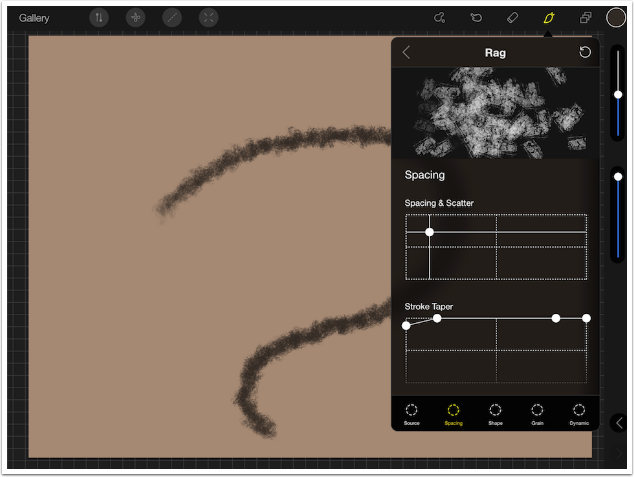
Scatter is the Y axis. Scatter refers to how far away the dibs are placed from the actual stroke. As you make a horizontal line, some of the dibs are placed on the horizontal line, but some are scattered above or below the actual stroke. Scatter is called Spread in some apps.
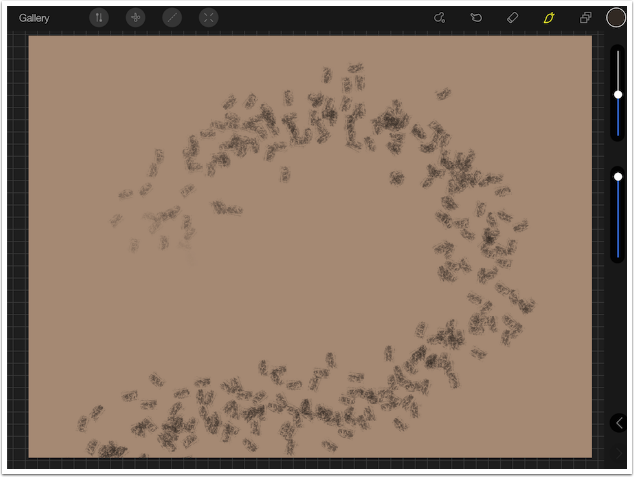
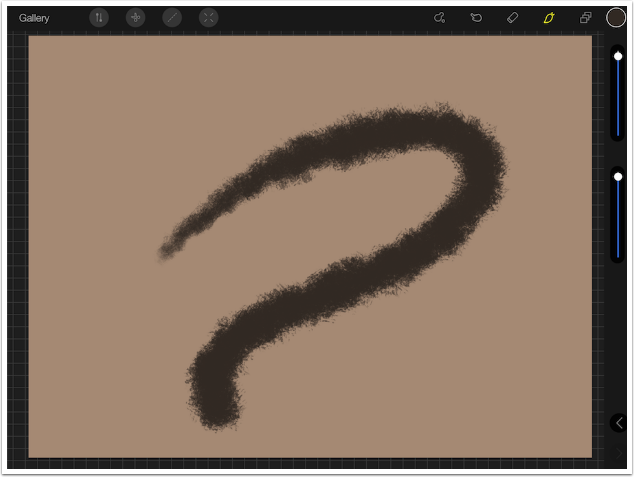
Below is my own example stroke after increasing both the Spacing and the Scatter. I decreased the size so that you could more readily see the direction of the stroke.
Stroke Taper controls allow you to change the size of the beginning and end of the stroke. By moving the dots as shown below, the beginning of the stroke is smaller, moving up to the full-size second dot.
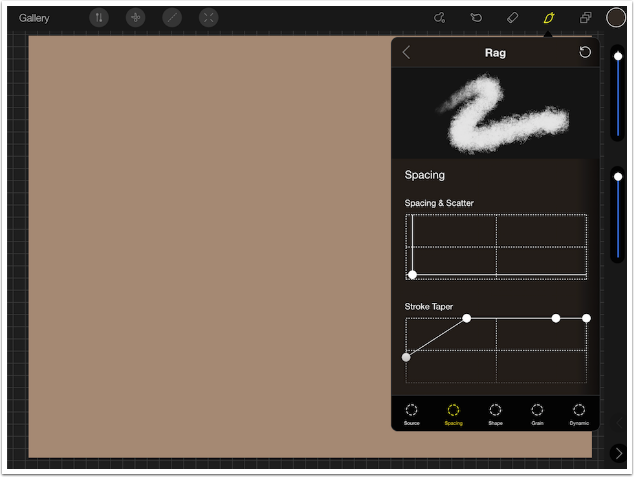
Below is an example of Taper. The program can handle a smooth beginning taper, but not a smooth ending taper. (Obviously, the program cannot predict when you are ending your stroke, and start to taper accordingly.)
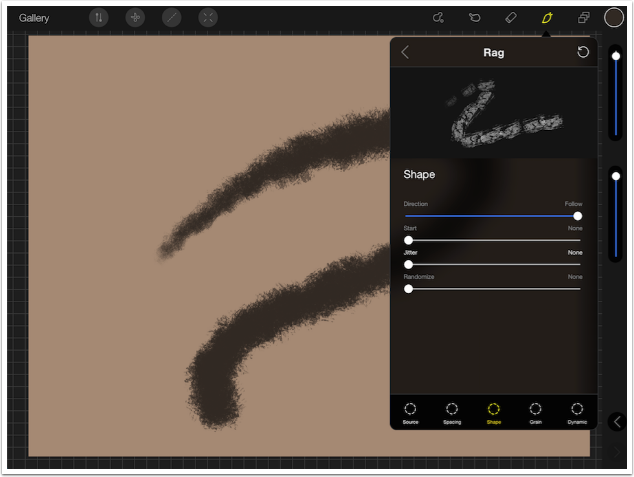
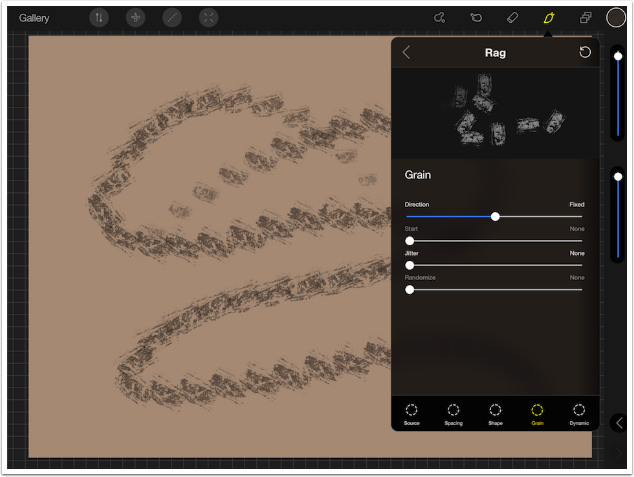
Next let’s look at the Shape and Grain controls. What do the terms Shape and Grain refer to? The Shape is the shape of the brush tip. You can have a circular brush tip, a flat oval, a square, a hexagon – any imaginable shape. The Rag example has a rough rectangle as the shape of the brush tip. The controls for Shape reflect how the shapes are rotated as the stroke is made.
The first control is Direction. At the far right of the slider, the shapes follow the stroke, rotating as there is a curve, or change in direction.

The Jitter control randomises the rotation somewhat. Imagine trying to lay down a row of blocks during an earthquake. You may get them in a line, but it would be hard to make each block straight. The above example had Jitter at 100%, and the blocks are not laid out straight along the path. Below Jitter is at 0%, and you can see the blocks follow the path exactly.
If I move the Direction slider away from the far right, then the direction becomes fixed, regardless of the movement of the stroke. At the center position, my vertical blocks remain vertical, no matter how I change the direction of the stroke.
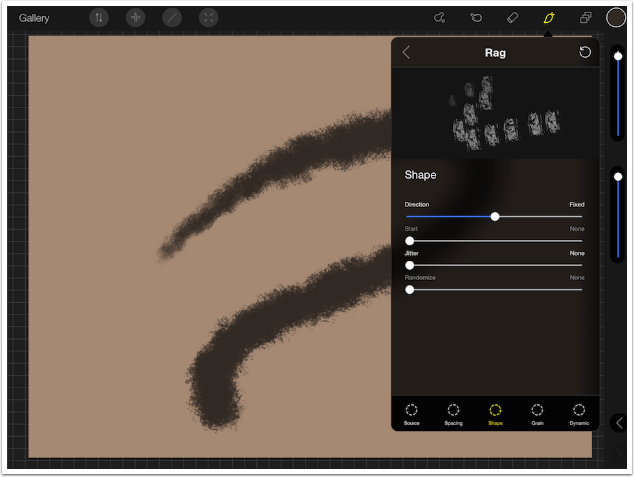
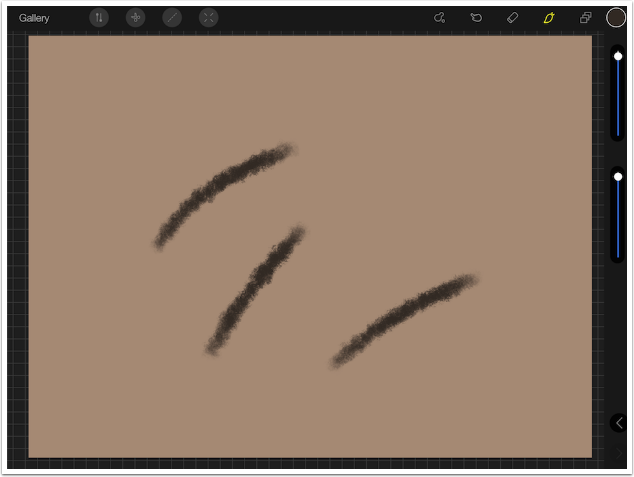
Below you’ll see two strokes using Shape direction settings that vary from the default, and have no Jitter. They mostly follow the direction of the stroke.

Shape refers to the shape of the brush tip; Grain refers to the fill within that shape. The fill can be smooth, but it can also be textured, as it is in the Rag brush. Grain, just like the Shape, can have direction and Jitter. Below, if you look closely at the individual dibs, you can see the same pattern within each of the dibs. That is because the Jitter is at zero.

You can fix the direction of the Grain even if the Shape is not fixed or has some Jitter. Below the Grain is fixed within “Jittering” shapes. (I can see a little face, tilted to the right, no matter how the block tip is rotated.)
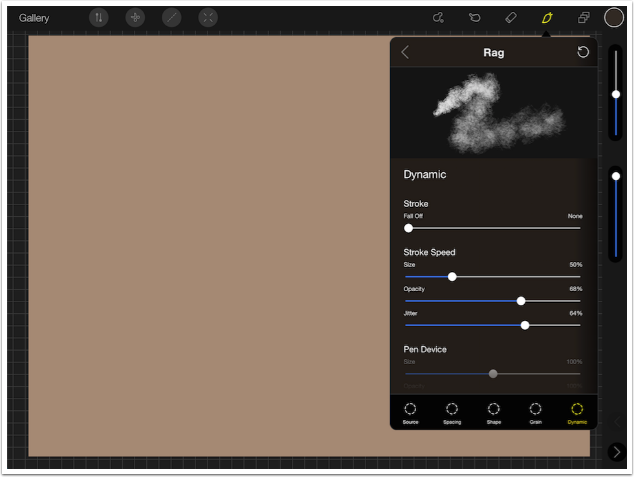
There are more controls under the Dynamic category. These, in my thinking, should only include controls that change on the fly, depending on how you move the stylus or your finger. The first control, Fall Off, is not what I would consider a Dynamic control.
Fall Off acts like the physical act of putting paint on the brush. The default value of 100% means that you never have to “re-load” the brush with paint. (“Fall Off” is alternatively called “Load” in some apps.) If you lower the percentage of Fall Off, then the paint “runs out” as you make your stroke. You “re-load” the paint by lifting your finger and starting another stroke.

Below are three strokes made with Fall Off reduced. All three strokes were actually twice as long, but it didn’t matter because the paint “ran out”.
Stroke Speed changes parameters based on the speed that the stylus/finger moves around the screen. Moving the Size slider to the left from the default center position, as seen below, means the Size of the brush tip will get smaller as your stylus speeds up.
The Opacity slider, set as it is below, will make the stroke more opaque as the stroke gets faster. The Jitter controls how much variation there can be for either the Size or the Opacity.
Another way of dynamically controlling a stroke is through Pen Pressure, which is only available on certain iDevices and with certain pens. I have neither the device nor the pen, but I can tell you that the controls work the same way as the Stroke Speed sliders.
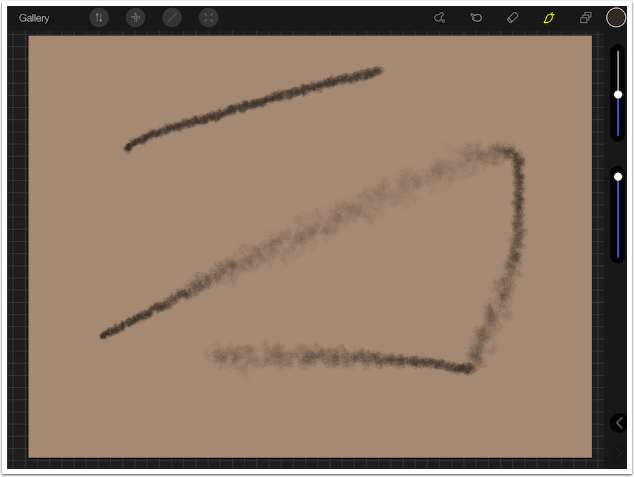
Below I reversed the Stroke Speed sliders, so that a faster stroke produced a larger Size with less Opacity. The top stroke is with normal parameters, so that the size and Opacity don’t change. The bottom stroke was smaller and more opaque as I started slowly, then became more “wispy” as I sped up. You can also see that I slowed down as I changed direction.
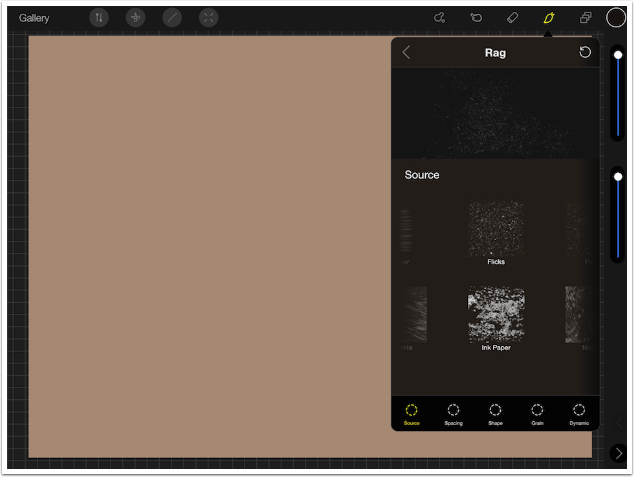
So far, I’ve been discussing parameters that are common across most apps that allow you to modify brushes: Spacing and Scatter, rotational variation through the Shape and Grain controls, Size and Opacity variation. But there are specialised controls as well. PaintHack and Procreate allow you to change the Source of the brush, which can make an enormous difference in the look of the finished stroke. (They both allow you to save your new creations as additional preset strokes.)
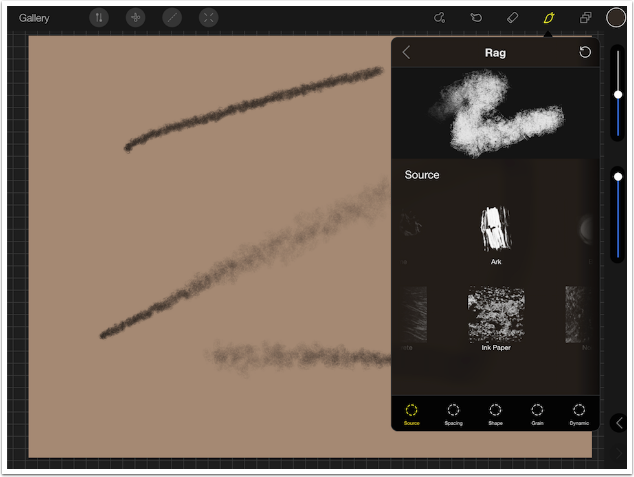
The Source consists of two variables: Shape and Grain, which we’ve discussed above. The default Source for the Rag brush has a rough rectangle for the Shape (Ark) and a rough texture for the Grain (Ink Paper).
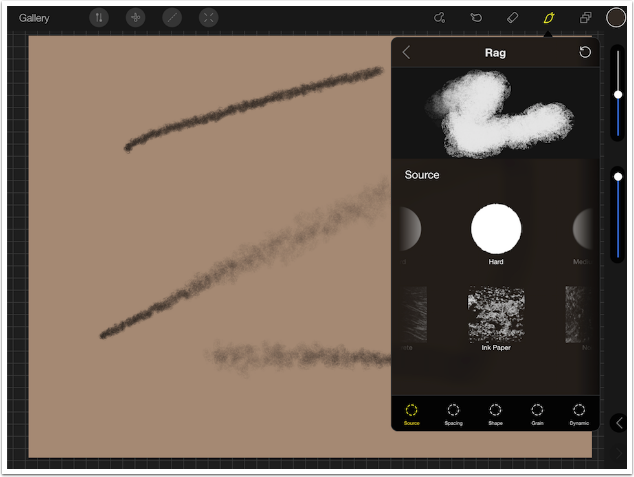
Look at the difference in the example stroke from changing the Shape from Ark to Hard, a smooth circle. The stroke becomes much smoother along the axis of the stroke.
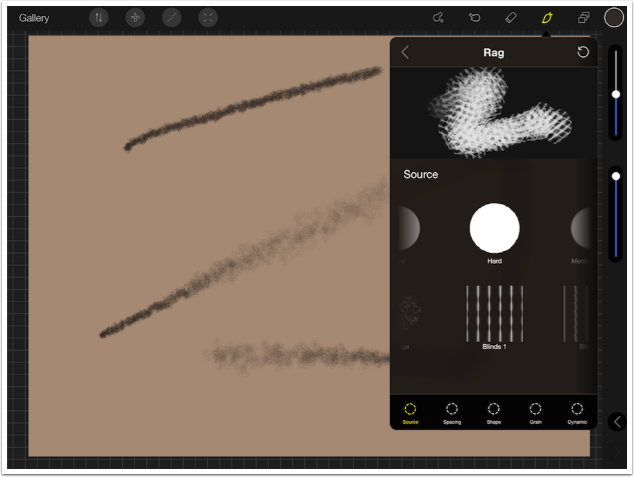
Even more of a change comes when I switch from Ink Paper Grain to Blinds 1.
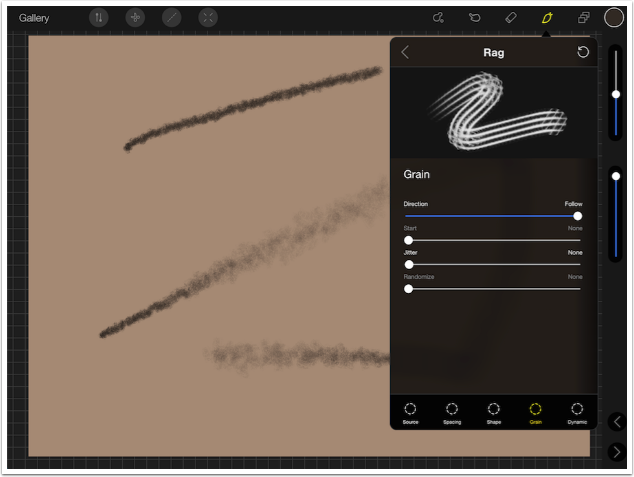
By removing the Jitter on the Grain Direction, I get a four-lined brush.
And here’s an example from my modified brush. Doesn’t look anything like the original Rag brush, does it?
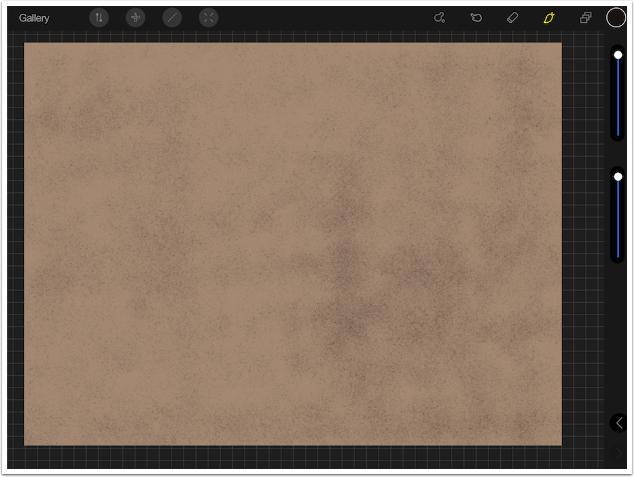
Some Shapes will give you much different results based on how much you space them out. By using Spacing and Scatter on this Shape of widely-spaced dots, I get a really nice dust brush.
Below is some quick work with the dust brush.
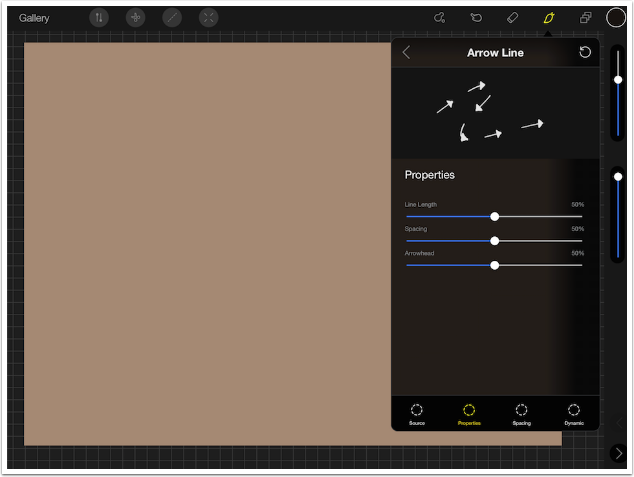
Both PaintHack and Procreate have some specialised brushes that have their own parameters. For instance, there’s an Arrow Line brush under the Shapes category.
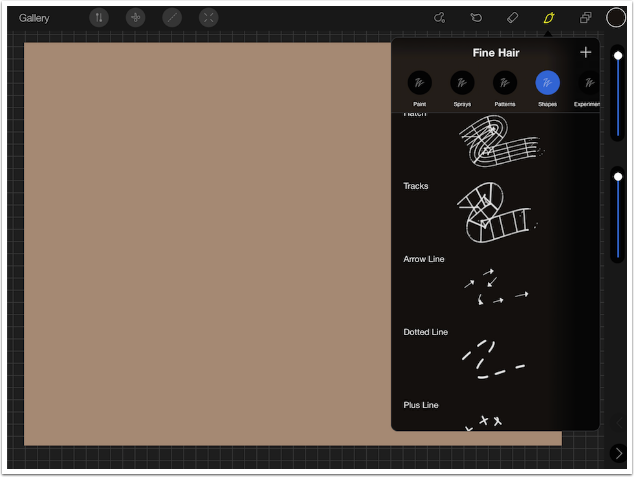
You will always want the arrows to follow the stroke, so there are no Shape and Grain parameters. You will find parameters for Line Length and Arrowhead size, though.
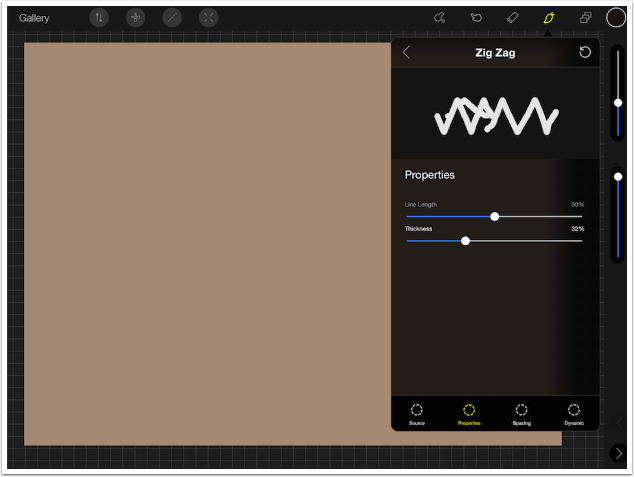
The Zig Zag brush has a Thickness parameter.
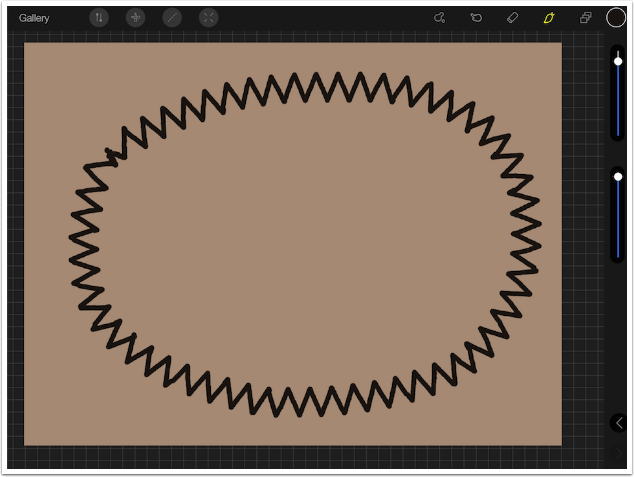
Here’s an example of the Zig Zag brush in action.
The Pattern Brushes, like Retro shown below, allow you to paint in a seamless pattern. The size of that pattern can be changed with the Texture Scale parameter.
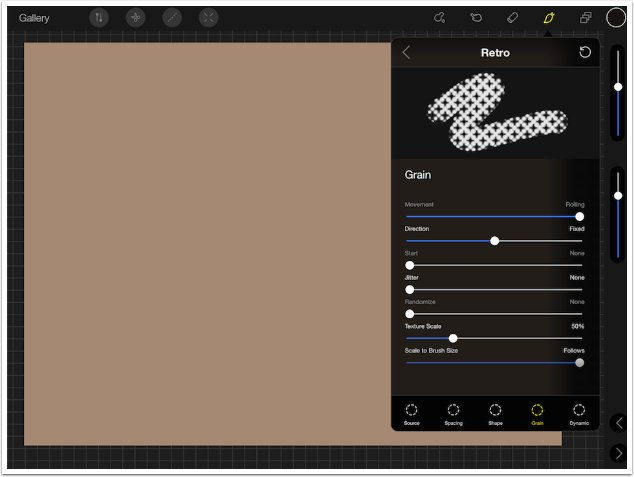
On the left is the original size pattern. On the right, the Texture Scale was increased.
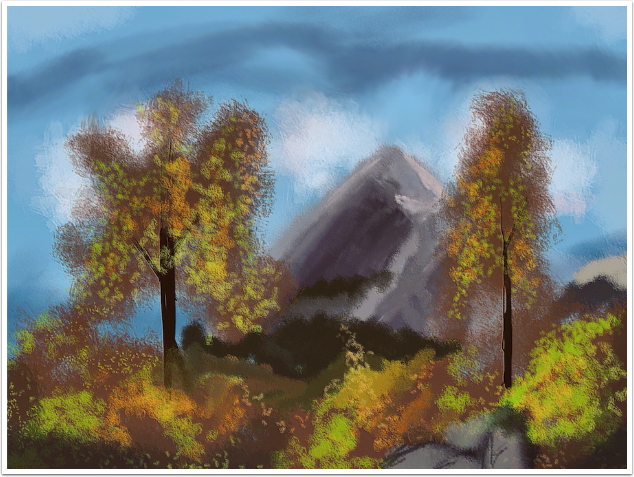
Well. I have often said that I am not an artist, and I can’t paint anything worthwhile from scratch. Here’s proof. I did, however, take advantage of the brush parameters when creating this…thing. I’m sure many of my readers can make much better use of pure painting apps than I can.
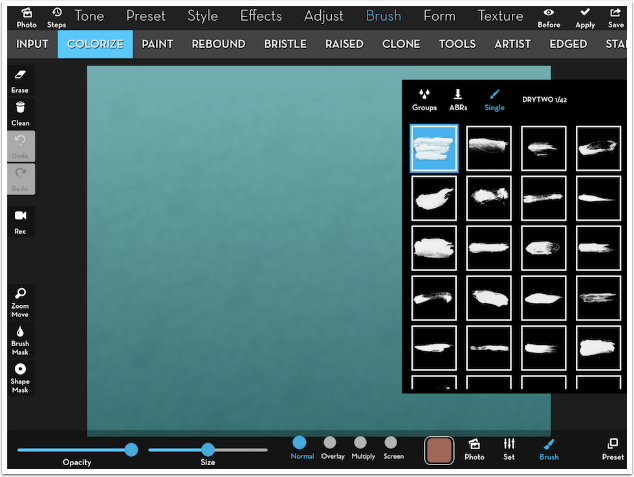
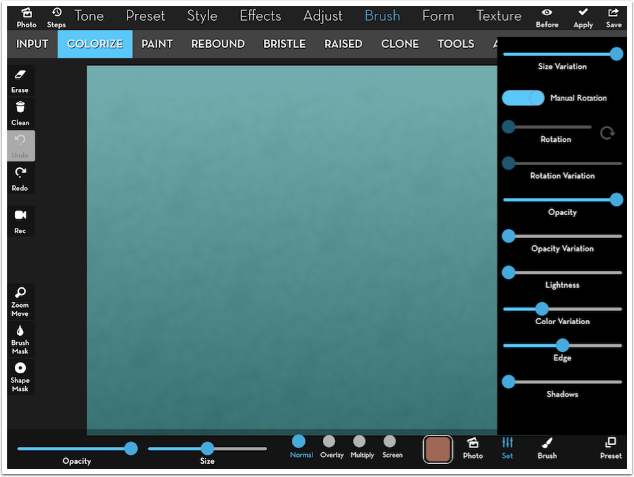
Now let’s turn and look at some of the brush parameters in iColorama. There are two ways to brush in color in iColorama: Colorize and Paint. I start with Colorize, and set my color to a pink at the bottom right. I choose the first brush of 42 total in the DRYTWO category.
There are some familiar parameters in the Settings for the Colorize brush. We have Size Variation, which corresponds to Size Jitter. We have the Manual Rotation switch. When it’s on, the shape of the brush tip follows the stroke. When it’s off, all brush tips are at a proscribed angle set by the Rotation slider, unless Rotation Jitter is added with the Rotation Variation slider. There is also Opacity Jitter, set with the Opacity Variation slider.

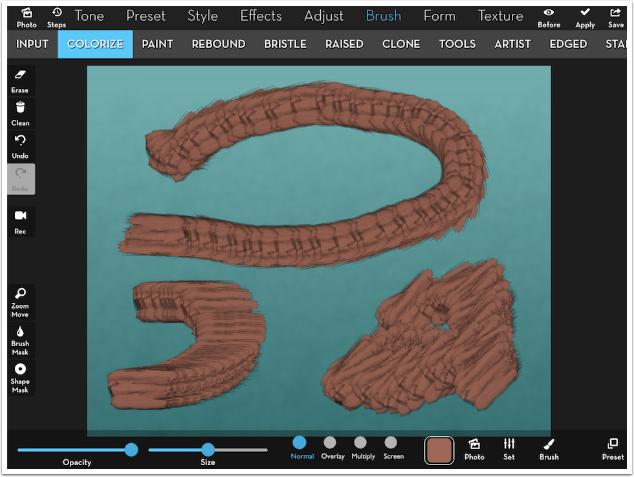
The top stroke below has Manual Rotation turned on. The lower left has Manual Rotation off, and Rotational Variation off, so the tip is always horizontal. The lower right has Rotation adjusted to put the dib at an angle, but Rotational Variation is turned up. This shows that Rotational Variation is a subtle effect. Even with it turned up, there is only a barely noticeable variation from one brush tip to the next.
Opacity Variation is subtle also. There is only a noticeable difference at one point along the top of the stroke.

So we have the familiar Size, Opacity and Direction (Rotation) variation. But what about Color Variation? Does the color Jitter also?
Yes, in iColorama we can make the color change in the brush strokes also. In the example below, I have both Size Variation and Color Variation turned up. Neither is dependent on Stroke Speed or Pen Pressure. The Variation sliders control how much out of “true” each parameter gets.
With Colorize, there are also Edge and Shadow sliders that make each brush tip distinct.
Edge and Shadow can become troublesome in Colorize if the brush tip touches the edge of the bounding box for the brush. Stipple Brush 4 does touch the edge of the box.
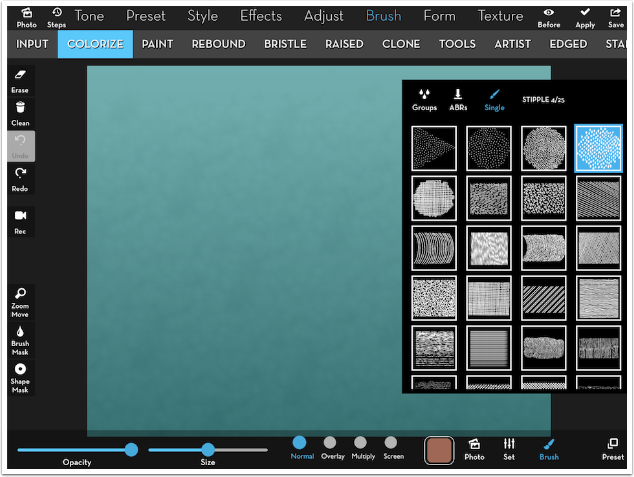
When I increase the shadow for this brush, I get shadow shooting off in all directions. So be careful with the Shadow parameter.
I have no problem using that Stipple brush tip if I use no Edge or Shadow.
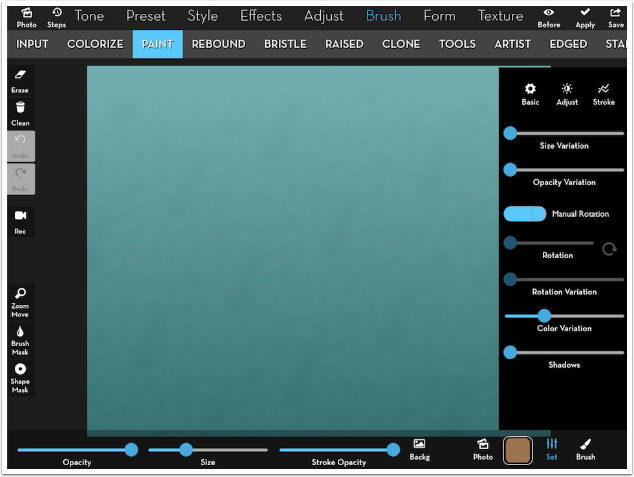
You may have noticed that there were no Spacing and Scatter controls in Colorize. Colorize automatically spaces the dibs apart. They are present in other types of Brush, like Paint. Paint settings are broken into Basic, Adjust and Stroke. Scatter and Spacing are under the Stroke category.
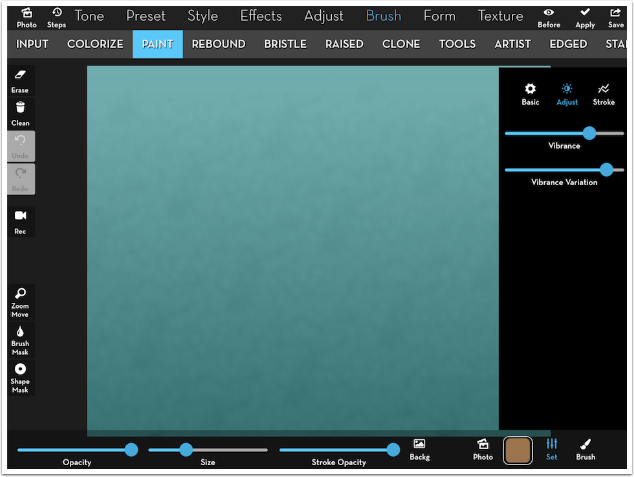
Under the Adjust category you sill find a Vibrance (Saturation) and a Vibrance Variation slider.
Color Variation for each brush tip is fine when they are automatically spaced apart, as they are in Colorize. If a stroke constantly changes color when the tips are mashed together, then you get a muddy mess. There is a parameter, found in the Setting app under iColorama, that I keep turned on: Variable Color by stroke. That means that the color changes each time you lift your finger/stylus, not within the same stroke. This parameter affects all Brushes except Colorize.
Below I’m using Color Variation under Paint using the Stipple brush. Each time I make a new stroke, it varies from the brown that I’ve chosen for my color. Because the Color Variation is not increased all the way, the colors stay within the green to orange part of the palette, and will not include the blues, purples and reds.

Below I added a couple of strokes with the Spacing and Scatter turned all the way up. These effects are mot as radical as the spacing and scatter effects in PaintHack and Procreate.
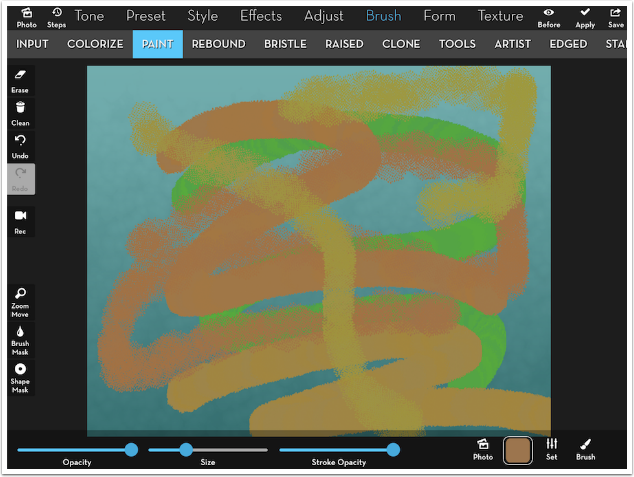
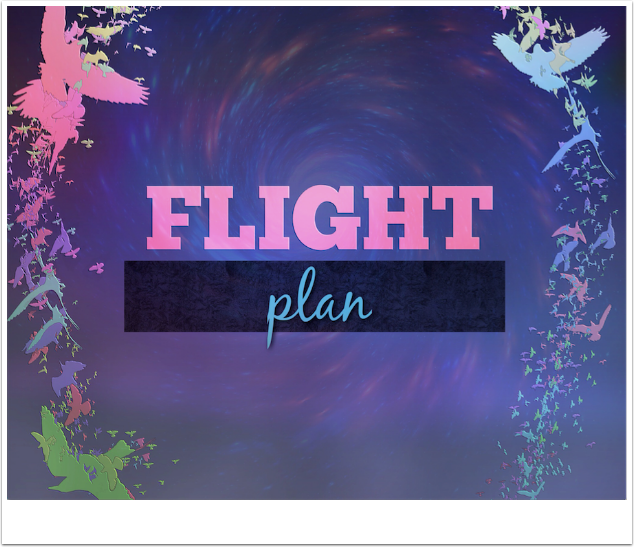
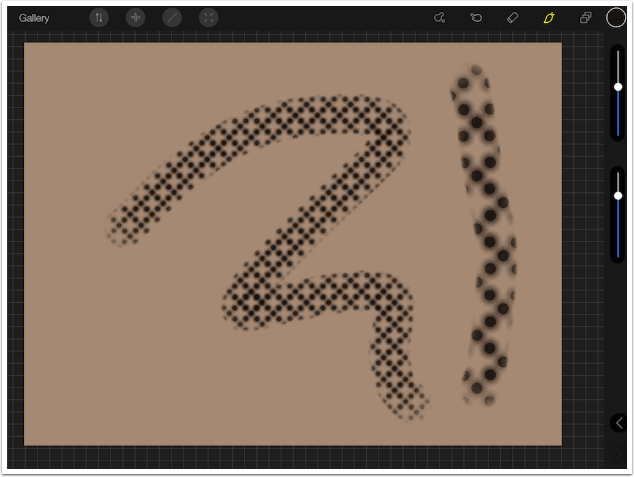
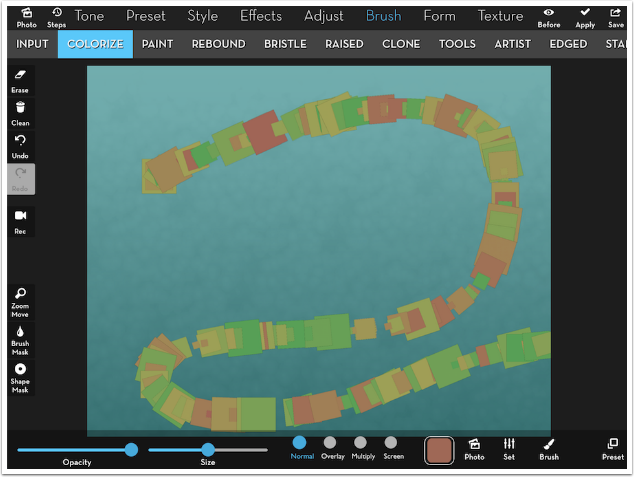
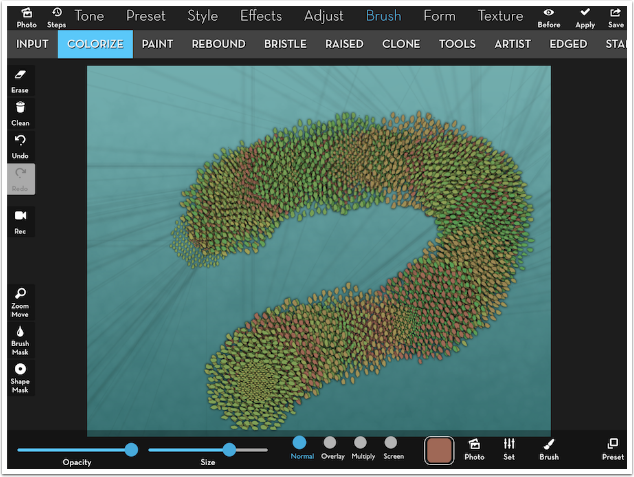
In case you haven’t guessed, the iColorama parameter that I used in the initial image is Color Variation. I used a group of bird brushes and cranked up the Size Variation and Color Variation and made the strokes along the sides from bottom to top. But Color Variation can be useful to paint using a photo as source also.
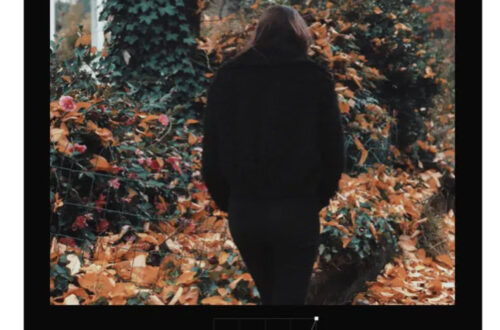
Below I’m still using the Stipple brush, but as a Plane brush under Rebound. The Color Variation colors each stroke differently, but the brightness or darkness, the luminosity, of each stroke is taken from the source image.

If I like, I can go back and bring in some of the original color. I did that below around the eyes by using a Rebound brush with no Color Variation.
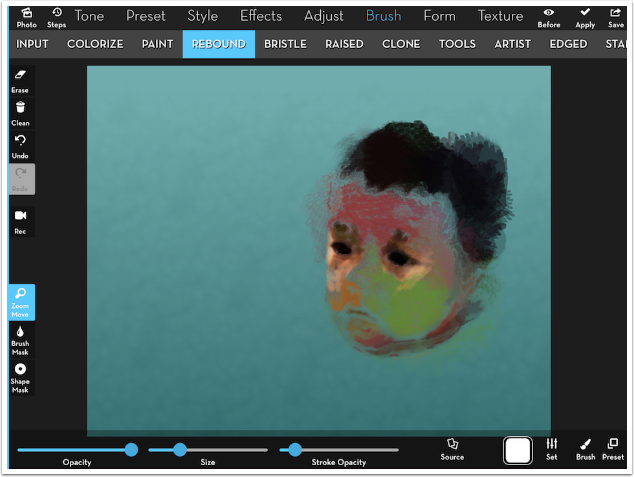
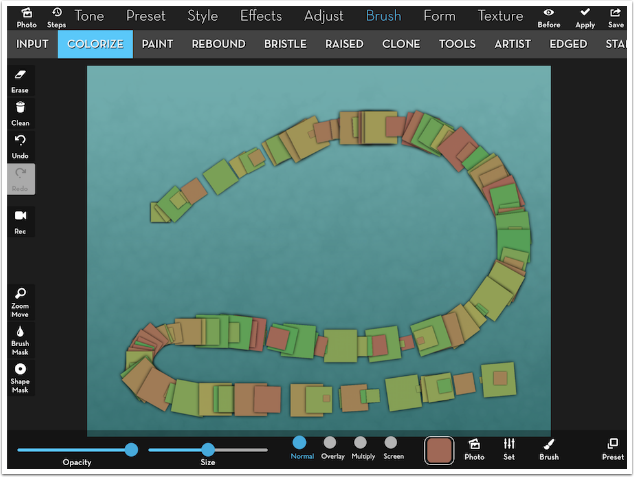
With judicious use of Color Variation as well as Size, Opacity, and Rotation Variation, you can get some very nice results.
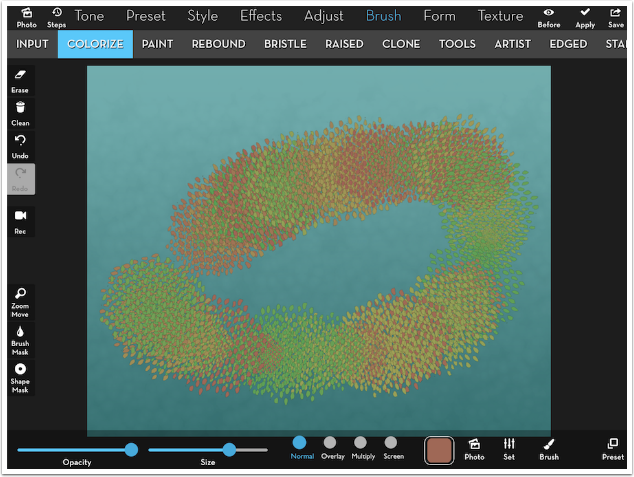
I hope that this introduction to the terms underlying brush use has been helpful. I also hope that any experimentation you do sparks something that’s worthwhile to you. Even though the landscape I threw together was regrettable, I do like this image created from a group of flower brushes.
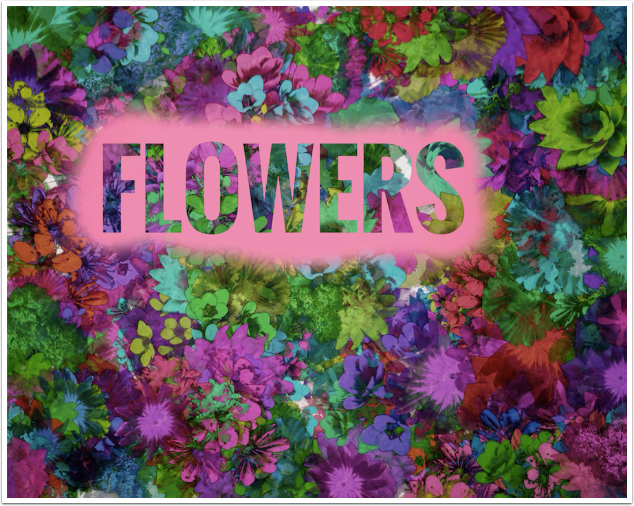
Until next time, enjoy!
Donating = Loving = TheAppWhisperer.com
Bringing you (ad-free) TheAppWhisperer.com takes hundreds of hours each month and hundreds of pounds to sustain. If you find any joy and stimulation here, please consider becoming a Supporting Member with a recurring monthly donation of your choosing, or possibly making a one-time donation. This is a not for profit website and one that can only grow with your support.
[seamless-donations]
Jerry Jobe
Never content with just scratching the surface of what an app can do, Jerry Jobe decided to pass on what he learned about imaging apps to others. He’s constantly trying to figure out just what tools other artists have used, and trying to incorporate them into his own work, in an attempt to find his style. He’s written tutorials on over 145 apps so far, which you can find (along with his Song of the Day entries) at http://enthusiasmnoted.wordpress.com/ He lives near Atlanta, Georgia, where he also finds a creative outlet in acting and directing in community theater.