iPhone Photography Tutorial – How To Create A Stunning Flower Shot With Artificial Rain
Our new iPhone photography tutorial section is in full swing and we’ve received much acclaim from the iPhone photography community, thanks to all. If you’ve missed our previous tutorials you can catch them here.
We recently interviewed the creator of this tutorial, Irene Oleksiuk for our A Day In the Life of … series, if you missed that you can read it here.
Irene impressed us with her contemporary flower and plant iPhone photography, her images are simply stunning and so well executed.
In this tutorial Irene goes through the steps necessary to enable you to capture a stunning flower image and add rain and effects, read this easy to follow tutorial and see if you too can create a similarly stunning shot.
(We have put links to the iTunes app store of every app that was used, just in case you feel inspired enough to download them).
Final Image
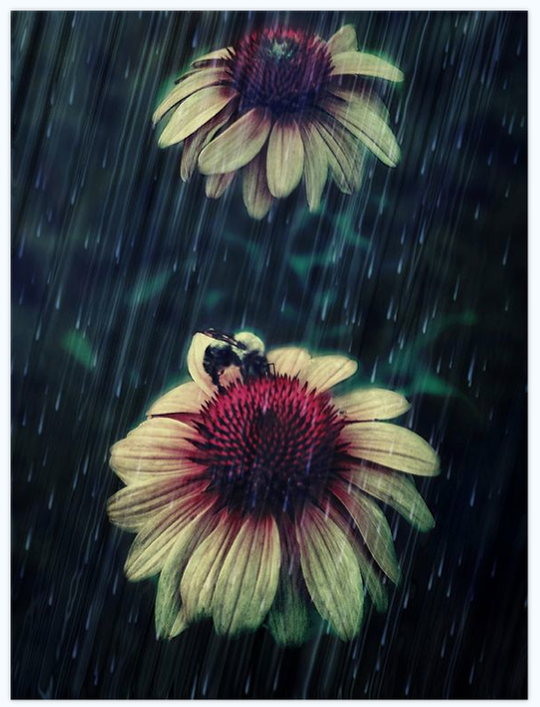
The image above is the final image, the one that we are going to show you how to recreate.
Original Image
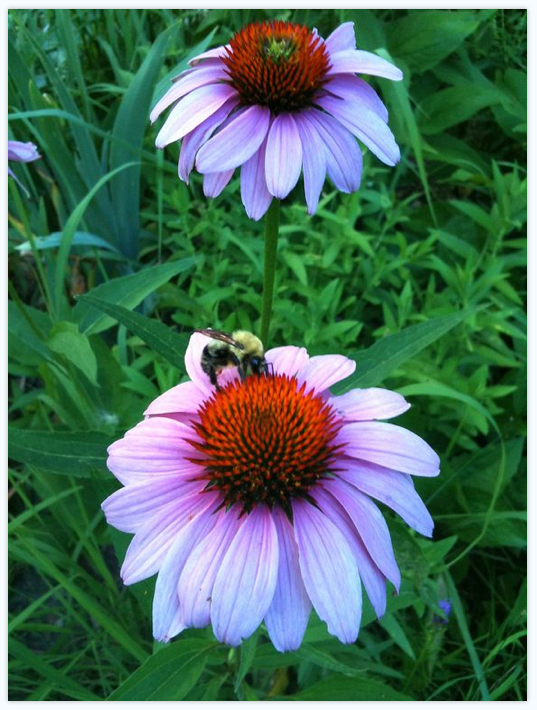
This is the original unedited photograph, Irene liked this image because of the bee that was captured. But she knew that she had to soften that busy background. Other than that, Irene really did not know what direction the would go in, until she got there.
Snapseed
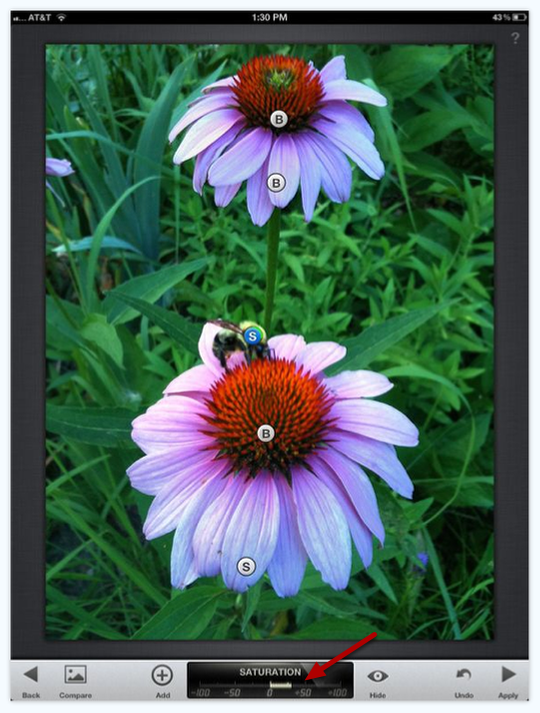
Irene opened the original image in Snapseed and at this point she wanted to boost the image. She chose the Selective adjust located on the bottom and added control points on the image where she felt the image needed Brightness or Non brightness, contrast or saturation.
Details
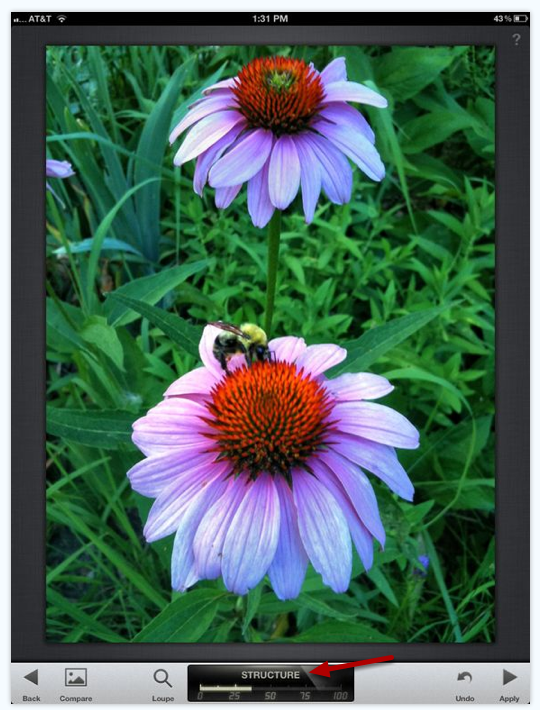
Next Irene clicked on the Details on the bottom and used Structure to pop out the detail. In Detail you can chose either Sharpening or Structure by rolling your finger over the image.
Touch ReTouch
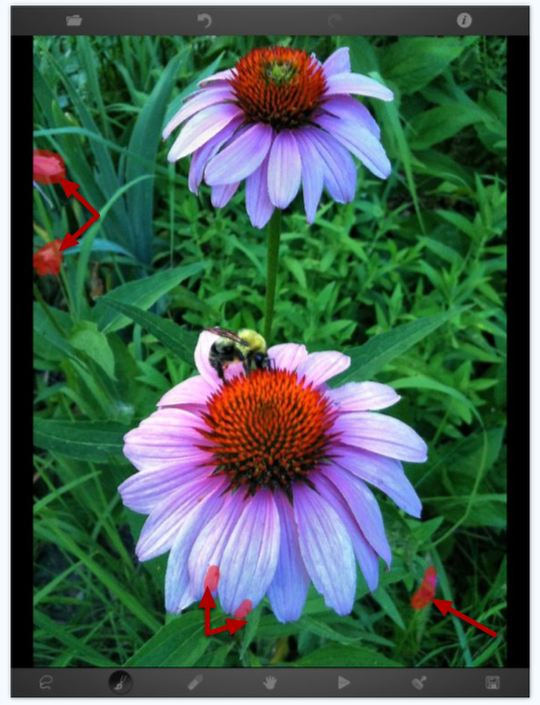
Next Irene opened the saved image in Touch Retouch to get rid of what she thought were distracting elements. Irene used the brush tool to paint out those areas.
BlurFX
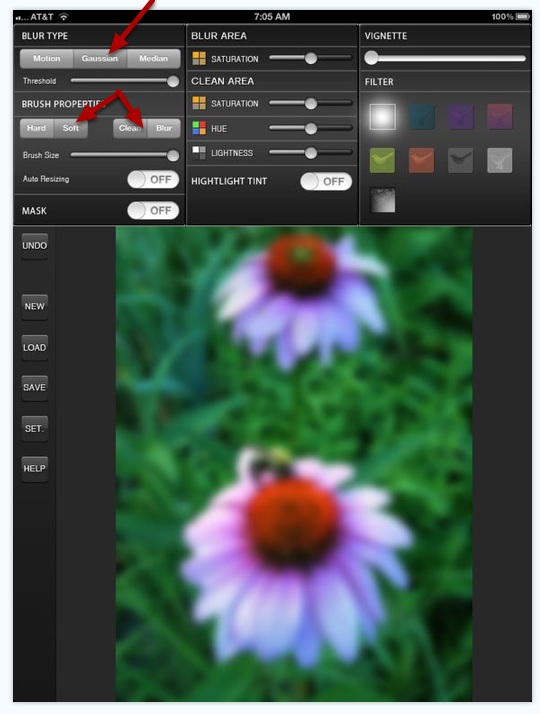
Irene then opened the saved image in BlurFX , whenever you bring in an image to this app it blurs the whole thing and then you get to mask it off. Irene chose Gaussian blur, a soft brush and clean mode.
You can control the brush size and you can zoom in using the fingers. If you go to far with cleaning the blur, just check the blur box and paint in the blur.
Masking
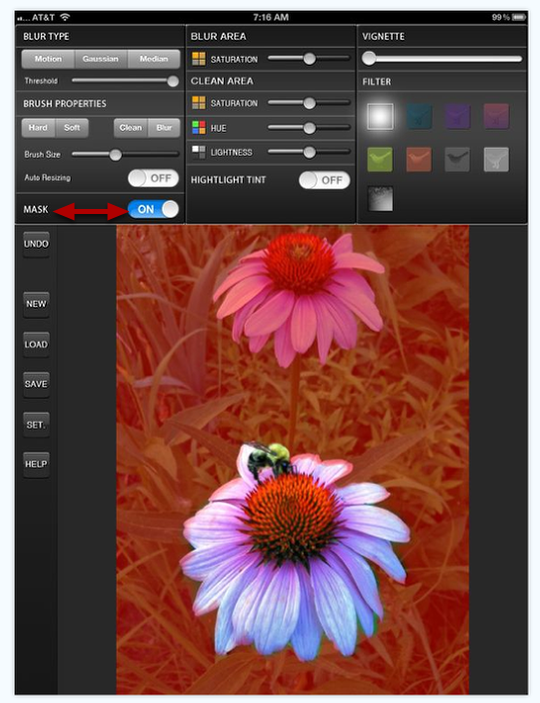
After painting for a while, Irene turns on the Mask icon, to see if she has missed anything or did too much over the subject.
Vignette
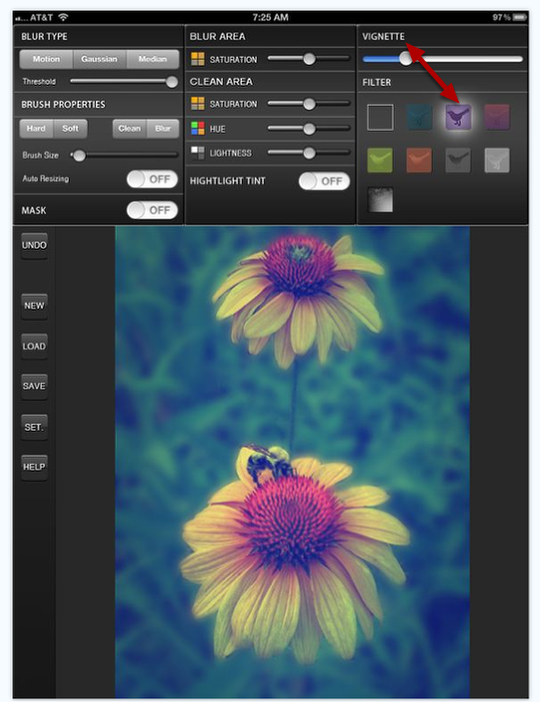
While still in BlurFx, on the right top side, there is a vignette slider, which Irene used. She also used the 3rd filter (purple)
to change the color of flower totally.
Pixlromatic
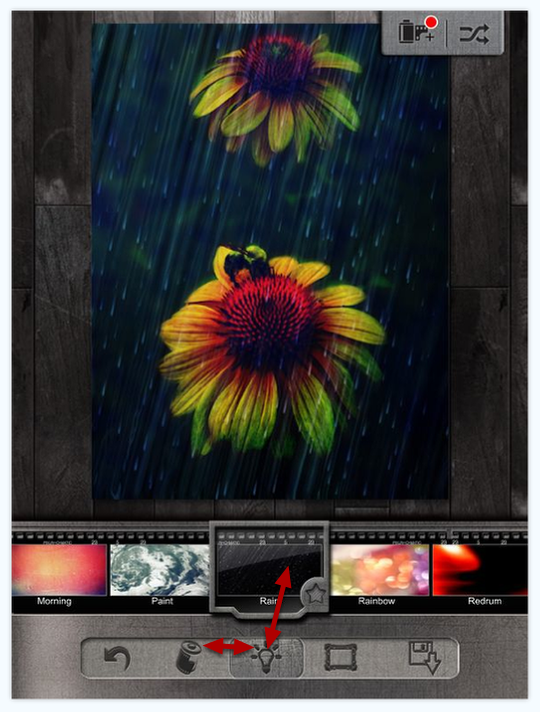
Next Irene opened the saved image in Pixlromatic. There are three things you can do here, on the bottom there’s a
roll of film, here you can pick the color or B&W look. The light bulb on bottom will overlay the image.
In the screenshot above, Irene selected the light bulb overlay section and chose the Rain.
Color Look
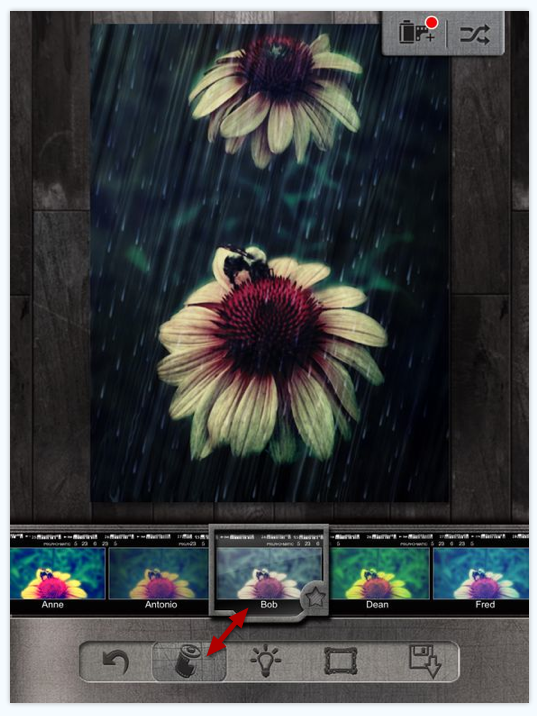
In the screenshot above, Irene selected Bob for the color look that she wanted.
Snapseed
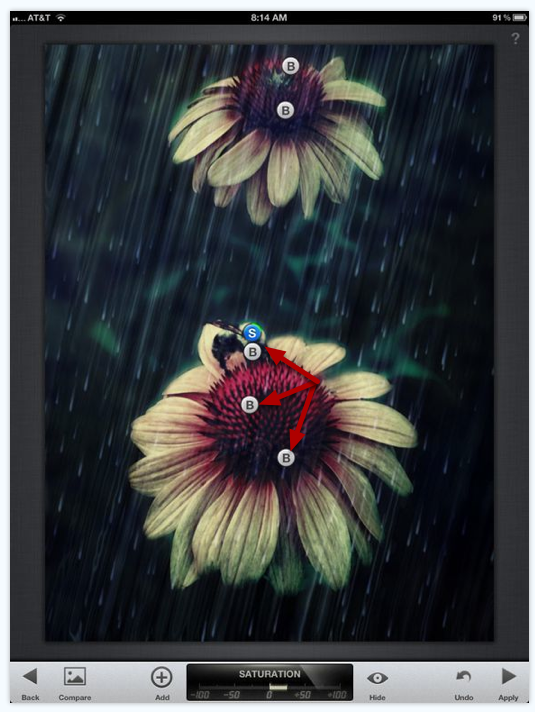
Next Irene opened the saved image in Snapseed as she felt it was too dark for her. She then put control points on the
flower center and the bee to lighten it up.
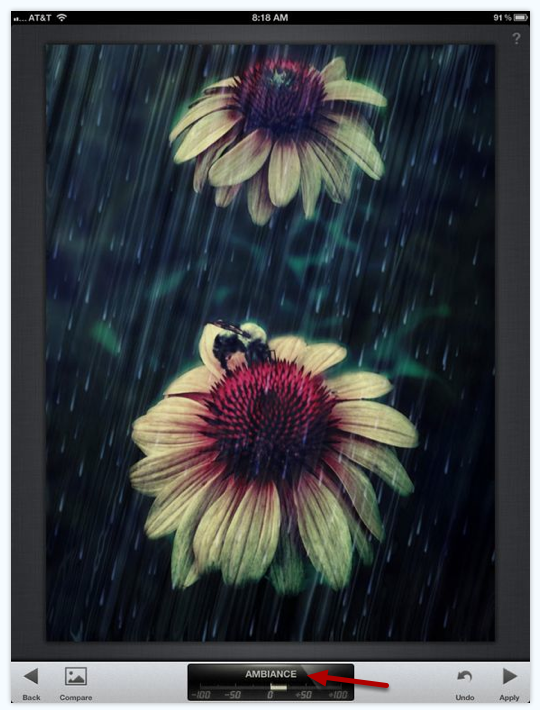
Finally, Irene clicked on Tune Image and again with her finger on the image slide she chose Ambience to lighten and warm up the image.
Final Image
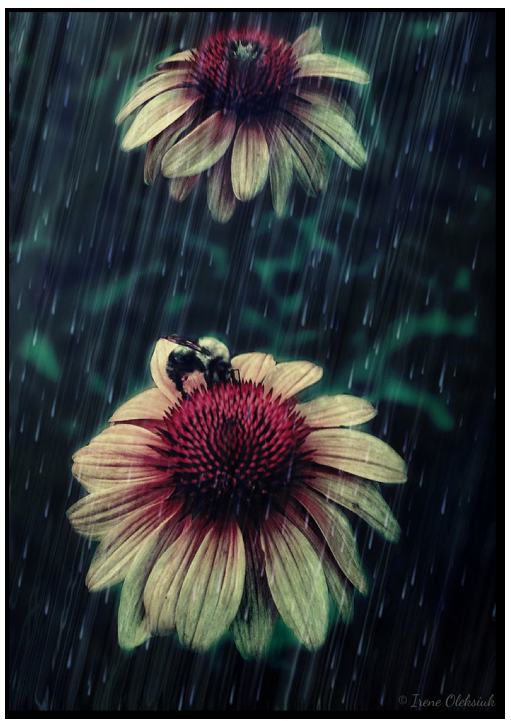
And here is that awesome final image again. We hope you successfully managed to follow that tutorial, please send us your similar examples, we’d love to take a look.

2 Comments
Bob
A wonderful explanation plus images, very fine work
Geri
what a gorgeous image and wonderful tutorial – thanks!