iPhone Photography Tutorial – ‘How To Enhance An Image And Use Layers With PhotoForge2’
Our new mobile photography tutorial section is in full swing and we’ve received much acclaim from the mobile photography community, thanks to all. If you’ve missed our previous tutorials you can catch them here.
We recently interviewed the creator of this tutorial, Gerry Coe for our A Day In the Life of … series, if you missed that you can read it here. Gerry’s images are simply wonderful and in this tutorial Gerry goes through the steps necessary to enable you to capture the stunning image below.
Read this easy to follow tutorial and see if you too can create a similarly wonderful shot. This tutorial purely uses the PhotoForge2 app and if you feel inspired to try to replicate this image, you can download the app here. It retails for $2.99/£1.99.
Final Image
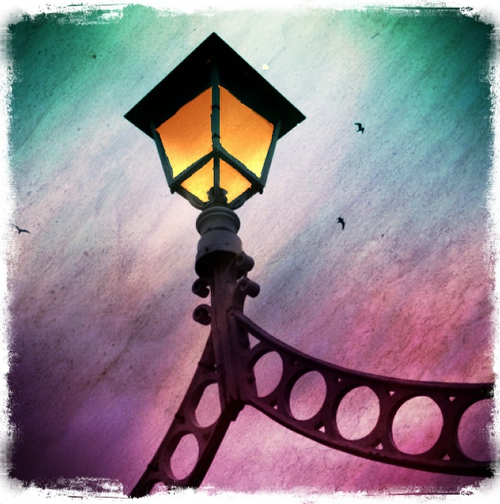
The image above is the final image, the one that we are going to show you how to recreate.
Original Image
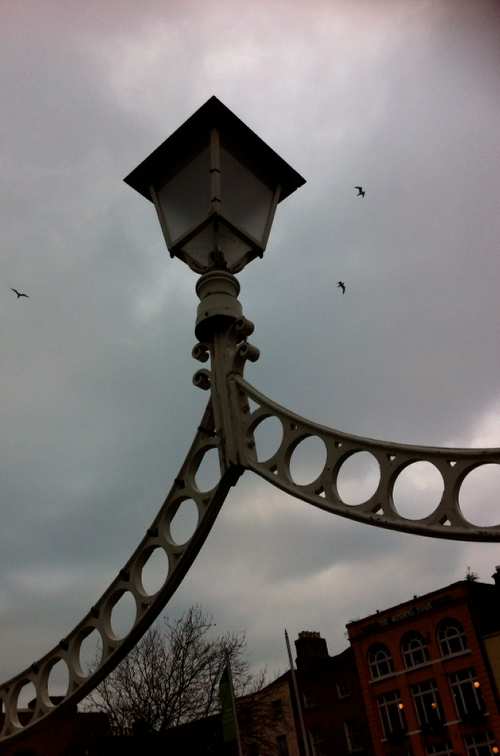
This is the original unedited photograph that Gerry took with the iPhone default camera of the Halfpenny Bridge in Dublin. It was taken on a typical Northern European dull and overcast day.
Photoforge2
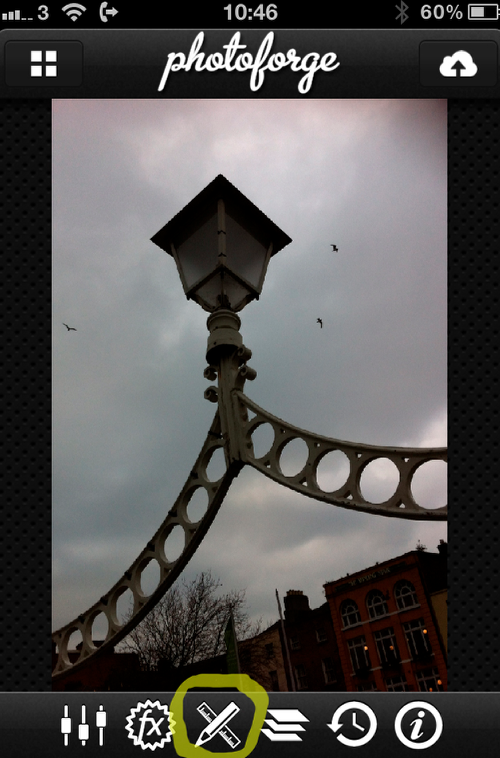
Firstly, Gerry opened the image up in Photoforge2, he wanted to crop it so he clicked the Pen and Ruler at the bottom of the screen.
Crop
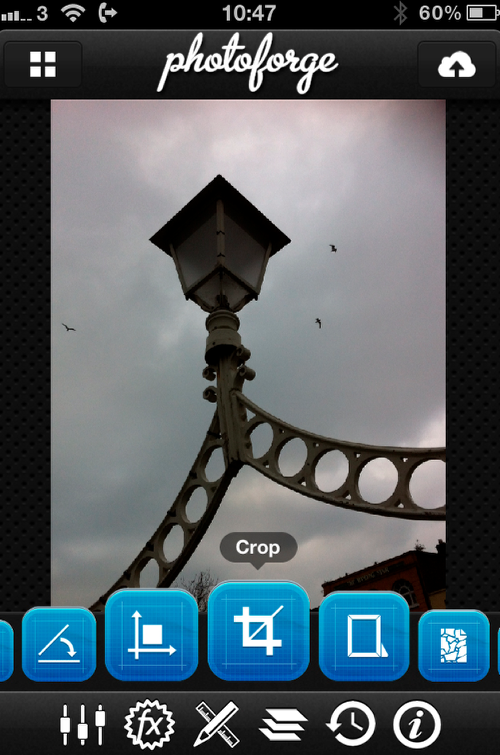
He wanted to remove the buildings so decided to crop it square.
Lining Up
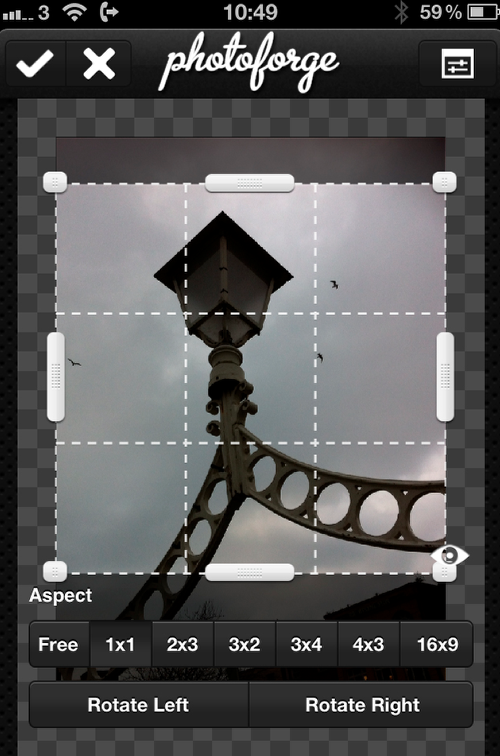
He cropped the image and hit the tick on top left to process the image.
Fx
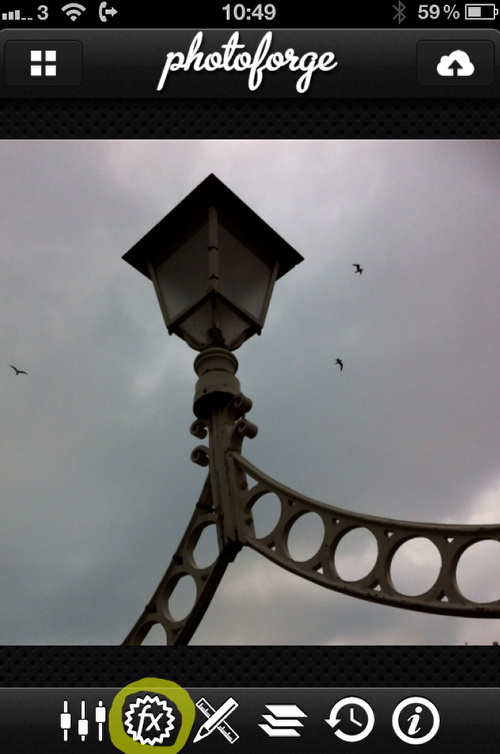
Gerry then selected the Fx button.
Pop! Cam
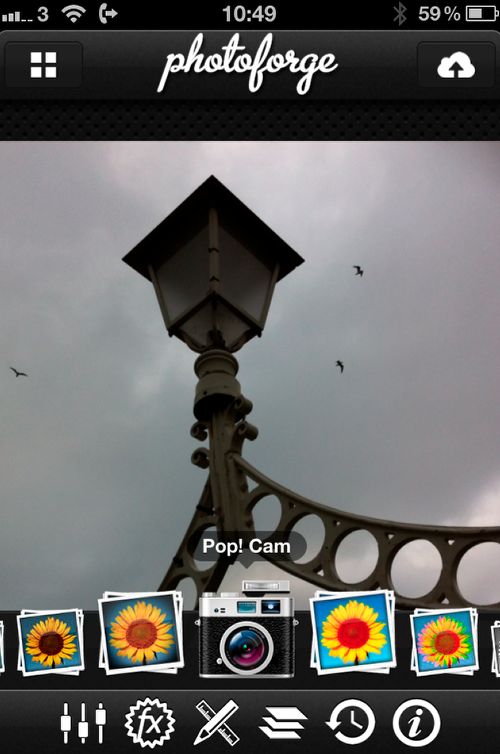
This opens up a new set of possibilities, Gerry wanted the Pop! Cam filter.
Options
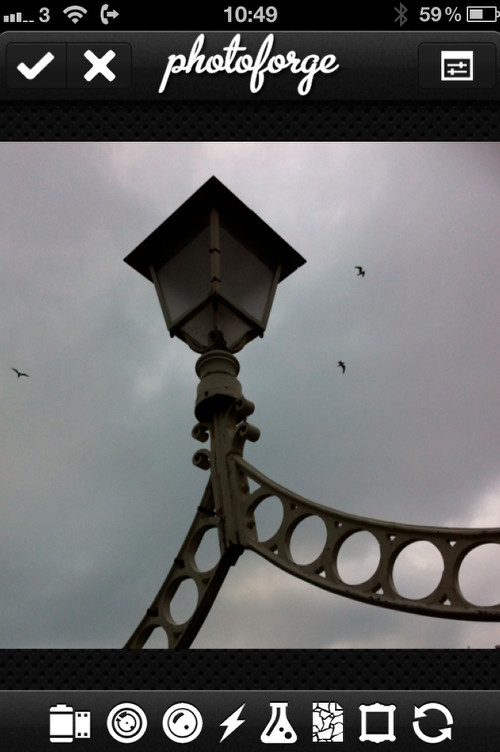
This brings up a new range of options.
Paper
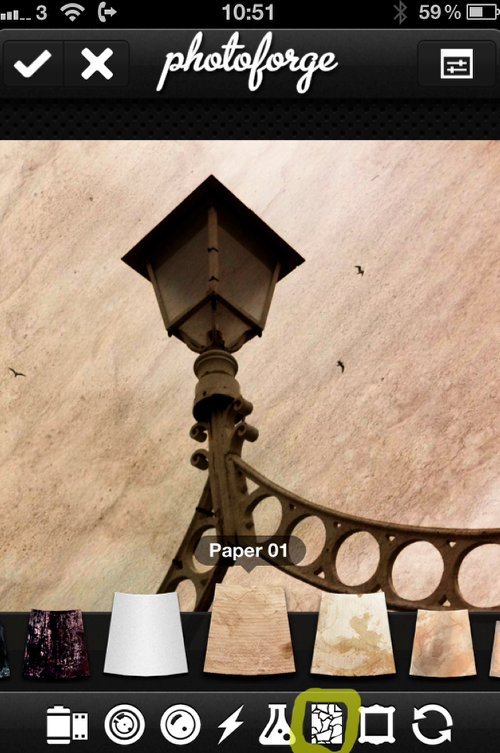
Gerry wanted a paper background but you can play around with them to see which one you like best.
Film
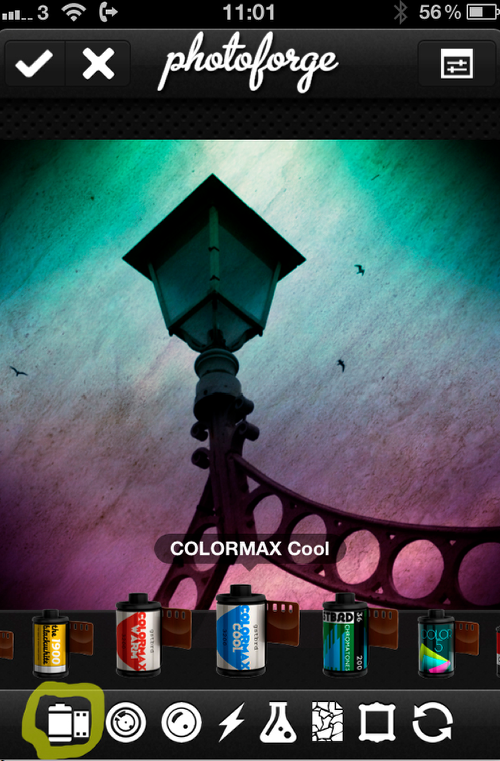
Next Gerry selected the film icon and choose Colormax Cool.
Cool Off
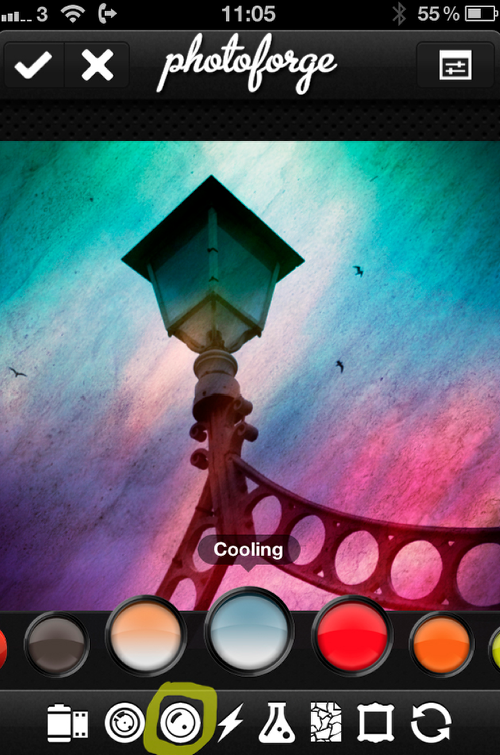
Then Gerry selected Filters and choose the Cooling option.
Darkroom
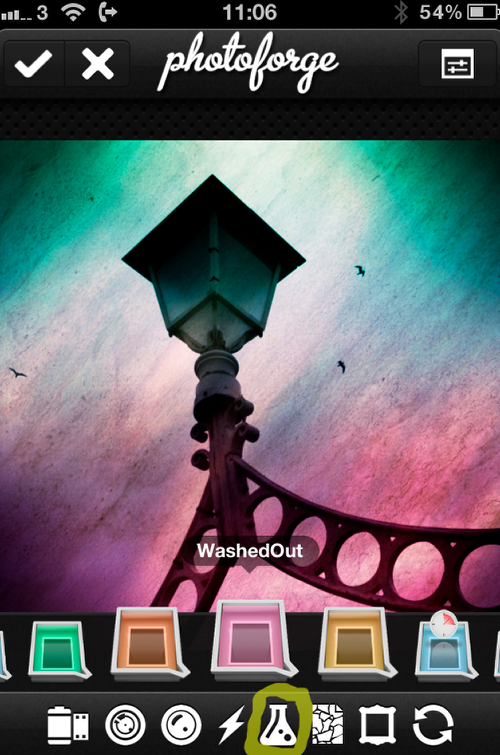
Gerry then went into the Darkroom Chemicals section and selected WashedOut.
Frame
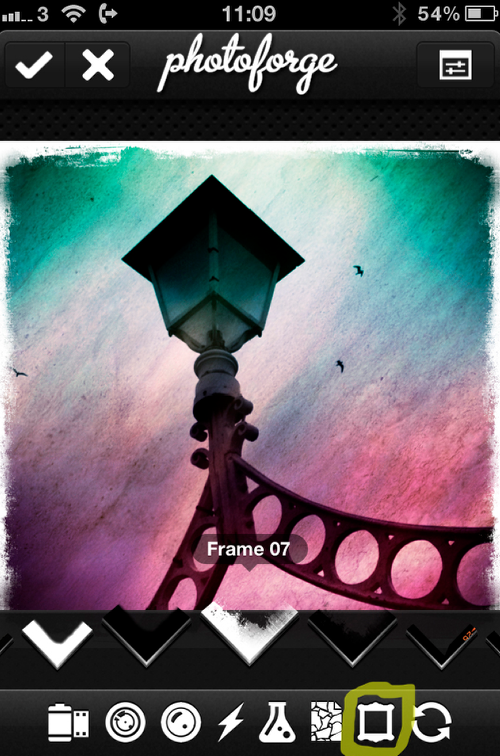
The next stage was to select the Frame, Gerry hit the tick mark on top left.
Warning
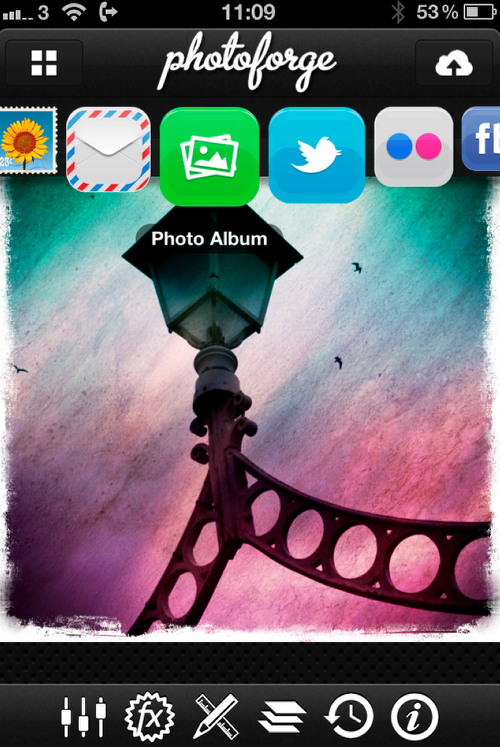
One word of warning, the tick mark only processes your image at that point, if you want to save it you have to click on the Cloud icon at the top right. You can save to your camera roll or send it on to any of the other websites listed.
Saved
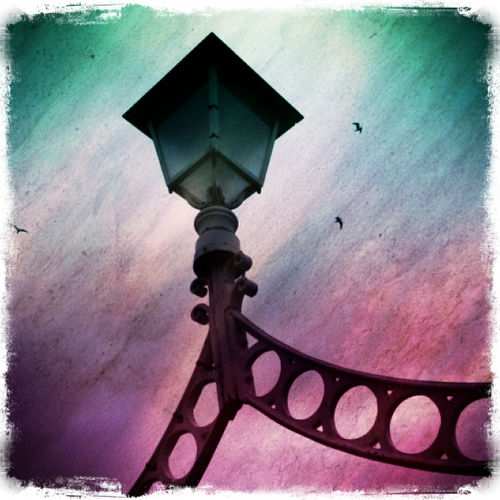
Gerry saved the image but felt it needed more work.
Channel Mixer
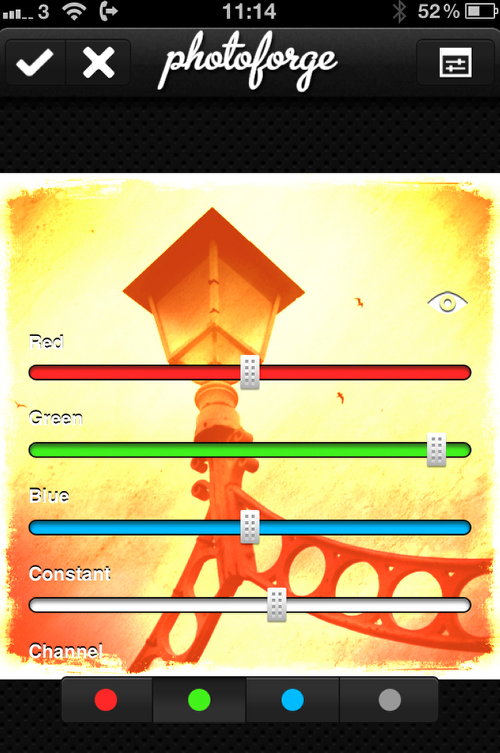
Re-open the image in Channel Mixer and change the color to a bright Orangey/Yellow.
Layers
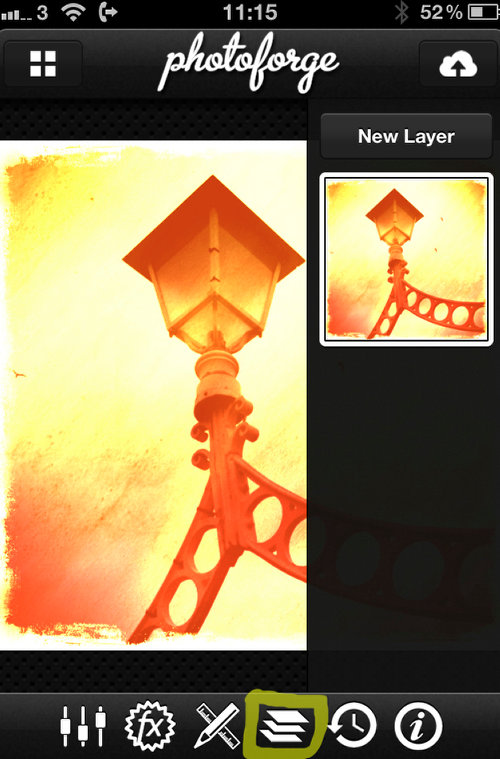
Next, click on the layers icon as marked and you get this layout.
New Layer
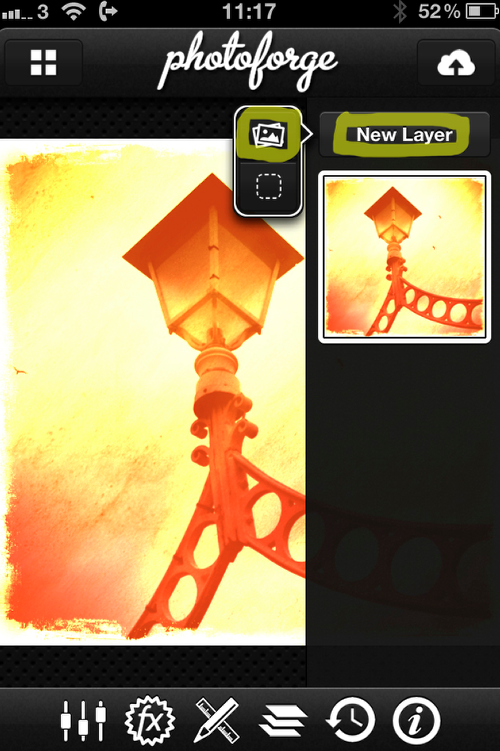
Then click on New Layer and on the pop out menu click the picture icon, this opens your camera roll.
Import
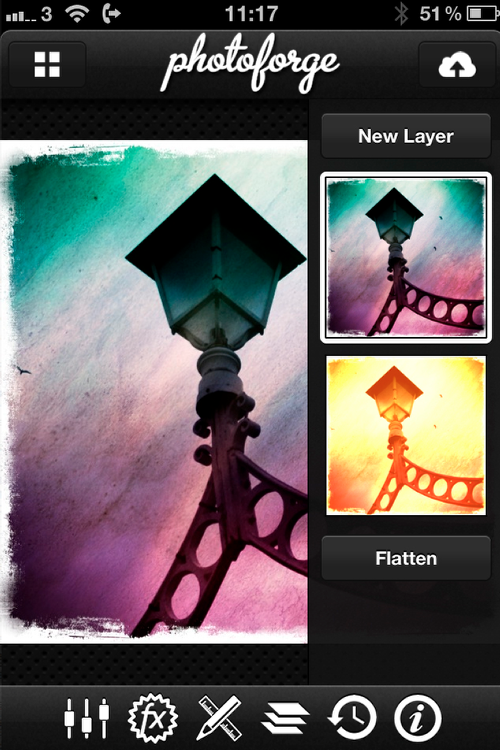
Import the original retouched image.
Mask
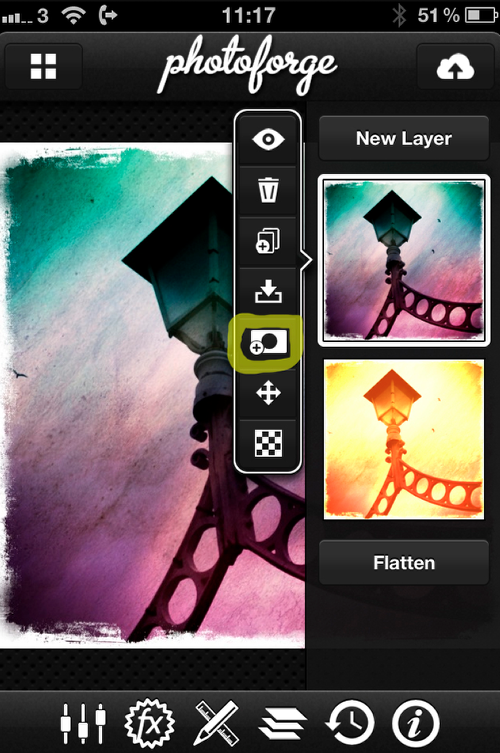
When you click on that image a new pop out menu appears, click on the Mask symbol.
Pen
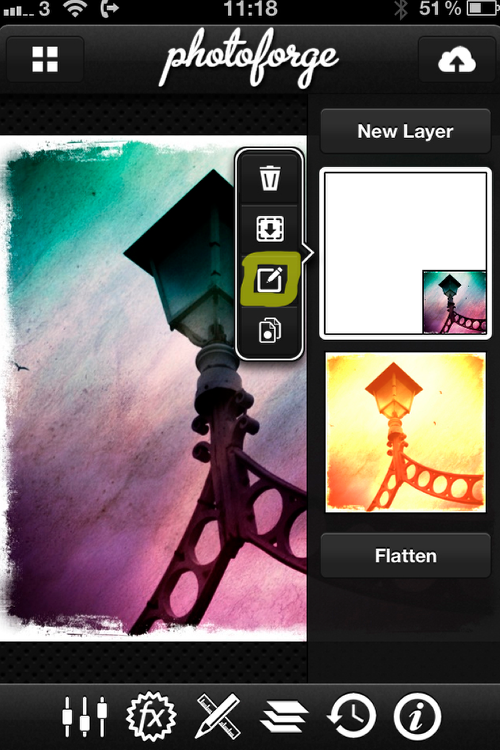
The image now shows a small version of your picture denoting that the mask is active, now click on the pen tool.
Mask Edit
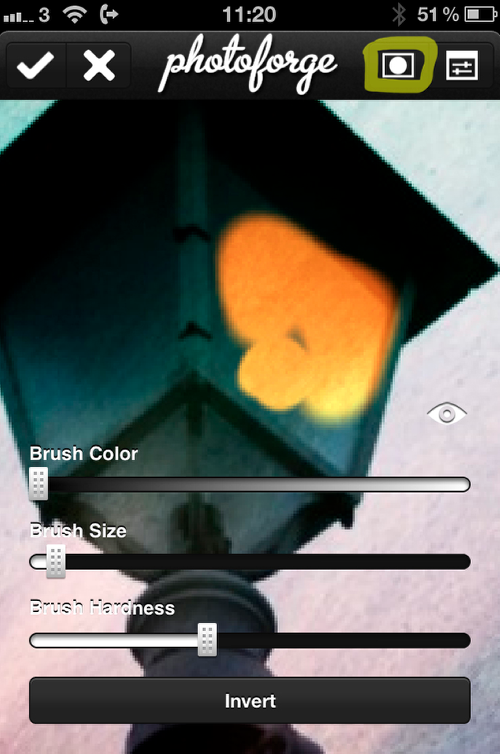
Now we move into Mask Edit and you can then start to rub out the portions you don’t want and show the underlying image. The round dot at the top right reveals the different ways the mask shows.
Flatten
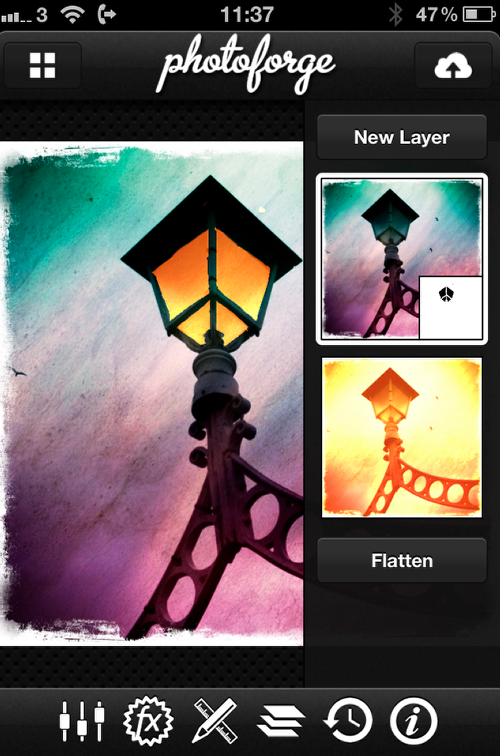
This shows the mask and the eliminated bits, and if you’re happy at this stage, Flatten the image and save to camera roll.
Final Image

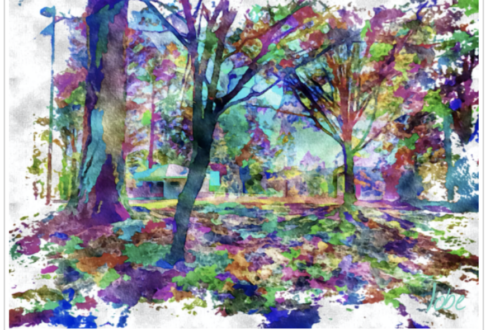
Here’s the finished awesome piece of art again. We hope you successfully managed to follow that tutorial, please send us your similar examples, we’d love to take a look.


9 Comments
Veevs
Fantastic tutorial!
Joanne Carter
Thank you Veevs 😉
Gerry Coe
Thanks for the comment Veevs
Frank Hoekzema
Nice, i have not yet found a way to like this app but seeing what’s possible through this tutorial has got me thinking I may need to take another look!
Gerry Coe
Frank, I find that too with certain apps, then I see what someone else has done with it and I look at it again. Glad you liked the Tut. G
Sharif Shajib Ahammed
Superb Tutorial
Gerry Coe
Thanks Sharif.
Mark Allen
Excellent Gerry, I must get this and have a play…
Gerry Coe
Always a bit of fun Mark.