Top 5 Apps – Photo App Lounge – With Giovanni Savino
Welcome to our new Photo App Lounge section of theappwhisperer.com. This is a very small area on our site where we ask highly accomplished iPhone photographers what their top five photo apps are and why.
Kicking us off today is Giovanni Savino, we previously interviewed Giovanni in both our A Day In The Life series and Extension of the I series. Giovanni started to work in photography, film and television when he was sixteen years old and learned the trade “hands on” relying on advice from the best photographers and producers in the annals of TV broadcasting. In the last decade he has produced a number of photo-reportages and documentary films, mainly in the Dominican Republic, which received very positive media exposure and rapidly became important reference and teaching tools in many academic collections.
He continues to pursue his passion for telling visual stories while working for a wide client base, as his experience and versatility lets him tackle and fulfill the most diverse assignments.
We caught up with Giovanni in between shoots and asked him what his top five photo apps are, this is what he said…
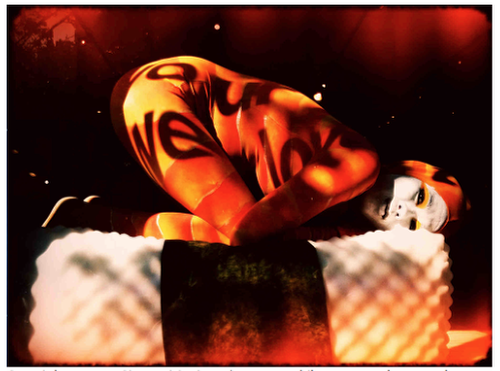
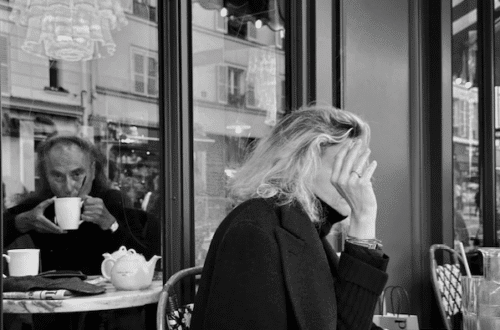
Copyright Image – Giovanni Savino – ‘Human sushi’ – Apps used – Lo-mob
‘As I explained before, when I use my iPhone to create images I have a fairly minimalistic approach with apps. In other words, I mostly tend to “shoot clean” using a camera app of choice, for example Hipstamatic, Camera+, Pro camera or even the native iPhone camera, and then, post process the images as needed (if I feel there is an actual need to post process them).
Today I am going to talk about five apps I don’t use all the time but which I still consider very useful and I keep in an easy to reach folder on my main iPhone screen’.
Number 1 Backgroundz
‘I use this app to create composite images made of two or more photographs. Since this app was introduced in the App Store, many others, more refined, perhaps better apps, were developed to do the same thing, to superimpose one image on top of the other.
However, although I sometimes use other apps for layering, I keep going back to Backgroundz because I like its extreme simplicity. It swiftly lets me achieve the desired results and I love the element of serendipity I find in its very basic layout.
To create a composite image in Backgroundz, you just choose your first photo, then the second one, decide if you want to maintain the aspect ratio of each picture (e.g. square, vertical etc) by clicking on the “maintain aspect ratio” button and then you just choose from several different layering effects (Mode Selection) that basically duplicate the ones you might be used to if you are familiar with layering images in Photoshop’.
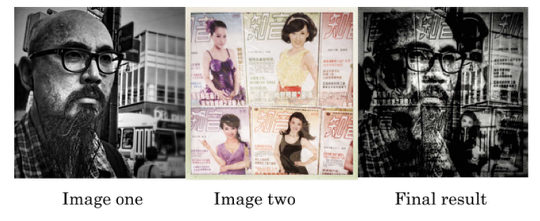
‘You can always go back and repeat the process, using different images and/or different layering effects. Then, simply save the layered image you are happy with.
At this point you are given an option to “re-use” your final image and further layer it with one or more photographs. My advice here is: “don’t overcook it” otherwise you’ll end up with a tremendously dense and convoluted image similar to exposing the same frame in a film camera six or seven time.
If you plan on layering your images it makes sense to think ahead at the time of shooting. If both images have a subject let’s say frame left and some empty space frame right you most likely won’t have a very pleasant result.
The layered image will have a dark blotch on the left side of the frame and some white nothing to the right. Your need to superimpose images can become also a great incentive to learn framing and composition’.
Number 2 – DMD Panorama
‘DMD is a very simple and fun panoramic picture app. I believe over three million people downloaded it already…. I discovered this app because an increasingly successful branch of my commercial photography is in fact panoramic photography. Professional panoramic photography is a rather complicated, time consuming and expensive affair.
We use special lenses, special rotating tripod heads and technically complex stitching software to achieve VR (virtual reality) imagery. These days a lot of people are interested in this relatively new technique in order to allow their audience to have a “full immersion experience”, via a computer screen, an iPad and even an iPhone, where the viewer is able to literally look around the image 360 degrees, as well as to enjoy multimedia materials, embedded in the panorama itself.
An example of a recent VR Tour project of mine, can be viewed here: http://photoweblab.com/33doors/virtualtour.html

DMD is extremely intuitive and easy to use. While it won’t produce a mind blowing viewing experience such as the ones we professionally create, it will allow you to take a panoramic view of your surroundings by simply keeping the iPhone vertical in your hand and rotating your body 360 degrees on it own axis, while letting a Yin and Yang on-screen symbol match together. Then it will automatically stitch the various images and bingo! You have a perfectly stitched panoramic image right in front of your eyes!
Also, DMD offers various sharing options, Facebook, Twitter, a link to their own immersive 3D viewer page (graciously supporting both HTML5 and Flash), email, or simply save to your Photo Album.
I would say this app is cutting edge technology; a lot of fun and also it is (still) FREE so you can’t go wrong, just start playing with it and let the creative juices flow…
Here is a pano originated with DMD and hosted on their panoramic viewer website: http://www.dermandar.com/p/bGvxyU
Number 3 – Pocket Light Meter
‘Is film DEAD? Well, if you ask me, the answer is NOOOO !
Beside the fact that I started my career shooting film, beside the fact that everyday there is less and less availability of film stocks and professional labs, I still use film for specific project and/or specific clients.
I LOVE film, and I have such a long term, organic relationship with it, that the most sophisticated digital cameras, which, by now, I use on a daily basis, don’t go even near to evoke in me the sheer joy and sense of accomplishment I still experience when I first look at a freshly developed negative.
Anyway, to avoid bombarding the reader with any further “poetry” about my never ending love affair with celluloid, I’ll just give a bare fact about this little, free App.’
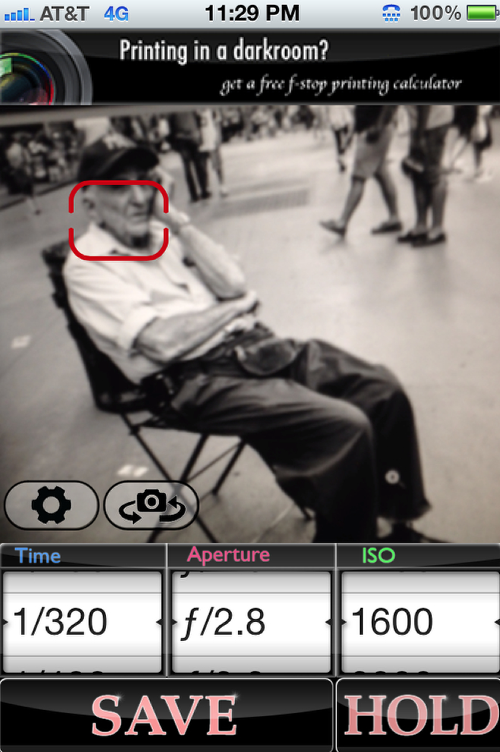
‘I compared the readings from this iPhone reflected light meter with two of my professional light meters, which, at the time I purchased them, cost me an arm and a leg. The results are so close that, really, I think you could feasibly shoot a feature film or run a portraiture studio simply using this free app for metering!!!
All you need to do is to select your shutter speed, aperture and ISO just like they are set on your film camera, point your iPhone to the subject and take a snapshot.’
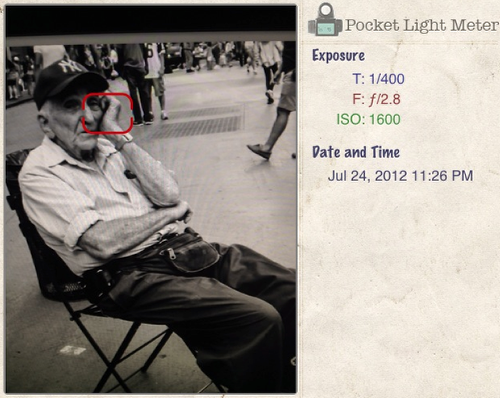
‘Of course you need to know HOW to use a reflected light meter, how to aim it, how to read it, how to interpret the combination of numbers (shutter speed, aperture and ISO) you find in there…. But that is something that you can and should learn anyway, if you are interested in shooting film.
As a matter of fact, this little app can actually help you learning the aforementioned number game as it lets you take a shot of the lighting conditions you are trying to measure and save it to your Photo Album together with the related shutter speed, aperture and ISO. This snapshot of your meter reading gives you plenty of time for thinking, studying, asking, your mentor, analyzing, discussing etc, before you actually press that shutter button on your film camera’.
So, if you really want to dust off that old Rolleiflex or Bolex (yes, this light meter also offers cinematic speeds settings) I strongly recommend you to get this free app and play with it in the most diverse lighting conditions until “reading light” in relation to your film and camera settings will become second nature to you and you’ll only need to use a light meter (any light meter), to “validate” what you already know’.
Number 5 – Pro HDR
‘There is a large group of professional photographers today who, if you mention the word HDR, will start screaming like Linda Blair in the Exorcist or simply will never speak to you again. Then, there is an equally large group of “HDR Aficionados” who swear by this technique, loving every pixel of it!
The people in the first group, “accuse” HDR technique for wanting to awkwardly emulate the human eye response and adaptability to different light conditions.
Photography, at the most basic level, is all about finding a working balance between light and darkness in your frame, within the technical limitations of modern cameras and based on your subjective taste.
Cameras, unlike the human eye, are unable to handle and to realistically reproduce the enormous difference between light and dark there is in nature’.
‘That is why if you take a picture of your friend on a beach with the sun behind him you’ll have three choices:
- Use a flash to “fill” your friend’s face and “equalize” the exposure on his face with the extreme brightness of the beach.
- Don’t use a flash and expose either for your friend’s face, which will “blow out” the background into an overexposed explosion of light, or expose for the ambient light (the beach), which will capture your friend as a dark silhouette with no discernible facial detail.
- Use the HDR technique which, by taking two (or more) frames at different exposure levels, ranging from the brightness of the beach to the darkness of your friend’s face, will allow you to build up a more desirable overall exposure level, by combining these different frames, in post-production.
Fact is, that while with a careful manipulation of a “fill flash” you can achieve very natural and pleasing results, HDR often tends to give a rather “fake”, overdone look, where the tonal range might easily appear over-compressed or simply unrealistic.
The trick with HDR is really not to overcook your image, trying to maintain a credible, tasteful amount of shadows, contrast and saturation in the post-production process. In a parallel example with spaghetti, try to keep your HDR “al dente”!’
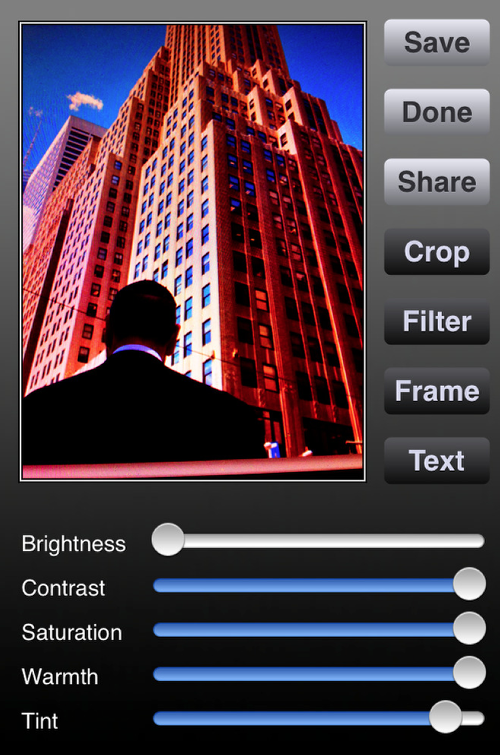
‘Pro HDR is a very intuitive app which requires you to hold the iPhone steady, for it to be able to analyze the frame and take two shots at different exposures (one lighter and one darker), which you’ll then combine and adjust with sliders (such as brightness, contrast , saturation etc.) in an effort to reach either a very realistic photo or an extremely surrealist one.
All said and done, although I could live without it, I end up using pro HDR in extreme lighting situation or when I don’t want to play with silhouettes and hard shadows.
This is certainly an app with a lot of potential. Whether its potential is to create stunningly realistic images or nearly psychedelic visual interpretations of reality is still open to discussion. But the potential is there’.
Number 5 – FiLMiC Pro
‘If I were to describe in detail all the features packed in this incredible video recording app I would be here until tomorrow….I’ll just say that if you are serious about shooting video with your iPhone this is probably an app you should look into.
What amazes me, being an old film and TV veteran, is that until a few years ago, to do the things this app lets you do, you would need several boxes full of expensive, heavy and difficult to operate equipment. Now it all fits in your pocket!!
With FiLMiC Pro you can feasibly embark in a serious video production just using your iPhone. This app offers variable frame rates, color bars, a built in slate that lets you synchronize audio with an external recorder, 48mbps video encoding at 1080p, different focus/exposure settings and much, much more.
Of course the plethora of functions available with FiLMiC Pro is very taxing on the processing capability of your iPhone, so, I suggest, when using this application, to close down as many apps as you can, and even disable the phone reception by setting your device to airplane mode, in order to allow FiLMiC Pro to use as much processing power as possible and also avoid your video recording to be interrupted by an inopportune phone call.
I won’t lie: processing your footage shot at 1080p takes a long time. As long as the actual recorded time (time code) or even longer, so while waiting, brew yourself a chamomile tea and try not to get antsy. I am sure, as the processing capabilities of future iPhone models will improve, the wait will shorten. Another nice feature of FiLMiC Pro is the ability to share your movie wherever you want, from DropBox to Vimeo to YouTube to nearly everywhere else. When sharing your footage, my advice is to use a good, fast Wi-Fi connection, as FiLMiC Pro files tend to be quite large.
Please remember: whenever you shoot video you should not hold your iPhone vertical but horizontal. That is the correct way to display your creation everywhere, from a computer screen to a theatrical release!!!’
TheAppWhisperer has always had a dual mission: to promote the most talented mobile artists of the day and to support ambitious, inquisitive viewers the world over. As the years passTheAppWhisperer has gained readers and viewers and found new venues for that exchange.
All this work thrives with the support of our community.
Please consider making a donation to TheAppWhisperer as this New Year commences because your support helps protect our independence and it means we can keep delivering the promotion of mobile artists that’s open for everyone around the world. Every contribution, however big or small, is so valuable for our future.


2 Comments
David
This is quite an interesting list of apps!! All worth looking into…thank you so much for sharing these with us Giovanni! I’m certainly going to download Pocket Light Meter now. I’ve seen it before but wasn’t sure if it was worth using…now I know. As a film lover myself with a collection of “vintage” cameras this app will come in handy!
Regib
This was the very best example of what this section of the Appwhisper can do for the iphoneographers! Instructive and enlightening info on using the apps mentioned.