Image Blender Tutorial – Part 1 – Blending Techniques
Image Blender is a simple photographic processing application that blends two images together in many different modes. A blending mode determines how pixels are blended with an underlying image to create a variety of effects.
This application is used daily in my workflow because of the creative opportunities it presents: toning down a filter effect, creating a double exposure, creating custom textures, brightening an image, and so much more.
We hope you will feel inspired to try Image Blender for yourself after reading this tutorial. It is one of the most popular Photo apps available for the iPhone/iPad. It retails for $2.99/£1.99 and you can download it here.
About The Author

Teri Lou Dantzler is a professional Photographer with the creativity and insight that it takes to craft artistic images. Her camera of choice is the iPhone and her processing device is an iPad; both are loaded with many photographic applications and are conveniently with her all the time. Teri Lou’s vast knowledge of these applications has earned her the title of “iPhone Guru” and ‘App Queen.”
As an instructor of iPhone Photography workshops and online courses her goal is to inspire, motivate and demonstrate what is photographically possible when using these devices and applications.
Visit her inspirational site to see amazing images and for additional information regarding online courses and workshops. http://www.teriloublog.com
Final Image
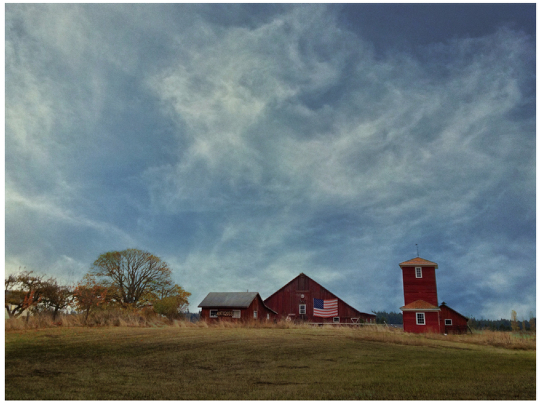
This image is a combination of two images, a barn scene and a blue sky with wispy clouds, that was processed using Image Blender in Multiply mode.
Original Image
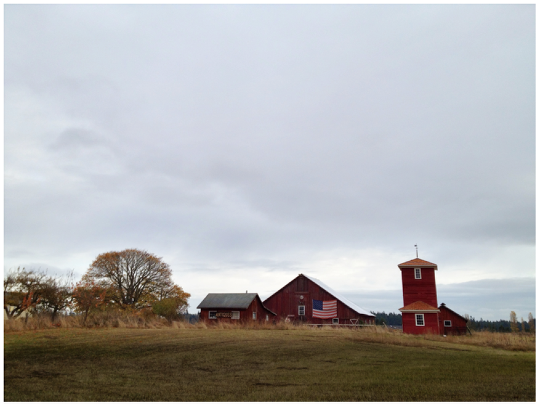
For the first demonstration I am going to use this barn image with a flat gray sky and blend it with the image below of a blue sky with fine wispy clouds. Since the sky in the barn image is mostly white and the rest of the image has little or no white, the blend will work well without needing additional processing.
Folders
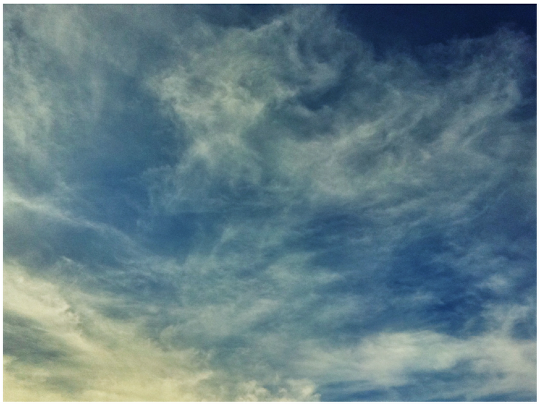
I have created a folder of clouds images that I have captured with my iPhone to use as blending images. It is a folder I use often and recommend for everyone to have.
Step 1
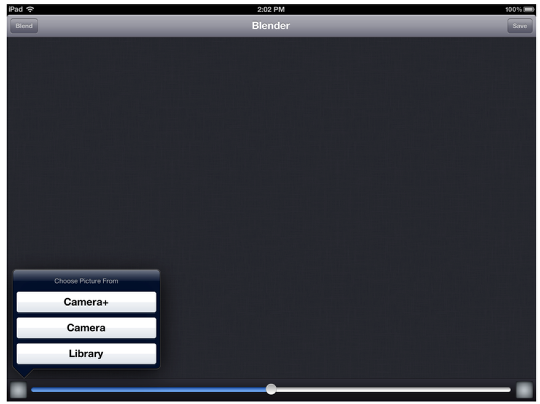
When Image Blender is first opened, tap on the lower left box to import your first photo. When choosing which photo to pick first it is important to note that the left photo is dominant. By dominant I mean it determines the shape and size, in pixels of the final image.
When importing a photo you are given three choices: Camera+, Camera and Library. If you chose one of the Camera options you will be able to capture an image and then use it to blend with. If you chose Library you will use an image that was previous captured and stored in the Library.
For this tutorial only the Library option was used.
Step 2
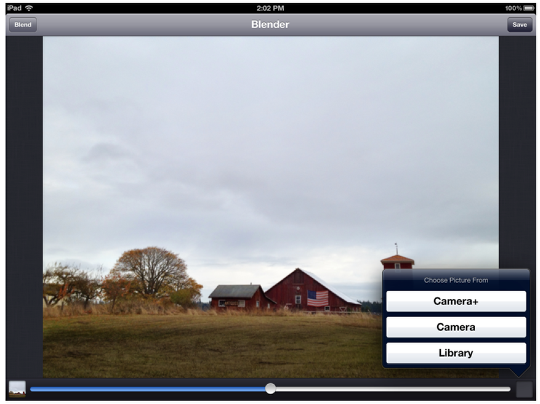
After selecting Library, you will need to navigate to the image you want to blend with. In this case the barn image was found and chosen. Then I tapped on the right corner, tapped ‘Library and again navigated to the location of the sky and clouds image.
Step 3
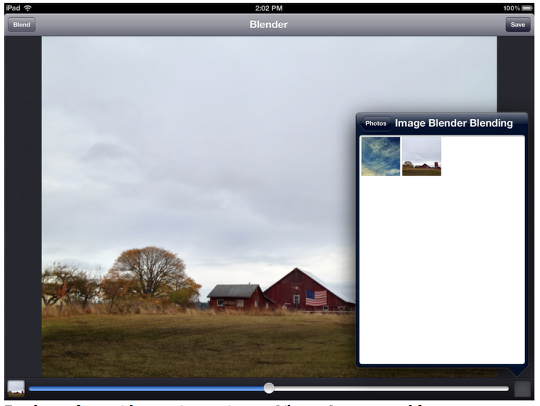
For those of you with many images in your Library, I recommend for you to create separate folders of just the images that you want to work on so they can easily be found when navigating through the Library images. As you see in the above screen capture, I created a folder called Image Blender Blending and placed just the two images in it. As I continue to create more images for this tutorial, I added them to this folder to keep them all in the same place for easy reference in the future.
Step 4
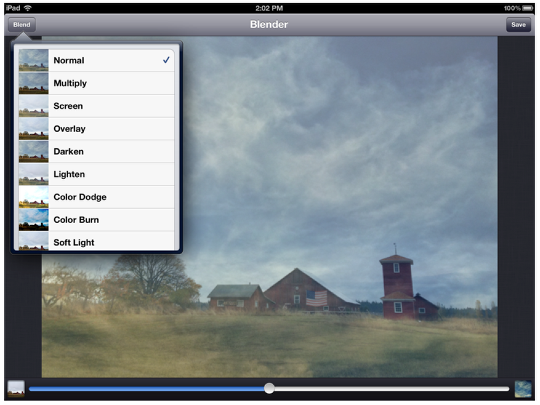
After both images are imported Image Blender will, by default, blend the images in ‘Normal’ mode at 50%. Tap the upper left corner, ‘Blend’ to select the different modes. Slide the dot on the bottom task bar to change the transparency of the right image from 0%-100%.
Step 5
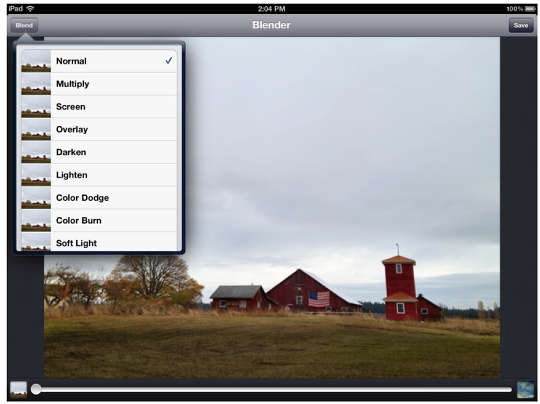
In ‘Normal’ mode at 0% only the left image will be seen, in this case the barn. As you move the slider to the right you will see the sky and cloud image on the right, appear and become less transparent.
Step 6
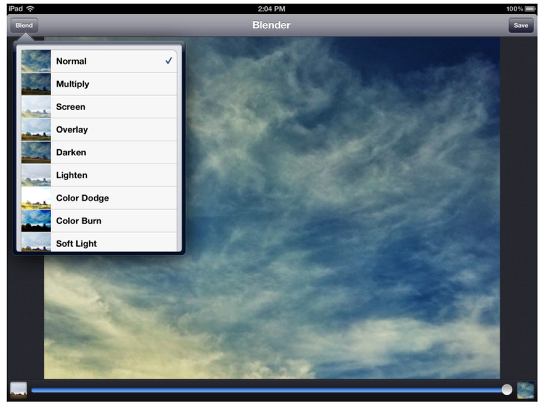
In ‘Normal’ mode at 100% only the right image will be seen. In this case the sky and clouds.
I highly recommend that when you first introduce yourself to this application ‘play’ with a variety of blending modes and move the slider dramatically to the left and to the right to see how each mode affects your image. You will discover the large variety of options and soon narrow them down to a few favorites.
Step 7
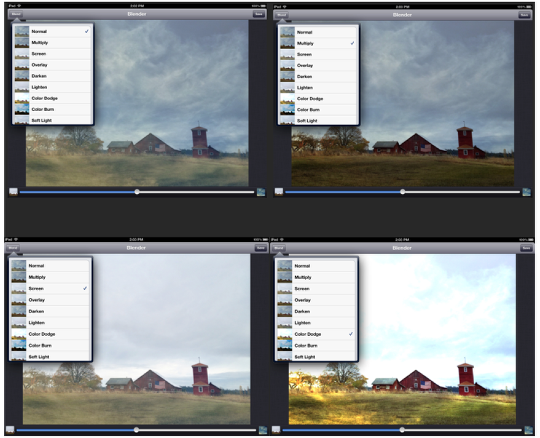
Here is an example of how a few of the blending modes look at 50%. As you see there are tiny thumbnail images to refer to in real time for preview purposes of the different blending modes. There are a total of 18 blending mode choices so don’t forget to scroll down to the bottom.
Step 8
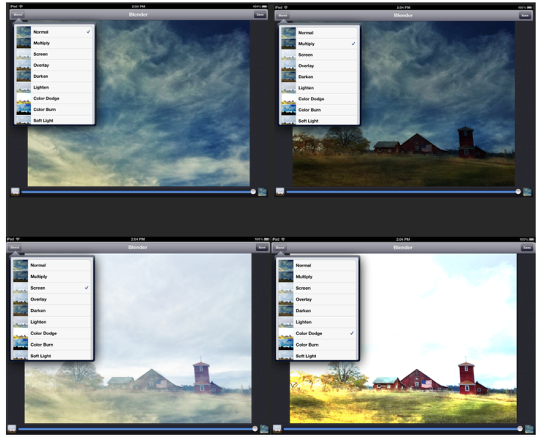
In this example, the same blending modes as in the previous example are shown however this time they are at 100%. As you see there is a dramatic different in some choices and a more subtle changes in others.
Step 9
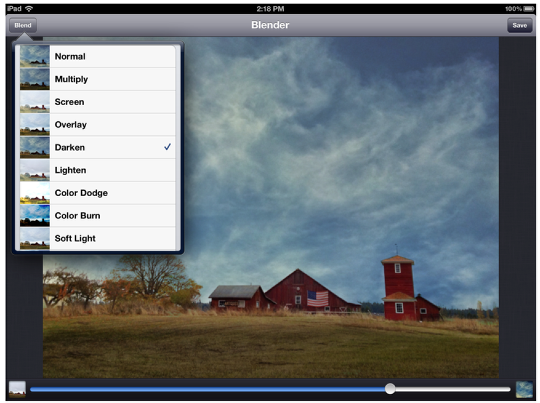
In my final image I chose to use “Darken” as my blending mode choice, at about 75-80%. I thought this mode created the most natural looking sky blend while adding some saturation to the total scene.
Additional Ways I Use Image Blender In My Workflow
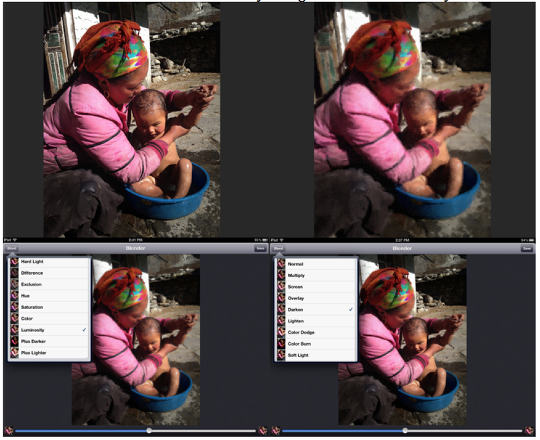
I will demonstrate a few more ways Image Blender is used in my workflow. I often will use the original image and one that I created in a different application to blend with. In this example I first imported the original on the left and a painterly look image from ArtistaOil on the right. The example shows two blending modes, Darken and Luminosity at 50%.
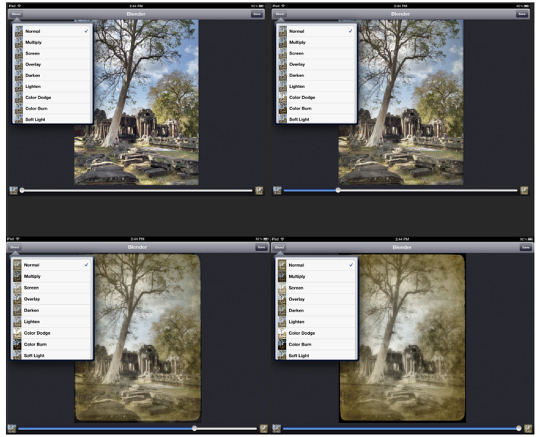
In this example I imported the original on the left and an antiqued version of VintageHD on the right. This time the blending mode of ‘Normal is shown at 0%, 25%, 75% and 100%. I will use this blending mode often in this situation to add a bit of color into an antique or sepia toned image.
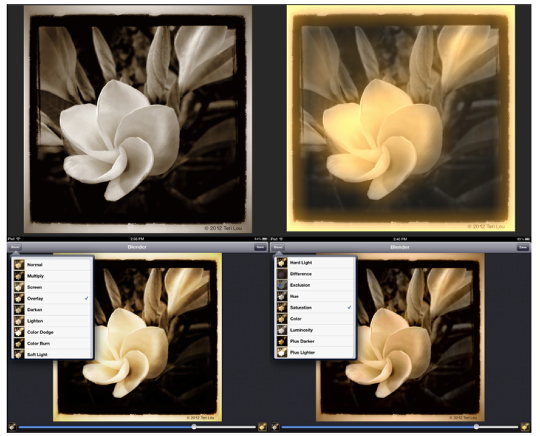
This example has the original on the left and an image with a yellow filter from fxPhotoStudio on the right. My goal here was to blend the yellow into a black and white image captured with the Hipstamatic camera. As you see the different blending modes of Overlay and Saturation create a completely different mood.
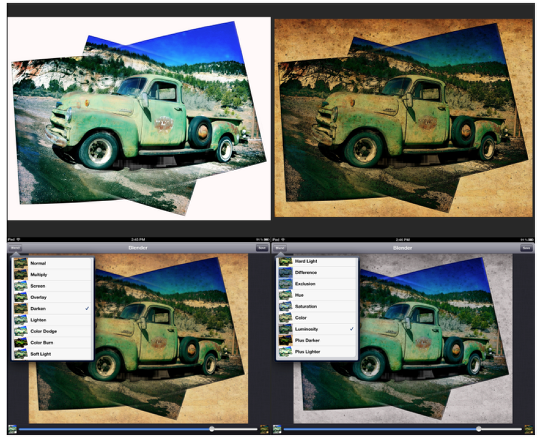
In this final example I wanted to demonstrate how well a texture could blend into the white portion of the image. The original, a funky AutoStitched image, was imported on the left and an image with some filters in fxPhotoStudio is on the right. The different blending modes of Darken and Luminosity blend the texture well into the white portion at 80% and create a totally different color.
From this tutorial I hope you are encouraged to ‘play’ and experiment with a variety of ways to use Image Blender’s blending modes. The possibilities are limitless.

5 Comments
kathy
this was most interesting, i have this app, and have never had a lot of luck.. now maybe things will change:) thank you!!!
Robert Lancaster
WOW! What an amazing tutorial.
ImageBlender features quite prominently in my workflow currently … but now I can see it featuring even more so.
Thanks Teri for your amazing work, and thanks Joanne for publishing this tutorial for all of us newbs to see.
David
Great tutorial Teri! I like how you show all the different blending options are available and how they work with an image. Fantastic!
tanci
Outstanding tutorial, so clearly demonstrated…with a ‘wonderful iphoneographer’!!!
Geoff White
Thank you so much for this tutorial,it’s fantastic. Can’t wait for the work for a follow up.