Image Blender Tutorial – Part 2 – Masking Techniques
Image Blender is a favorite application of mine that is simple and to the point when you want to blend two images together. Image Blender also has two other features for more versatility and creativity: Mask and Arrange. This tutorial will demonstrate how to import two images for Blending and how the Mask feature works.
In our previous tutorial the Blend feature was discussed in detail. Please go here, to read that.
About The Author

Teri Lou Dantzler is a professional Photographer with the creativity and insight that it takes to craft artistic images. Her camera of choice is the iPhone and her processing device is an iPad; both are loaded with many photographic applications and are conveniently with her all the time. Teri Lou’s vast knowledge of these applications has earned her the title of “iPhone Guru” and ‘App Queen.”
As an instructor of iPhone Photography workshops and online courses her goal is to inspire, motivate and demonstrate what is photographically possible when using these devices and applications. Visit her inspirational site to see amazing images and for additional information regarding online courses and workshops. http://www.teriloublog.com
The First Image
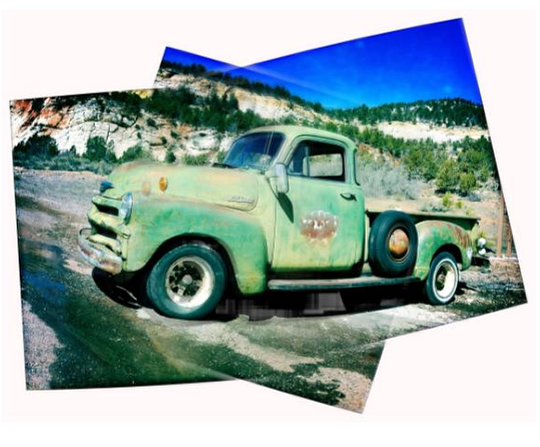
The first image that will be imported into Image Blender was created from three Hipstamatic Camera captures stitched together in AutoStitch to create this funky framed image.
The Second Image
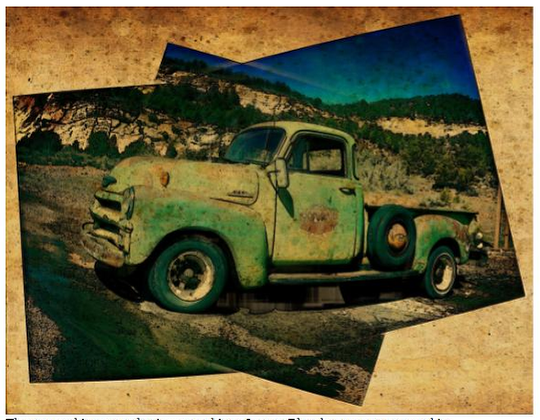
The second image to be imported into Image Blender was processed in FX PhotoStudio. I like the effect on the image, however I want it to be a bit subtler and also the filter effect to be removed from the truck so it is only on the frame.
Step 1
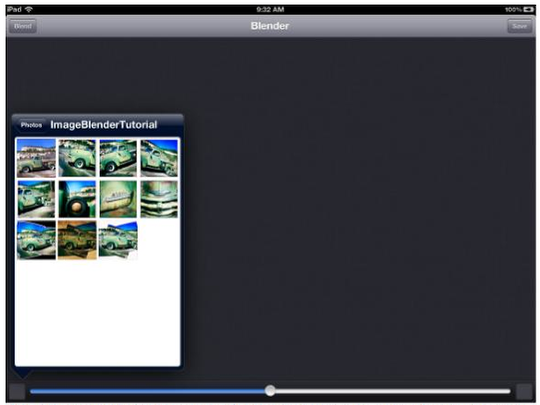
When Image Blender is first opened tap on the lower left box to select the image that you want to import as the dominant image. The dominant image will control the size, amount of pixels, and shape of the final image.
Step 2
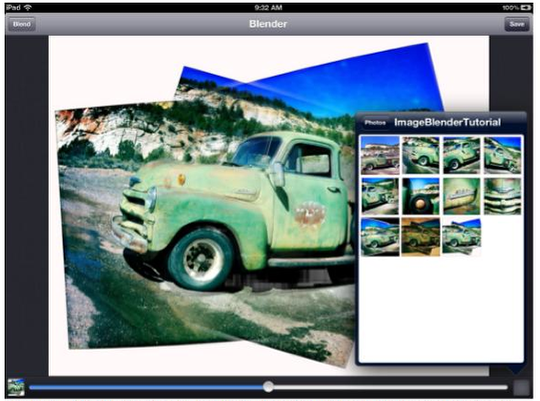
After selecting the first image, tap on the lower right hand box to select the image that you want to import for the blend.
Step 3
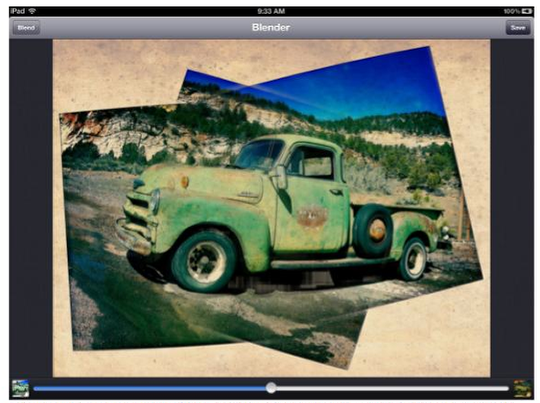
Once both images are selected the default is the Blending Mode of Normal at 50%. To select a different Blending Mode, tap Blend in the upper left hand corner.
Step 4
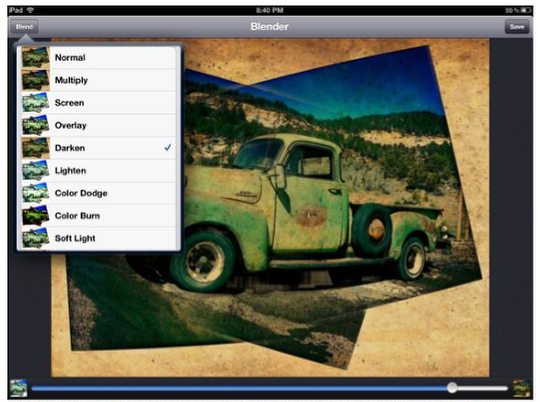
Tapping Blend will pop up a window with thumbnails of the different blending modes so you can easily see the effect in real time. I recommend that when you are becoming familiar with this app and how the different blending modes work, select many different blends and move the slider on the bottom all the way to the left and all the way to the right. By following this process you will soon be able to choose which blending modes are your favorites. For this particular image blend I chose Multiple with the slider at about 80% – 90%.
Step 5
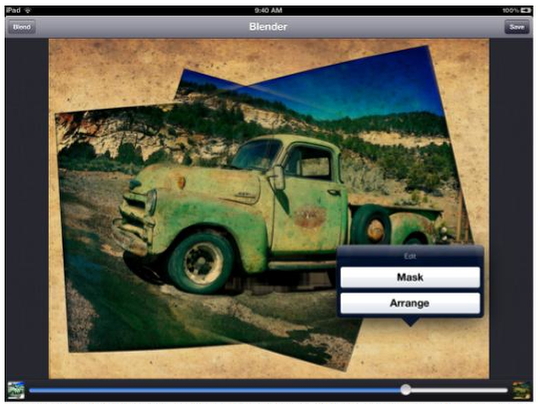
The next step is to Mask the effect off of the truck. There are two ways to access the Mask feature: 1) tap on the image and a box will appear and then tap Mask or 2) swipe the screen from left to right and the Mask screen will load. To verify which feature you are using look at the top of the screen for the title ‘Mask’.
Step 6
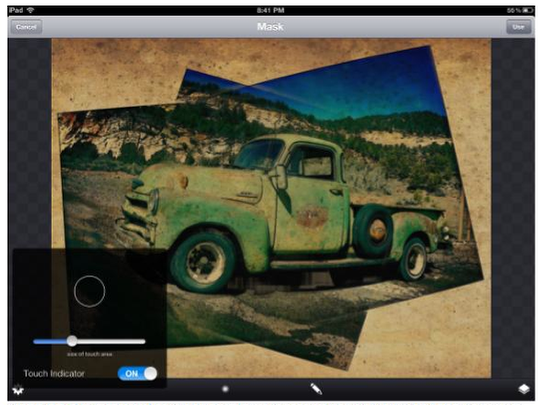
Once the Mask screen loads you will have new options on the top and bottom task bars. Tap the upper left to Cancel the Mask and return to the Blending option. Tap on the upper right to Save the changes you have made to the Mask. Tap the Gear in the lower left to select the tool size. Also along the bottom you can choose either a soft or hard-edged tool. The Tool options are a Brush or an Eraser. Tap the Brush to toggle to the Eraser and visa versa. The lower right corner changes the opacity of the top and bottom image.
Step 7
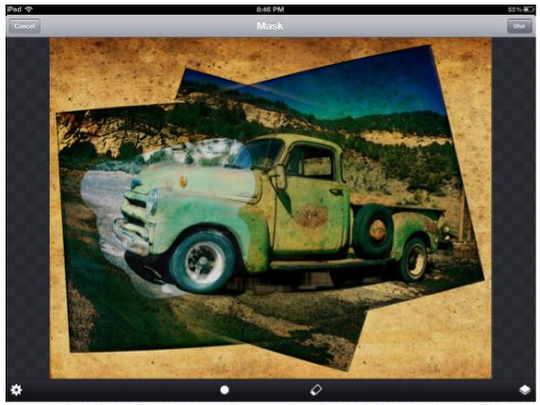
In this image the hard-edged Erase tool is demonstrated. Please see the next image for a comparison to the soft-edged Erase Tool.
Step 8
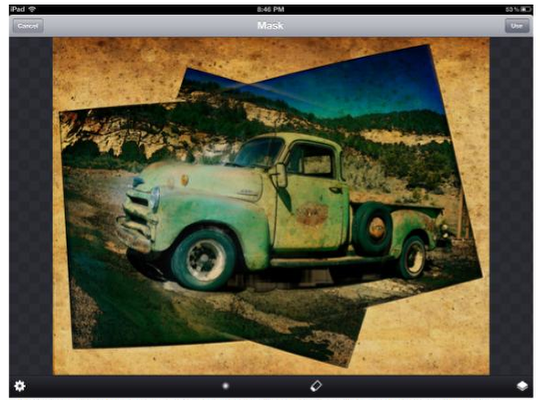
In this image the soft-edged Erase tool is demonstrated as a comparison to the previous hard-edged Erase tool.
Step 9
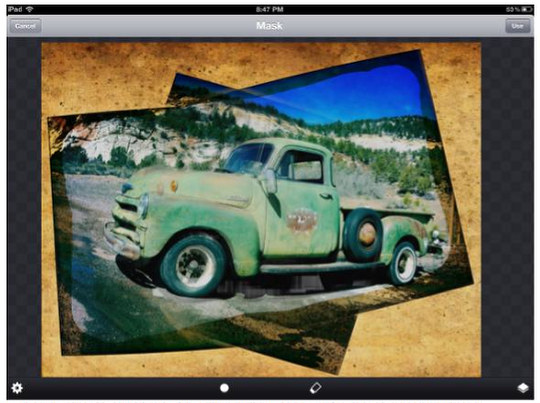
I chose to use a large hard-edged Eraser to Mask a large portion of the image quickly.
Step 10
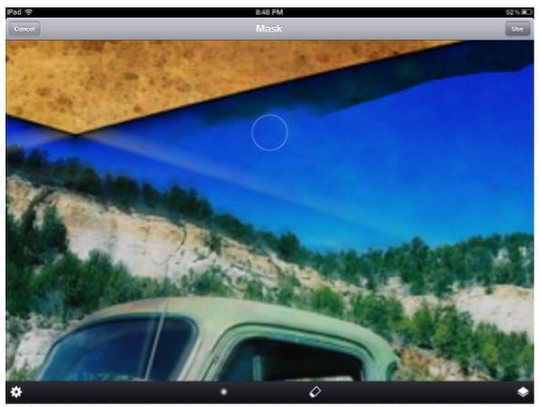
After the majority of the image was masked, I zoomed into the image by using the two-finger pinch gesture and changed to a smaller soft-edged Eraser to finalize the mask.
Final Image
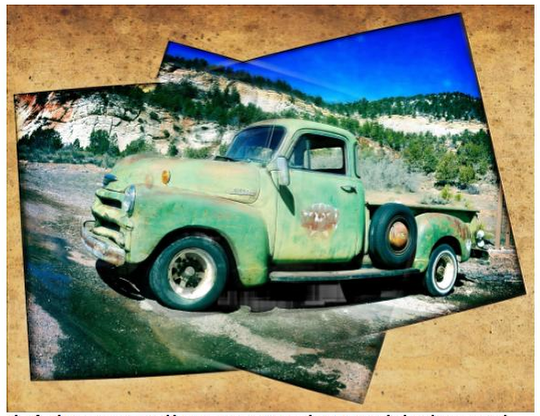
The final image was saved by tapping on Use in the Upper right hand corner and then tapping Save in the upper right hand corner of the Blending screen.
This is just one of the ways to incorporate masking into your workflow. I encourage you to try blending and then masking a variety of images together.

One Comment
squishybrain
Thank you for the tutorial! I’ve had the damnedest time figuring out how to work with masks in blender. Now I understand. Again, thanks!