Halftone Tutorial – ‘The Tale of the Tilted Lamp…’
Growing up as a kid in small town America during the late 60’s-early 70’s, the greatest thing ever for my friends and myself was to scrounge up enough money on a summer’s afternoon…and then ride our bikes to the corner drugstore. There, we’d squander our funds on comic books and a fountain Coke.
Back then…comic books where perfect. Good guys where good. Bad guys bad. Nothing in-between. And all the women were beautiful. (Not that we cared about this…much.) The only real controversy was D.C. comics vs. Marvel. Superman vs. Capt. America.
Thinking back, I realize why I have always wanted to be a comic book writer. I love comic books! However, each time I have tried in the past…my efforts have been shamefully lacking. That was until I discovered such apps as Halftone! This app has liberated my pulp nature!! So when The App Whisperer asked me to do not one, but two tutorials on Halftone, I jumped at the chance.
This first tutorial will take you through a quick tour on setting up a panel. I’ll touch on some of the controls in Halftone’s Photo Editor but not all of them. Likewise on the choices you have for “paper”. In my second tutorial, I’ll go into more details on both of these areas.
In any case, let’s get started!
We hope this tutorial inspires you to try out Halftone for yourself. It retails for $0.99/£0.69, you can download it here.
Step 1
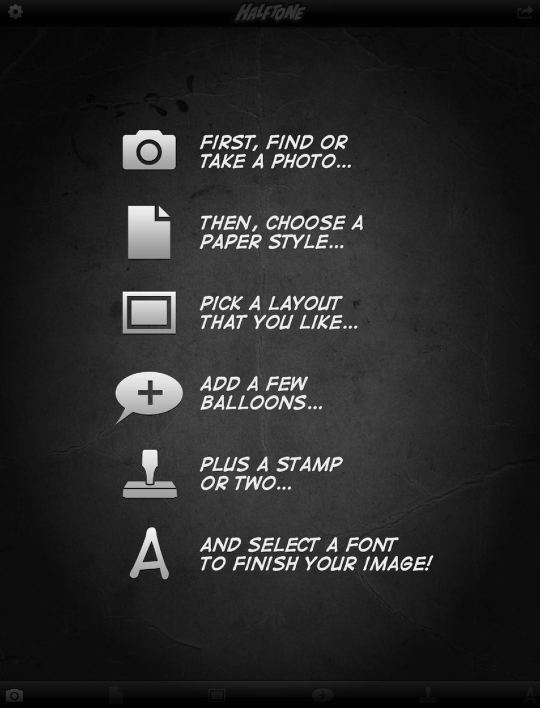
When Halftone first opens…unless you’re coming back to a panel in-progress…you’ll get this tutorial panel. When you’re ready to move on, click on the camera icon.
Step 2
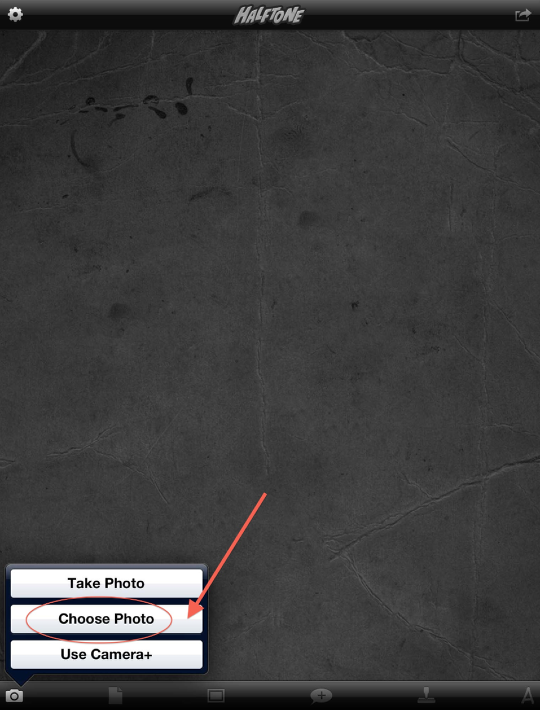
This pop-up screen will come up giving you the choice of taking a new photo using the native camera app, choosing a photo from your libraries, or using Camera+. Halftone is fully integrated into this app so once you’re done, the image will open in Halftone. For this tutorial, I’ll choose a photo from my camera roll.
Step 3
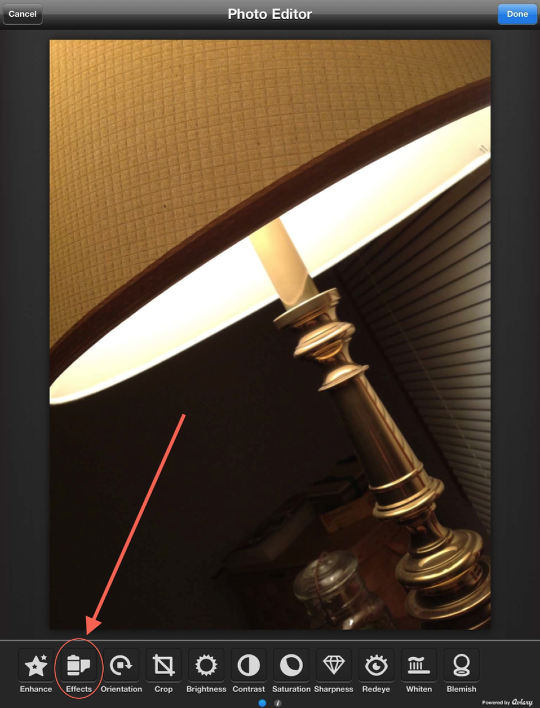
I’m going to use this image as I already have a “story line” in mind for this panel. Halftone takes you straight to its Photo Editor that has a full array of editing tools to help you work with your image. This time I’m just going to apply an effect that I know will help me tell my story. Clicking on the “Effects” icon will take me to these controls.
Step 4
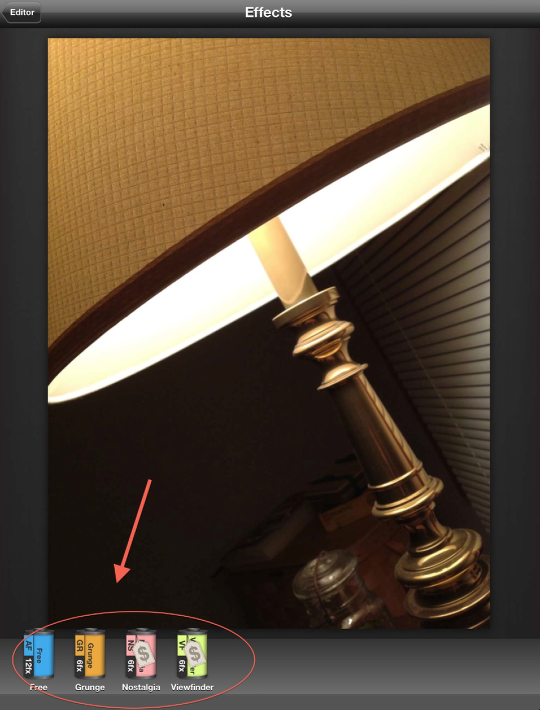
Halftone has four different categories of effect filters. One set, “Free” comes with the app and gives 12 different effects. The other three shown are in-app purchases, costing $0.99 each. Each of these contain 6 effects. Naturally, I purchased the “Grunge” package!
Step 5
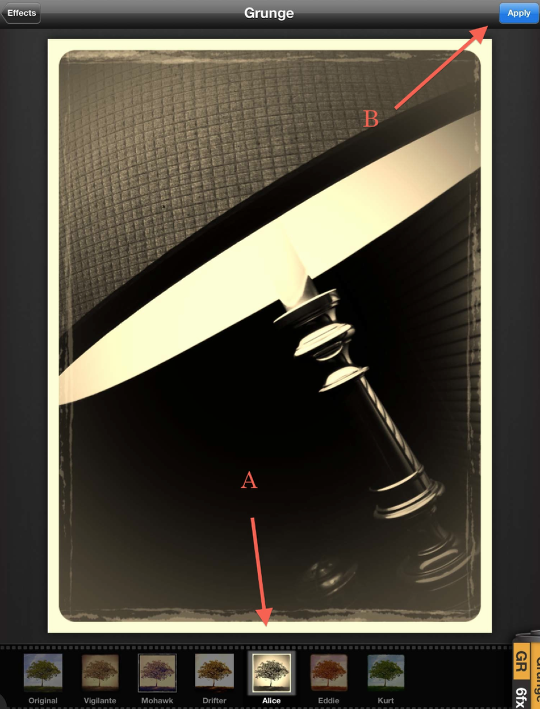
Picking the “Grunge” category, I then clicked on “Alice” giving the lamp image a pulp fiction/noir feel. (A). This done, I clicked on “Apply” (B) in the top right corner which will take me back to the Photo Editor control panel.
Step 6
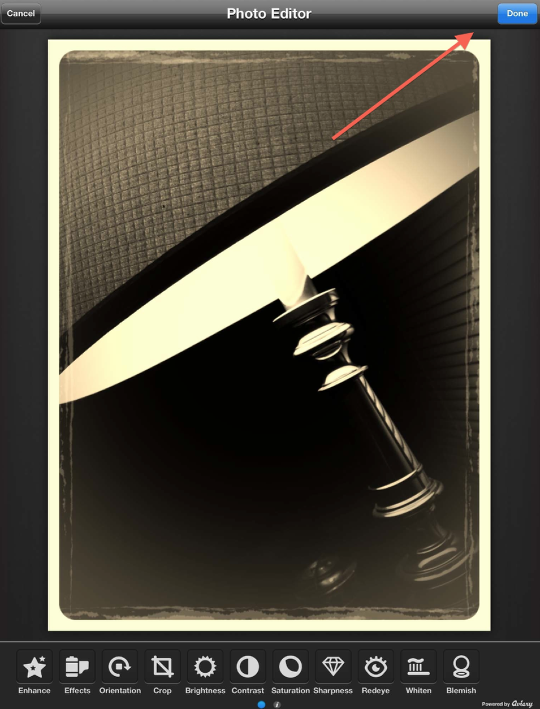
As I wasn’t going to do anymore editing in Photo Editor, I clicked on “Done”. This takes me into the Halftone panel creation mode!
Step 7
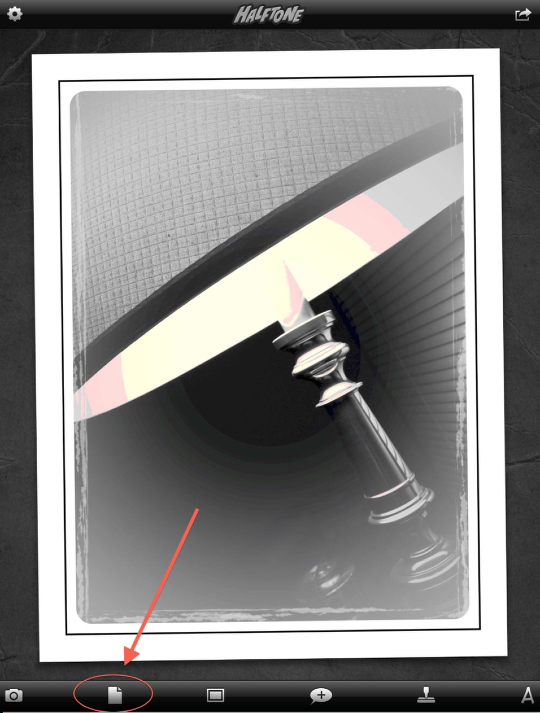
At this point, Halftone chooses its on page type and format. You can use this, or pick your own! Clicking on the Page icon will bring up the paper type choices.
Step 8
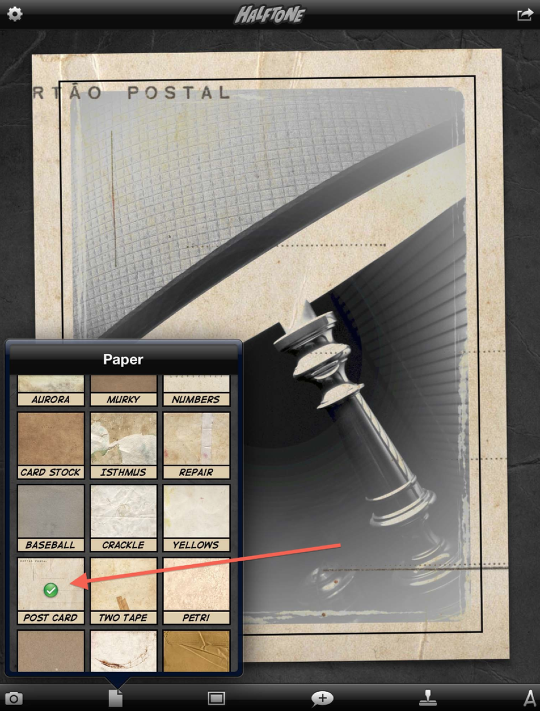
There are many choices to work with, each giving a different feel to your panel. I picked the “Post Card” paper as I felt that would be best for my story line. A note here: the paper type also supplies the color background for any text bubbles you use. Just something to keep in mind.
Step 9
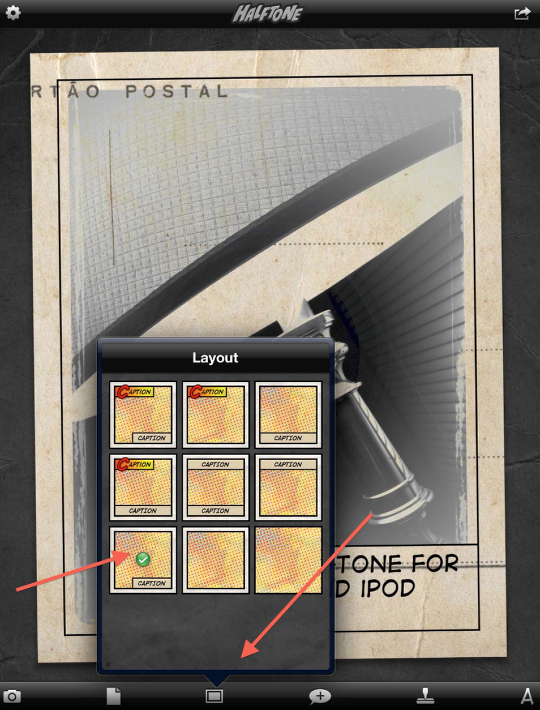
Next up…the layout for your panel. Clicking on this icon brings up 6 different options. Halftone doesn’t allow you to change the position or size of these caption boxes…and they don’t expand with text. Again, something to keep in mind. I picked the indicated layout.
I don’t show this, but once the layout is in place, tap on the screen. This will bring up Halftone’s keyboard.
Step 10
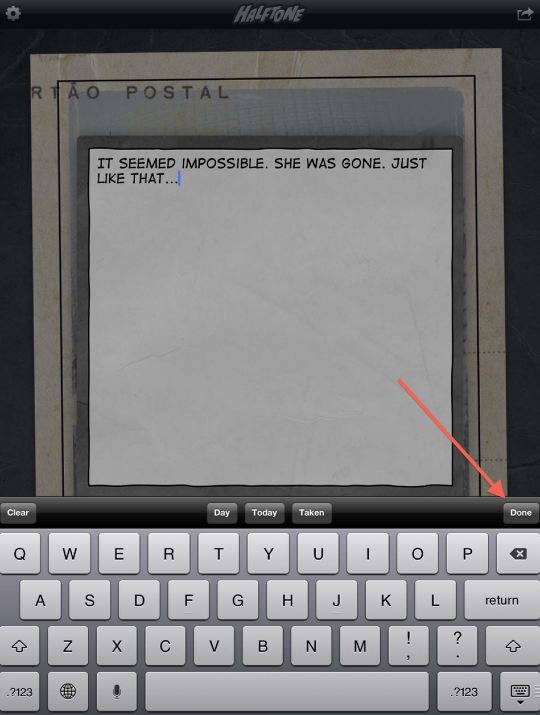
After clicking in my “copy”, I clicked “Done” to put it into place. (I actually had picked my type font and size before doing this…but I can’t find that screen shot! I do have a screen shot of doing this in the next step…so all is not lost. My apologies!!)
Step 11
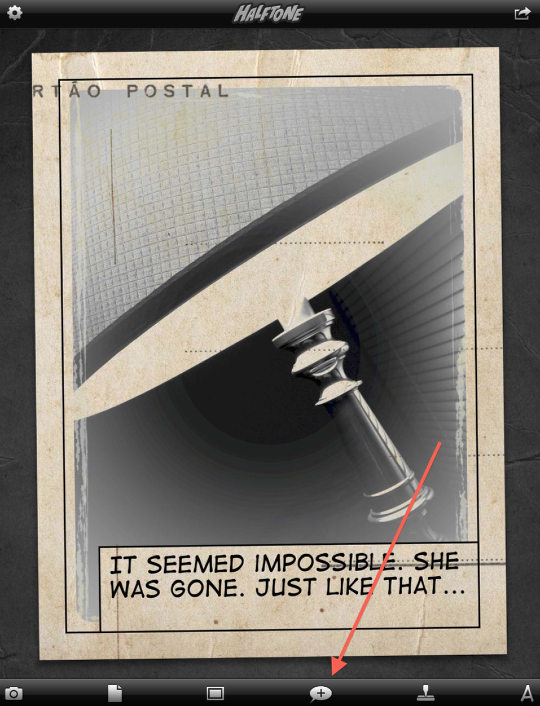
My caption in place, it’s time to add a text bubble to heighten the drama of my story. Clicking on the balloon icon, brought up a “default” balloon. I tapped on this, which activates the keyboard.
Step 12
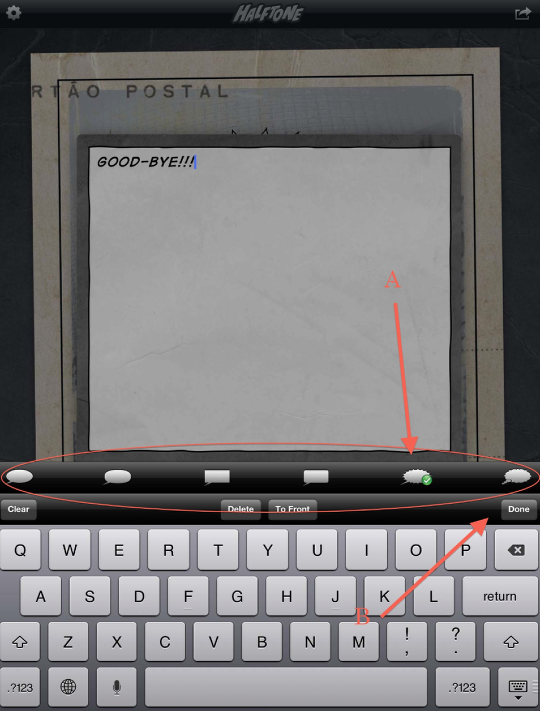
On this screen shot, I’ve circled the different choices of text balloons available in Halftone. As I wanted I wanted to add a “bite” to my text, I chose this one. (A) Finished, I clicked done.
Step 13
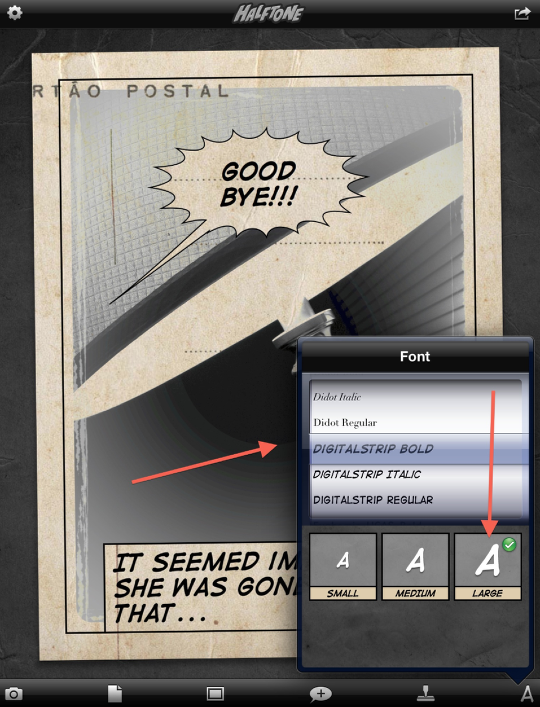
After looking at the panel as it stood at this point, I decided to change the size and “boldness” of the text. I clicked on the “A” icon in the lower right hand corner, bringing up this screen. Spinning font dial, I selected Digitalstrip Bold. I also clicked on the Large box. (Note: these controls affect all text in bubbles and captions. So if you make it Large, it’s large everywhere!)
Step 14
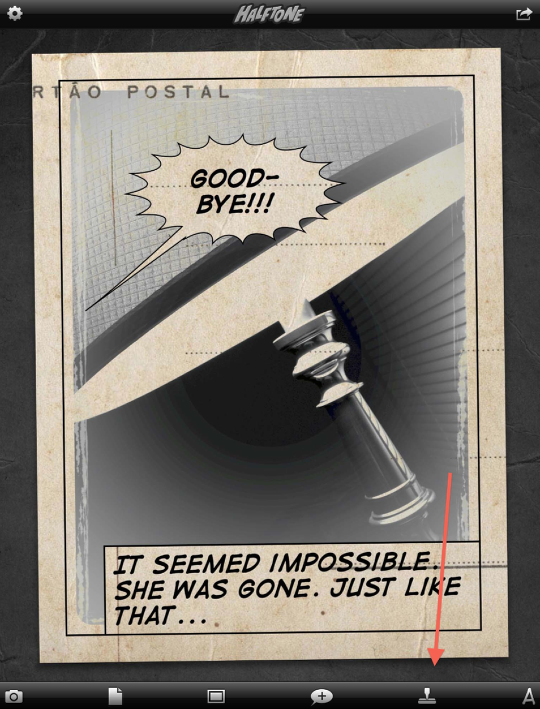
Looking good so far…but not quite. It needed one more thing. An “action” stamp. Click on the “stamp” icon to bring these up!!
Step 15
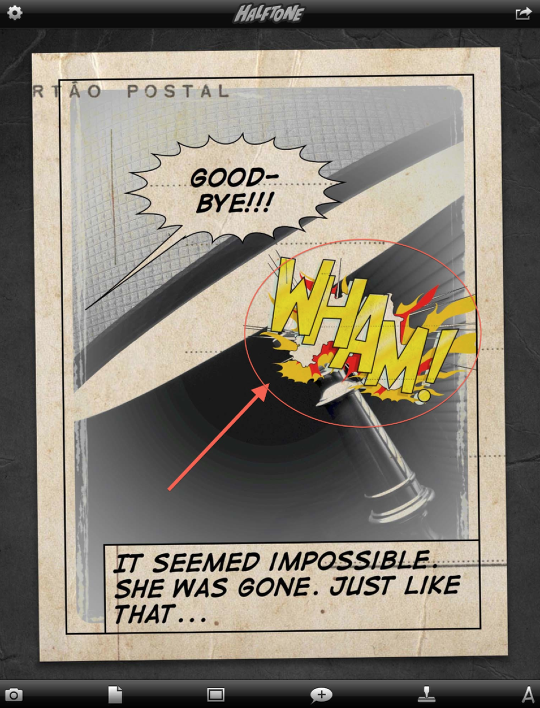
As with the text bubbles, Halftone will bring up a “default” stamp. Click on that to see the full array!
Step 16
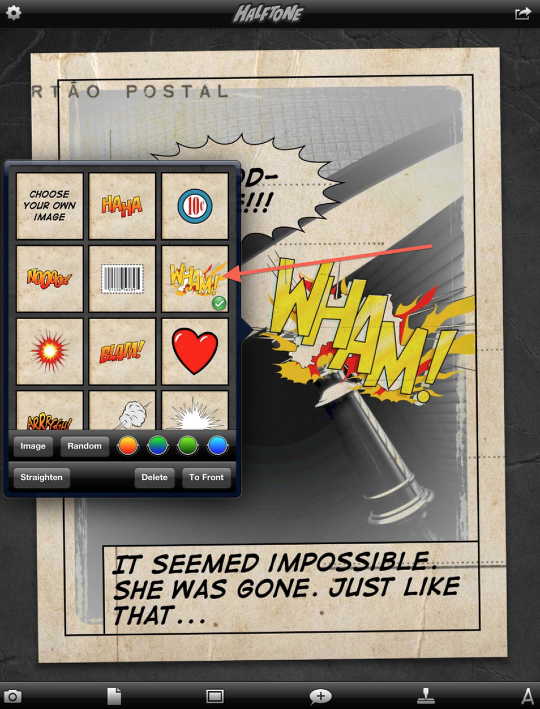
There are a number of standard stamps to work with including creating your own. (Click on the “CHOOSE YOUR OWN IMAGE” box to put this into place.) You also have some control over color of stamp. After looking at them all, I decided that Halftone had made a good choice. The “WHAM” fit perfectly…like the sound of a slamming door!! Oh…you can also use the pinch/spread finger motions to change the size and position of any stamp you use.
Step 17
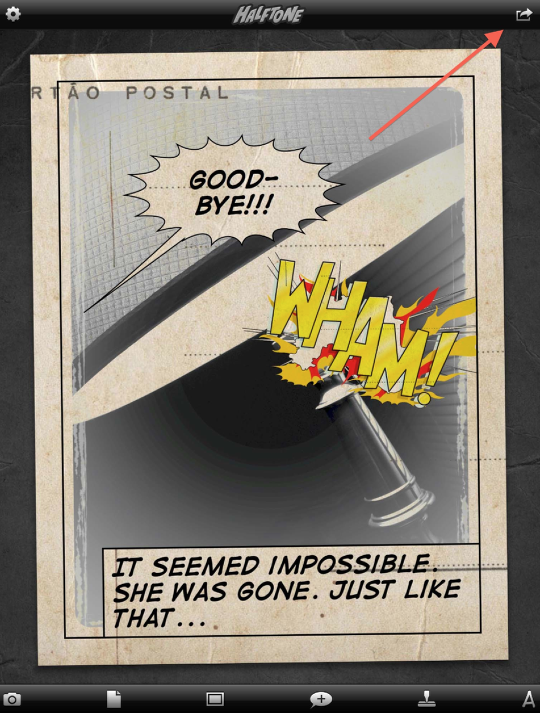
Here it is! My completed story panel. One can only wonder what brought this on…or what will happen next!
To save this to my camera roll, I clicked on the icon in the top right corner…
Step 18
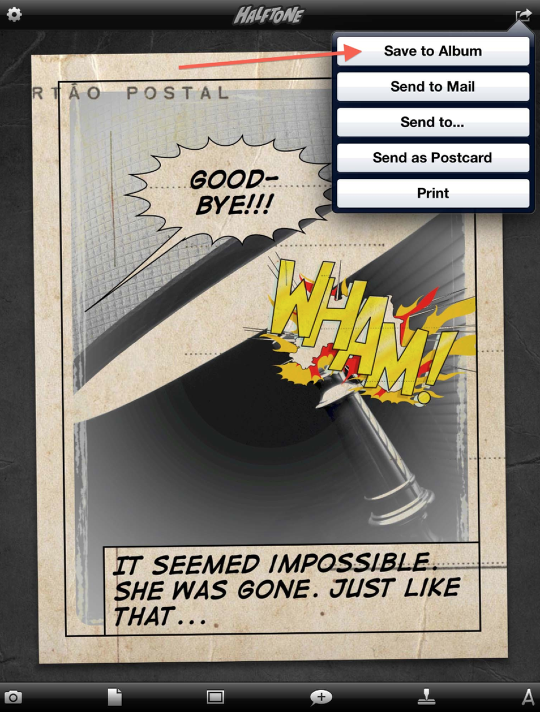
…bringing up this pop-up screen. I picked “Save to Album”. Time to think about a sequel.
I hope you found this tutorial helpful. Please don’t be shy with your comments or questions. As I stated in the beginning, my next Halftone tutorial will take in a bit more about the Photo Editor as well as other features you can use while creating your own panels.



2 Comments
LynneM
That was fun! It looks like a great app and you demonstrated it well.
David
Thanks Lynne! I’m glad you liked this!