AnyShape – Photo Editor – Tutorial – Putting The Crop Tool To Work!
In my first Any Shape tutorial, see here, I spent time taking an overall look at Any Shape’s selection tool and its FX library. In this article, I’d like to take a look at using its cropping tools to create digital “stamps” that you can use in your digital college projects.
We hope you feel inspired to try AnyShape – Photo Editor for yourself after reading this tutorial. You can download it here, it retails for $1.99/£1.49.
Step 1
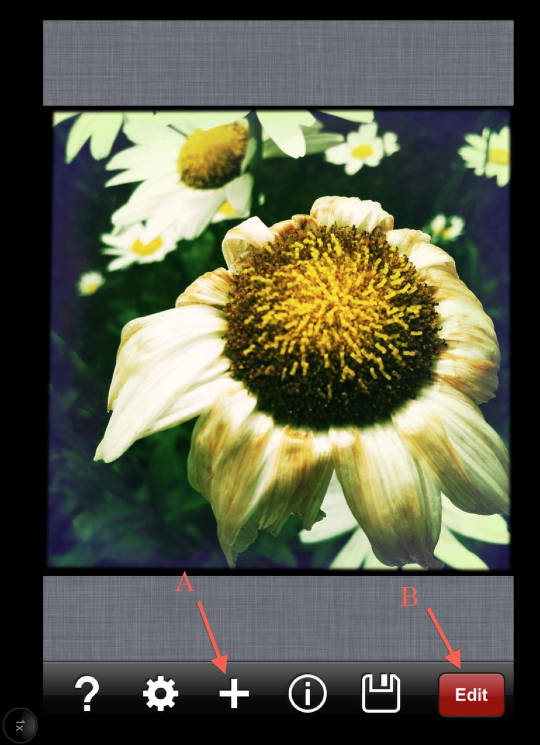
I went into my photo library and pulled up this image, Faded Beauty that I posted on my website back in July. To bring this into Any Shape, click on the “+” symbol (A)…this will take you to your Camera Rolls. This done, click on “Edit” (B) to use Any Shape’s selection tools.
Step 2
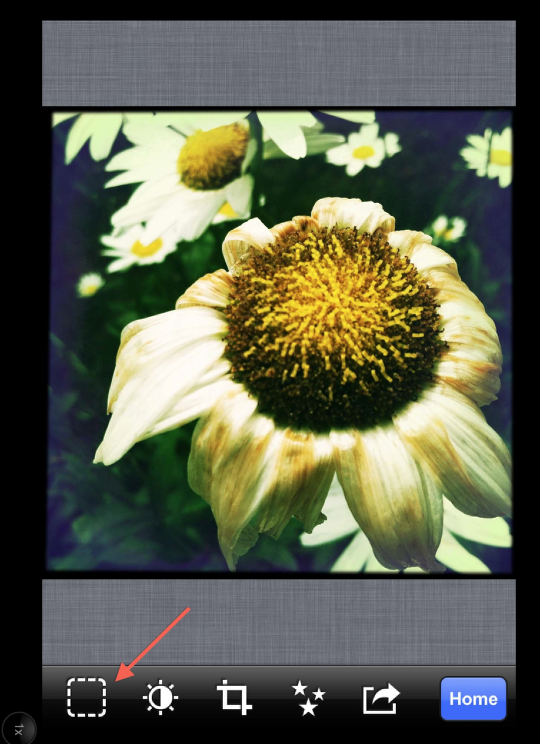
Clicking on the selection icon in the lower left corner, I activated the next screen, which has the selection tools I’ll need.
Step 3
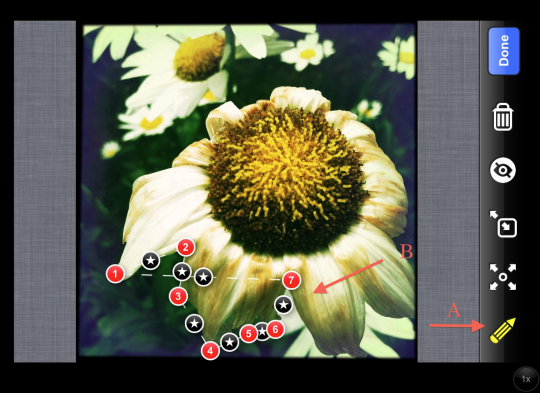
As I discussed in my first tutorial, you need to click on the “pencil” tool (A) to begin. Then…you go around the image you want to selection, touching the screen to create selection points (B). Each point is numbered in the order you applied them and you can use up to 40 points.
Step 4
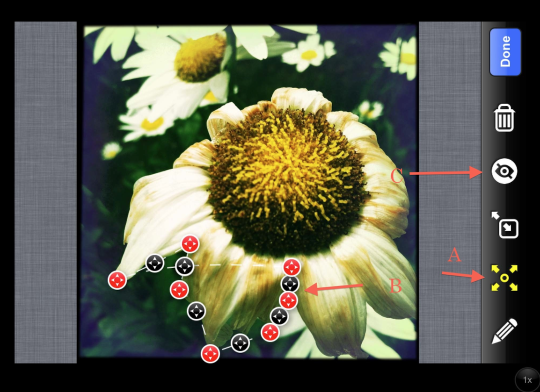
I have found it helpful to pause at certain points during this process to double check my points and to fine-tune them. Click on “A”. This will change to selection points to moveable points (B). The red points are your “gross” selection points and the black one are for fine-tuning. I also use the “Eye” (C) to turn off the selection points so I can see the dotted or selection lines. I just go around to each point and make sure it’s where I need it!
Step 5
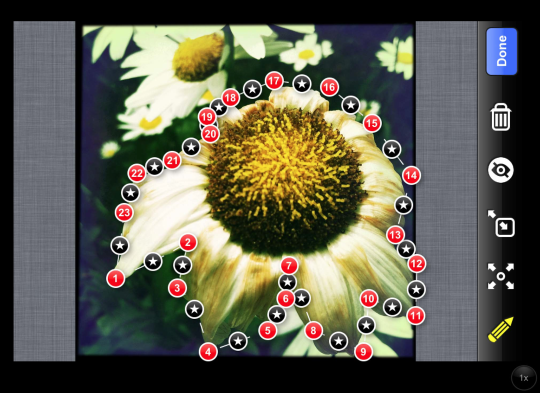
To go back to using the selection points, re-click on the “pencil” tool. In this screen shot, I’ve completed going around the entire flower placing all the points that I’ll need. Looks like I used 23…leaving 17 more if I need to add them!
Step 6

And…in this screen shot, I have finished with my fine-tuning and am ready to move on and create my “stamp”! To do this, I clicked on “Done”.
Step 7
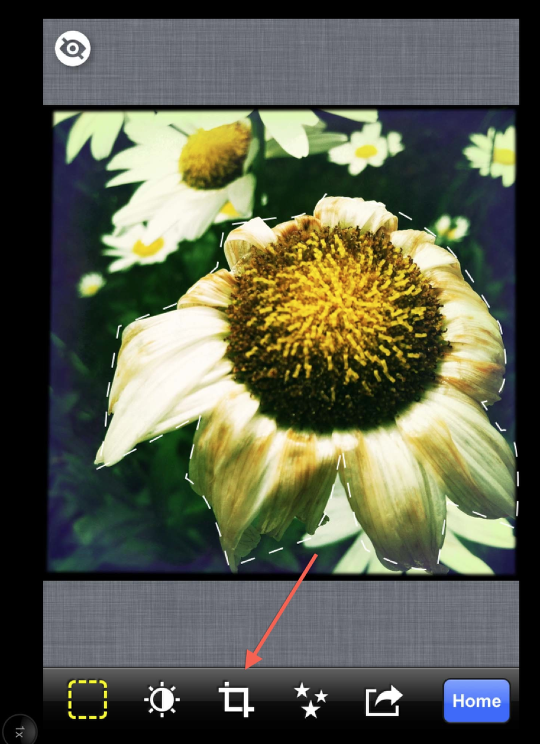
Back in the “Home” screen…and you can see the flower image with its selection lines…click on the “Crop” tool.
Step 8
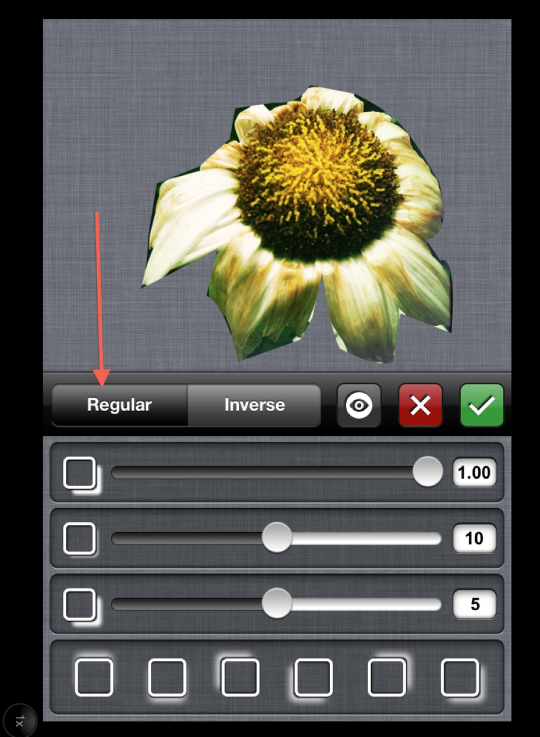
This will bring you to “Crop” screen…and clicking on “Regular”…. I can see the flower cut out from its background. An aside: if you notice, I didn’t worry about getting to “fine” with my selection points/lines around the flower as I knew that once I used this image later, I’d have to do masking…and would take of the edges then.
Step 9
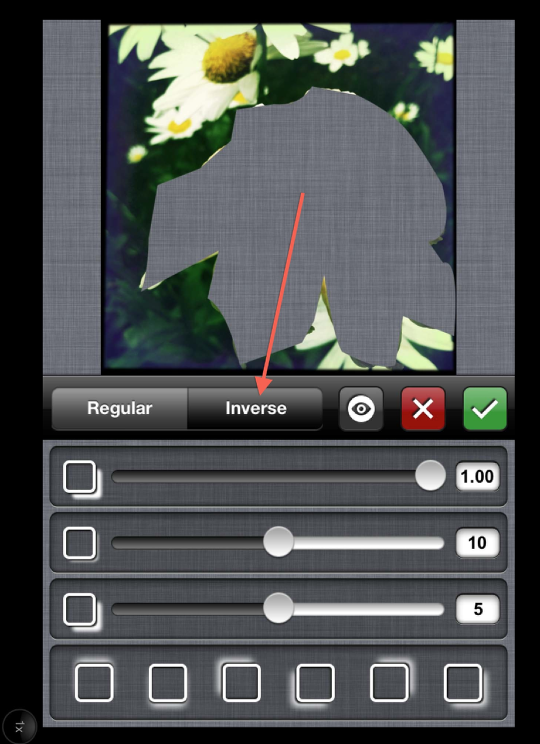
In this same screen, if you click on “Inverse” you’ll bring up the background instead! (The background can also be turned into a stamp…and I’ll touch on that at the end of this article.)
Step 10
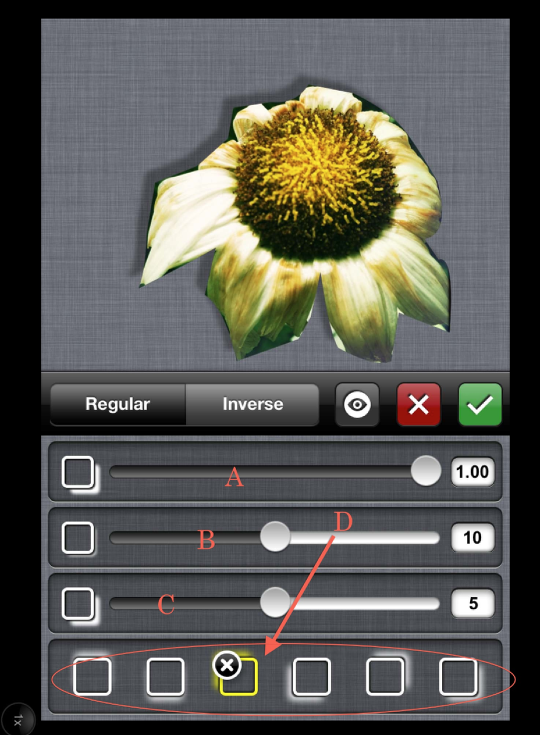
Okay…back to the flower. In this panel, Any Shape gives you a number of shadow controls that you can use to give your image a nice shadow. And why would you want to do that? Well…have you ever seen an picture that has been obviously built with different images? I say “obvious” because each of the elements in that image seen to “float” on top of the bottom layers. There are a number of ways to help this float…and one of them is to use shadows to give a sense of being “in the same light” to all your elements. So…let’s talk about what Any Shape’s shadow tools will do for you!
What this screen shot shows is the preset that you get when first coming into this control panel. Slider bar “A” controls the opacity of your shadow. Slider bar “B” controls offset and Slider bar “C” controls blur/sharpness of the shadow. The buttons below this slider bars (D) control shadow direction.
Step 11
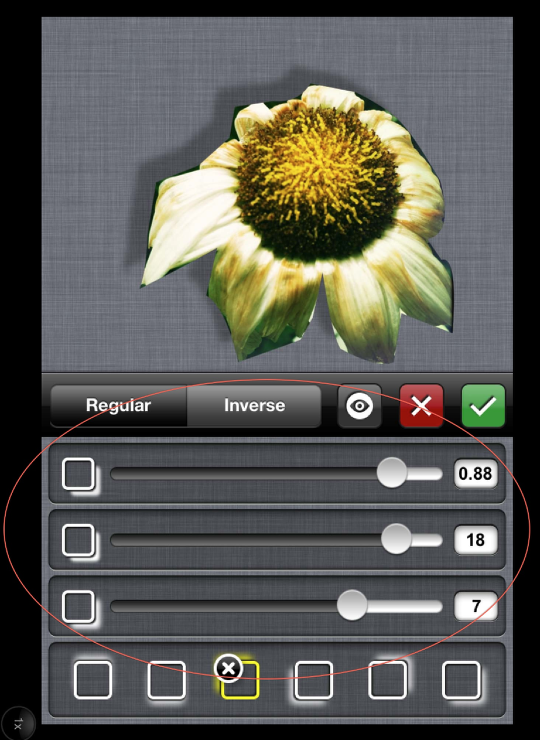
So…I kept the shadow direction the same as the preset, but as you can see in this screen shot, adjusted the other controls giving my flower a softer shadow effect. Oh…if you decide not to use any shadowing, just run the slider bars all the way to the left, zeroing everything out. Or you could select the black X circle in the upper left corner of the selected shadow direction button.
Step 12
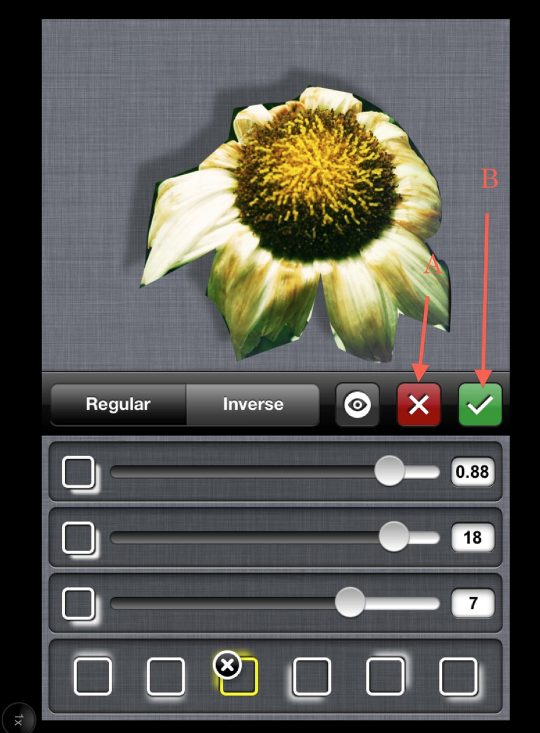
That’s about it to using the crop tool. Now you’re ready to either save this image to your photo libraries to be used later…or you could use Any Shape’s FX filters to do a little enhancing before saving. In any case, you’ll want to click on the check mark (B) and not the “X” which will undo everything! I clicked on the check mark…
Step 13
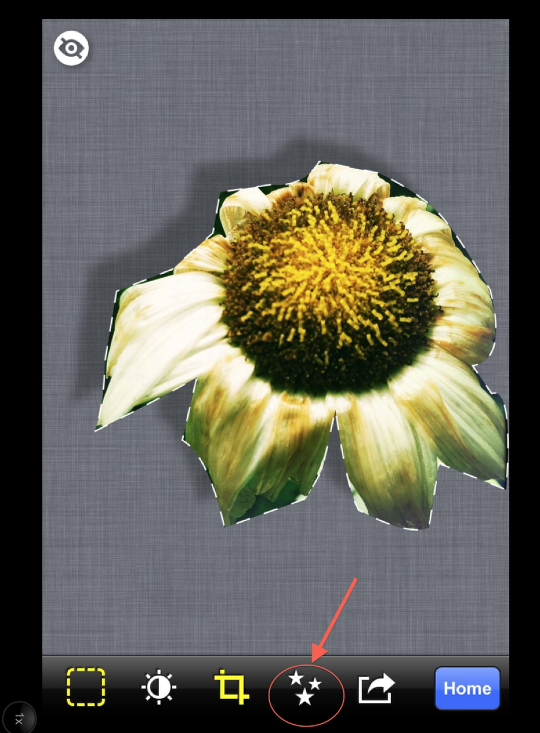
Once again, back in the “Home screen! Time to do some enhancing!!! (Don’t worry about the selection lines you see around the flower, they’ll go away in the next screen! I clicked on the “Three Stars” icon….
Step 14
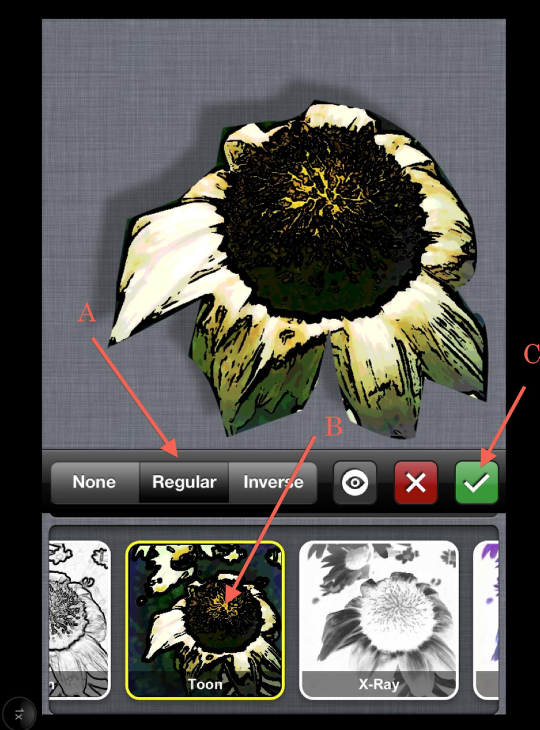
Going straight to the FX filters…and making sure I clicked on “Regular” (A) to apply these to the flower, I decided on “Toon” (B). I like cartoons! To finish, click on (C).
Step 15
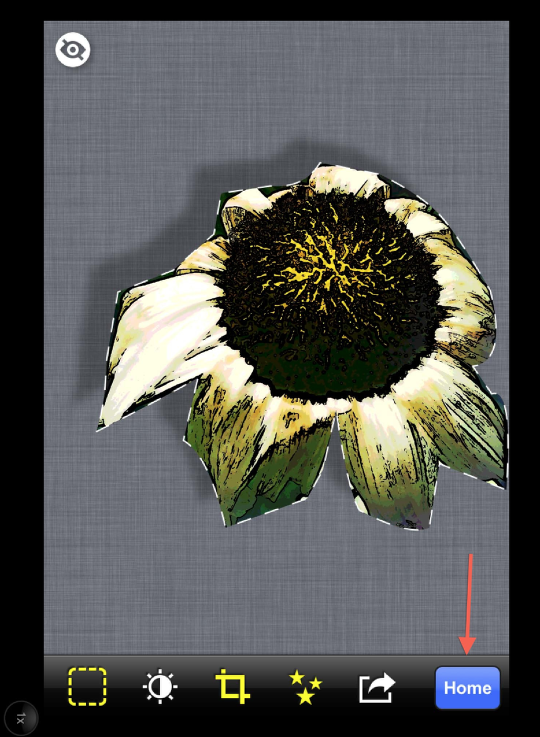
This brings us back to “Home”. Time to save this image! Click on the “Home” button this time…
Step 16
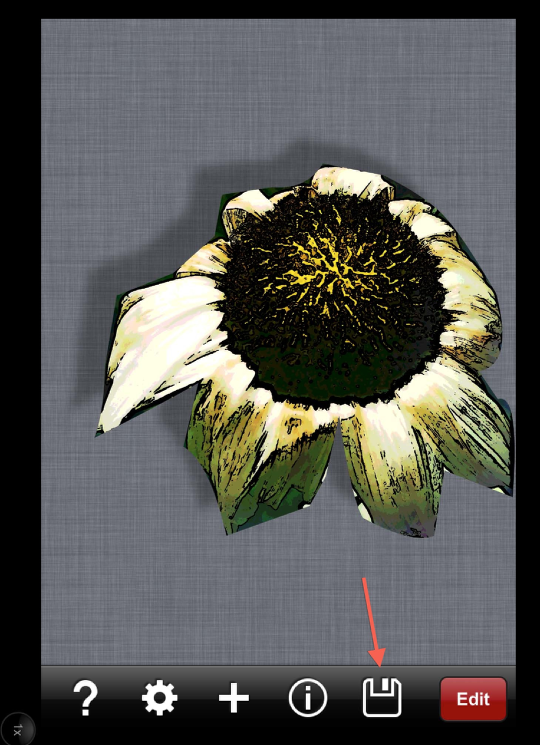
…then click on the “Save” icon. (I love it how they use the image of a floppy disc for their Save tab…takes me back to the good old days!)
Step 17
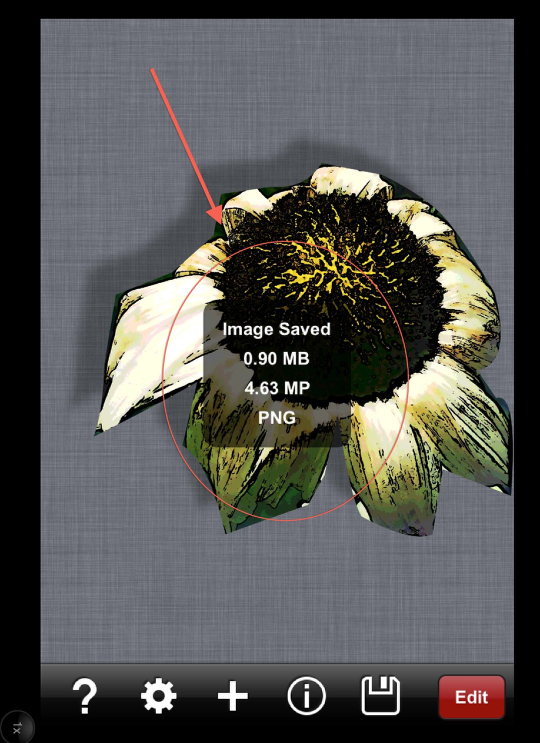
Once saved, Any Shape will put up this info screen about your saved image. It will only save as a PNG file which will work in all the apps I know about. Here’s another aside: if you know anything about PNG files, they save without a background, which is real useful when doing layering. However…not all apps will treat them as PNG files, instead giving them a background when you import them. Not a big deal…but something to be aware of ahead of time. (I know of only two layering apps that treat PNG’s as PNG’s!)
Step 18
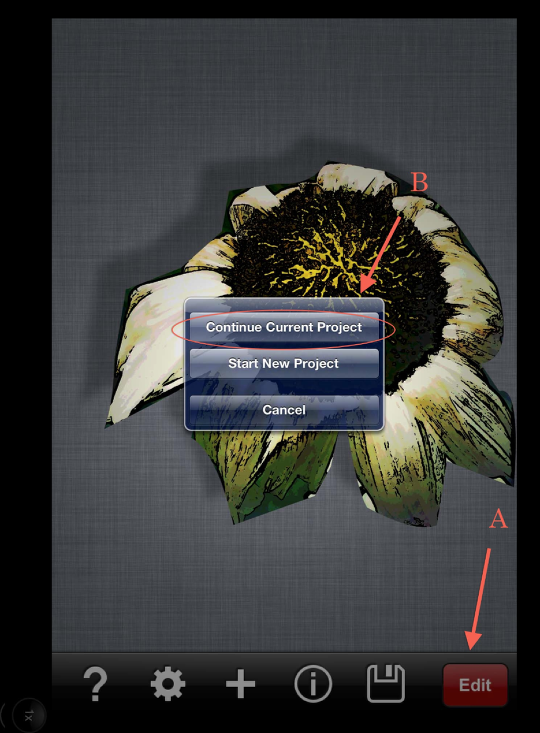
Although I have saved my flower “stamp”, I can still work with this image…or it’s background if I want. Click on the “Edit” button and this pop-up screen will appear. As I wanted to “continue current project”, I clicked this!
Step 19
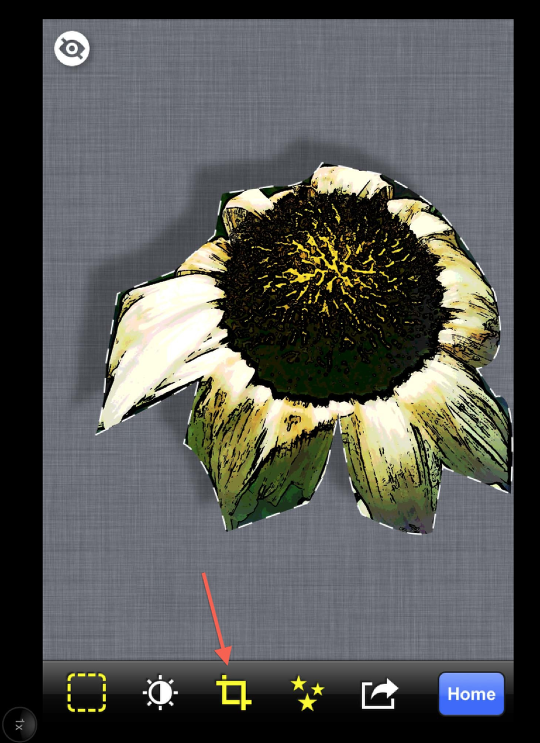
And…I’m brought back to the “Home” screen still showing my flower stamp. I clicked on the “Crop” icon to restart the process…
Step 20
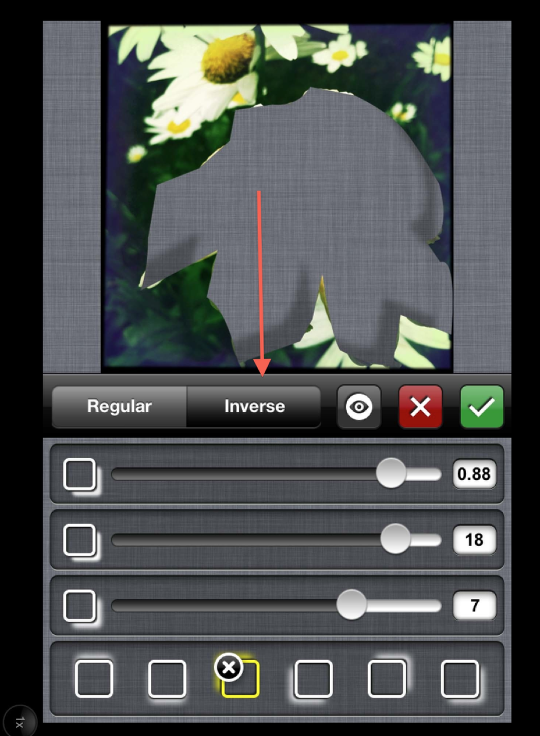
This time, I clicked on the “Inverse” tab bringing up the background! Now…if I wanted to, I could repeat the entire process I just went through for my background! Not! At least this time!! So I clicked on the X…and closed Any Shape!
Thank you once again for taking time to read my tutorial. I hope you found it helpful and enjoyable! Please do not be shy with your questions and comments, as I love hearing from you!!



10 Comments
melia
thank you david. once again, i am inspired because i’ve learned something new!
and thank you joanne for giving us these great artists
David
Melia ~ music to my ears!! I’m also pleased when I find out that I inspired someone!!
Robert Lancaster
Thanks David for not only an awesome tutorial but also for removing the mystique and apparent complexity of the app. I have had it for a while now but have been massively intimidated when trying to use it. Now I have the confidence to add this to my arsenal and will be experimenting with it soon.
Thank you again.
David
Robert ~ I’m so glad this tutorial helped! And thank you for your comments…I do appreciate it!!
kathy
wow, thnaks david, cant wait to play with this
David
Kathy ~ this one is definitely one to play with! Enjoy!!!
Mel Harrison
Thank you Dave! I picked up anyshape free and had a little play but could not work it out! Got it now 😀
Mel xx
David
I glad I was of help Mel! I can see great things happening when you start using this app…how exciting!!
Brice
David,
You say above, “I know of only two layering apps that treat PNG’s as PNG’s!)”
What are the apps? I tried Layover, but a stamp from AnyShape (a.k.a. PhotoStation) doesn’t behave properly. It comes in looking correct, but when I export the layered image l, it puts a white background on the PNG stamp.
I’d appreciate if you could recommend a layering app that treats PNGs properly.
Thanks,
Brice
Dave
Brice ~ Yeah…I was totally frustrated myself when I figured out that Layover didn’t like png’s. Maybe they’ll change that sometime. I would suggest you let the developer know you would like this! There are actually three apps that I know of that will deal with .png’s from PhotoStation. These are: Image Blender, Photoforge2, and Laminar Pro. I have a feeling there are others that will do so as well, I’ll just have to do more experimenting! Yes!!!
Dave