Tutorial – PhotoStation….formerly known as AnyShape – Photo Editor
Last month I sat down to write an article describing the latest up dates on an app that I have given some attention in the past, AnyShape. The developers had updated it and included an in-app camera function and social networking sharing capabilities. Nice, but not really anything to write home about. Then…they came out with an update that allowed for more control on placing the selection points around an image. Now…this was a great enhancement! I had my article about all of this practically in the bag….then…then they came out with yet another update and this one also had a couple enhancements of note! And a name change to boot! This app is now known as “Photo Station”! So…it was back to the drawing board for me!!
I won’t be going through all the steps I used to create certain of the images you’ll see figuring by now you all know how to do those. If not, do check out the first three tutorials that I’ve written for the basics and such. You can find these on The App Whisperer or in the tutorial section of “PhotoStation”.
We hope you feel inspired to try Photo Station for yourself after reading this tutorial. You can download it here, it retails for $1.99/£1.49.We hope you feel inspired to try AnyShape – Photo Editor for yourself after reading this tutorial. You can download it here, it retails for $1.99/£1.49.
Step 1
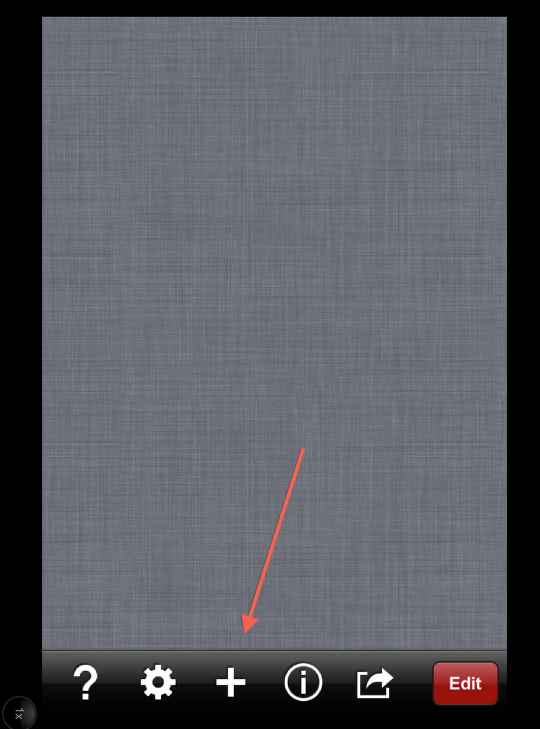
Let’s start out by taking a look at how to access the camera function. In the home screen, click on the same “+” icon you used in the past to access your images.
Step 2
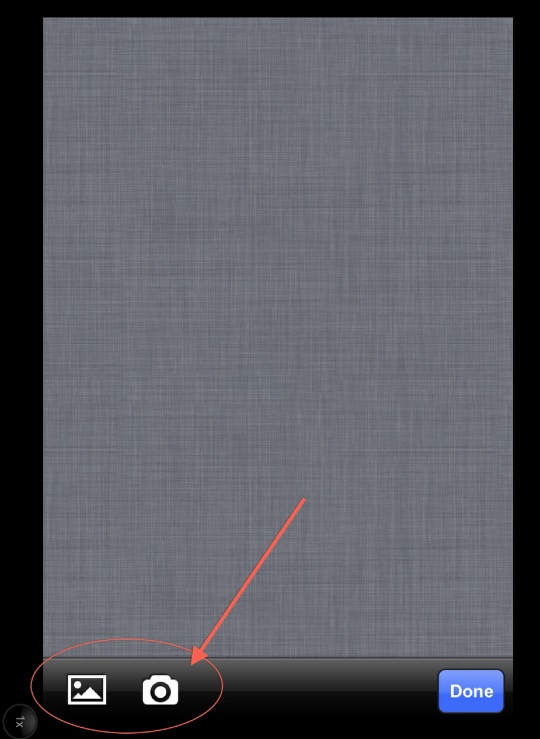
This screen comes up…and you are given two choices. One that will take you to your camera roll….the other opens the camera function. I’m not going to spend any time discussing this as it works just like your native camera app! Doesn’t do much more than that. Make your shot…and move to the edit step!
Step 3
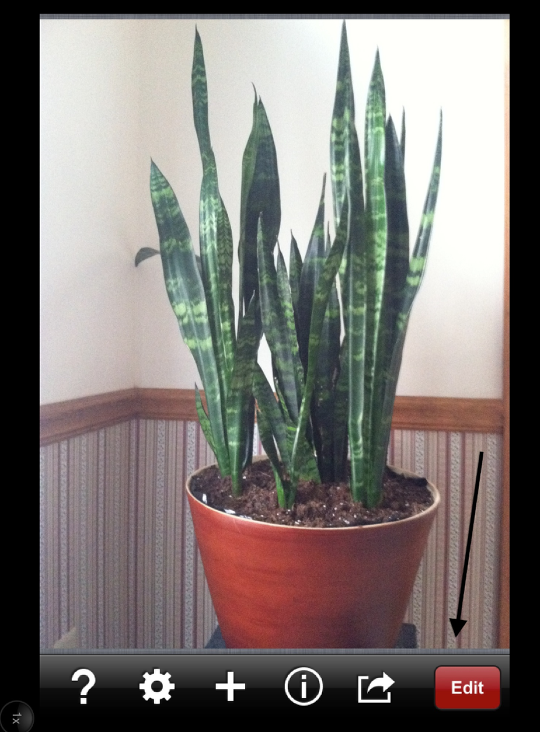
Okay…here’s my shot of a plant. Not very exciting. I’ll admit that. What I was looking for was something with challenging lines so I could show you how cool the selection point process as become! So…click on “Edit”…
Step 4
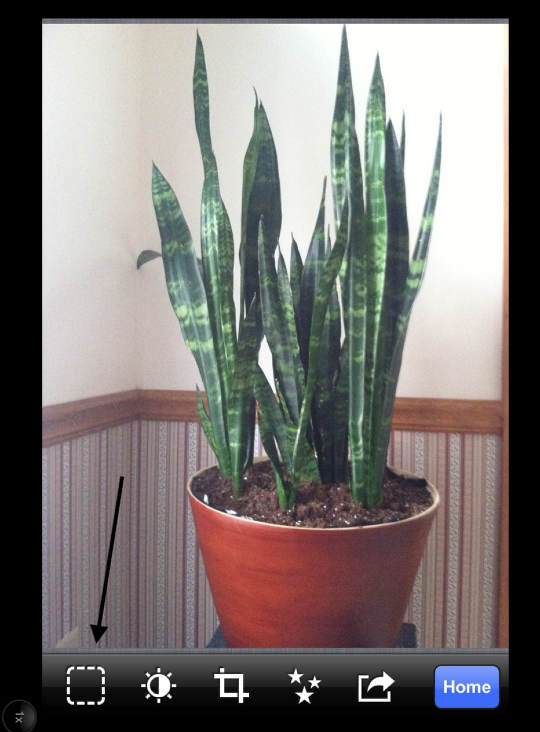
Then click on the “Selection” box…just like old times! No changes here…but they’re coming!
Step 5
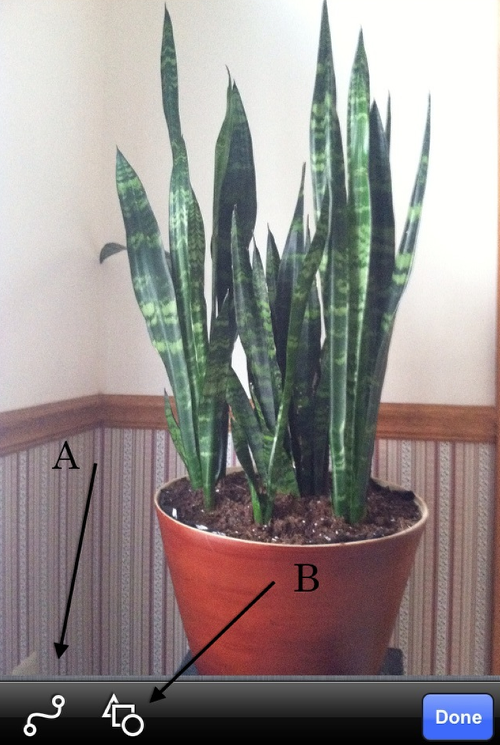
In the updated version, this screen now comes up. You are given a choice of using free-form selection lines (A) or shape-selected lines (B). I’m going to show you the free-form selection first…so I click on this icon.
Step 6
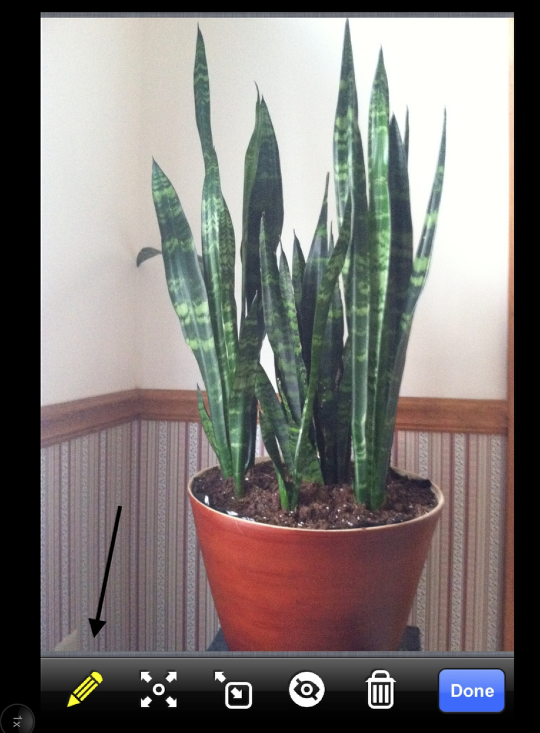
As before, this screen comes up. Click on the “pencil” icon to activate the selection function…
Step 7
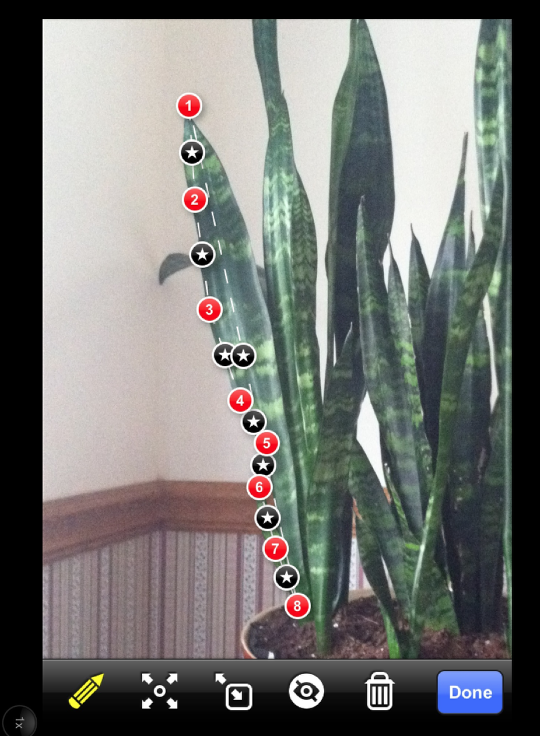
…and like always, place the points by touching the screen along the image. In this screen shot I’ve quickly placed 8 points on one side of the plant. Now it’s time to do some fine-tuning…and it’s here that “Photo Station” makes this task a lot easier!
Step 8
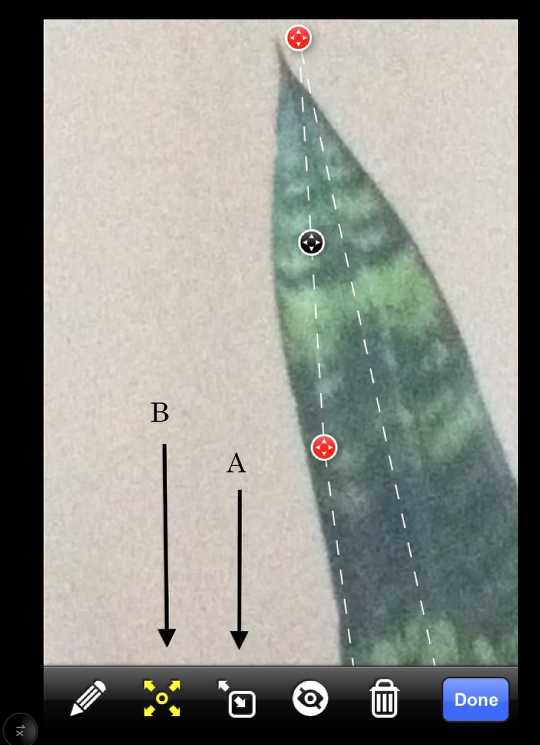
The first thing I did was to click on the “zoom” icon (A) and using the usual two-finger pinch/spread moved in CLOSE. “Photo Station” now allows you to move in close…and to take the selection lines with you. Talk about being able to custom fit!! Remember to click on the “move” icon (B) to move your points around….
Step 9
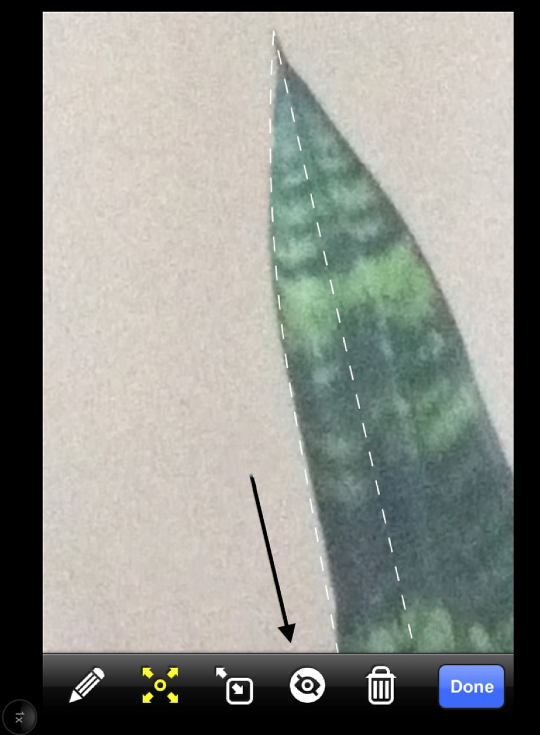
Here I’ve moved the points in close! (If you remember, clicking on the “eye” icon removes the point markers so you can get a close look at your selection lines.)
Step 10
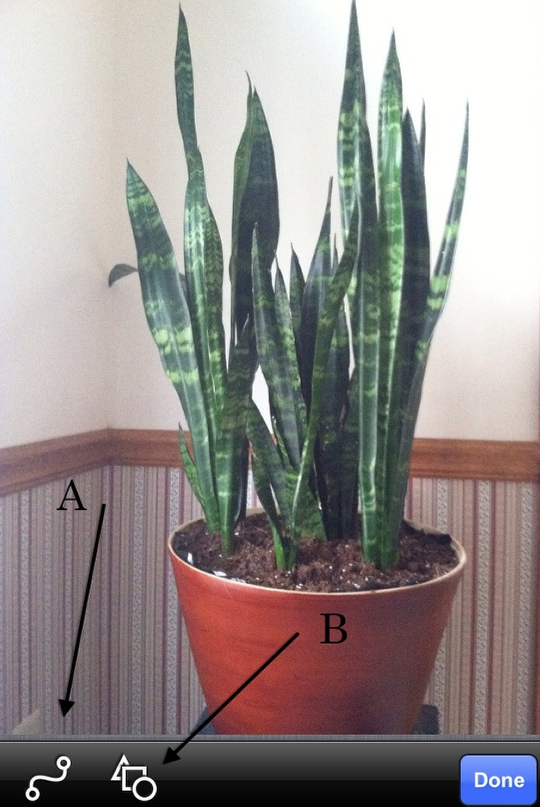
It was right about here that I had originally planned to continue show you more of this edit…but then their newest update came out. So…instead of doing that, I think I’ll move on and show you the newest feature….shape-selected editing! Going back to this screen shot, I clicked on “B”.
Step 11
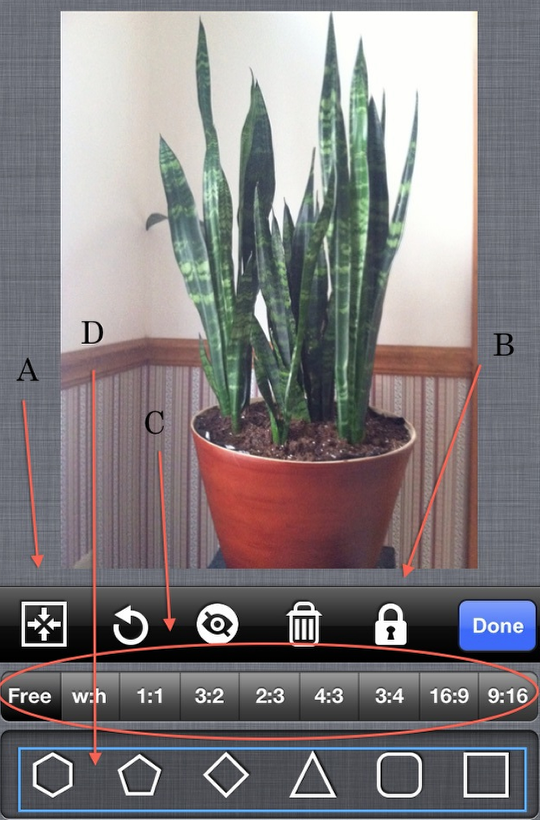
This screen comes up, giving you lots of choices and controls. Here’s a quick run down of what all of this does! When you pick a selection shape “D”, it comes up in a what could be best called a “selection box”. The ratio of this box is determined by click on the ratios shown in “C”. The “lock” icon (B) maintains that ratio, unlocking this allows you to free select the box ratio. Icon “A” centers the selection box in the screen. I hope all this made sense! I have a couple of examples coming up that should help.
Step 12
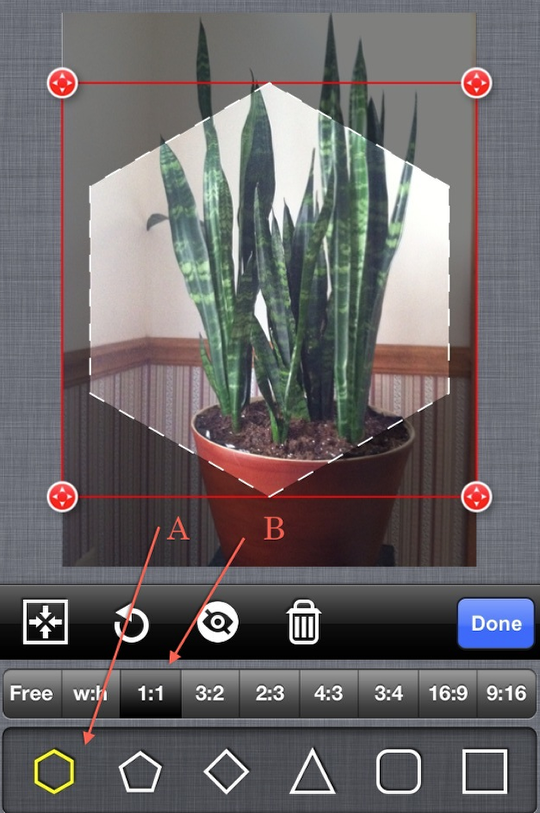
Selecting the hexagon shape (A) and the 1:1 ratio (B), I was given this to work with. The selection points on the box corners allow you to adjust the size and position of the hexagon.
Step 13
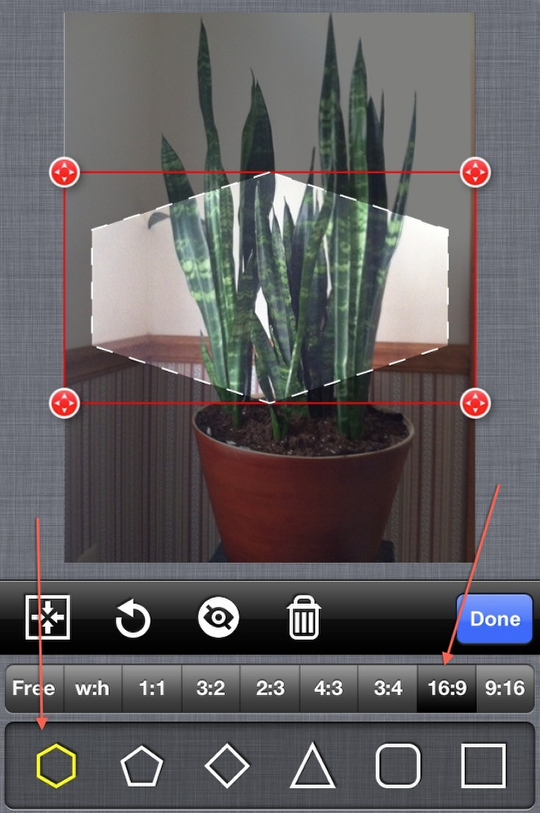
Keeping things simple, I stayed with the hexagon shape, but this time chose the 16:9 ratio. You can see what this does to the selection area and the hexagon!
Step 14
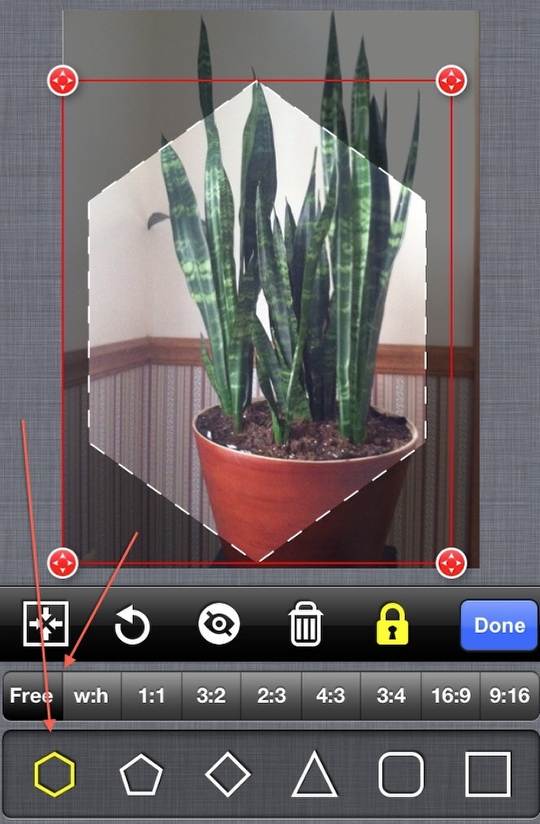
This time, I clicked on “Free” and “locked”. This will allow me to create any ratio I want yet keeping the width and height constant. If I wanted to be able to adjust the width and/or height independently, then I’d “unlock”! That pretty much sums up this new feature. Make sure to play around with the different shapes and ratios…you can come up with some interesting combinations to work with!
Step 15
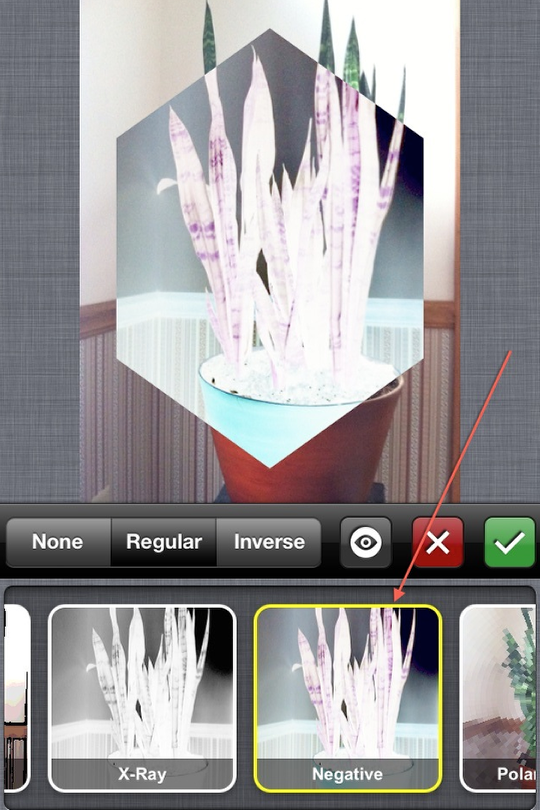
Like this one! Keeping the hexagon shape, I moved to the filters and applied the “Negative” filter. Not a “keeper” but interesting nonetheless!
Step 16
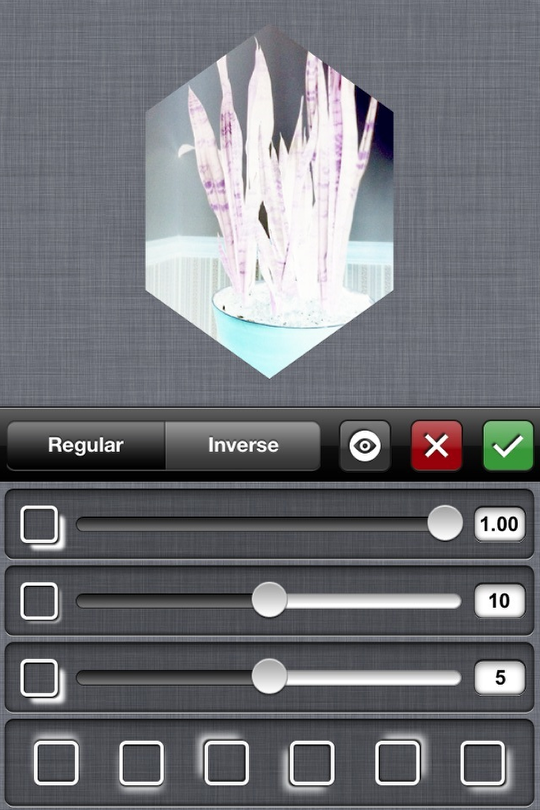
Here’s what the crop function gives you. Now this has some potential as a “stamp” in another image!!
Step 17
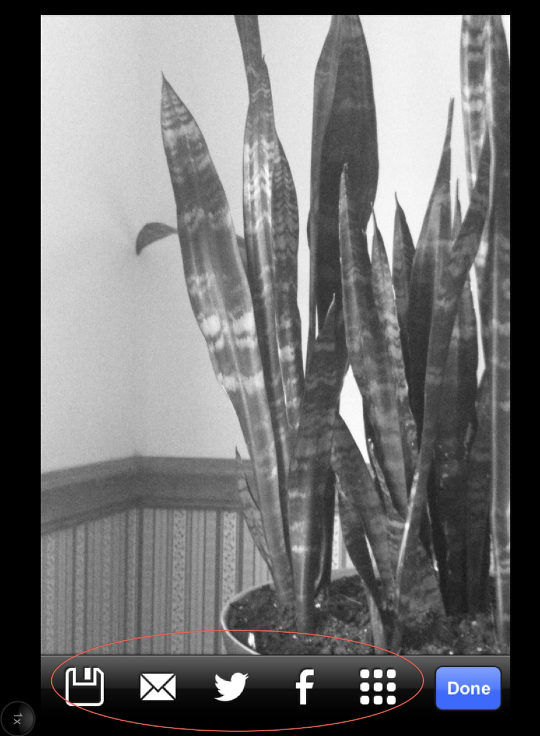
Finally, I wanted to make sure I showed you the “sharing” functions now available. Instead of just being able to save to your camera roll; you can now also share to all the popular sites!
“Photo Station” now is an all-in-one app. Take your shot using it’s camera function, have fun with it’s edit and crop function…and share your results…all without having to leave the app!
As always, thanks for taking time to read this article. And…don’t be shy with your comments and questions, I do love hearing from you!!

6 Comments
Robert Lancaster
Awesome tutorial again David! I think I need to try this app again.
I have found it rather intimidating, but now need to start using it.
This tutorial has definitely helped.
David
Thanks Robert….glad I was able to help. They’ve just come out with a new update that gives the user 80 selection points vs. 40 points. Which means you’ll be able to fine tune your selection even more accurately!
Zee
It’d be great when adding a new layer you could actually change the background image! Not as awesome as I’d hoped it would, maybe it’s something they can work on in the future 🙂
David
Zee ~ I agree! I’ve not had a chance to take a close look at their last updates…something I need to do real soon!!
Will
How do I give this app permission to acces my pictures from the sharing feature I accidentally denied permission so now Im unable to save my edited picture so I can share them MMS.. Any suggestions I tried uninstalling and reinstalling but it still stay user permission denied!! Help plz!
Will
Plz disregard last comment problem solved… For a moment I forgot I had the ability to read!! But just the same I enjoy your site it very helpful!!! Thx!!