Technical Tutorial – Snapseed & Etchings – Combined
We are delighted to publish the third of many tutorials that we’re planning with the app, Etchings. In this tutorial, our Head of Technical Tutorials, David Hayes, mixes Etchings with another popular app, Snapseed, with some very interesting results. Don’t miss this (foreword by Joanne Carter). Over to you David…
“In my past Etchings tutorials, I’ve focused on what you could do with the different aspects of this great app. This time I combined Etchings with another app, Snapseed and would like to share what came from this partnership!
If you would like to purchase Etchings and/or Snapseed the links are below:
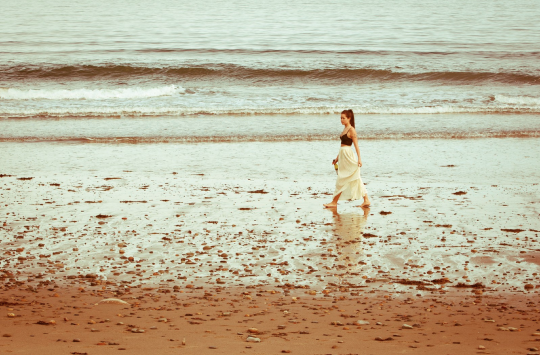
Let’s start with the source image. While I’d like to claim this image has my own, I can’t. Credit goes to Chris Brown at www.overxpsr.com. This beautiful photo is part of his “Sea Foam” gallery. My thanks to him for the use of this image!!
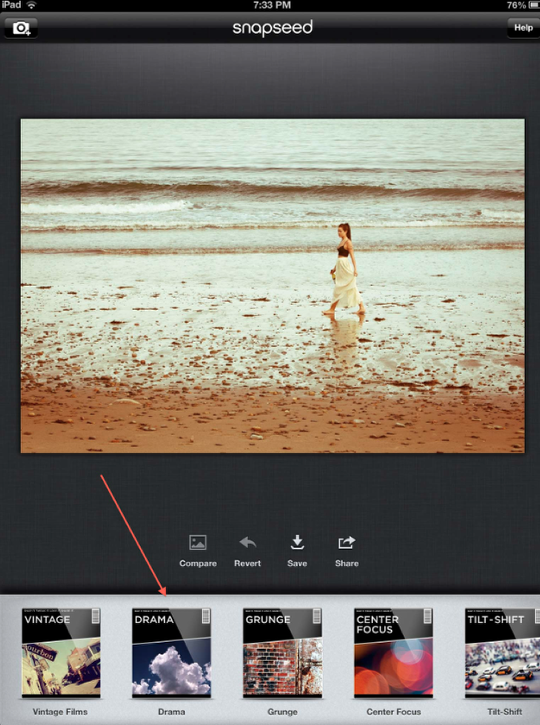
Opening Snapseed, and after importing the source image, I selected its “Drama” filter group.
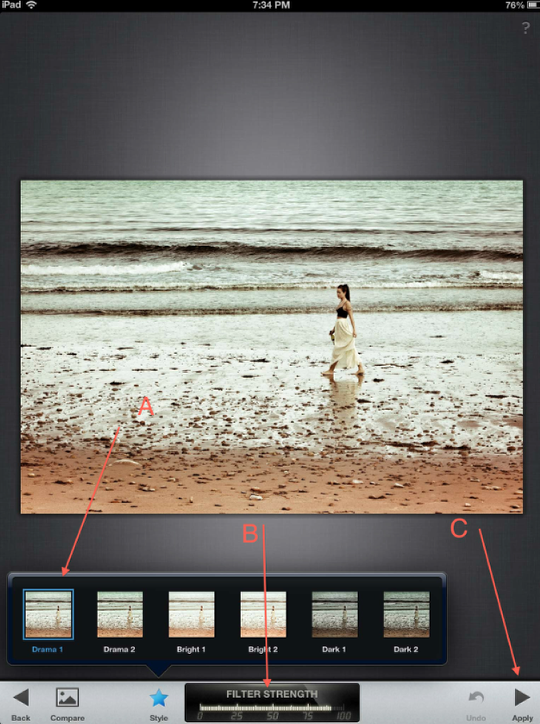
In this group, I decided to use “Drama 1”…just to add a touch of…drama! I adjusted the Filter Strength (B) and then clicked on Apply (C) to put this into place.
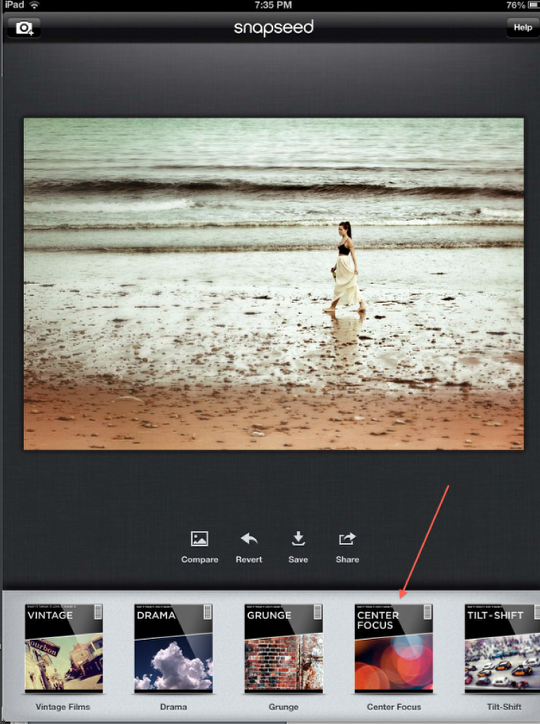
Going to “Center Focus”…
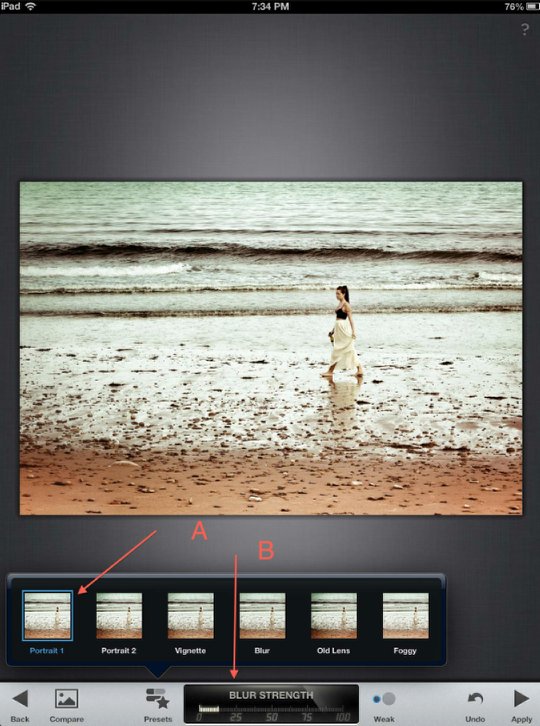
And…in this group, picked “Portrait 1” (A). I also adjusted the Blur Strength (B) to…
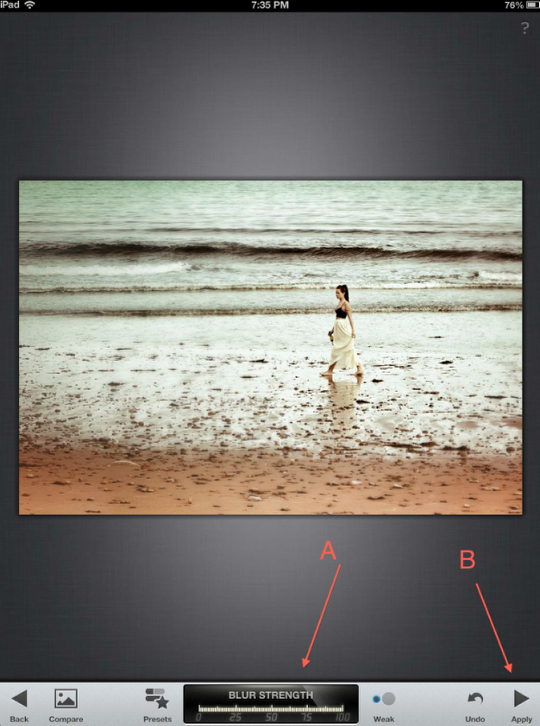
…100%! As before, I then clicked on Apply (B) to put this into place. Since I was done with Snapseed, I then saved this version to my camera roll.
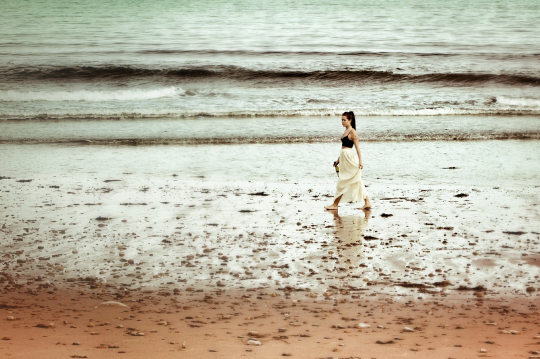
Here’s what “Girl” looks like so far. Time for some Etchings magic!!
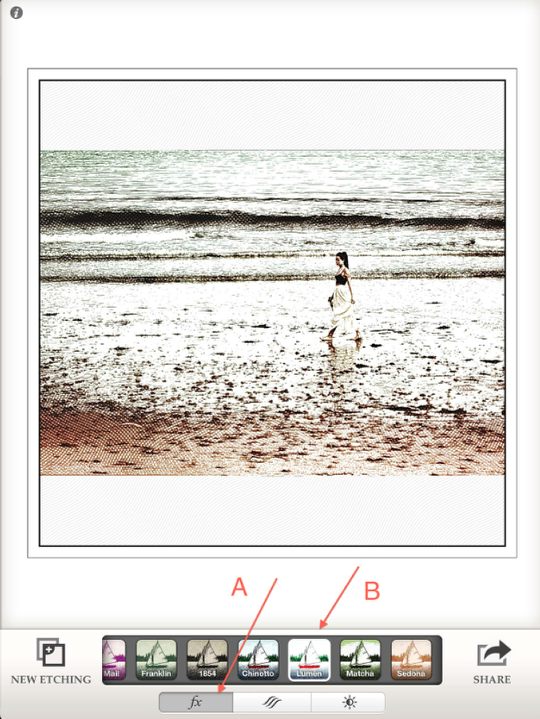
In this screen shot, I’ve imported the Snapseed version. After considering a couple of Etchings’ fx filters, I picked “Lumen” (B).
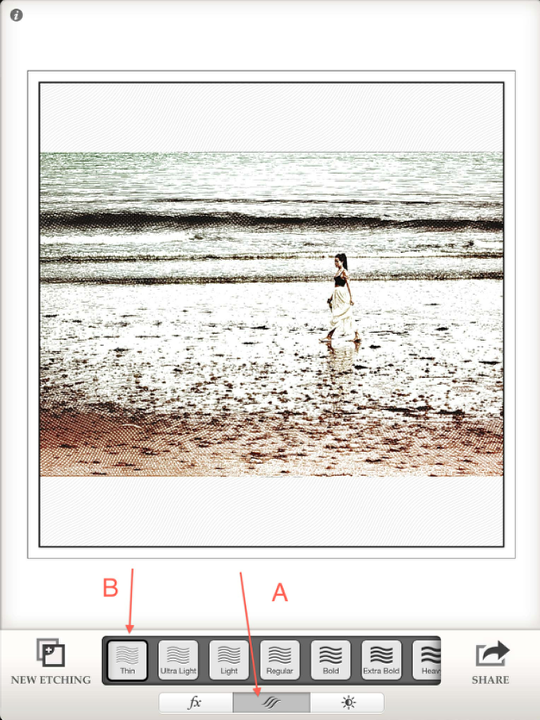
Moving to Line Weight (A), I went for “Thin” (B).
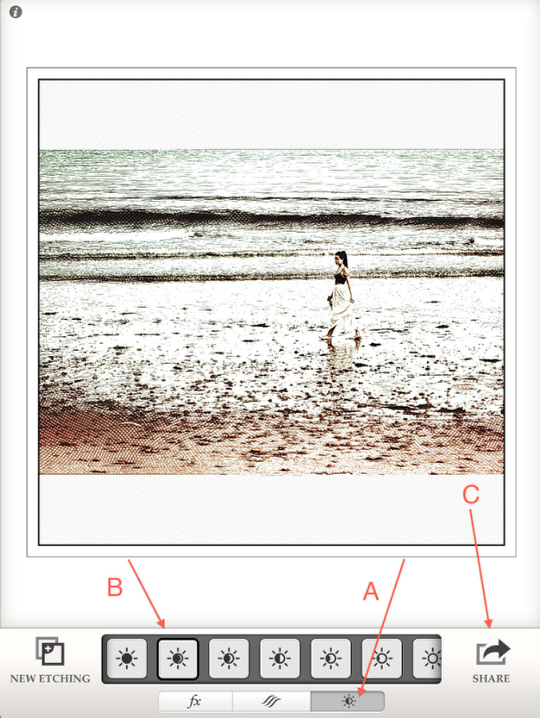
Finally, going to the Exposure settings (A), I picked (B) to darken the image just a tad. All done! Clicking on the Share tab (C)…
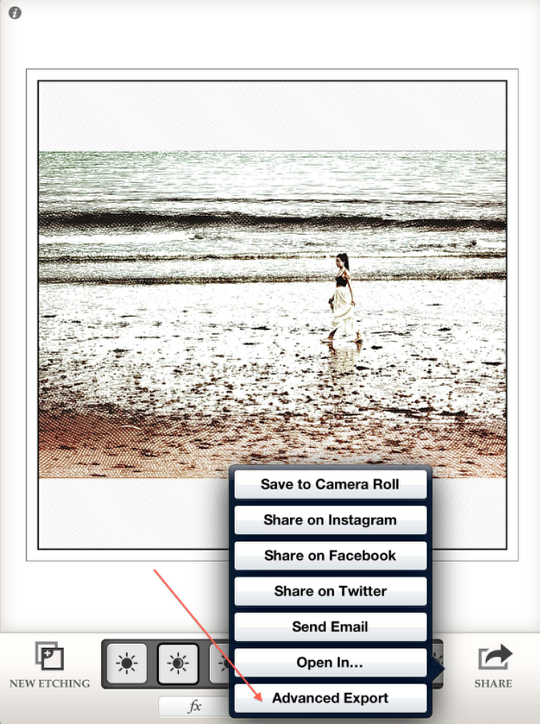
…brought up this pop-up menu. As I wanted the full image…and not the cropped and framed version, I clicked on “Advanced Export”.
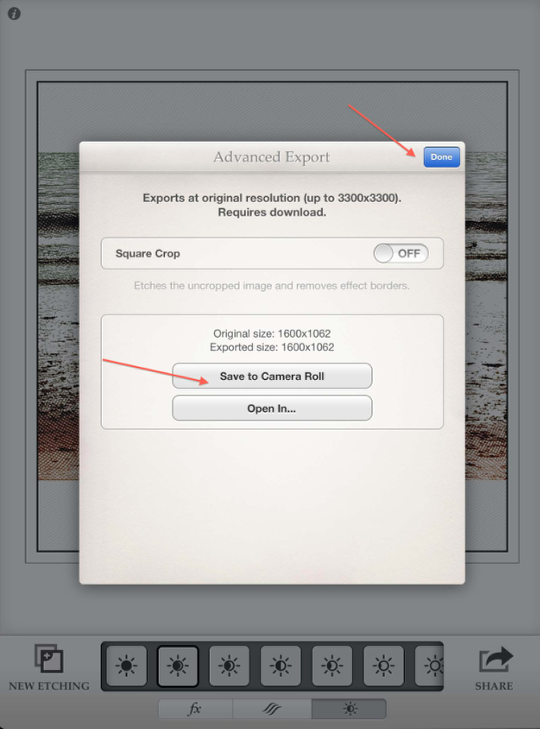
In this menu, I then picked “Save to Camera Roll” giving me the full 1600×1062 image. Once saved, I clicked on “Done” to close this menu.
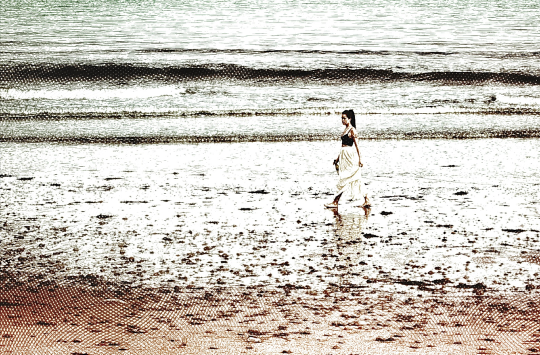
Here’s the final image! What do you think?
As always, I hope you enjoyed this tutorial. Please don’t be shy with your comments and questions…I do love hearing from you!!

13 Comments
alain goldfarb
your result is awesome, great tuto!!
David
Thanks Alain! I’m so glad you liked it!!
Carol
Excellent tutorial, Dave, and the result is great. Many thanks.
David
Thanks bunches, Carol!!!
Kachouro
Hi David – thank you, I really didn’t know the trick with the “advanced export”. Very helpful! Thank you very much for sharing your ideas.
Kachouro
David
Kachouro ~ You are most welcome…and thank you!!
Peg Price
Wonderful! Thank you for your work that keeps me learning everyday.
David
And thank you Peg! I do appreciate the feedback!
Carolyn Hall Young
Once again, thank you, David.
David
You are most welcome, Carolyn! I’m glad you like my tutorials!!
Tracy Mitchell Griggs
Nicely explained and nice blend of apps.
Dave
Thanks Tracy!! These apps do play well together!!
Peggy Prather
WOW!! Fantastic!!!