iPad/iPhone Photography Tutorial – iColorama from the Beginning – Part 2
We’re delighted to publish Part 2 of Jerry Jobe’s introduction to the wonderful world of iColorama for iPad/iPhone photography/art. If you missed Part 1, please go here. (Foreword by Joanne Carter).
iColorama for iPad retails for $2.99/£1.99 and you can download it here.
iColorama S for iPhone retails for $2.99/£1.99 and you can download it here
“Well, I’m back. So says Samwise the hobbit in the seventy-third ending of The Lord of the Rings. Just when you think the movie is finally done, there’s another ten minutes of farewells. Another literary comparison of my returning to the beginner tutorial for iColorama would be Columbo – I’m turning to you as I go and say “Just one thing…”
Last time I took you through the basics of menu navigation; the help file; the differences between iColorama (the iPad version) and iColorama S (the iPhone version); and the all-important Apply button, and how it relates to Steps, the History function. Let’s turn now to a subject that is very dear to me – masking. This is what makes iColorama more than a filter app – the ability to make changes to only part of an image.
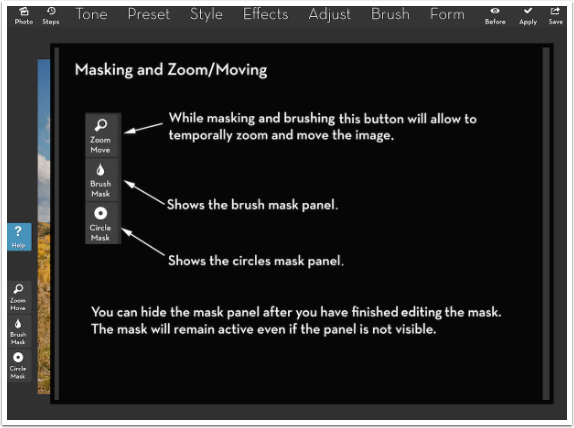
I’ve written quite a bit about masking in iColorama, and also recorded a couple of videos that discuss masking technique in this app. But I’m going to revisit it here, in brief. Below you’ll see the help for the masking buttons and the Zoom button. Remember: If the Brush Mask or the brushes found in the Brush menu are active, any touch to the screen will make a stroke. If you wish to move around the screen while a brush is active, you will need to tap Zoom Move.
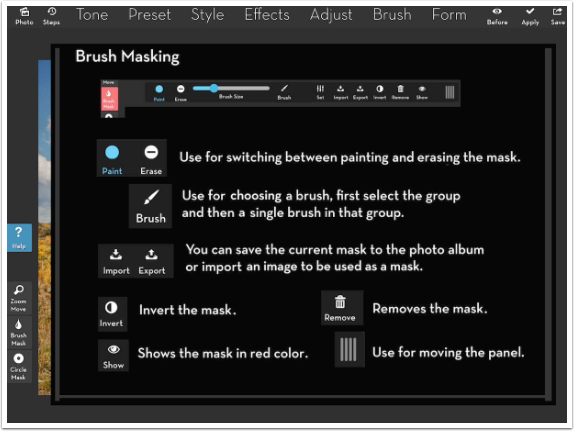
The next screenshot shows you the help for the Brush Mask toolbar. When you are painting a mask, you are masking out the effect chosen in the menu. It looks on the screen like you are erasing the effect. Erase, on the other hand, restores the effect, showing it again. This all is reversed if you invert the mask. The mask is a black and white image that you can save and reload (Export and Import, respectively). The mask stays active through multiple taps of the Apply button until you tap the trashcan icon to remove the mask.
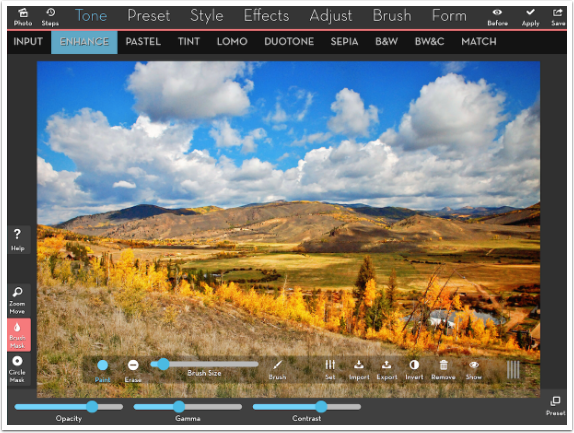
The default brush for masking is the first brush in the Basic group – a soft, round brush perfect for masking. Below I’ve brushed over the foreground so that it doesn’t “glow” as much due to the Tone>Enhance>16 setting I’m using.
Notice the red border around the workspace. This is shown when you are in Mask mode. If you are in Zoom Move mode, the border will become blue, and any screen touches will not make a stroke, but will reposition your image within the workspace. There borders are not present in iColorama S, the iPhone version.
The Eye icon in the Brush Mask toolbar is the “Show” option, and it puts a red overlay on the masked area for easier visual recognition. Below you can see exactly where the mask is applied to mask out the Enhance effect.

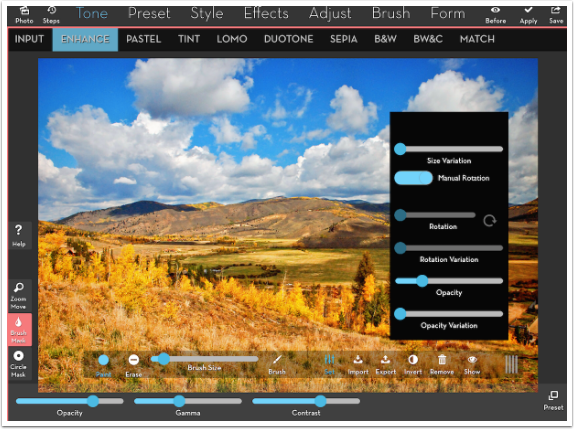
There are also a number of Settings for the brush that can be modified. Here in this beginning tutorial I will just address the Opacity slider. This is used when you only want to mask out part, but not all, of an effect. In the image below I have lowered the opacity for the brush before making a stroke with the brush.
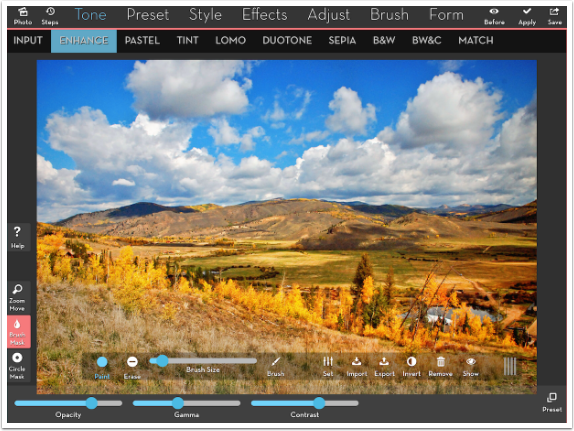
Brushes have to be at a very low opacity before it makes any real difference. Even though the Opacity was lowered to about 20%, the resulting stroke below still masks out most of the effect.
Remember: effects are not added until you hit the Apply button. Below I tapped the Input setting at the left end of the submenu and lost the Enhance changes that I’d made. This is the advantage and disadvantage of iColorama – changes are easily lost, but it encourages experimentation. You can really mess things up, but the changes can be discarded with a single tap, allowing you to start over with the same effect or try again with another.

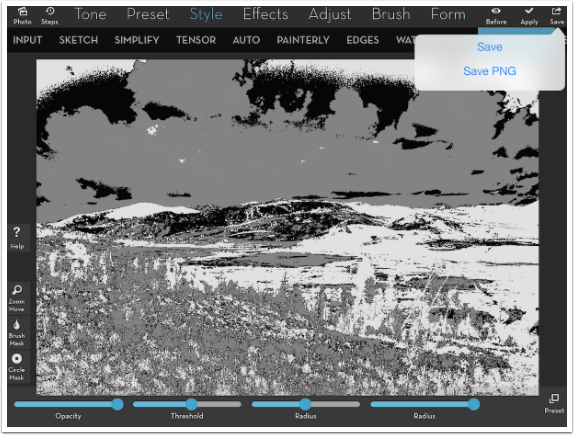
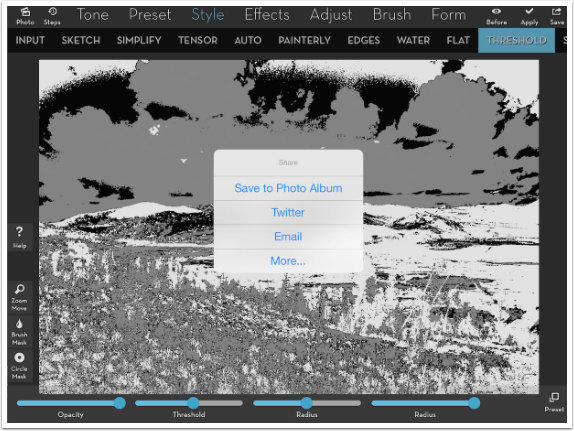
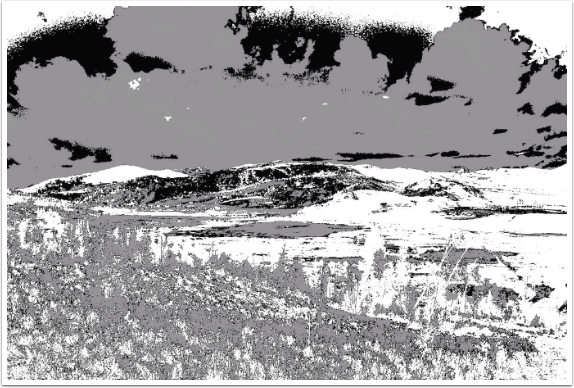
As I said, the mask itself is a black and white image. Black reveals the changes, white conceals them. So any black and white image can be used as a mask, which you can then load in. There are different ways to create such a mask, other than through painting a brush mask. For instance, the image below is the result of Style>Threshold>5, and it has rendered the image in black, white, and gray. It is ready to use as a mask. I do not Apply the changes. Instead, I just save the changes. After the mask is saved I can go back to Input and this Threshold effect will not be applied.
There are two options: Save and Save .PNG. The PNG file is larger and contains more detail. Although the PNG can be useful for a final result, it is overkill for a mask. So I just tap Save.
There are multiple Save options. This being a mask, I just want to save it to Photo Album for Import into the mask.
If I look at the Photo Album, this is the saved mask.
Now I go back to the image, and tap the Input setting. It discards the Threshold setting, and now I can make any other changes I like.
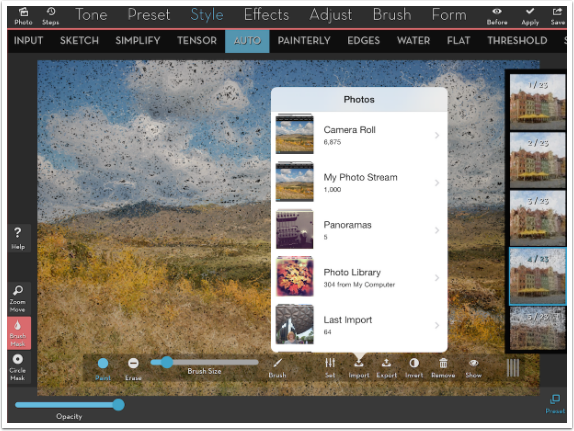
I decide to try Style>Auto>4. But I want to use the mask. The Auto will be hidden by the white, fully revealed by the black, and partially revealed by the gray. I tap the Brush Mask button and then the Import button. I am directed to Import the mask from my library.
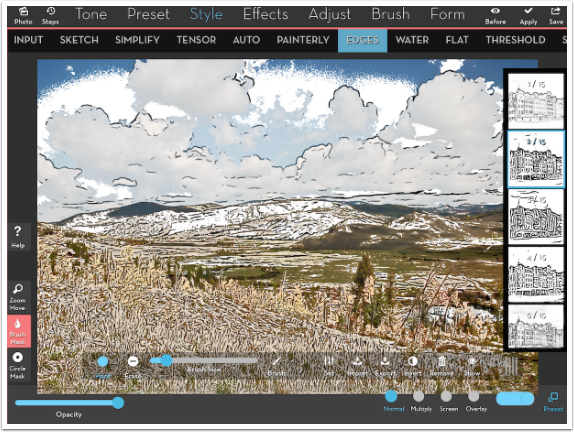
As it turns out, I didn’t like the Auto effect applied through the imported mask. So I didn’t apply it. I instead went to Style>Edges>2. You’ll see that the mask stayed in place. It stays in place until the Remove icon on the Brush Mask Toolbar is tapped, or until you use Steps to move back in History. It is obvious with this Edges setting where the white, black and gray areas are in the mask by how much of the underlying image is showing through.
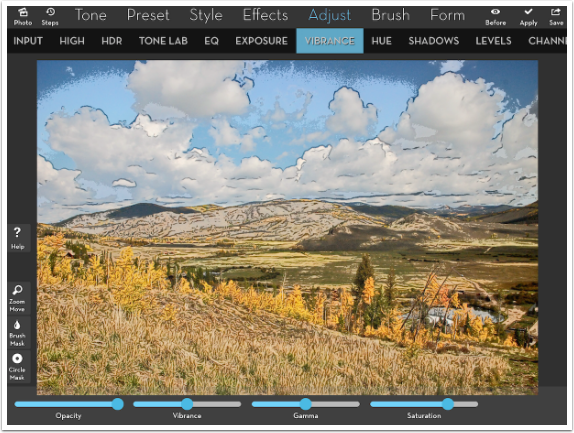
I lowered the Opacity of the Edges setting, then decided to increase the saturation of the colors, since the white of the Edges washed out the underlying image. By leaving the mask in place, when using Adjust>Vibrance>Saturation, only the parts of the image that were affected by the Edges effect were also increased in saturation.
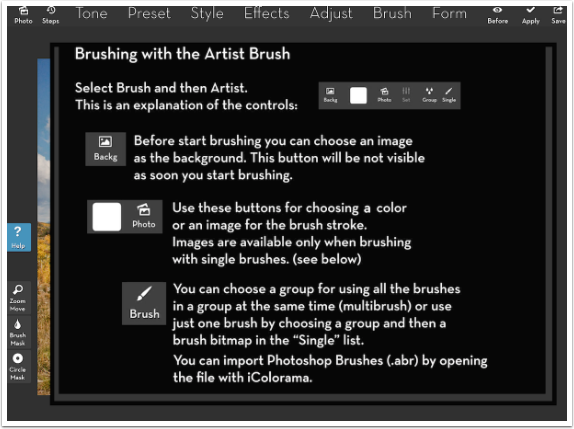
Throughout the two parts of this tutorial, I have followed the help file included in the app. Below you’ll see the last part of the help file. This deals with Brushes, which are more advanced and which I have covered in other tutorials.
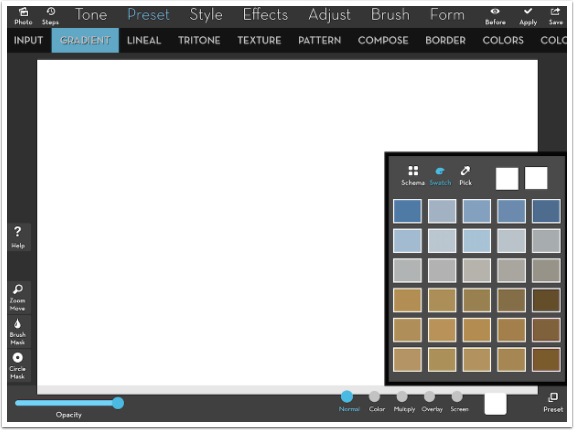
Many of the effects in iColorama include a color thumbnail, and so a task for beginners is to be able to navigate the color picker. I decided to add a painted frame to my image, and that starts with the Preset>Gradient>1 effect. At the bottom is a white block, which is the thumbnail of the currently selected color. Tapping it brings up the color picker, which allows you to change from one color to another. Along the bottom is a color wheel, which allows you to pick the hue. The larger box allows you to adjust the saturation and luminance of the color you’ve picked.
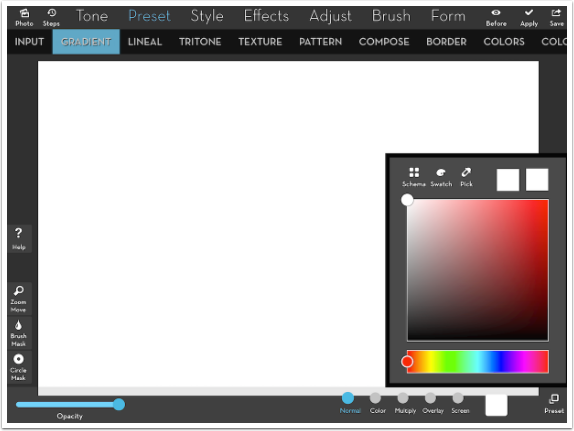
There are also three buttons on the color picker. The first, Schema, gives you choices based on the currently selected color. These colors are similar in saturation to the selected color. When the selected color is white, as here, the Schema button would show grays. If the selected color was a bright pink, you’d see a selection of vibrant colors of the rainbow when choosing Schema; if it was a pastel, then you’d see muted colors.
The Pick button would show the underlying photo and you would move your finger over the image to choose a color, like using an eyedropper to pick up the color.
Below I’ve chosen the Swatch button, and you can see the resulting thumbnails. Swatch brings up representations of the colors within the underlying photo. It’s like the Pick button, but it’s easier to see the color you’re choosing when you see thumbnails rather than picking a particular pixel’s colors.
I chose a medium blue, and that color now covers the entire image because I had chosen Preset>Gradient. I now want to use that as my painted border, so I want to mask out the color and reveal the underlying image in the center. Because I want the edges to look painted, I don’t want to use the default soft-edged masking brush. So now I get to show you the new brush picker.
When you touch the Brush icon on the Brush Mask toolbar, you’ll see a number of groups of brushes. Each group of thumbnails contains anywhere from just a few to dozens of brushes. I’m going to choose the thumbnail on the fifth row down, third from the left.
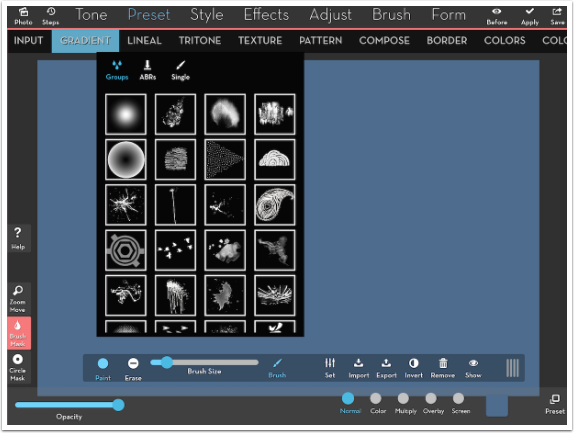
Now that I have the group, I touch the Single button at the top of the Brush picker to see the brushes that are part of the group. I then choose the last one as seen below. At the upper right of the Brush picker you’ll see the brush identification, number 10 of 10 in the STAIN group.

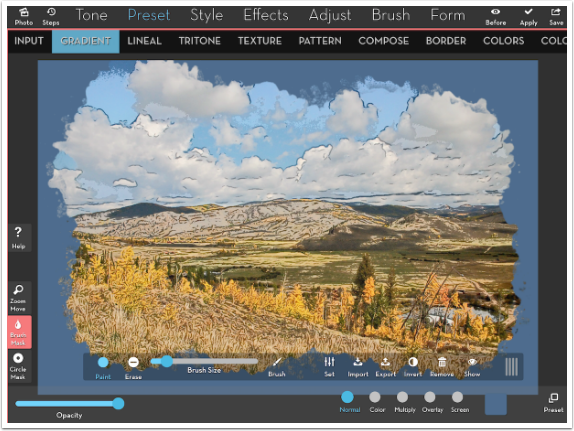
I then start brushing out from the center, leaving blue along the edge. You can think of that blue as the edges of a window allowing you to see the image, or as the canvas on which the image was applied.
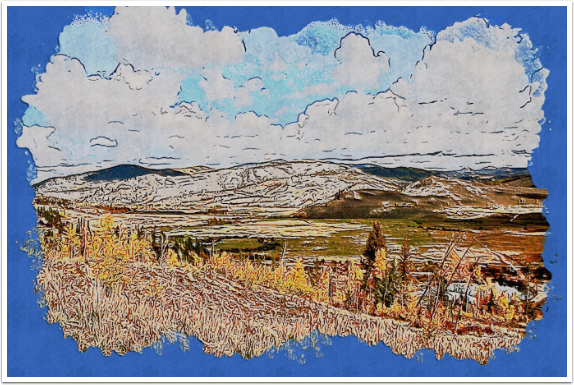
And here’s the finished image.
iColorama can be an overwhelming app. I hope that this beginner’s view will help you realize that once you get into the habit of experimenting and then using the Apply button when satisfied, you will quickly and easily create images you did not know were possible. Look for my other iColorama tutorials, as well as those I do for other apps. Enjoy!
Jerry Jobe
Never content with just scratching the surface of what an app can do, Jerry Jobe decided to pass on what he learned about imaging apps to others. He’s constantly trying to figure out just what tools other artists have used, and trying to incorporate them into his own work, in an attempt to find his style. He’s written tutorials on over 145 apps so far, which you can find (along with his Song of the Day entries) at http://enthusiasmnoted.wordpress.com/ He lives near Atlanta, Georgia, where he also finds a creative outlet in acting and directing in community theater.