After Focus – Tutorial – Using Blur To Improve Your Mobile Images
Recently we published a similar article by our Columnist ItalianBrother aka Dilshad Corleone but that time he used the Big Lens app – if you missed that article, go here. This time Dilshad takes us through the paces of using a similar technique with After Focus. Over to you Dilshad (foreword by Joanne Carter).
A few days ago I was having a lovely conversation with my very good IG friend Ian Garrington (@iangarrington on Instagram), about the various blurring apps that one can find around. At one point he said something that made me come up with an idea, one of those moments when a light-bulb lights up over your head…
So here it is, the second of three tutorials of my very favorite blurring apps, in this instance After Focus £0.69 or $0.99. For this tutorial I will use one portrait photo of a friend of mine, which I took sometime ago in Italy while he was concentrating on his gelato, I quite liked his expression of satisfaction, however I am not to keen on the background and these apps come perfectly handy for my purpose!
Step 1
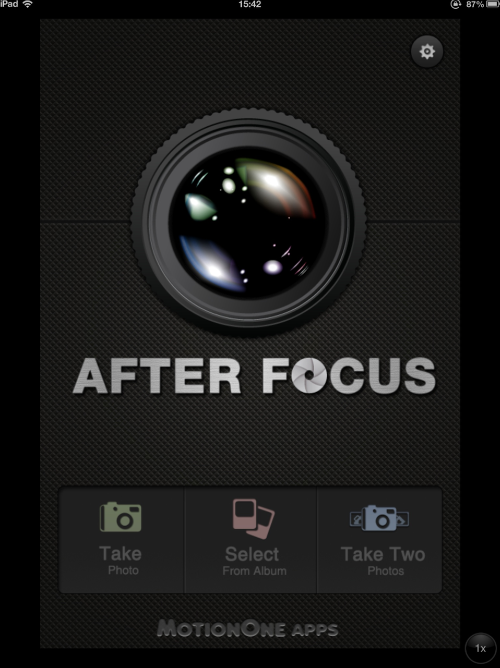
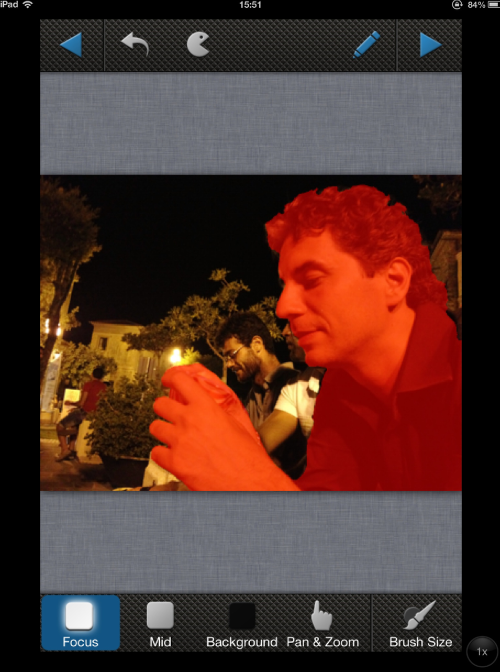
Probably After Focus is the easiest of the three, very simple to use and very quick too. When you open After Focus just press Select from album, I’ll choose the same photo.
Step 2
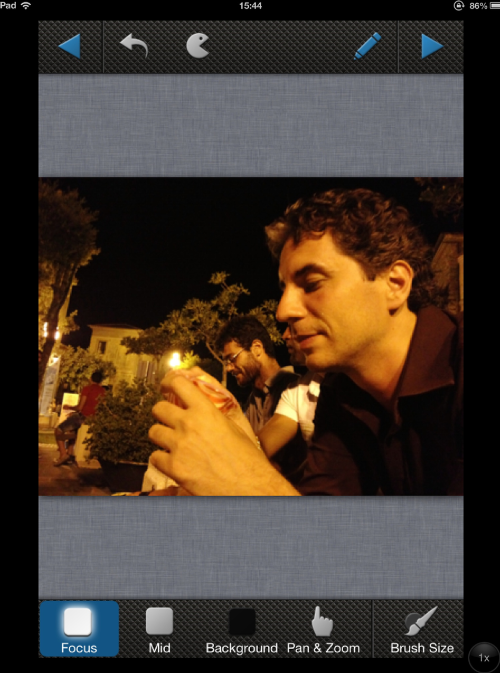
You don’t have a basic and advanced section, just a very simple area with a few tools: Focus, Mild and Background. Focus serves to mask the area that will stay in focus, Mild is to mildly focus an area and Background is the eraser tool.
Step 3
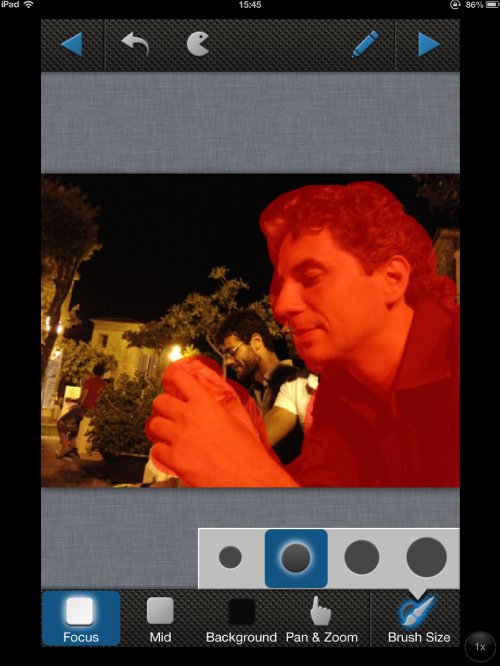
You then have your brush area where you can select the size of the brush, only four sizes available: small, medium, large and extra large, quite straight forward… I usually start with medium or large, depending on the subject and then go to small to fine tune my image
Step 4
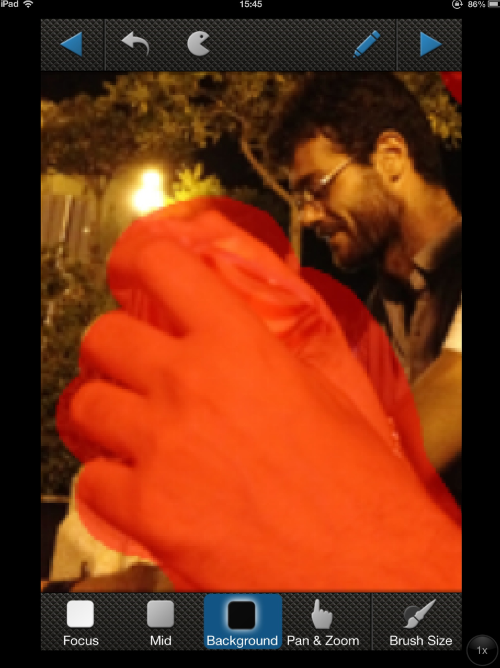
You can pinch out or in to zoom and using the background tool (eraser) you can delete the over spillage.
Step 5
6 minutes and 48 seconds and I am done. Now just press the arrow in the top right hand corner and let’s enjoy the rest.
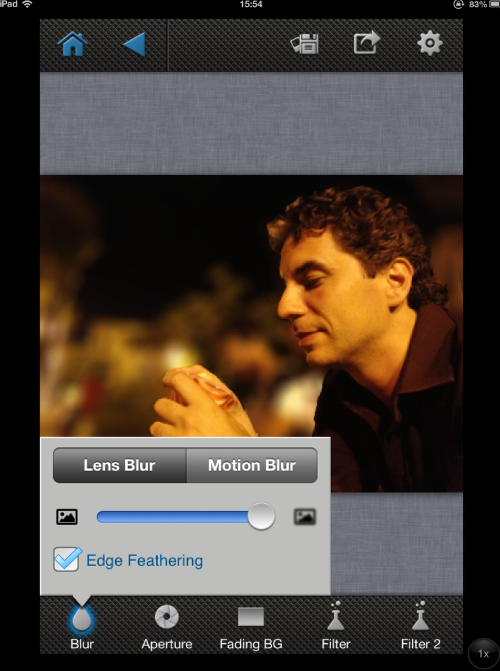
Step 6
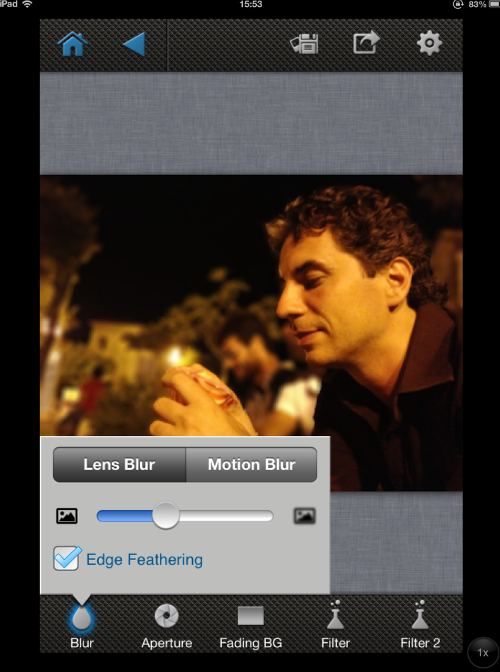
So here we have already two different types of Blurs, the lens blur (Gaussian) and the motion blur, I am already excited! It does not have a selection of Aperture levels but a simple bar, which you move left or right for the strength of the blur. But before we go into this, let me show you a very cool little surprise!
Step 7
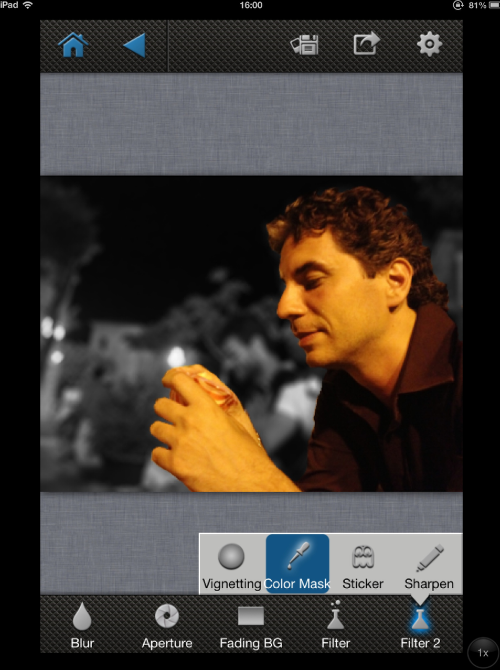
There is a section called Filter 2, in which you will find some really great tools, Color Mask (or Colorsplash) makes my day any day! Yes it colorsplashes everything that has not been masked! I tend to use this tool, however, to see if my masking is perfect, if not I just go back and blur or focus where is needed.
Step 8
You can blur as little or as much you like your background by just moving the blur bar.
Step 9
I often use the maximum strength.
Step 10
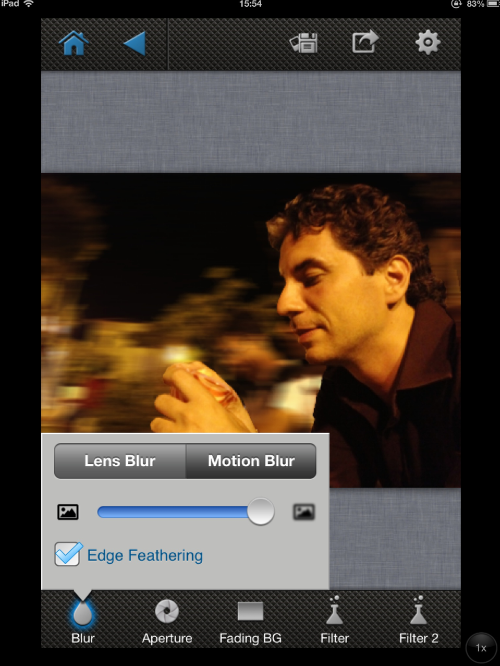
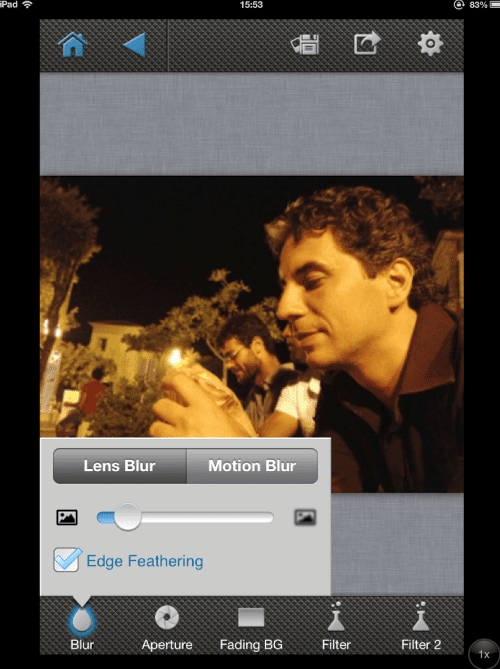
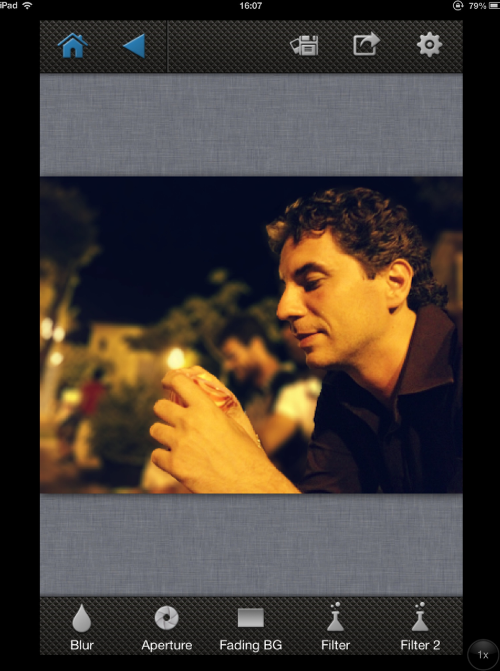
And you can select between the Gaussian blur and the Motion blur, which is fantastic. The motion blur looks brilliant when there are moving subjects and when you want to highlight motion. The Edge Feathering keeps everything smooth and tidy so keep it selected.
Step 11
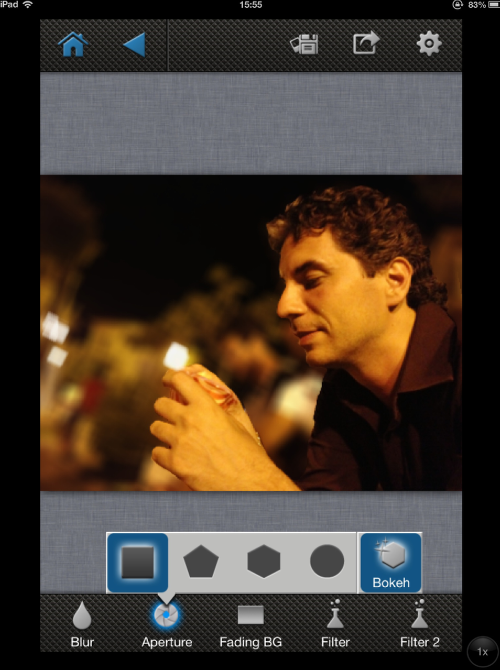
The four apertures tools literally don’t do much, to see some results you have to select the Lens blur and the bokeh is needs to be selected. Even with the bokeh selected and on Gaussian blur there isn’t much strength, which is a bit of a shame…
Step 12
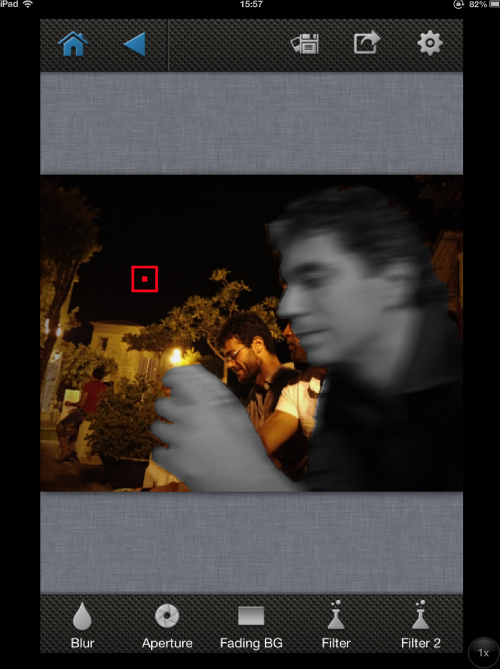
One particular tool that no other app has is if you touch anywhere, where it is blurred, that will automatically reverse the blur/focus area, hence blurring your subject and focusing your background. Please don’t panic if it happens by mistake, I did and I thought I had to start all over again, but it is very simple to fix, look at the next image.
Step 13
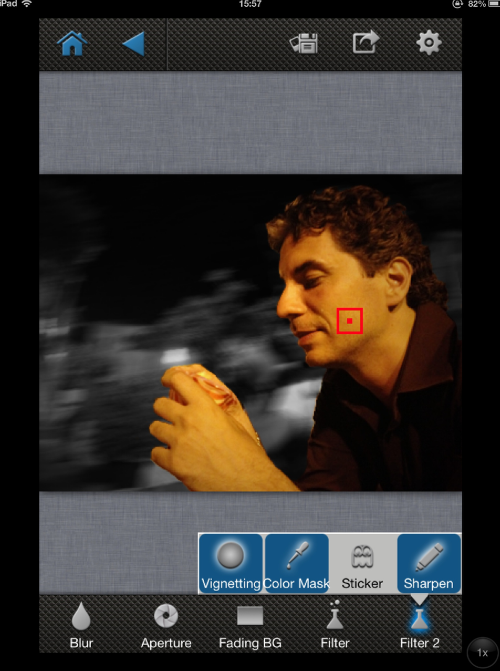
By reselecting your subject again it all goes back to normal. In both images I had the Colormask tool selected and you can also sharpen and add a vignette too, wonderful!
Step 14
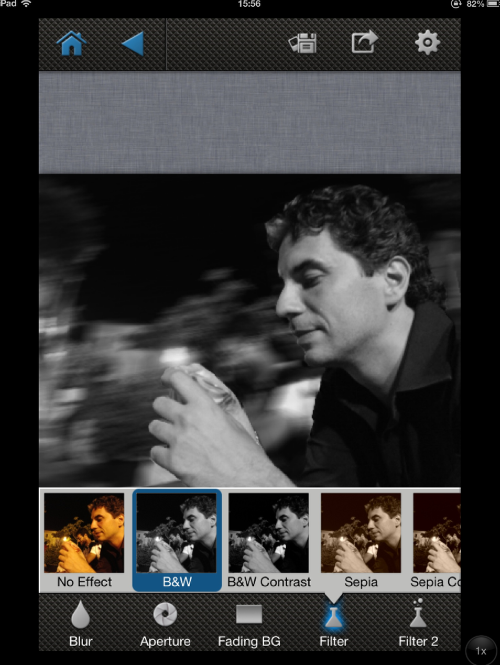
The Filter area allows you to select from the usual color filters, B&Ws, sepias, 1970 vintage etc.. Play around and enjoy.
Step 15
After Focus is easy and one of the best blurring app around! And lately it has become my first choice too. It has everything you need that allows you to show off your image and it is very quick to learn. The Motion blur, I think is one of the best around, for it truly gives you that movement effect you where always looking for. The bokeh, conversely, could be better, but hey… Nevertheless, sometime I think it is a little bit too easy, quite to the contrary of BlurFX.
Dilshad Corleone
Dilshad Corleone aka italianbrother on Instagram, albeit in love with the photography of Henri Cartier-Bresson and his 35mm format, considers himself to be a true iphoneographer. His street photography has been exhibited at the Vyner Studio in London for the Photomonth East London (October 2012), at KCC Chelsea in London A collective Iphoneography Exhibition (November 2012), at the Truman Brewery in London for the Iconic London Exhibition (December 2012), at the Unit24 Gallery in London MobilePixation Mobile Arts Exhibition (December 2012), At the Laboratorio de Artes Variedades, Guadalajara, Mexico for the Dreams Without Borders Exhibition (December 2012 – January 2013), at the Garden Gate Creativity Centre in Berkeley, California and at the Galerie OutOfMyMind in Bremen, Germany as part of the Third Wave Iphoneography Exhibition (January 2013), at MacWorld International Conference in Los Angeles as part of the Mobilmasters Exhibition (Januarry/February 2013), Soho Gallery For Digital Arts in New York as part of the Mobile Photo Award Exhibition (February 2013). Dilshad’s work is gracing the wall of private owners in London, Italy, France, Spain and the USA, and he is a columnist for Theappwhisperer.com. Dilshad has travelled widely all over the world, especially in East Asia, Africa and recently in Iraq where he worked in an orphanage as a volunteer. His Iphoneography have a strong feel of the old 1920’s 1930’s photography and he loves the grunge, the dirt, and the grit. Dilshad is also fond to portray the unspoken London, the untold London, with heavily blurred background, men with big, long beards, hats and characteristic and peculiar faces. Iphoneography and Street-photography has given him the power to tell his stories, what he sees and what touches him.

8 Comments
Anne
Been waiting for this. Thank you!
Dilshad
Hope you enjoyed it!! And do let me know what you think;)
Lee Thatcher
What a great tutorial, thank you for creating this and sharing your knowledge.
Regards
Lee
Dilshad
Thank you so much!!!! I have a few more ideas that I am working n…;)
Jennifer
Great tutorial. Looking forward to many more soon!
Dilshad
Really glad that you liked it!! Let me know how you get on…;)
Mirlene
Very informative will definitely check out this app now thanks to your wonderful tutorial Dilshad!
Many thanks,
Mirlene
Pingback: