iPhone Photography Technical Tutorial – Layer Pic and Background Eraser: Images in isolation – By Jerry Jobe
We’re delighted to publish Jerry Jobe’s latest tutorial, this weeks’ tutorial is with two apps that you may not yet have tried using to create collages, Layer Pic and Background Eraser (just click on the names for a link to the app store). Jerry puts these two apps through their paces and comes up with some incredibly interesting images. Don’t miss this, over to you Jerry. (foreword by Joanne Carter).
“Last May I talked about creating collages – putting various images together to create a new work. I reviewed Superimpose, which allows you to “lift” part of an image and “superimpose” it on another.
During the last couple of weeks, two apps, both with the same developer, became free for the asking for a limited time. The more robust of the two, Layer Pic, could be considered Superimpose Lite. The other, Background Eraser (there are two apps on the App Store with the same name – I’m reviewing the one by Sunwoong Jang) is Layer Pic Lite.
First of all, a word of caution: these apps are brand new. The interfaces are new to me, but that doesn’t mean that the apps haven’t been stolen from a more established app. As always, you should watch out for counterfeit apps. Two things, in my mind, argue against these being counterfeit apps: One, they were offered free; two, there are no in-app purchases. Counterfeit apps are usually only interested in making a quick buck before they’re found out, and the developer here is not making any initial monetary windfall.
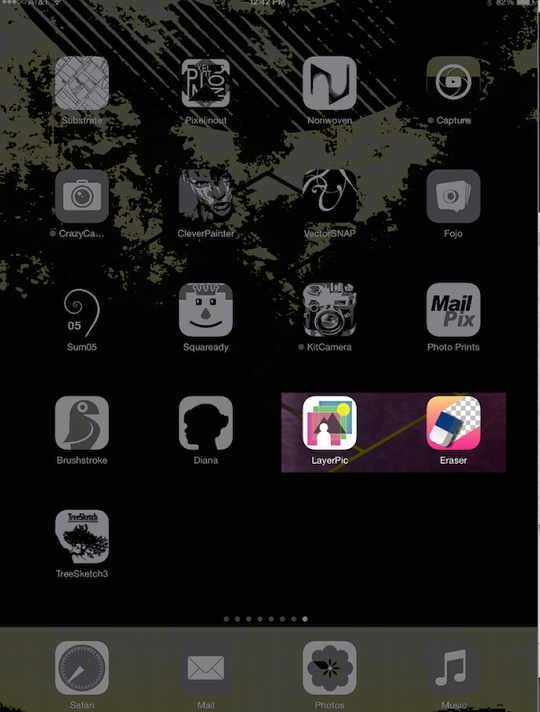
Let’s get started, shall we? Both apps have both an iPhone version and an “HD” version for iPad, but my screenshots today will come from the iPhone version running on the iPad. Neither app has an opening splashscreen, so let me show you their icons.
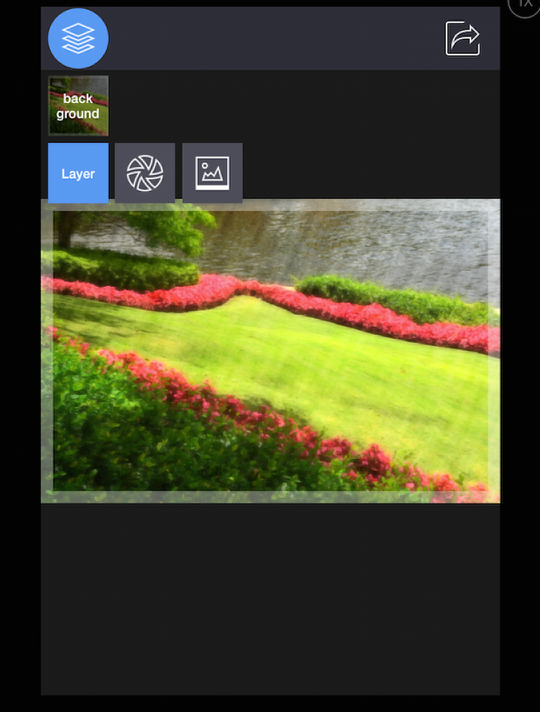
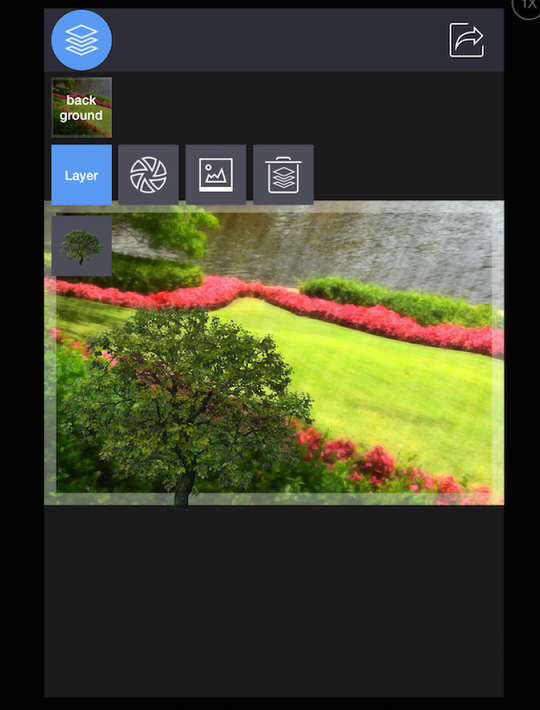
Entering Layer Pic, initially you’ll see a blank screen with two buttons at the top: Layers and Save. Tapping the Layers button will drop down two buttons: Background and Layer. You’ll want to establish your background first, and tapping “background” will show two buttons; one will bring up a camera for you to take a photo, while the other will allow you to choose an image from your library.

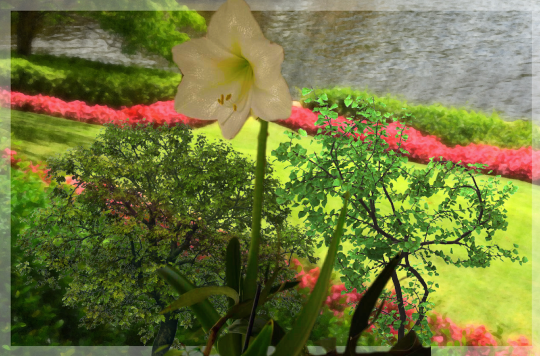
I’ve chosen a nice little painterly landscape as my background. Next I tap Layer, and am presented with the same options, camera or library. For some reason, the Photo Stream is not available as your source for your layers, although it is for the background.
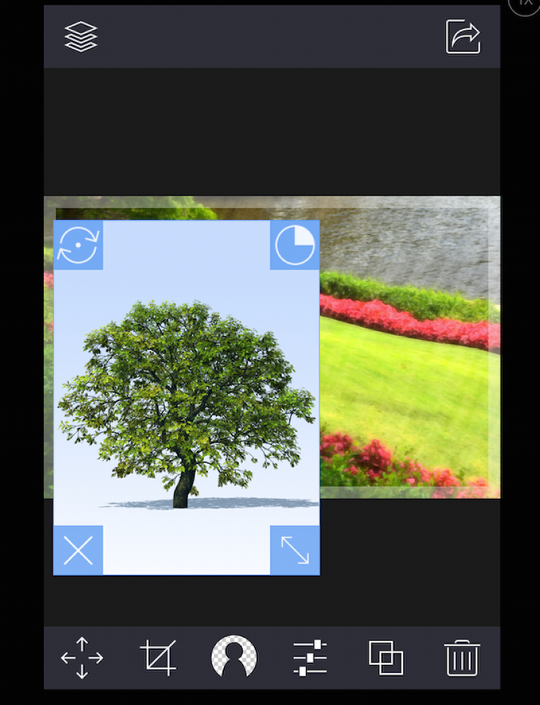
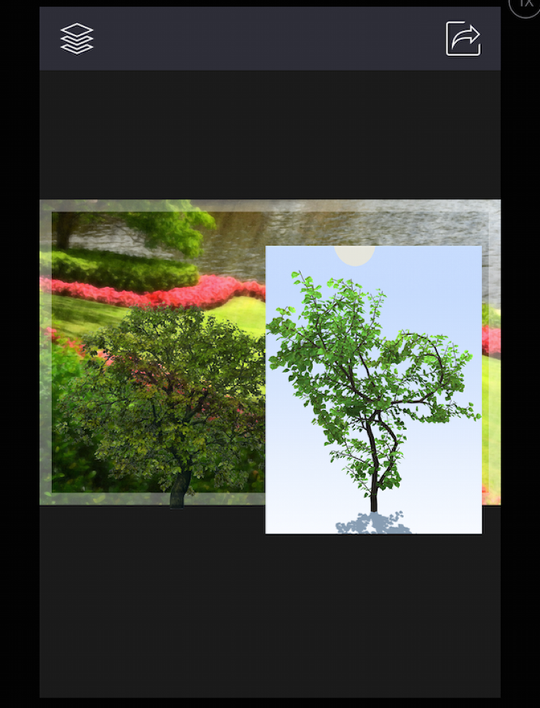
I’ve chosen a tree I created with TreeSketch (a wonderful free program for your iPad). Now we have lots of options presented to us. You can grab the upper left corner of the layer and rotate it; tapping the upper right will rotate the layer clockwise in 90° increments; the lower right will resize the layer; and the lower left will reset the layer to the original size and rotation. Along the bottom are six buttons: Transform, Crop, Erase, Adjust, Layer Properties, and Delete. These buttons and the blue bounding box will show whenever a layer is active.
After tapping the Transform button, you see the options below. On the left you’ll see up, down, left and right arrows for moving the layer around the screen, although I just drag the layer around the screen. The remaining buttons on the top row deal with rotation. The middle row contains buttons for centering the layer on the background. The plus and minus on the bottom are for resizing, and the remaining two buttons will flip your layer horizontally and vertically.

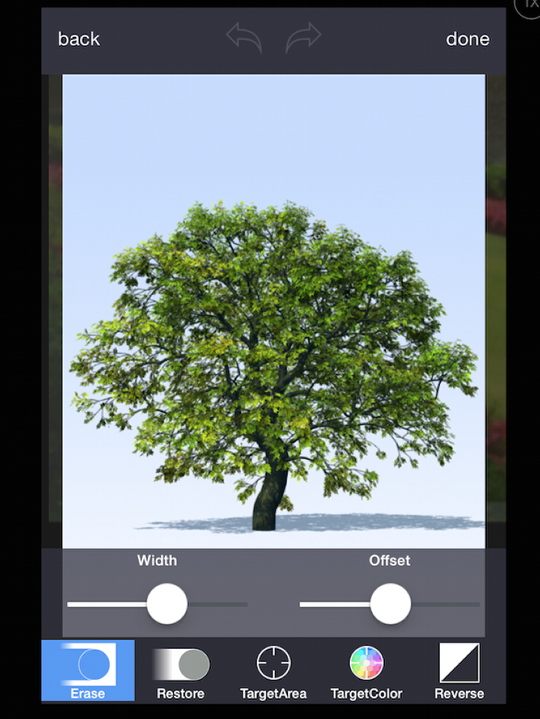
The Crop feature is self-explanatory, so I won’t cover that. Moving on, we come to the “guts” of these apps, the erase function. In order to create a collage, we erase the background of the layer, leaving only an object (in this case, the tree). You have five buttons along the bottom: Erase, Restore, Target Area, Target Color and Reverse. When either of the brush options is selected (Erase or Restore), the Width and Offset sliders are displayed. Width of the brush is self-explanatory, but what’s Offset? In order to make sure you can see where you’re erasing, the brush does not operate under your finger, but a short distance above it. That distance is configurable with the offset – how far the brush is offset from your finger touching the screen.
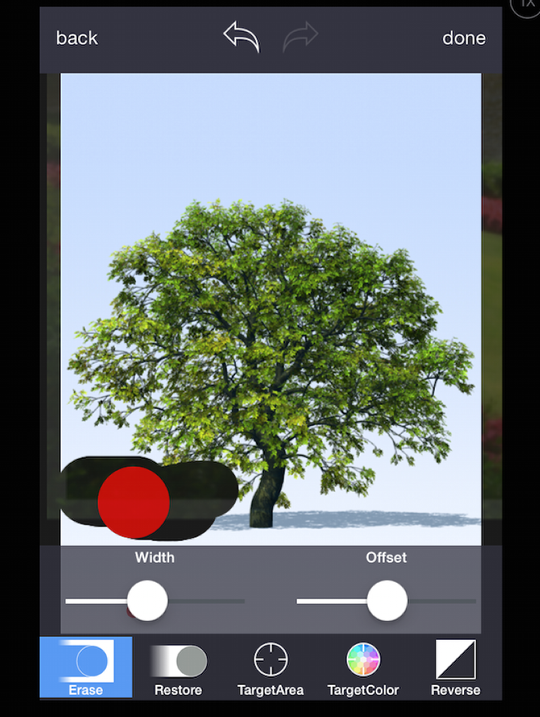
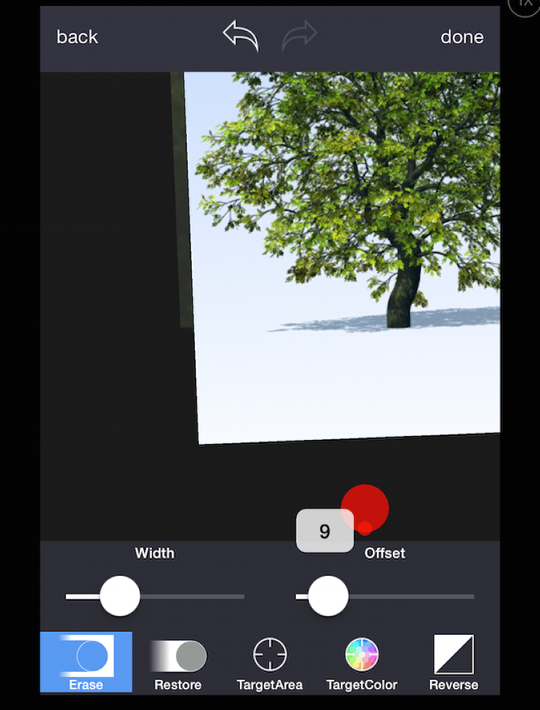
Unfortunately, the sliders are touchy. If you linger on the slider before moving it, then the brush starts to work. Instead of moving the slider, you end up erasing the layer, as I’ve done below. Just tap the Undo arrow at the top, then grab the slider and drag in one motion.
You can also pinch and drag the image so that it is not above the slider. That way you won’t erase something vital.
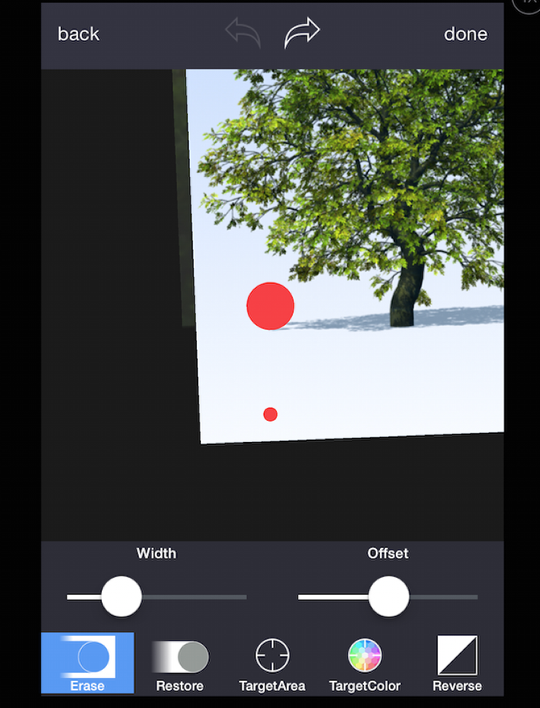
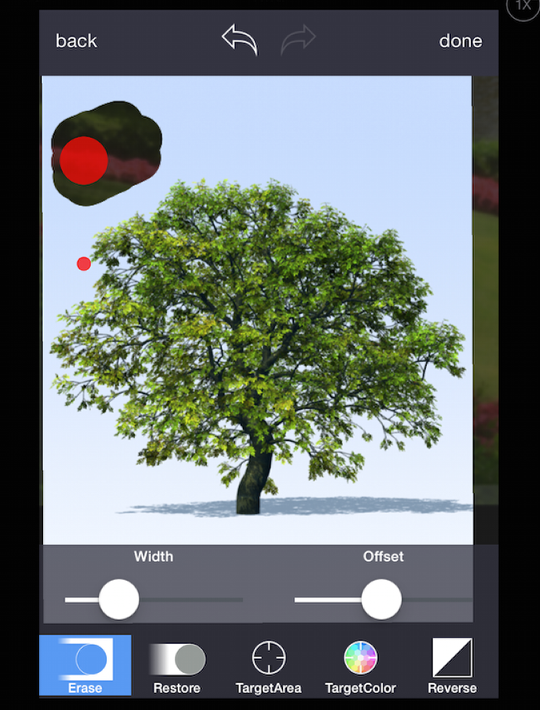
In the picture above, the small circle indicates where your finger is placed, and the larger is the brush size, offset from the finger. Below you’ll see what happens if you reduce the offset – the circles overlap.
Below you’ll see what happens when you erase – you can see through to a heavily darkened background. This can be troublesome if you’re trying to erase something the same dark tone as the background – it can be difficult to see.
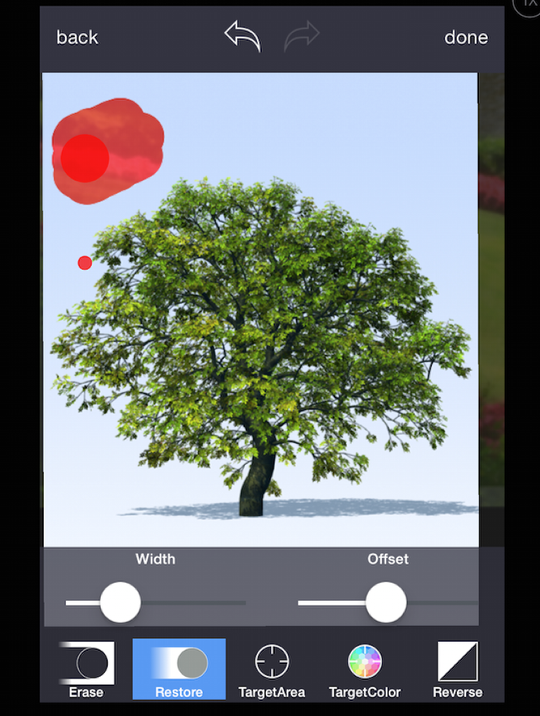
When you choose Restore, all previously erased portions of the image are overlaid with red. This shows you what is eligible to be restored.
In addition to the brush options, you have the color options. Target Area will erase all of a color that is contiguous. In the example below, I am touching a small blue area that is completely bounded by leaves. A magnifier with crosshairs opens up above my finger to help in selection.

As soon as I lift my finger, Layer Pic erases that section of contiguous color. If you look closely at the image below, you’ll see a dark area where once there was light blue.
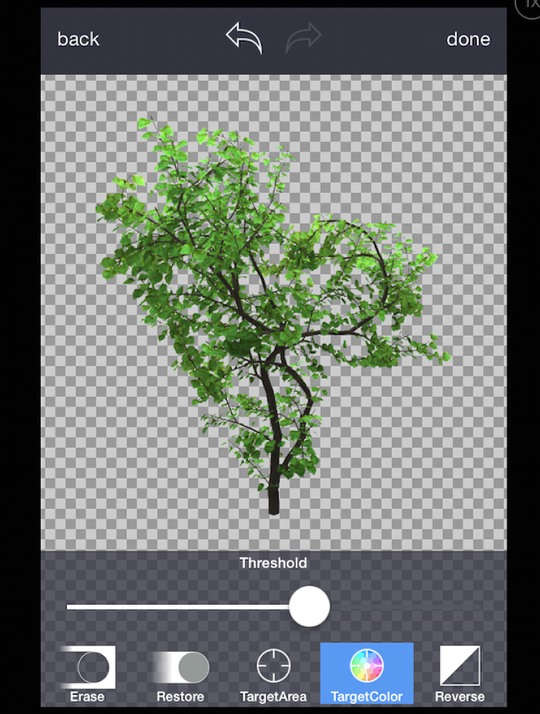
For this particular layer, the best choice is Target Color. Once again, the magnifier with crosshairs appears to help me choose a color to be erased throughout the entire image.
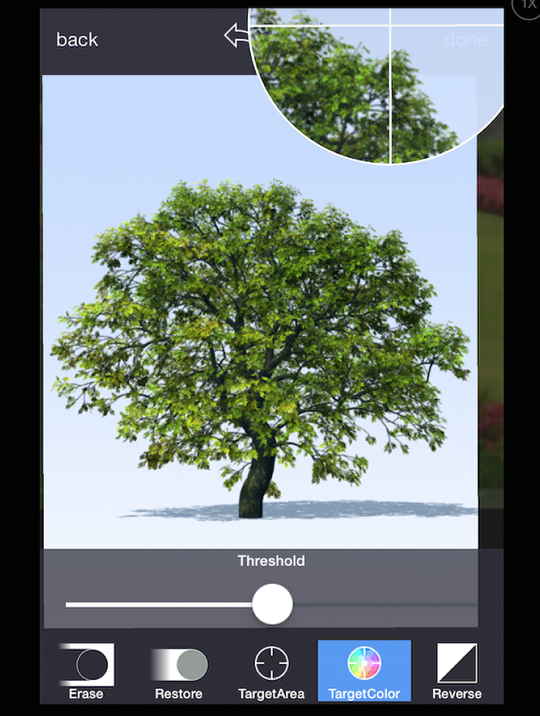
When I lift my finger, the light blue is gone! There is still a midtone blue, however.
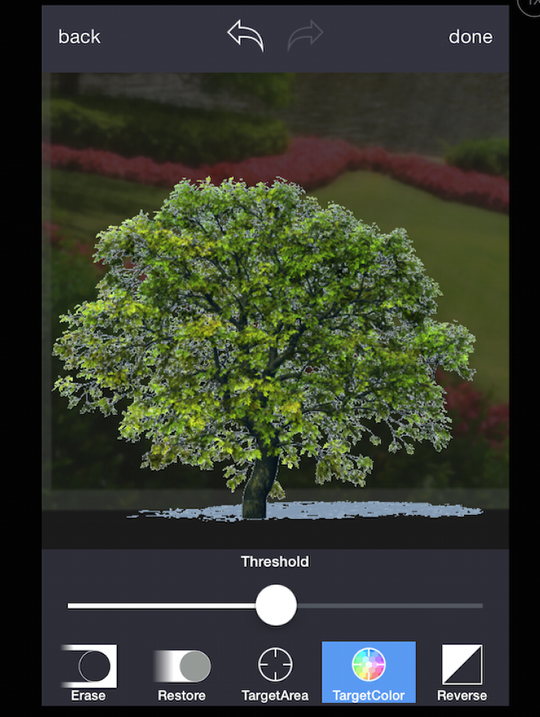
So I touch the midtone blue and get rid of that, as well.
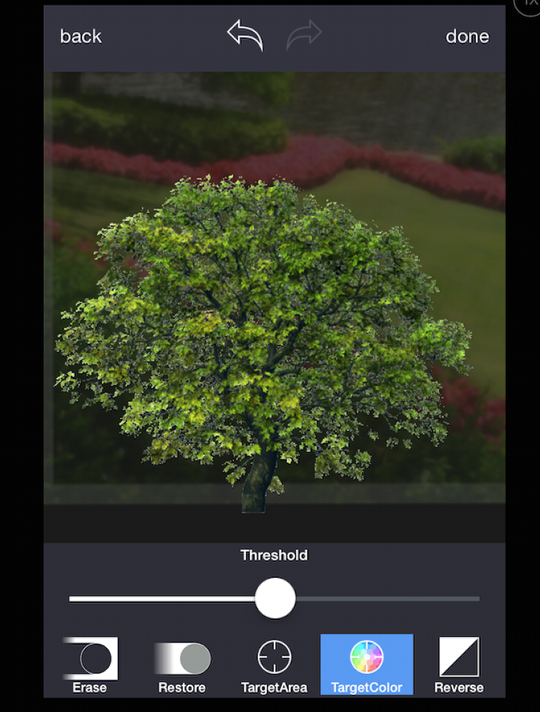
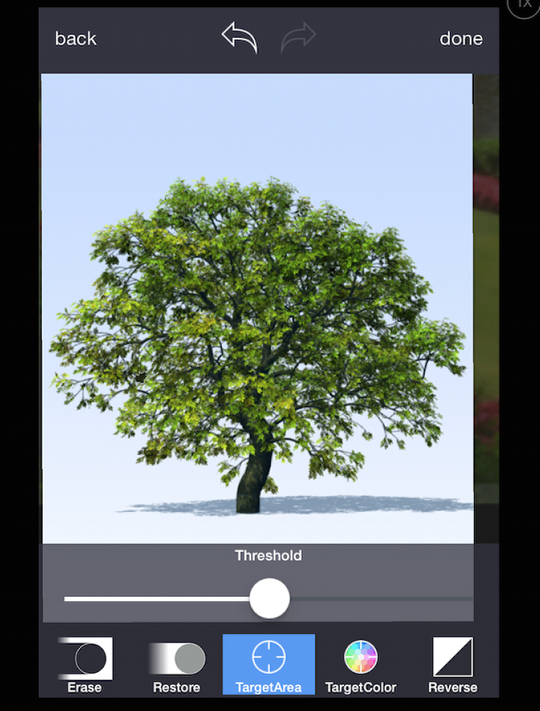
There’s still a blue fringe around the leaves. This is where the Threshold slider comes in. Raising the Threshold include more colors in the erasure – like the slightly darker blue fringing the leaves.
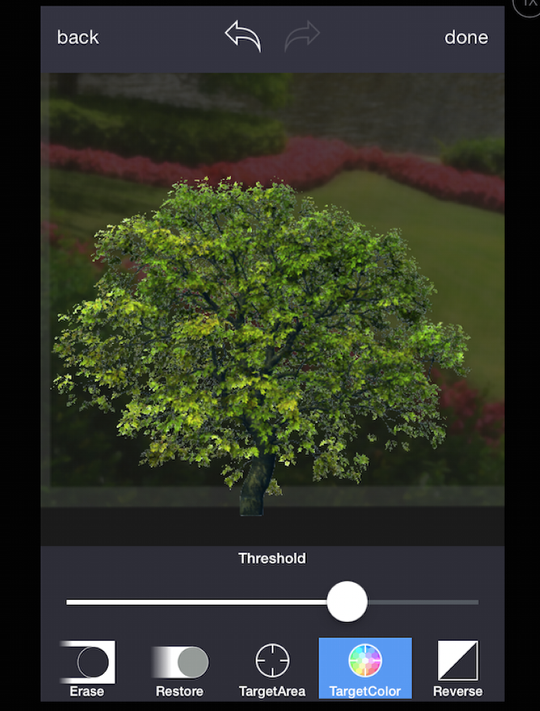
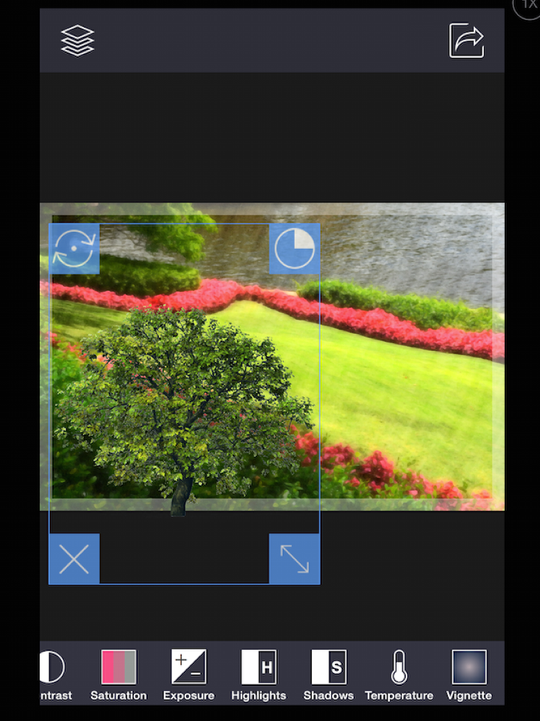
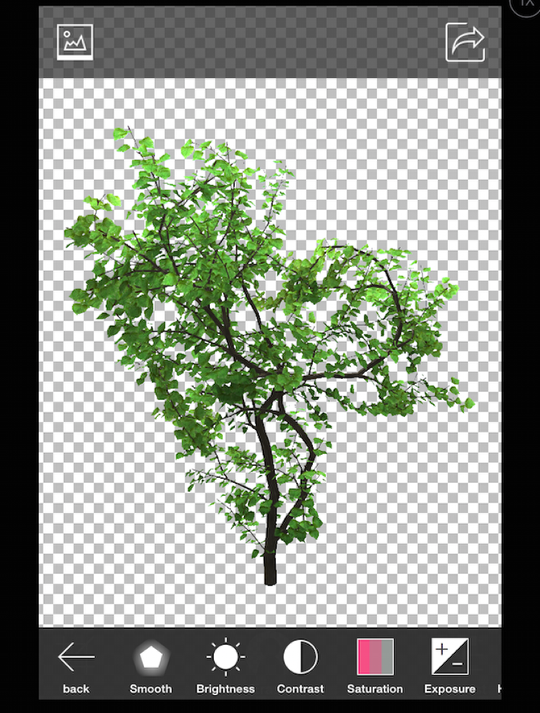
Tapping the Done button at the upper right returns your layer, with the background erased, to the background. Along the bottom of the screen you’ll see the options available under adjust, which impact the layer and not the background: Alpha (opacity), Smooth, Brightness, Contrast, Saturation and Exposure.
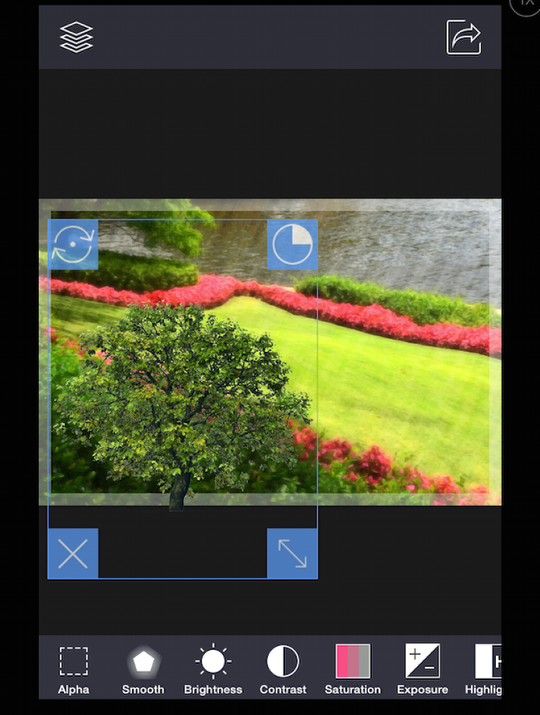
Also available are Highlights, Shadows, Temperature and Vignette. (Vignette is interesting, because it only shows on the unerased parts. In this case, t results in the outer leaves and the bottom of the trunk darkening. I don’t know how useful that is.)
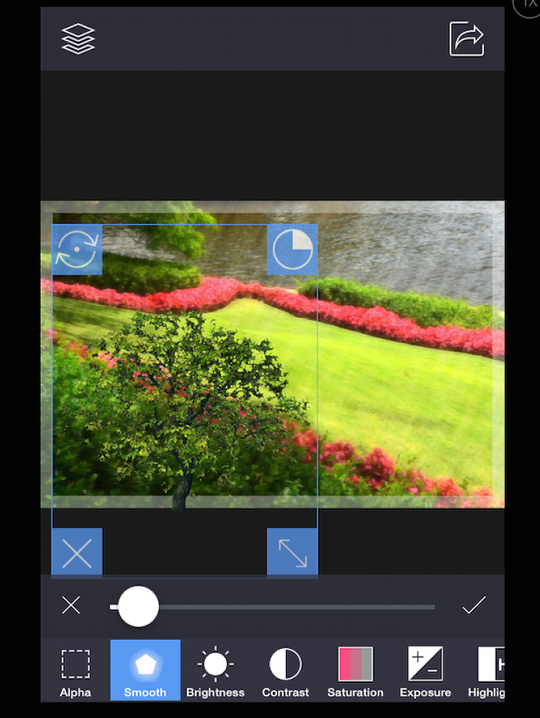
If you’ve got a jagged edge on your layer, it might not blend well with your background. Smoothing attempts to help that, but even the lowest settings eliminates leaves on our tree.
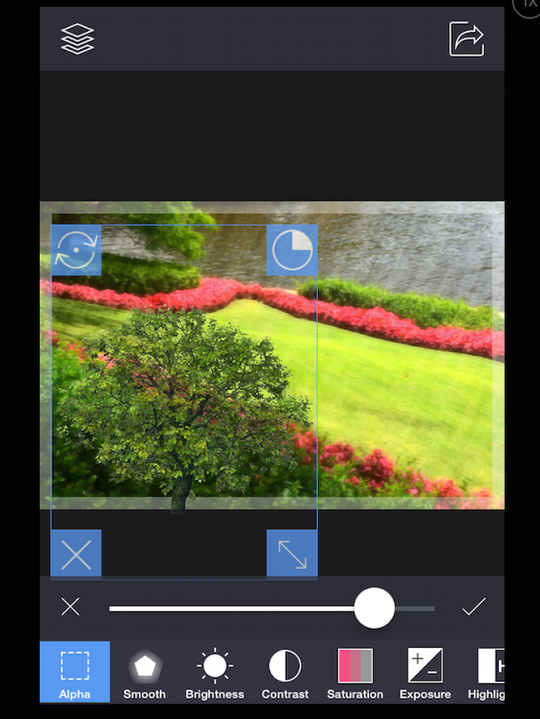
Another way to temper the edges is to lower the Alpha, or opacity, slightly. Remember to tap the check mark after moving the slider. Otherwise your changes will not apply.
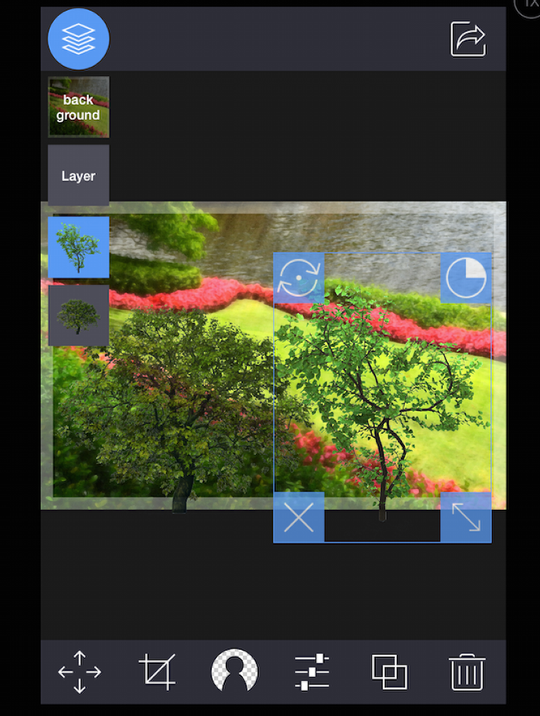
After lowering the exposure a bit, I’ve decided to add another layer. Tapping the Layer button gives us an additional choice now. The trashcan will delete all the layers, leaving only the background.
I load another tree made with TreeSketch.
In the image below, I’ve used Target Color with the Threshold raised to erase the background, just as I did with the first tree. I tapped the Layers button at the top left to show that, as you add layers, they are added to the top of the stack of layer thumbnails.
The button I call Layer Properties has five options: Lock the layer in place; make the current layer the Background; Duplicate the current layer; Merge the layers (not the background) into a single layer (I’m not sure of the utility of this function); and Save the layer as a PNG file with a transparent background.

If you Save the layer you get the following dialog box.
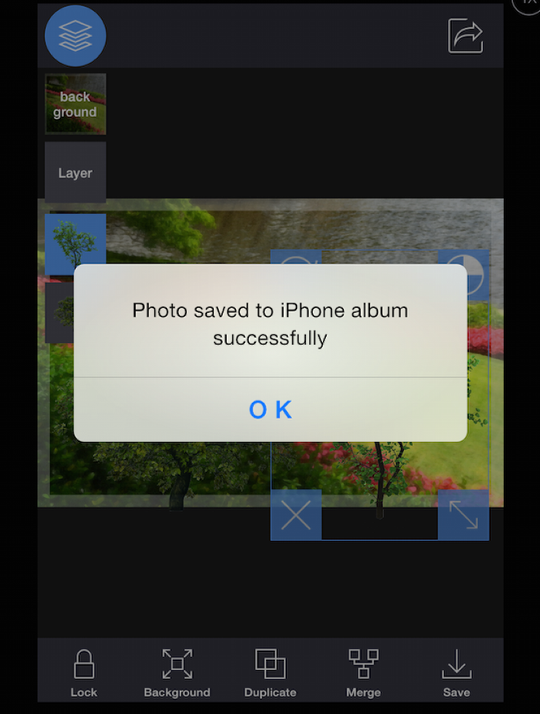
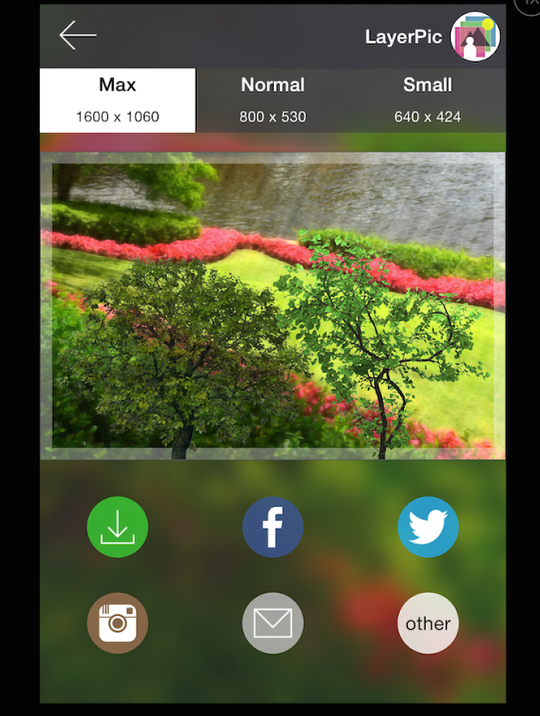
When I tap the Save project icon at the top right, the screen below is presented. Layer Pic does save at a fairly good resolution, but not at original size. The original background was 2048 pixels wide, not 1600.
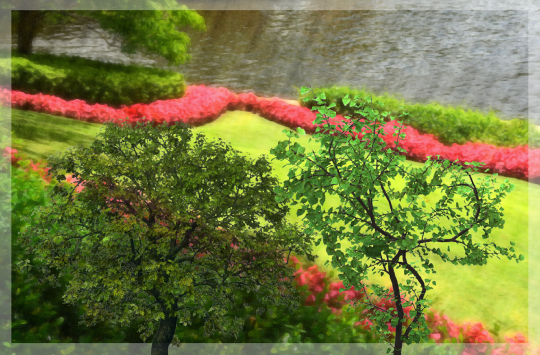
So here’s the result so far.
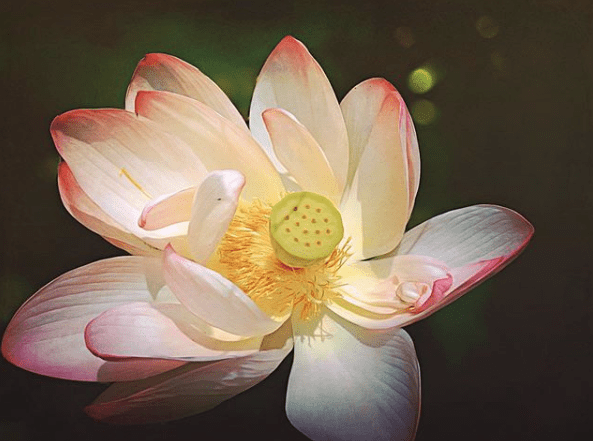
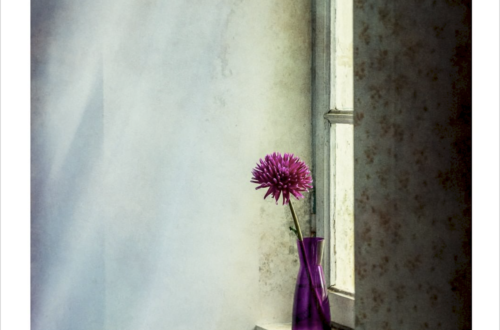
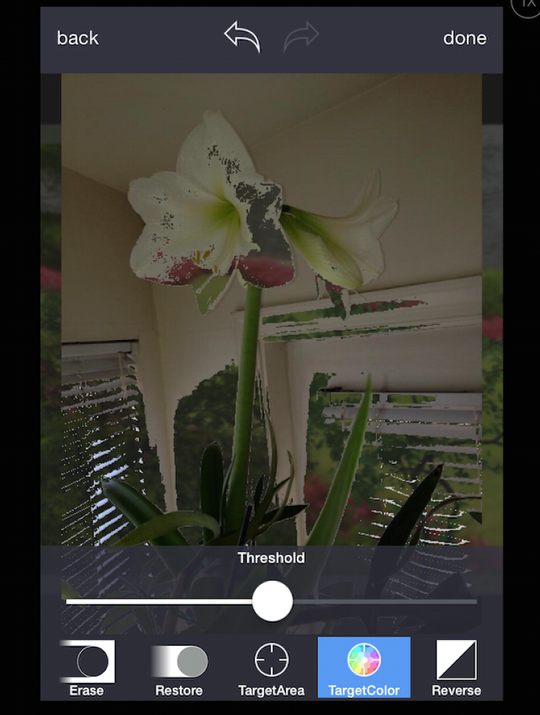
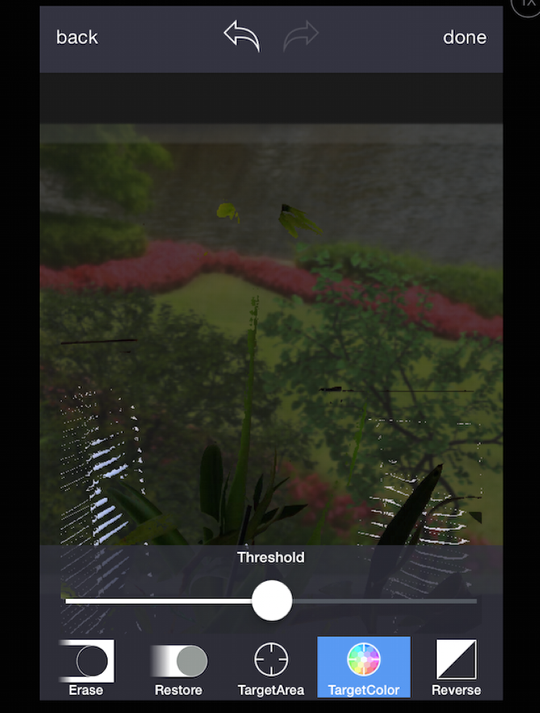
Some images, of course, do not have as clear a distinction between subject and background. Below I’m trying to use the original flower photo from last week’s tutorial, and started with a target color. The results are disastrous, taking out part of the flower as well as parts of the wall, door molding and blinds.
Next I put my crosshairs on a section of wall next to the rightmost bloom.
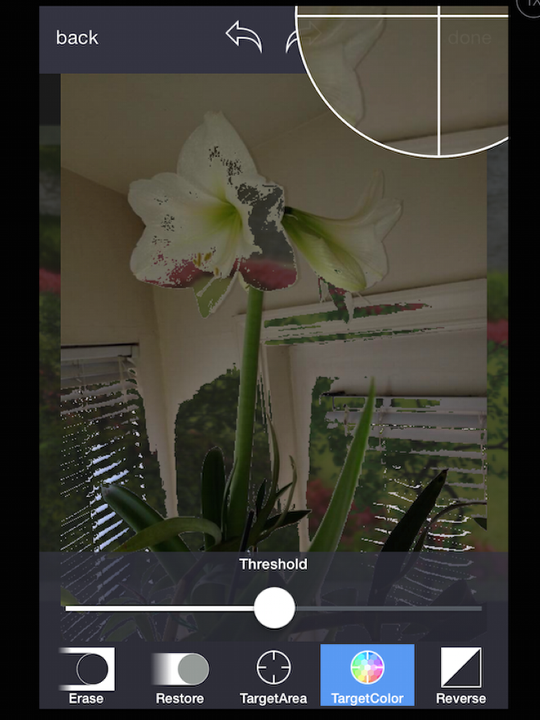
Well, that’s no good – that erased everything except part of the stems and the leaves.
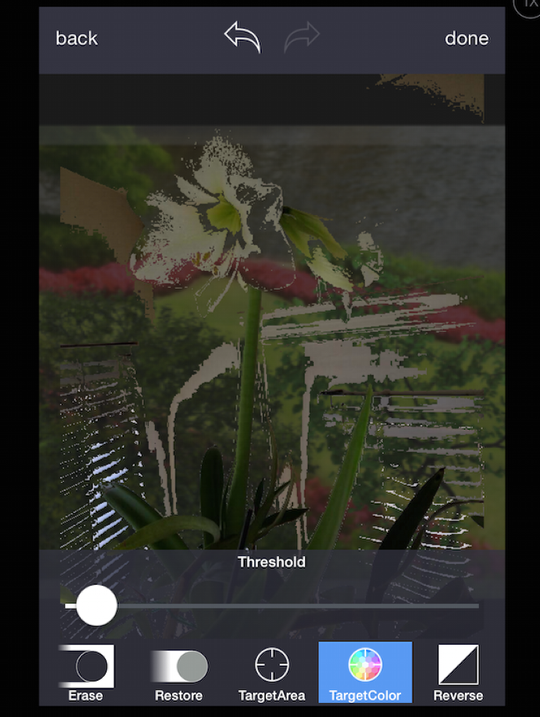
Even if I lower the Threshold to nearly nonexistent, that particular click takes out too much of the flower.
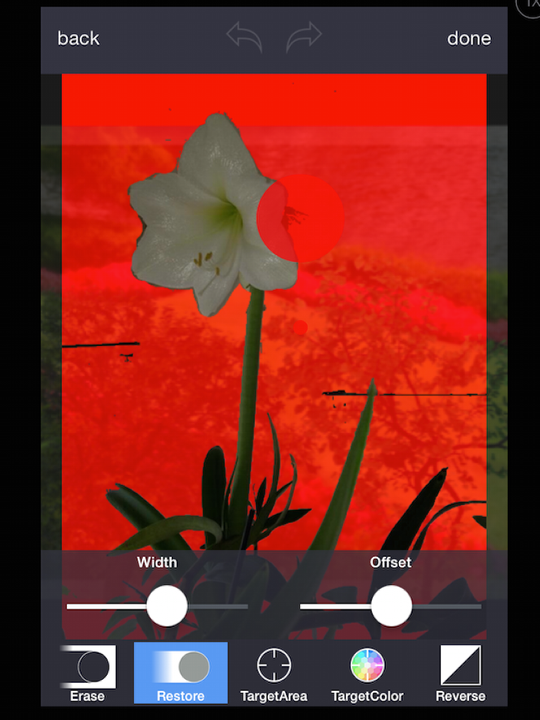
I could try to mask out the flower, then reverse the mask to remove everything else. When I use Target Color on the stem of the flower, it also picks up much of the shadow around the door. I thought it might be easier to use Restore to bring those shadows back. Once again, notice that when I select the restore tool, the removed portions are covered with red. The Restore brush removes the red and replaces it with the original layer.

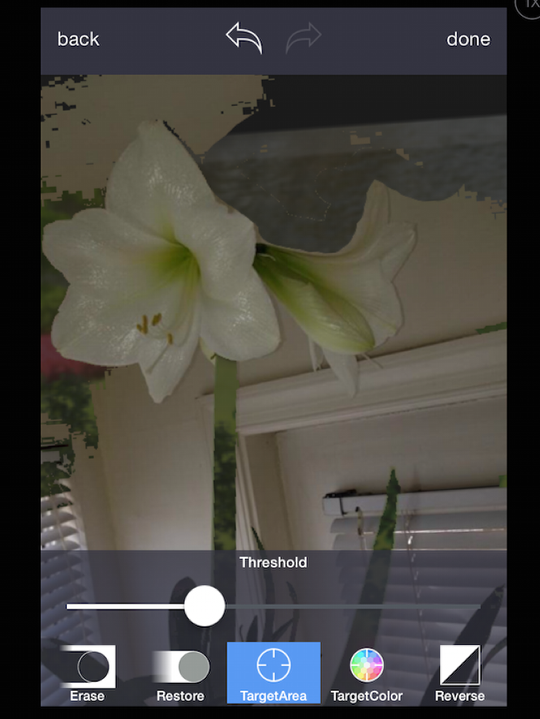
In the image below I used the Erase brush to erase close to the bloom, then erased out to the edges to leave a large portion of wall behind. Then I used Target Area on the remainder, since that would stop processing as it got to the erased portion. You can see that some of the Target Area was left behind.
So I kept using Erase and Restore until the background was erased and tapped Done. But when I saw the finished layer, I realized it was not finished. I hadn’t worked on the rightmost bloom. So I wanted to Restore that bloom.
But Restore only works within the current erasing session. As soon as I clicked Done, I was barred from Restoring any of the erased portion. In the image below, I’ve got the Restore brush over the right bloom, and nothing’s there to Restore.
Instead I Erased what remained of the right bloom, along with some stray dark portions that I didn’t see against the darkened background. I also used Smooth to get rid of the jagged edge, but it left the edge of the stem fuzzy.
Background Eraser works the same way as Layer Pic, only without the layering capability. It is only capable of creating PNG files with transparent backgrounds. These PNG files can be taken into other apps and used as layers there. The advantage of using other apps for layering is that you can change the blend mode of the layer. Layer Pic does not use blend modes.
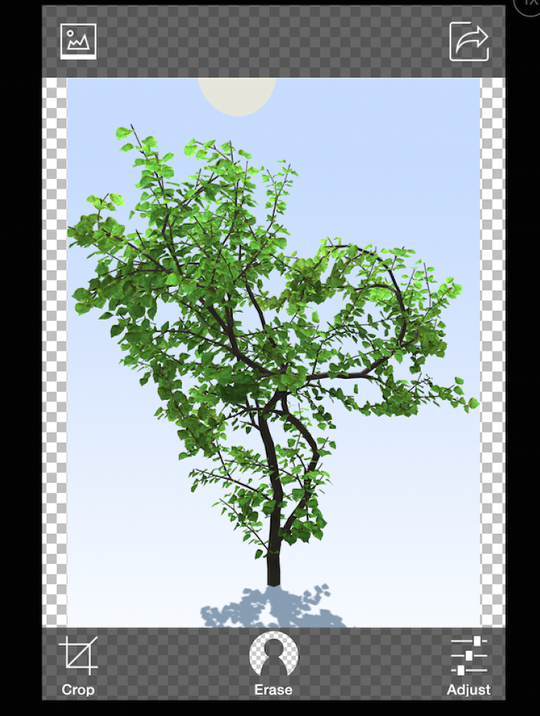
The initial screen allows you to import an image. Then, you are given the options of Erase and Adjust.
The Erasing functions work just the same as in Layer Pic. You have Erase and Restore, Target Area and Target Color.
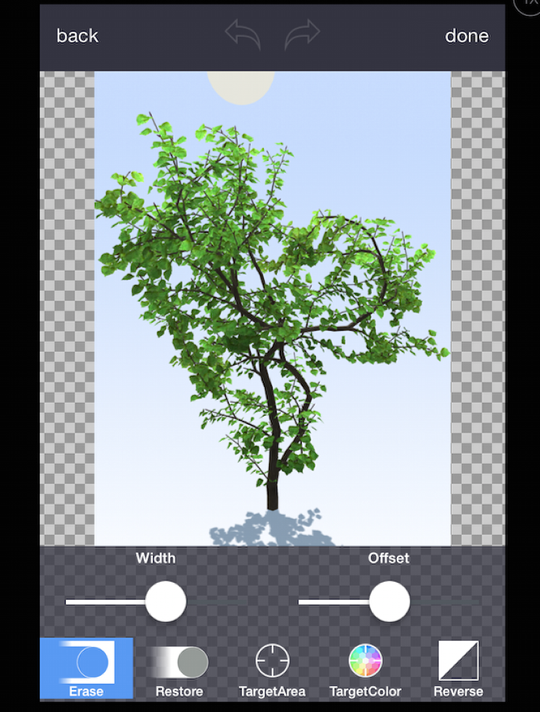
Once again, I choose Target Color, tap in two different places, and up the Threshold when tapping the tree shadow.
The Adjust features are also the same, except that Alpha (opacity) is not available. Opacity should be adjusted in your layering program.
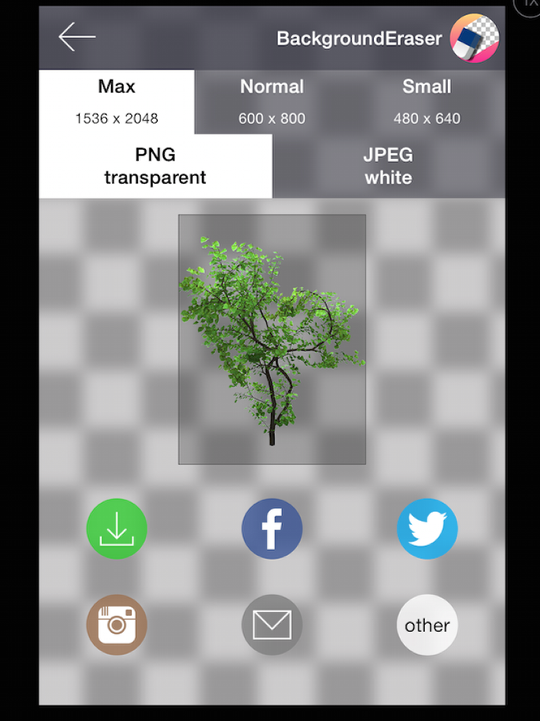
You can save your image as a PNG with a transparent background or as a JPG with a white background. Background Eraser seems to save at the original resolution.
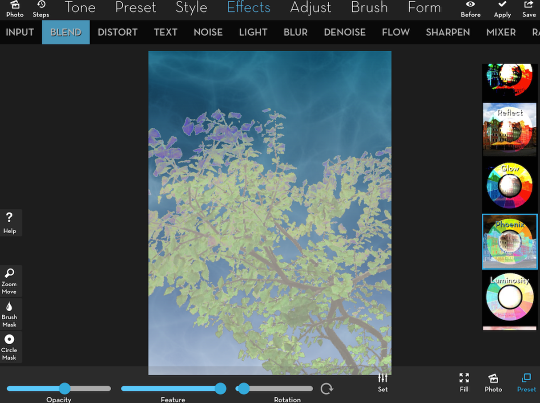
Any app that handles PNG files correctly can then be used for layering: Image Blender, Photoshop Touch, and Leonardo are examples of these. Below I’m using iColorama (Effects>Blend) to add the tree in Negation blend mode.
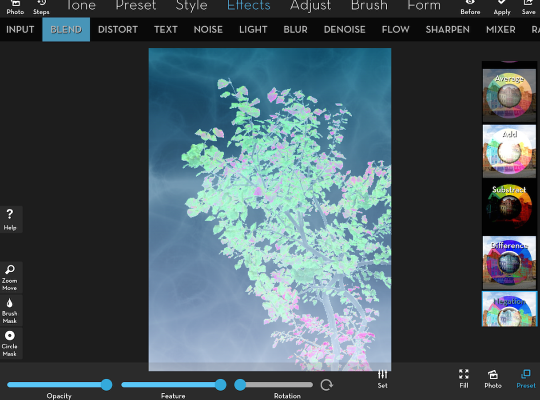
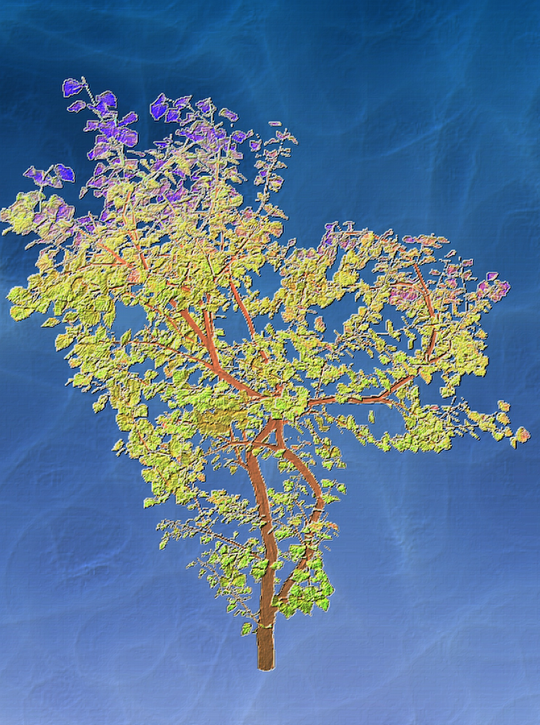
I changed the blend mode to Phoenix and resized the tree, then adjusted Rotation and Opacity.
This is what I decided on: Phoenix blend mode, followed by Effects>Raise>3 and Adjust>Channels>1.
Layer Pic and Background Eraser can be relatively quick and easy tools for collage. If you’re working seriously, I find Superimpose to be a much better solution, and far less tedious for complicated extractions. Only you can decide whether these apps work well for you.
You can use Layer Pic/Background Eraser to replace the sky in your photos. I would have to be more careful if I wanted to use the following image of Epcot’s Mission: Space anywhere – notice the top center edge of the building, the sweeping point, and the tree at the left of the image. Further refinement of the extraction would be necessary.

Here I’ve done a quick replacement of the contents of the window with the same sky. Notice how my overdoing of the Smooth effect makes the edge of the window out-of-focus.

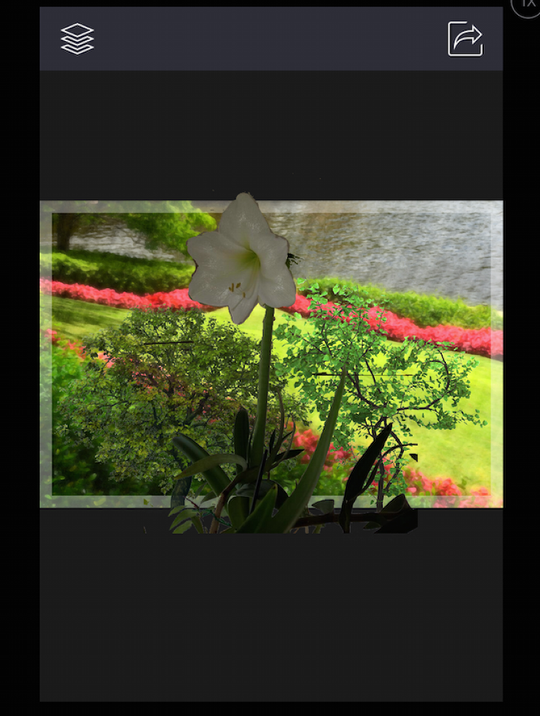
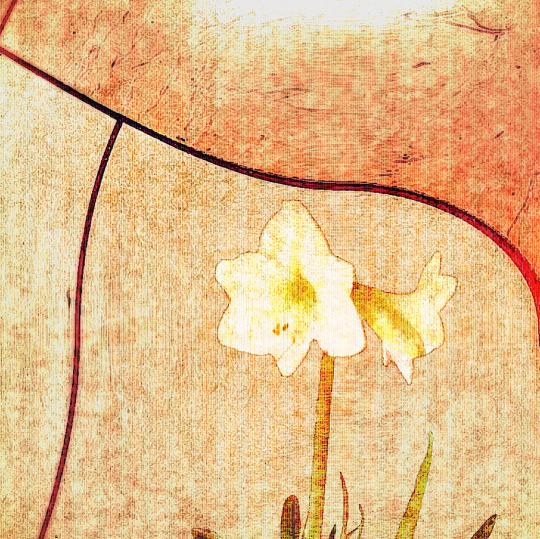
Finally, here’s my properly extracted flower in Vivid Light blend mode over an abstract of mine. Enjoy!
Jerry Jobe
Never content with just scratching the surface of what an app can do, Jerry Jobe decided to pass on what he learned about imaging apps to others. He’s constantly trying to figure out just what tools other artists have used, and trying to incorporate them into his own work, in an attempt to find his style. He’s written tutorials on over 145 apps so far, which you can find (along with his Song of the Day entries) at http://enthusiasmnoted.wordpress.com/ He lives near Atlanta, Georgia, where he also finds a creative outlet in acting and directing in community theater.