Final Cut Pro X, Motion 5, Compressor 4 – Apple Releases New Software To The Mac App Store
Apple have steathly unleashed Final Cut Pro X, Motion 5 and Compressor 4 to the Mac AppStore. "Final Cut Pro X is the biggest adance in Pro editing since the original Final Cut Pro", said Philip Schiller – Apple’s Senior Vice President of Worldwide Product Marketing.
Take a look at these awesome features…
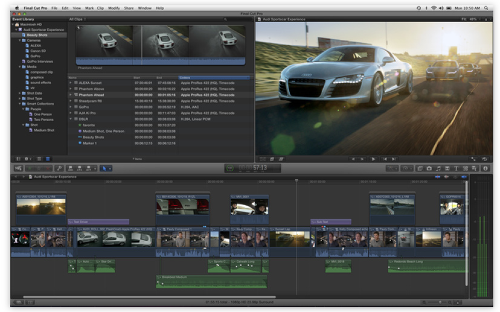
Rebuilt from the ground up to meet the needs of today’s creative editors, Final Cut Pro breaks free from the restrictions of old-fashioned timeline tracks. A new, dynamic editing interface lets you experiment freely while working with extraordinary speed and precision.
With a visual simplicity that reveals powerful professional tools just when you need them, the Magnetic Timeline in Final Cut Pro offers an exceptionally fluid, flexible way to edit. Assemble shots with ease as clips “magnetically” close up to eliminate unwanted black gaps in the timeline. Similarly, clips move out of the way to avoid clip collisions and sync problems, so you can focus on creating your story. Interactive animations show you exactly what’s happening in the timeline as you work, so you can easily try out new ideas.
Clip Connections are an easy way to place clips such as B-roll, sound effects, and music in the timeline so that they all move together as you make changes — even in the most complex projects. Final Cut Pro automatically creates a Clip Connection when you drag a secondary element to the timeline.
Whether you’re doing a fast assembly or precise trimming, you can edit with confidence, knowing that Clip Connections keep everything together. It’s particularly easy to reorganize your story as you work, because you can move a section of your project in a single step. Clear visual connections make it easy to hand off a project to another editor or to resume editing at a later date.
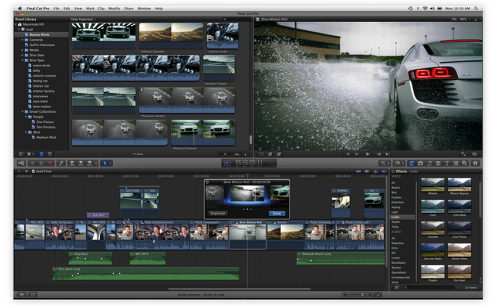
With Compound Clips, you can group a complex set of elements and collapse them into a single clip. This removes clutter from the timeline and creates a simplified version of the segment that’s easy to move or duplicate. Reuse a Compound Clip in other projects — for example, for a unique sound design with layered sound effects. Or use a Compound Clip to add an effect to multiple shots with a click. Step into a Compound Clip or expand it at any time to make changes to individual elements.
The Magnetic Timeline improves on traditional ways of trimming, including ripple, roll, slip, and slide edits. If you need additional control, double-click an edit to open the Precision Editor and make trims directly in the timeline. The Precision Editor expands your view of the edit point so you can see both used and unused portions of your clips. Then skim entire clips and adjust edit points with a click.
With the unique Auditions feature, you can collect multiple alternative shots at a single location in the timeline and quickly cycle through them in context. Test different B-roll shots, different reads of the same lines, different color grades for the same shot, or different effects. Or use Auditions to create multiple versions of your project for different deliverables and venues. It’s easy to create an Audition — simply drag shots of any length to the same place in the timeline and choose “Add to Audition.” As you try out different shots, the Magnetic Timeline keeps everything in sync.
Motion 5
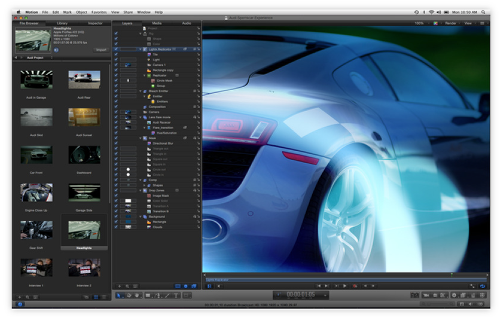
Motion lets you create sophisticated moving images and other visual effects on the fly and in real time. Simply drag one of Motion’s built-in behaviors (such as Spin or Throw) or filters (such as Glow or Strobe) onto an object in the Canvas and watch your composition spring to life—twirling, zipping across the screen, pulsing with luminescence, or any of hundreds of other effects.
You can also animate the traditional way, using keyframes, but Motion behaviors give you instant feedback, so you can sit with your clients, art directors, or friends and interactively design a motion graphics project on your desktop. You want a title to fade in, do a little shimmy, and then slide out of view? Simply click Play, then drag the Fade, Random Motion, and Gravity behaviors onto the title in the Canvas—no preview rendering time is necessary.
Whether you need simple text effects like lower-thirds and credit rolls, a complex motion graphics project for a show intro or television commercial, or more advanced image manipulation techniques to stabilize footage or composite green screen effects, Motion has a flexible tool set to meet your motion graphics needs.
The Motion interface has been redesigned specifically for Final Cut Pro editors, with a familiar look and feel that makes it easy to switch between the two applications. A new single-window layout puts all the tools you need at your fingertips, and redesigned icons make it easy to identify options at glance. The darker look of the new interface is designed to enhance color perception as you work with any combination of video, stills, and motion graphic elements. Many filters now include onscreen controls for direct, intuitive manipulation of effects. And keyframe editing is much more accessible thanks to a new view that displays the Keyframe editor below the timeline.
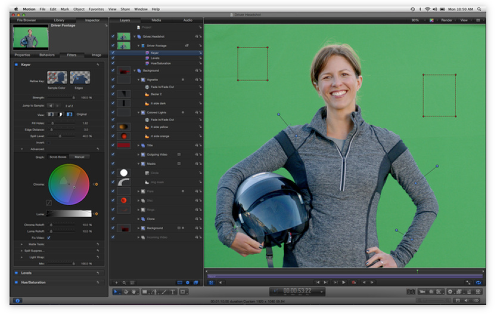
Motion features new intelligent templates that let you work quickly and flexibly with high-quality effects, titles, transitions, and generators as you edit in Final Cut Pro. Create Smart Motion Templates with any combination of single parameters and rigs, which let you control a group of parameters with a simple slider, pop-up menu, or checkbox. For titles, define fixed durations for intro and outro sections, and Final Cut Pro adjusts the title body to fit the timing in the middle. Or set up templates with multiple aspect ratios to have Final Cut Pro automatically use the correct layout based on the frame size of your footage. Publish templates to Final Cut Pro simply by saving them.
Save steps when you’re working with a large number of parameters. Rigs let you adjust related parameters with a single control — a slider, pop-up menu, or checkbox. For example, change the colors of all the objects in your project in one step, or apply a complicated logo to a scene with a click. Set up rigs with drag-and-drop ease and change them at any time. Because rigs let you switch quickly among options in real time, they are ideal for Smart Motion Templates used in Final Cut Pro.
Compressor
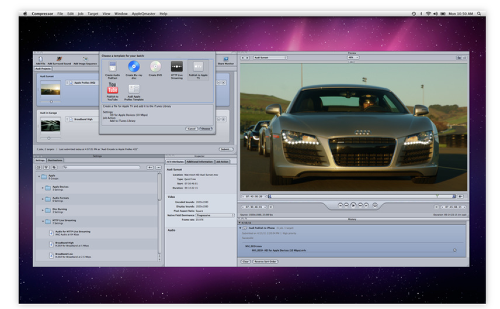
Compressor offers new features that make it fast and easy to customize any of the export settings built into Final Cut Pro X — or create entirely new delivery settings.
For custom export options, send your Final Cut Pro project directly to Compressor and choose from a wide array of codecs, sizes, frame rates, and other parameters. Save your customized or new settings, and they instantly appear in the Compressor settings menu in Final Cut Pro. You can share these settings with other Final Cut Pro editors, even if they don’t have Compressor installed on their workstations.
Distributed encoding uses available capacity in other cores and other computers to make encoding go faster. You can now designate computers as encoding nodes without opening an additional application. To get started, install Compressor on your own Mac or any other Mac on your network and activate it as a node for distributed encoding.
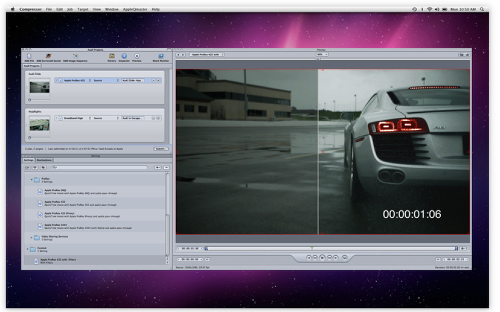
Compressor now supports HTTP live streaming, with new export settings that let you encode your media in a single step for streaming web playback on Apple devices and Mac computers. All the files you need appear in a folder, ready for upload to your website.
Find the preconfigured settings you need in just a few clicks. Choose from folders including Apple Devices, Disc Burning, HTTP Live Streaming, and more. Standardized plain-English labels and descriptions let you identify the setting you need at a glance.

