iPhone Photography Tutorial – How To Create A Stunning Still Life Image
Hopefully you will recall our ‘A Day In The Life Of Veevs’ article that we recently published, if not, you can read it here. We were so impressed with Veevs’ images and we know so many of our readers were too, that it has inspired us to launch another new section on theappwhisperer.com.
This new section contains iPhone photography tutorials, and we launched it with the help of Veevs a few days ago. The first tutorial we published explained how to recreate Veevs’ wonderful pastel effect seagull shot. If you missed that, you can read it here.
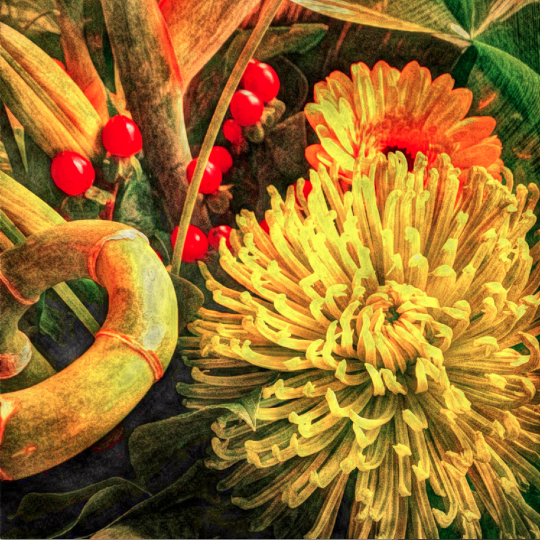
In this tutorial with help from Veevs we have retraced the steps she took to create the wonderful still life image below, entitled ‘A Bunch’. The original image was taken with an iPhone 4S and the editing was completed on an iPad.
Read this easy to follow tutorial and see if you can too create a similarly stunning shot too.
(We have put links to the iTunes app store of every app that was used, just incase you feel inspired enough to download them).
Final Image
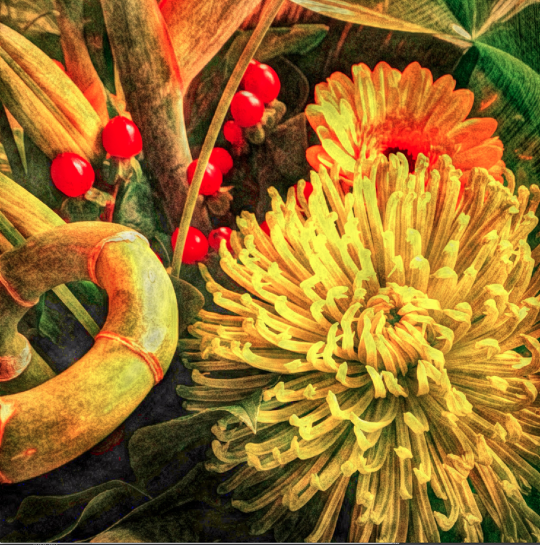
The image above is the final image, the one that we are going to show you how to recreate.
Original Photograph
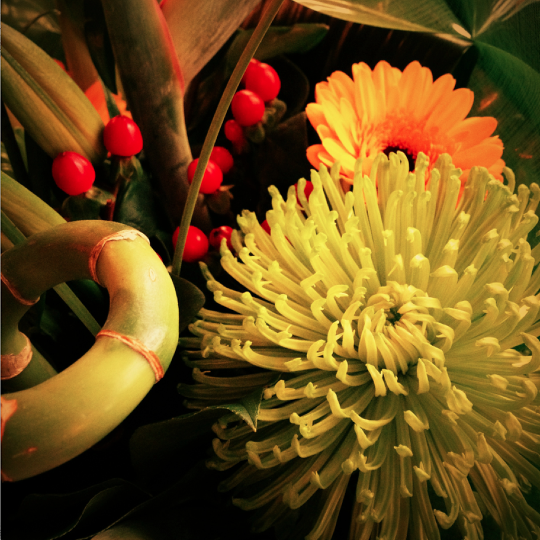
This is the original unedited initial image. Veevs knew that she wanted to use Painteresque with this image. But sometimes Painteresque’s results are too dark, so firstly Veevs uploaded the image into Camera+ and ran the Clarity Filter.
Camera+
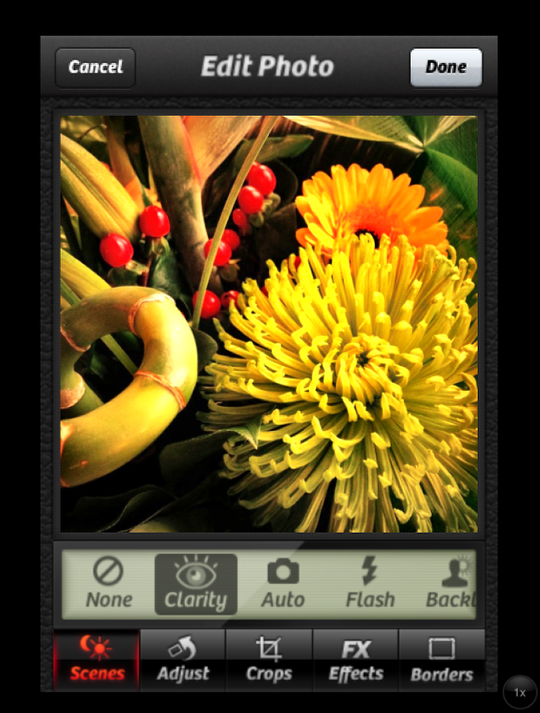
To do this, open the image in Camera+, Select Scenes. Then click on Clarity and click Done.
Finally, Save your image as (Image A).
Vivid Filter
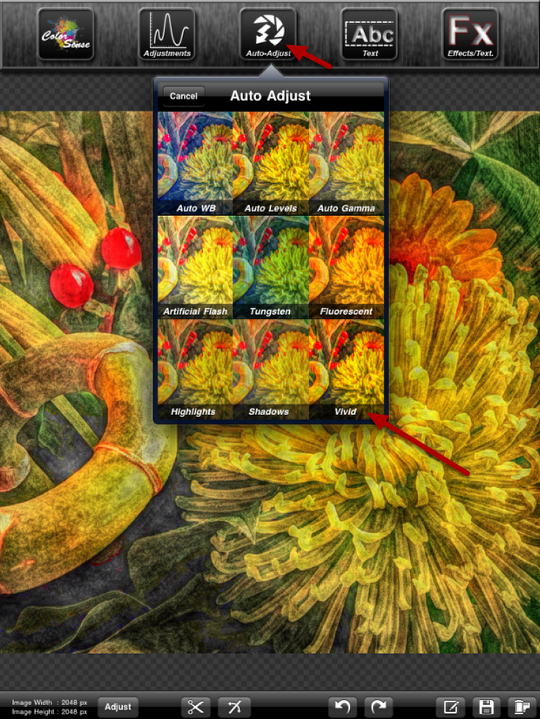
Next, open image B in Iris Photo Suite. In this example, Veevs did not need to resize the image as it was already at 2048 px square.
Veevs likes to brighten her images a little, so she selected Auto Adjust, then selected the Vivid filter.
Adjustments
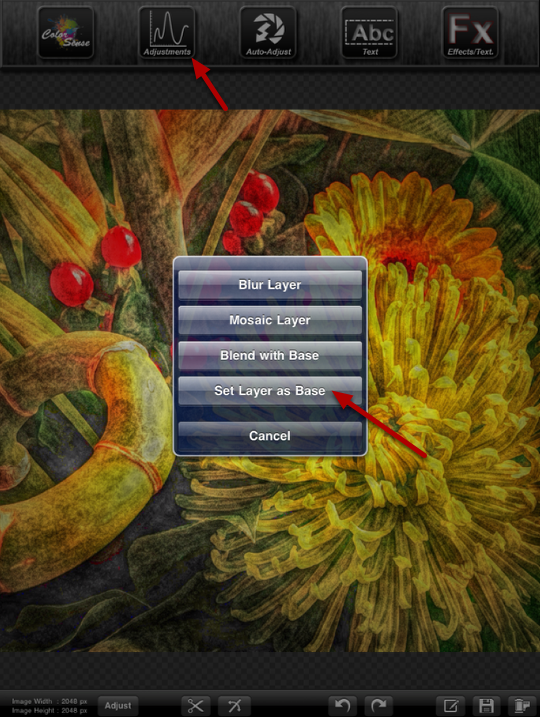
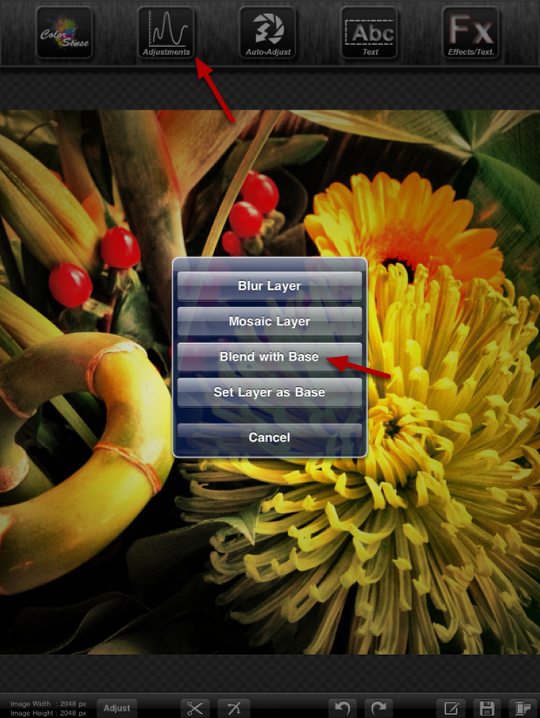
Next, whilst still in Iris Photo Suite, click on Adjustments > Layers > Set Layer as base – then click ok.
Image A
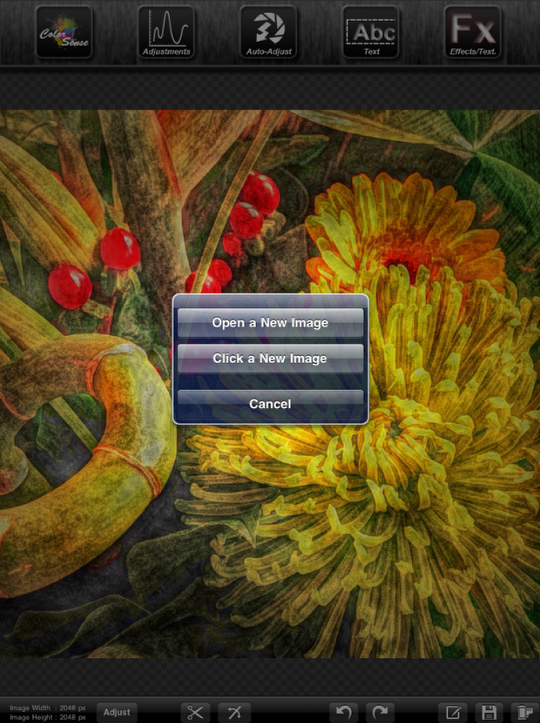
Click on Open Image and open up Image A.
Blend Modes
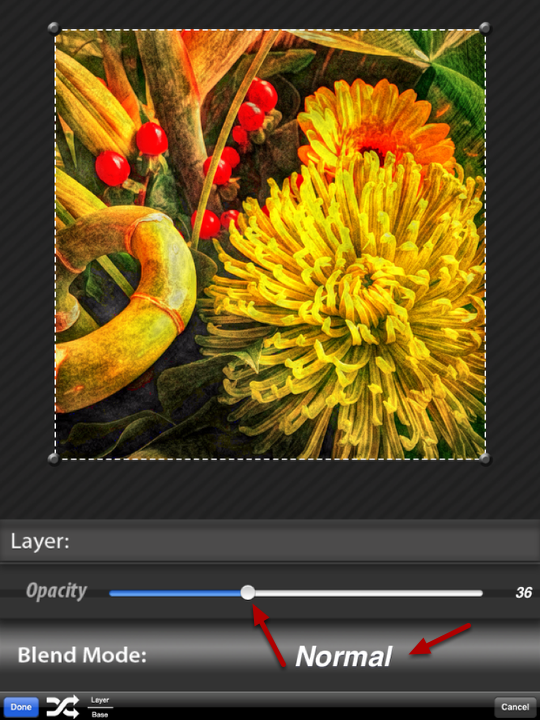
Next, play around with the different blend modes and use the opacity sliders to get a look that you like.
In this example Veevs used Normal and lowered the opacity to 36. Click on Done.
Draw Mask
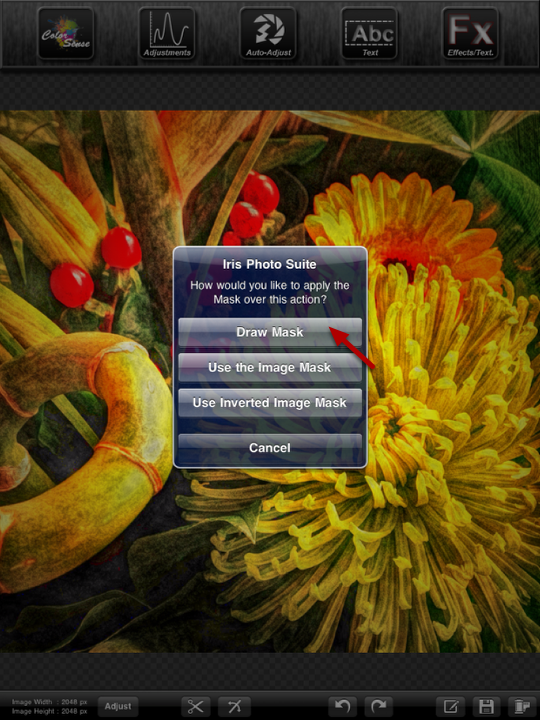
Veevs does not like to apply the filter to the whole image so her next step is to mask parts of the filter from the image.
Click on Draw Mask.
Final Image
Lower the brush size and the opacity and click on the paintbrush to brush off the filter.
Use single finger to paint the mask and two fingers to PAN-ZOOM into the image.
If you brush too much off use the eraser to brush it back on again.
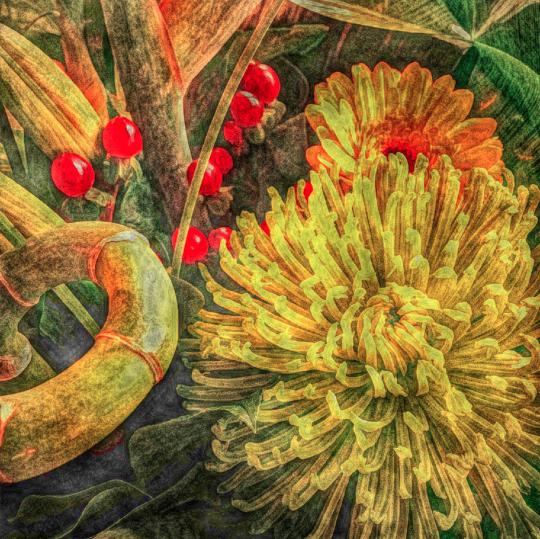
Once you are happy with the results click on the check mark to accept, then save your image.
And here is that awesome image again. We hope you successfully managed to follow that tutorial, please send us your similar examples, we’d love to take a look.


2 Comments
Kim martino
Tutes now?! Yay!
Jana Holden
Veevs, you’re simply amazing! I love these tutorials! This will be so fun to follow while trying to learn iphoneography! TFS!