Color Lake Tutorial – Creating A Digital Collage
A new app in my collection is Color Lake that claims you can…”create your own magic with natural effects.” And indeed you can…adding ripple effects along with rain and snow. You can also adjust the overall tone of your image using several filters built into the app.
In this tutorial I do use several other apps to first put together a simple collage that is then tied together and enhanced with the wonderful effects provided by Color Lake! Let’s get started…
About The Author

David worked at a truck stop and as a janitor to put himself through college. A couple of years at a small ad agency convinced him that wasn’t what he wanted, so after picking up an MBA he became a banker, managing other people’s money. Twelve years of this showed him that this wasn’t what he wanted either…so it was back to grad school.
This time, with a MEd in Elementary Education in hand, he became a teacher. Fourteen and half years…and it was time once again for a change. So now he is giving his "art" a chance. David’s work expresses his life experiences and his take on things around him . He is always surprised by what he comes up with and invites you to come along for the ride!
David has a wonderful website and within it he curates ‘The Recipe Book Project’. where he invites readers to particpate and share their mobile images. Take a look here to find out more.
Final Image
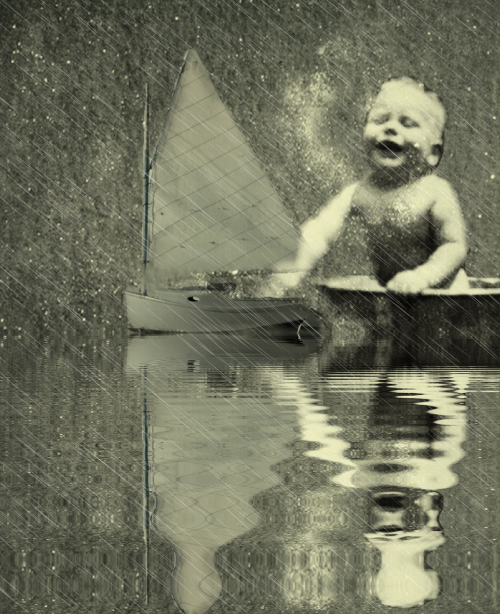
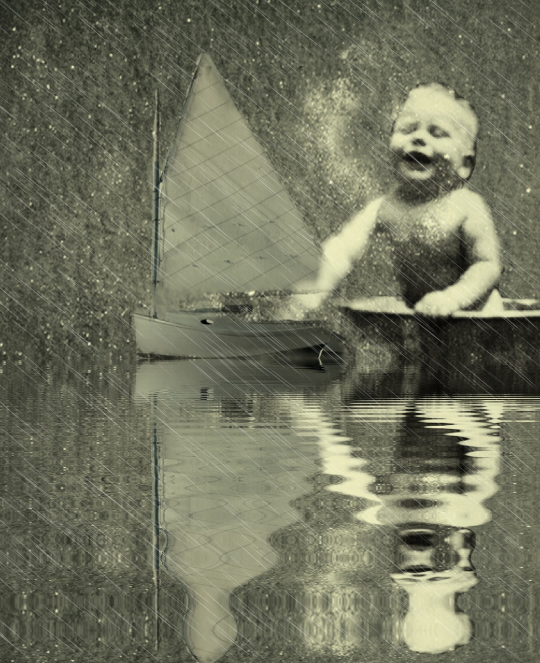
This is the final image, the one we’re going to show you how to create.
Step 1
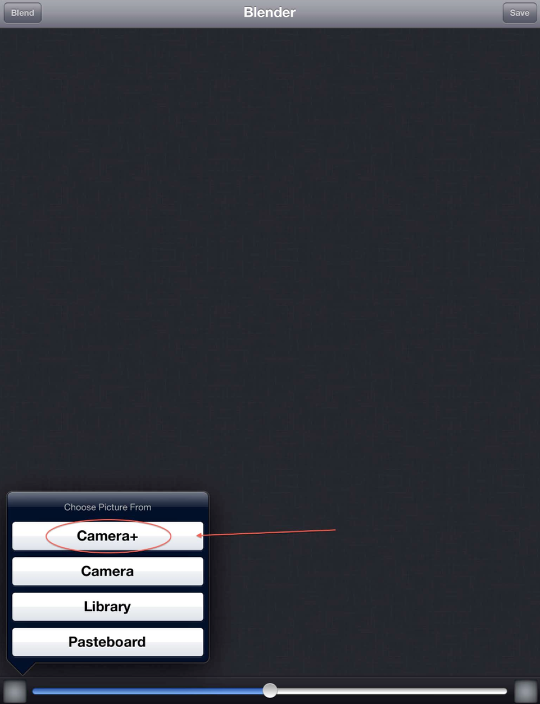
I needed a simple background to build my collage and rather than going to my files, once I opened Image Blender, I chose Camera+ to take a quick snap of my wall.
Step 2
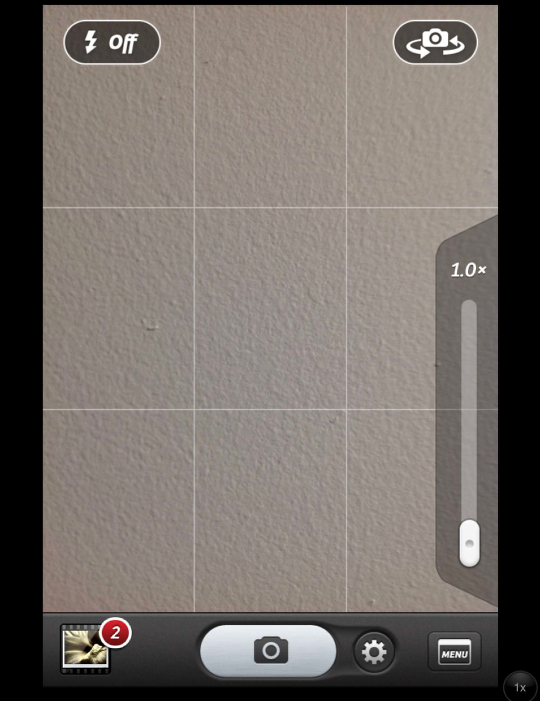
Nothing fancy here.
Step 3
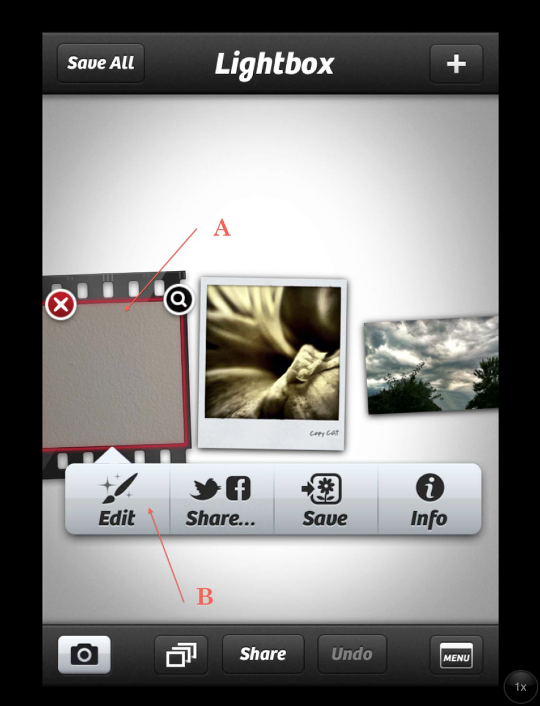
Opening Lightbox, I chose my wall pic and clicked on Edit
Step 4
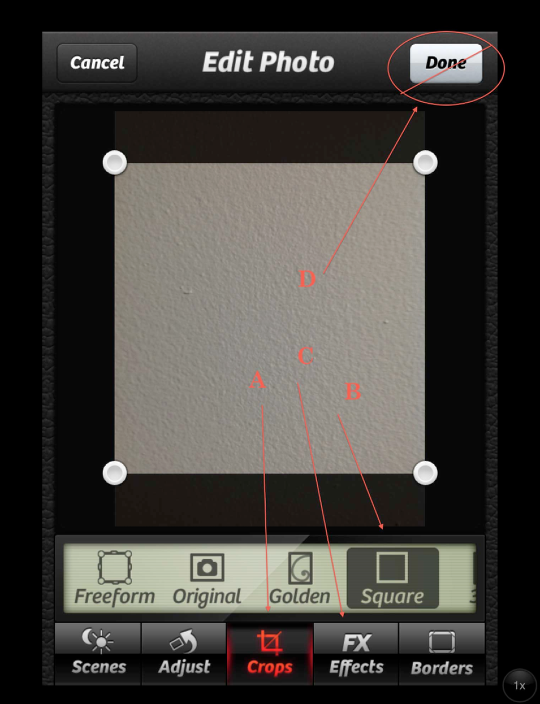
Clicking on Crop (A), I chose “Square” (B). This done I then clicked on FX Effects. (C). (Just a reminder….don’t click on Done (D) until you’re totally finished. Otherwise you have to start all over!!)
Step 5
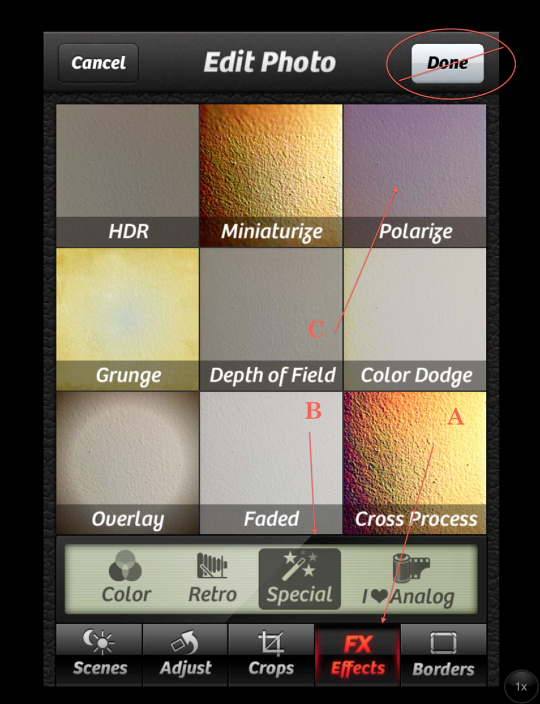
In FX Effects, I picked “Special” (B), then “Polarize” (C).
Step 6
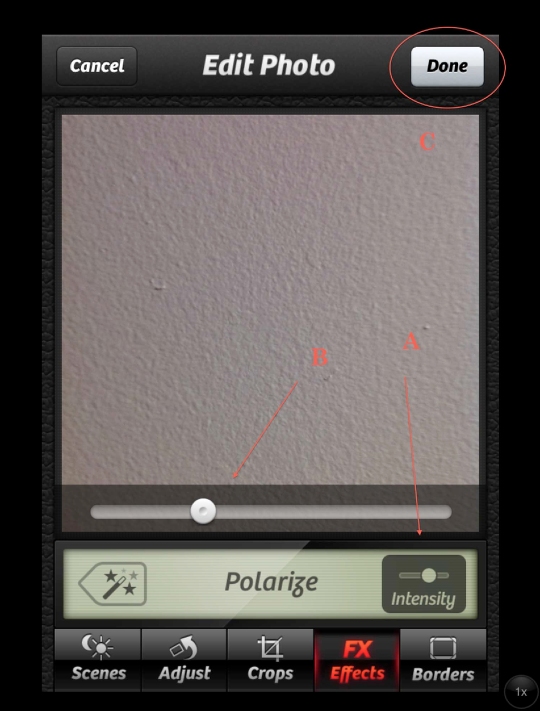
Using the slider bar, I adjusted the level of Polarize until I achieved an acceptable background for my collage. With this, I clicked “Done”. Camera+ automatically closed and my newly created background appeared as the background layer in Image Blender! Time to put my collage together. (I’m going to move through these steps quickly. If you need more information on using Image Blender, check out my recent Image Blender tutorials!)
Step 7
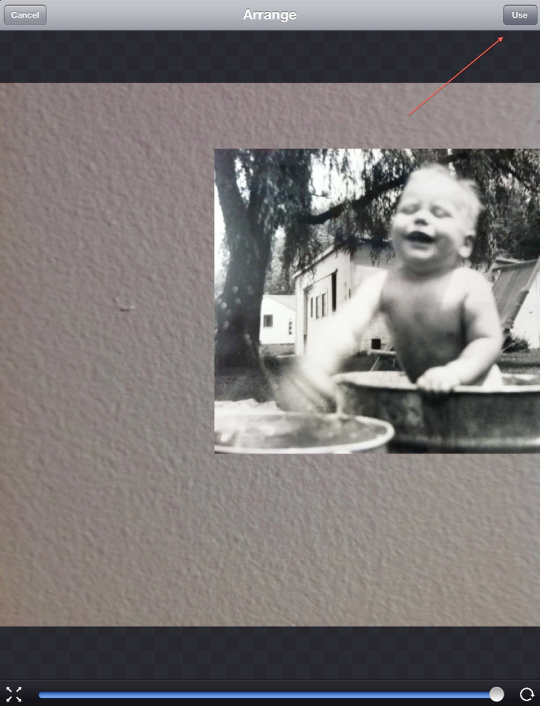
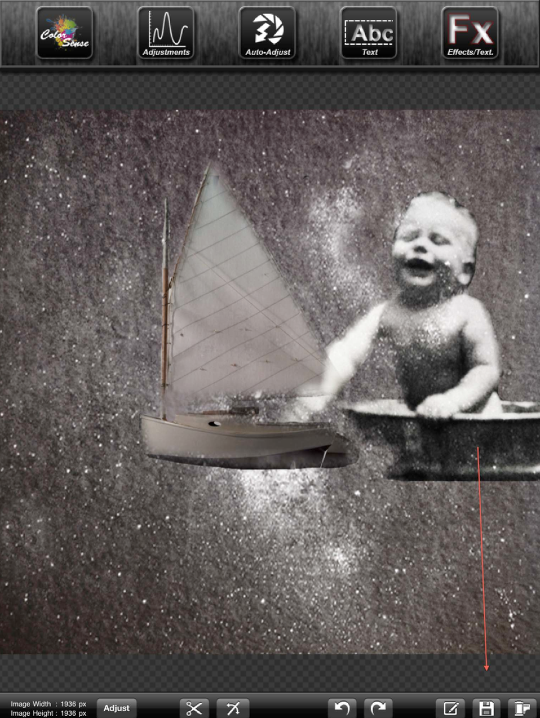
I brought in an image of a barefoot boy with cheeks of tan…
Step 8
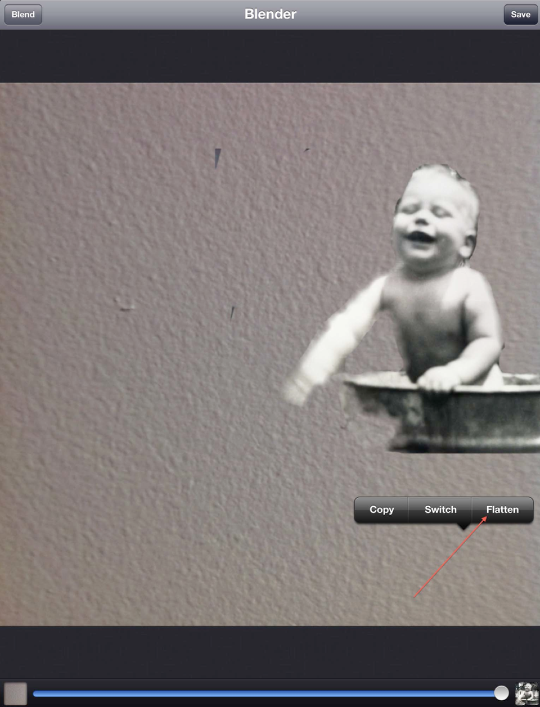
I arranged, masked, and blended (Normal @100)…then flattened.
Step 9
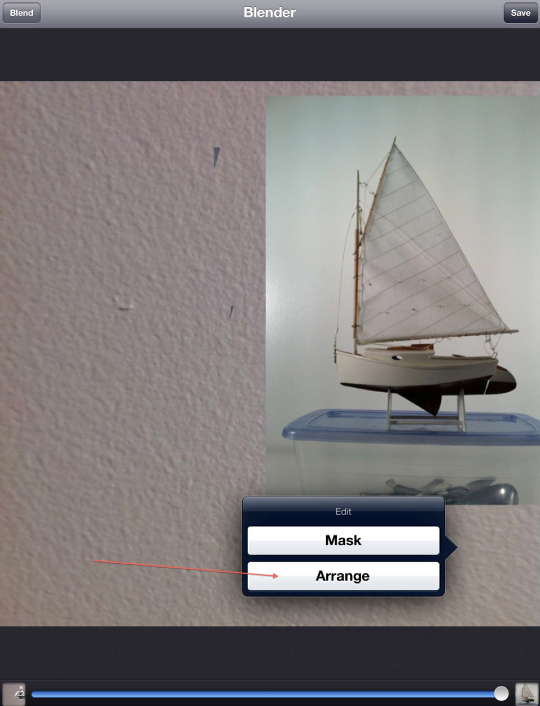
Next, I used an image of a “toy boat”….
Step 10
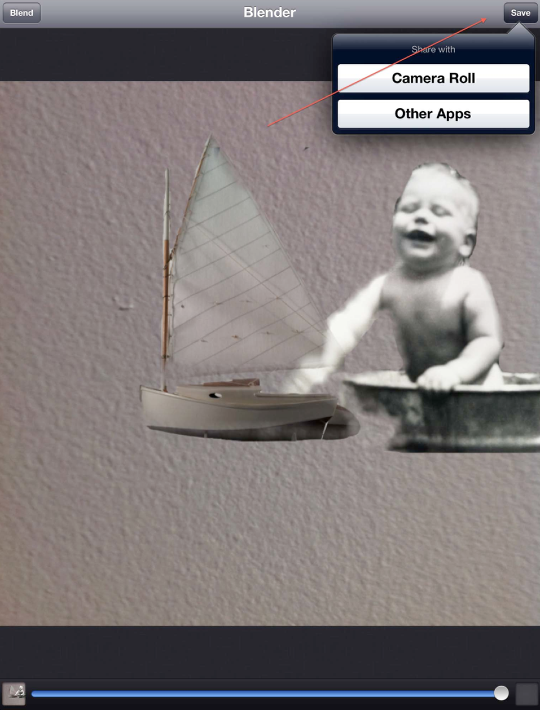
Once again, I arranged, masked and blended. (Normal @ 100%) I was all done with Blender, so I saved and moved onto Iris. (A side note here…you’ll notice that the edges of my two images are a bit “rough”. I wasn’t too concerned about this, as I knew my other layers would hide this in the end.)
Step 11
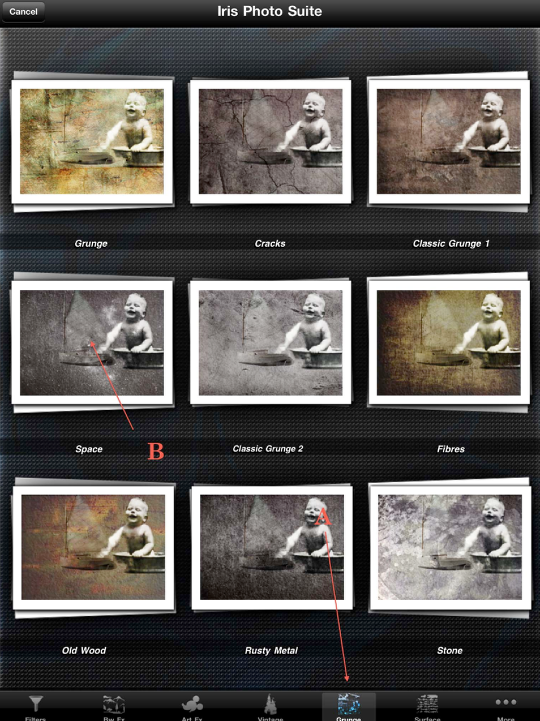
Moving on…I opened my image in Iris, went straight to FX Effects…chose “Grunge” (A)…and clicked on “Space” (B).
Step 12
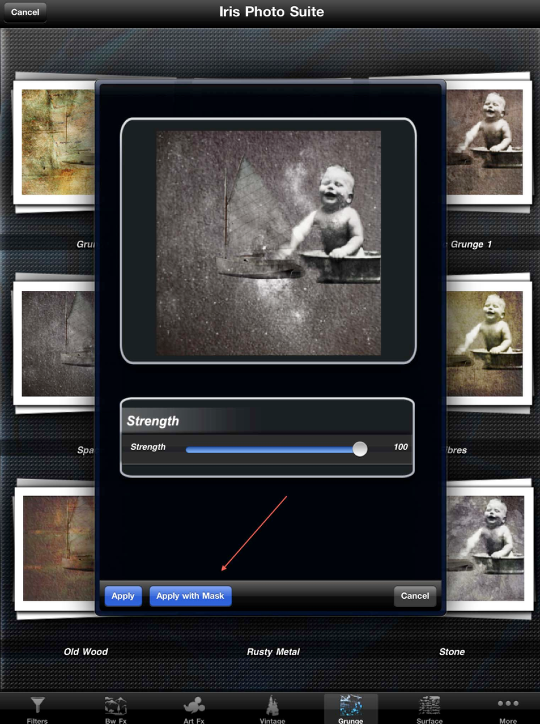
Using this filter at 100%, I clicked “Apply with Mask” so I could adjust the amount on the sailboat.
Step 14
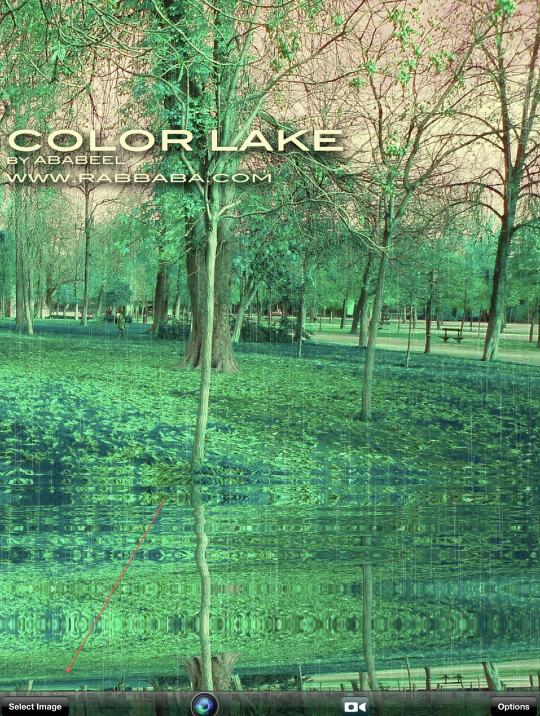
When Color Lake opened, I clicked on the “Select Image” tab in the lower left corner…
Step 15
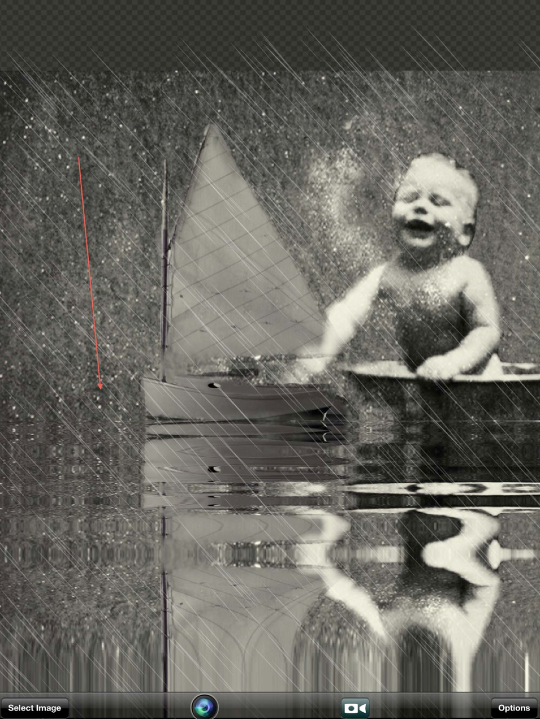
Now the fun begins!! I first brought the horizon line up to the my images….giving the sense that both the playtime boy and the boat where floating. (This screen shot doesn’t give a clear picture of the horizon line…I tried to point it out with my arrow.)
Step 16
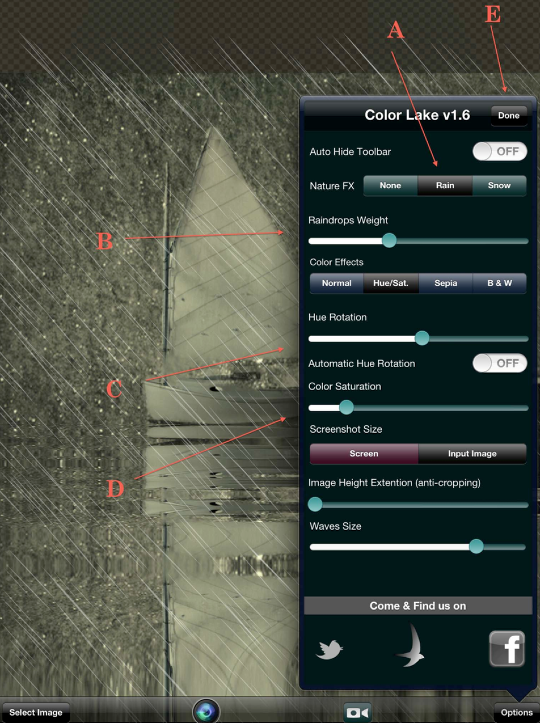
Clicking on the “Options” tab in the right corner, I chose “Rain” (A), adjusted the raindrop weight (B), played around with the hue and saturation of my final image using (C) and (D). Once done, click “Done”!
Step 17
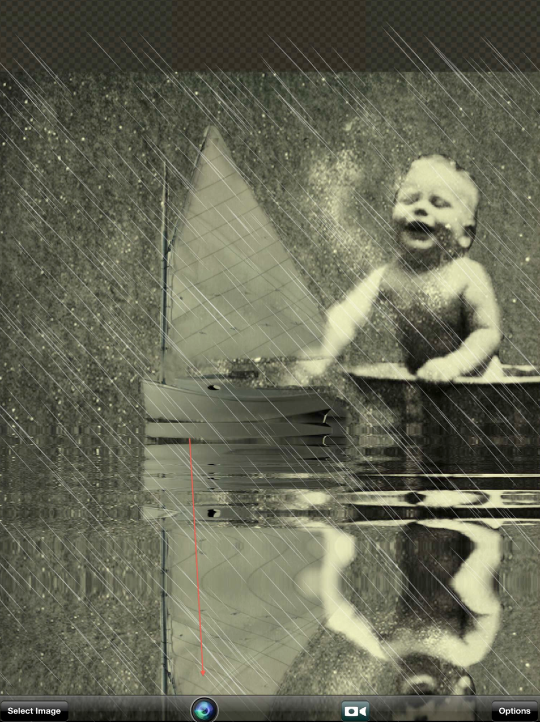
Okay…to finish your image you need to be observant! Watching the ripple/wave effects you have to pick the exact moment the ripples make your image perfect. Then… you hit the camera button pointed out by the arrow. This will take a snap of your image and save it to your camera roll!
Step 18
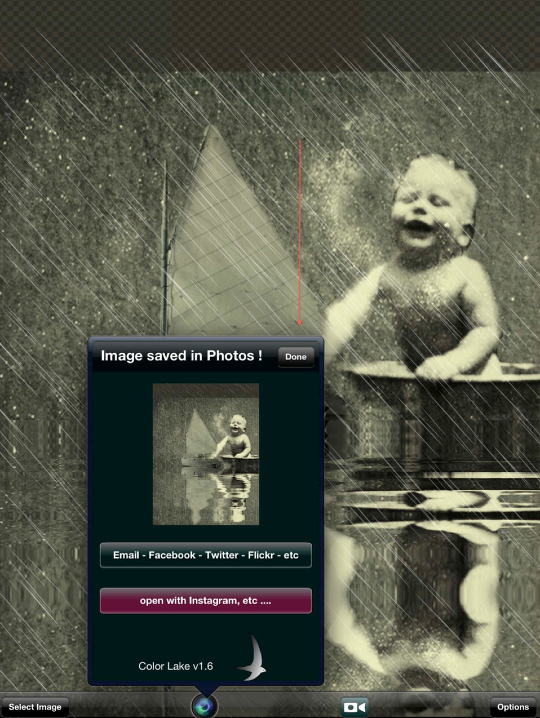
This pop-up screen will come up once the save is finished. Clicking the “Done” button will drop the pop-up screen and let you try again if needed.
One last thought…I’ve noticed that the Color Lake effects don’t always go edge to edge of your image. There might be a way of controlling this, but I haven’t figured out how to do so!? In any case, I used PS Express to do a quick square crop on my final image. Done!
Final Image
As always, I hope you found my tutorial both useful and enjoyable. Please don’t be shy about leaving comments, questions, etc. I do appreciate hearing from you!!!

8 Comments
Robert Lancaster
Nice one David!
Picked up some really nifty tips and ideas from you … again 🙂
Please keep posting these tutorials as I, and I am sure many others, really enjoy them.
David
Thanks, Robert! I’ll do my best!!!
Carol
Good one, Dave! I enjoy your tutorials very much. There is always something to be learned and this is no exception. Many thanks!
David
Thank you, Carol! And thank you for letting me know this…I do appreciate it!!
Irene Oleksiuk
Dave, great tutorial! Picked up some helpful tips and good ideas to play with.
David
Thanks Irene! Glad you found some tips and such to play with…that means I did a good job!!
Lilian
Great tutorial! Thanks for the tips!!!
David
You are welcome, Lilian. Glad it was helpful!!