Tutorial – Technical – ProCam
ProCam has been designed by Samer Azzam, the developer of Any Shape, to look and feel like a real pocket camera. After taking a look at this app for my new Technical Tutorial section of The App Whisperer I would have to agree that this is a nifty replacement camera app for your iPhone! The app has recently been updated too for the iPhone5 and iOS 6….however, I still don’t have my iPhone5 so I couldn’t take full advantage of what this app has to offer. In any case, let’s take a look at this app!
The tutorial relates to the latest version of ProCam V 1.5 that was updated on October 29. 2012. ProCam retails for $0.99/£0.69 and you can download it here.
Step 1
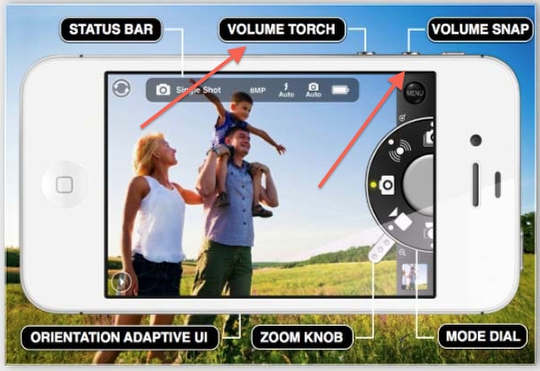
One of the first things that impressed me about this app was the fact that it had the capability to use the iPhone’s volume controls as shutter releases. The volume up control takes a “snap” and the volume down takes a snap while using the flash or “torch”. (I like this because it also means I can use my earbuds as a shutter release cable…this will come in handy doing macro shots!)
As you can also see from this screen shot taken from the developer’s website, ProCam gives you a nice, large image screen with a great status bar at the top along with such things as a Zoom Knob and Mode Dial…both of which I plan to discuss in more detail. The other cool aspect of ProCam is that it does have an “orientation adaptive UI”…which means it works in either landscape or portrait mode.
Step 2
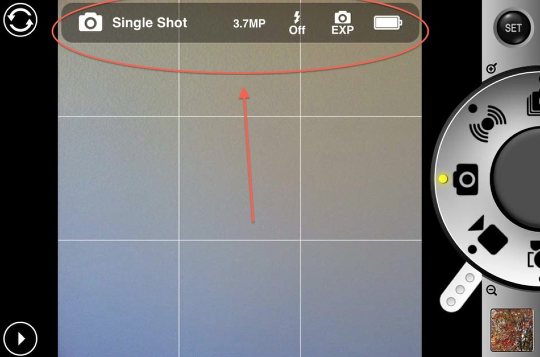
The status bar lets you see at a glance what shooting mode you’re in, your image size…which depends on your image ratio, whether your flash is on, and whether you’re in manual or auto exposure mode. There’s also a battery indicator!
Step 3
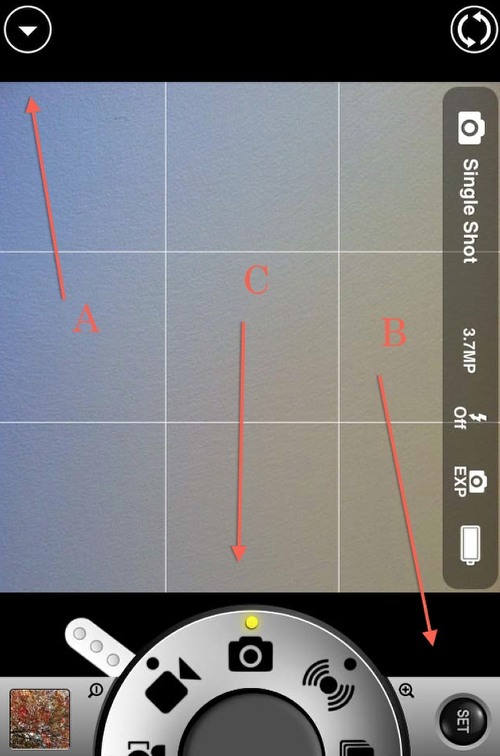
Let’s take a quick look at the main screen. Clicking on the Arrow tab (A) will bring up a screen for setting alignment grids, aspect ratios, image resolutions, and flash settings. The “Set” button (B) brings up a screen where you can set the volume snaps, geo-tagging, zoom, jpeg compression quality, timer settings, and anti-shake settings to name a few. The “Mode” dial (C) allows you to select your shooting modes.
Step 4
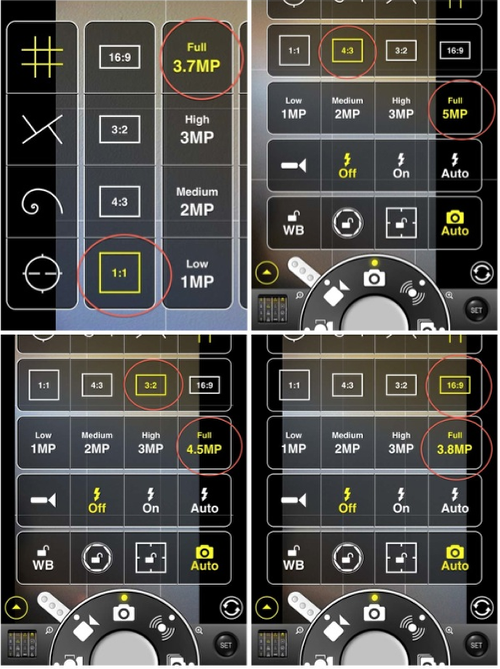
I created this grid to show you the different options available in this screen. Looking at the top left quadrant, you’ll see the different alignment grids in ProCam, including a compass grid, which is helpful keeping your horizon level. In this quadrant, I’ve also circled the 1:1 aspect ratio grid and it’s corresponding resolution, which at Full resolution is 3.7MP. Moving to the top right quadrant, you’ll see the 4:3 ratio circled with its Full resolution of 5MP. In this screen you can also see the various settings for flash/torch as well as WB, exposure, focus, or auto. The bottom left shows the 3:2 ratio and its 4.5 MP resolution while the bottom right shows the 16:9 resolution and its 3.8 MP resolution.
Step 5

I thought it would be interesting to take four snaps of the same image using each of the above settings. I also used the app, Lab (LateNiteSoft, S.L) in this “study”. (All images were first saved to my Camera Roll.)
This first shot used the 1:1 aspect ratio with a resolution of 3.7 MP or 1936×1936. It also takes up 2.02 Mb.
Step 6

This shot was at the 4:3 ratio with a resolution of 5.0 MP or 2592×1936. It takes up 2.84 Mb.
Step 7

This shot was at the 3:2 ratio with a resolution of 4.5 MP or 2592×1728, taking up 2.58 Mb.
Step 8

And finally, this shot was the 16:9 aspect ratio with a resolution of 3.8 MP or 2592×1458, taking up 2.54 Mb.
Step 9
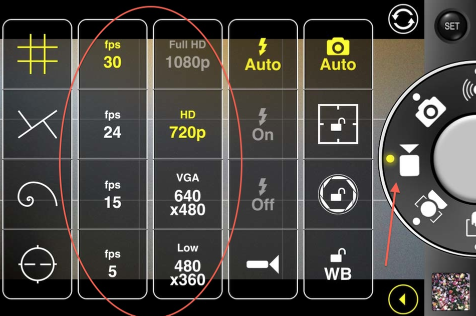
While I was still in this screen, I used the Mode Dial to switch to the video settings. As you can see from this screen, there are four different film speeds to work with along with four different resolution settings. ProCam is optimized for iPhone5 which does allow for the Full HD res of 1080p…unlike my iPhone4.
Step 10
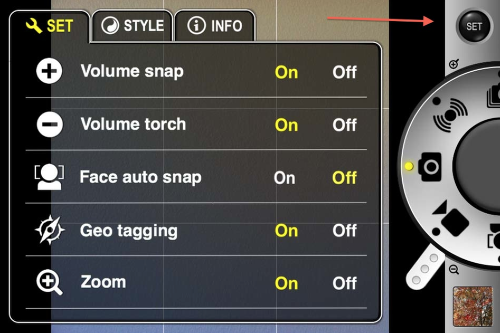
Moving to the “Set” tab, this screen shot show the beginning of all the controls ProCam has available.
Step 11
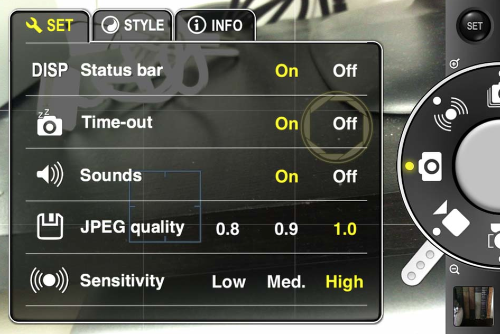
Scrolling down are more…
Step 12
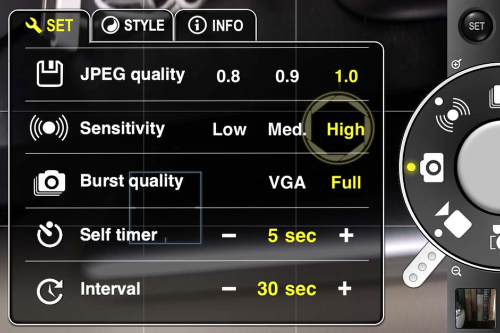
…and more! As I hope you can tell, ProCam does allow for lots of personal fine tuning!!
Step 13
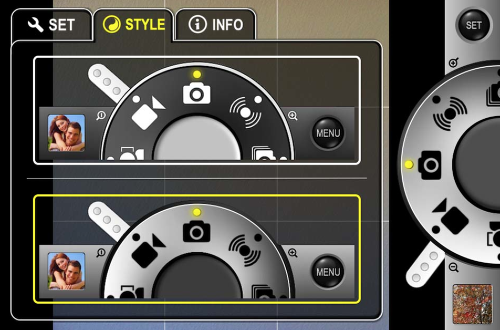
Clicking on the “Style” tab lets you chose between silver or black Mode Dial.
Step 14
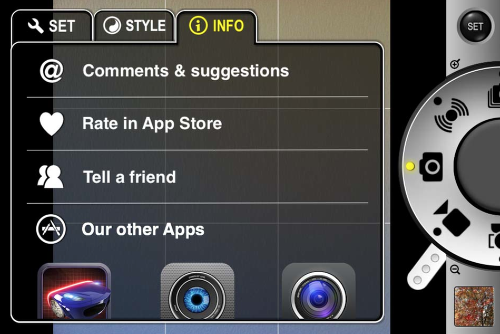
And the “Info” tab gives you these options. (I had hoped that there would be some sort of tutorial in this screen…but I didn’t find any. Not even a link to their support page but this is something that the developers could easily incorporate in a future update.
Step 15
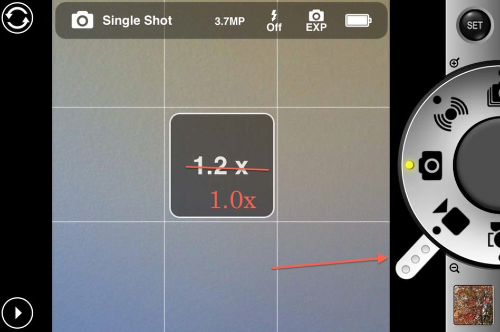
Next, the zoom control! You begin with 1.0… (not the 1.2 showing on the screen…I had a devil of the time getting a screen shot before the indicator faded away.)
Step 16
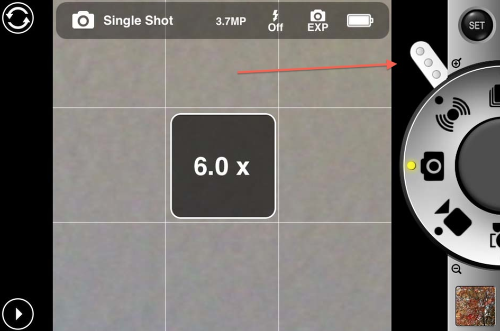
…and go to a digital zoom of 6.0x. I like this zoom control versus the usual pinch and squeeze controls that some apps use so this is a nice touch.
Step 17
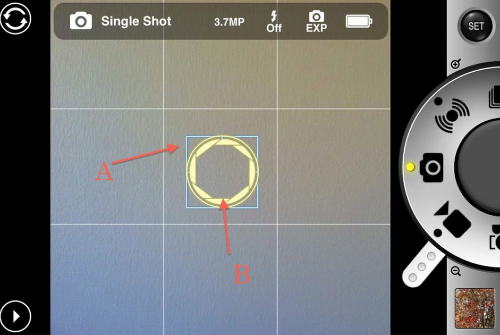
Let’s take a look at the manual focus (A) and exposure (B) controls next. Doing a two-finger tap on the screen activates these. This will bring up the blue focus box and yellow exposure circle. These then can be moved to different points of your image, establishing your focus and exposure points. I have found there is a bit of a lag time when you move one of these points…not a big deal, just something to be aware of when your composing your images.
Step 18
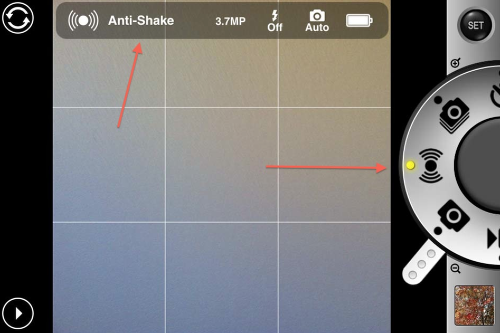
Moving the Mode Dial to the indicated symbol activates the “Anti-Shake” mode. Its sensitivity is set in the “Setting” screens.
Step 19
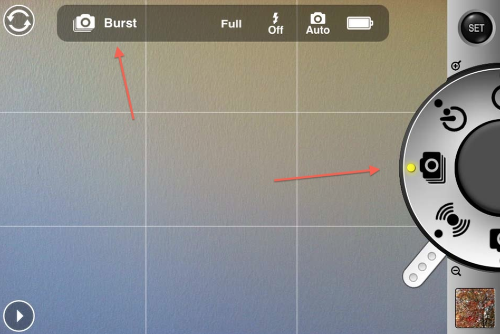
Going around the Mode Dial, next up is the Burst mode. As with the “Anti-Shake” mode, the settings for this are also found in the “Settings” screens. I would suggest you try this mode out a couple of times before using it for “real”. I received a “fail to save” error message several times when I tried to “Burst” too fast for my quality settings.
Step 20
The “Self-Timer” mode is next…set the time for this in Settings. Clicking on the shutter button gets things rolling.
Step 21
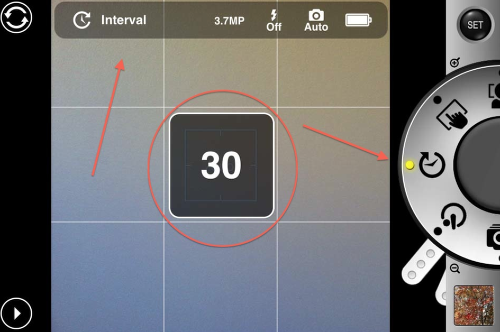
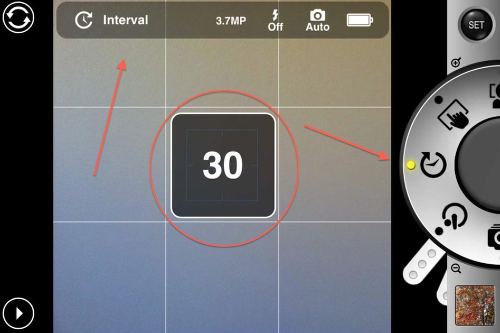
“Interval” mode follows the “Self-Timer”…again, set the time for this in Settings. While you’re in this mode, ProCam will continue to take a snap at the interval rate you’ve set…until you stop in by clicking the shutter button again. (Or you run out of memory!) All sorts of possibilities with this mode!!
Step 22
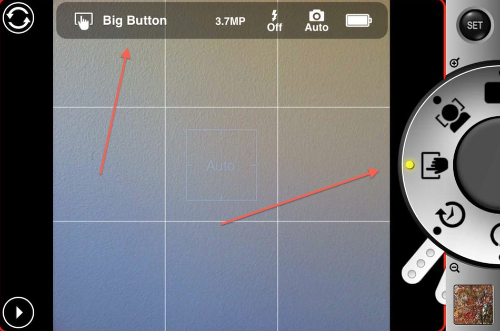
“Big Button” turns your entire screen into a shutter button. Of course, you won’t be able to use the manual focus/exposure modes then…but life is full of trade-offs!
Step 23
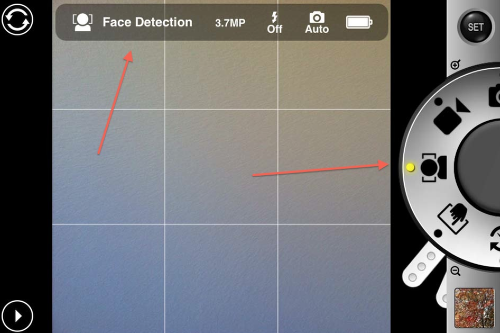
“Face Detection” mode is pretty cool! I found it fairly accurate recognizing faces…even ones on my television screens. You do have to be careful with this, as it will continue to snap a picture every time you point it at a face. When I was trying it out, I kept getting that “fail to save” error message. You do have to give ProCam time to save to your camera roll!
Step 24
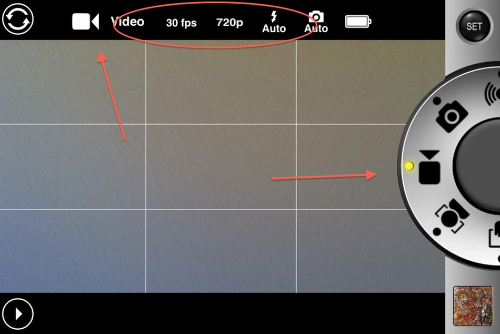
The last function on the Mode Dial is “Video”. When in this mode, the status bar shows the fps and resolutions settings you’ve preset.
This finishes up my overview of ProCam. As always, I hope you found this article to be both informative and interesting. Please don’t be shy with your comments and/or questions. I do love hearing from you!


7 Comments
Anne
A ProCam tutorial! Been waiting for this. Thank you!
David
You’re welcome, Anne! I hope this was helpful to you!!
Barry
Get a message when I take picture “save to camera roll failed (-3311)”
Then it says ” photo library access disabled, either your photo library is empty or you have denied ProCam access to it. Please enable access in settings.”
How do I enable?
Gusson
I have the same problem as Barry. Have gone through all the settings. Everything looks right but it still won’t allow me to take pictures.
David
Barry ~ Go to Privacy in your Settings menu. In the Privacy menu, click on Photos. Scroll thru the list of apps and find ProCam. Make sure it’s setting is “On”. If not, slide it to On and this should do the trick.
Jim
i’ve changed my privacy settings as previously mentioned on my Iphone 5. I videotaped my daughter’s kindergarten spring concert with this app. It seemed to be recording the entire time (approx 10 mins) however, when finished recording, I was unable to locate the video footage. Any ideas where it would be located?
Thanks!!!!
David
Jim – I don’t what to tell you other to double check your Camera Roll and Photo Stream? That would be the only places that ProCam would save. Are your still images saving okay? Another thought…did you stop your recording by hitting the shutter button and not just the pause button? I know from experience that if I close ProCam after just hitting Pause, it doesn’t save my clips. You might also contact the developer about this…they are very helpful!
Dave