Tutorial – Technical – Layover – A First Look
For a long time there were only a couple of apps that everyone seemed to use when they wanted to blend layers. Apps like Iris, Image Blender, and Juxtaposer. Each of these have their strengths and are quite dependable blenders. However, you can only blend two layers at a time when using these which can slow you down if, you’re working with more than two layers while building your image.
Recently the same folks, Peak Systems, that brought us Diptic introduced a new blending app, Layover. It’s been out long enough to work out some of its newness and was updated back in mid-October. What’s special about Layover is that you can blend up to five images at one time! Not only that…it also gives you the capability to move the layers around much like a certain desk-top photo editor we all know about it.
Layover does take some use before understanding fully. I’ve been using it for a while now and I think I’ve figured out most of its quirks, which is why I felt it safe to put together a couple of tutorials on it. This first tutorial will be a quick overview of its features…enough to get you started if you haven’t used Layover before. My second tutorial will put Layover through its paces for you. So…let’s get started!
Hopefully, this tutorial will inspire you to try Layover for yourselves. You can download it here, it retails for $0.99/£0.69/download.
Step 1
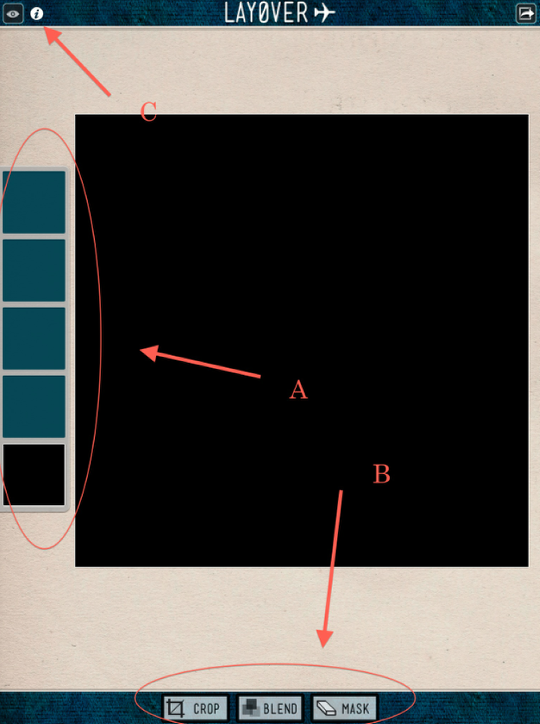
The opening screen presents you with a “working area”, thumbnail views for five images (A), and a control panel (B). The most important feature on this screen if you are a “newbie” to Layover is that little “i” icon (C) at the top left corner. Go ahead, click on it before you do anything else…you’ll be glad you did!
Step 2
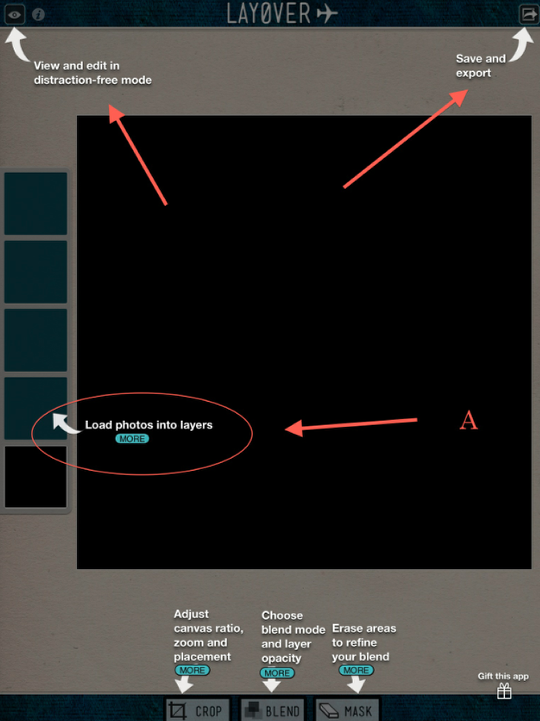
What you are given is Layover’s tutorial screens. I will have to say that they have done a great job giving you a beginner’s explanation…such that I would also have to say…why re-invent the wheel! So I’m just going to show you theirs!
At the top corners, you can find the tabs to turn off the edit screens and to save your images. Moving down the screen on the left, you’ll see a legend pointing to the layer screens (A) and the tab “MORE” underneath this. Yep…go ahead and click on that! (Oh…a tip. It’s not easy to activate these tabs. You need to firmly put you finger on it, hold for a moment…and then release. It took me a couple of tries to figure this out…)
Step 3
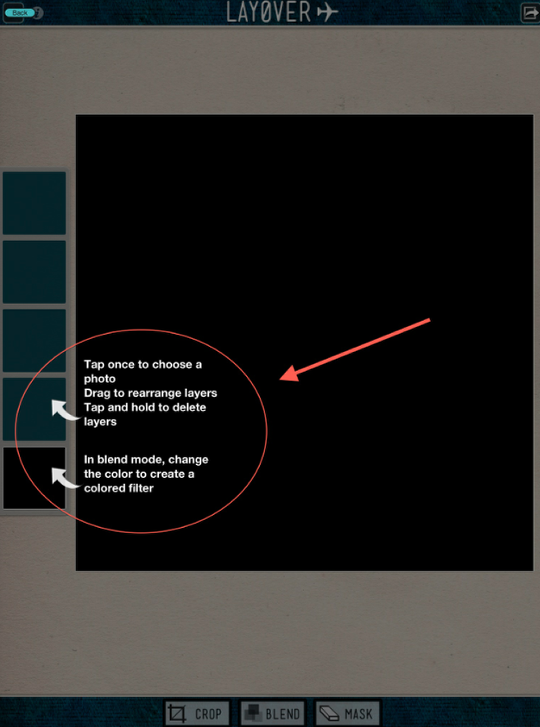
What come up next are more directions on how to use these layering screens. Pretty nifty! The bottom layer is always your first layer or blending layer. You can change the color of this as they’ve indicated or you can bring in your own layer. This layer will also move if you need to rearrange.
Step 4
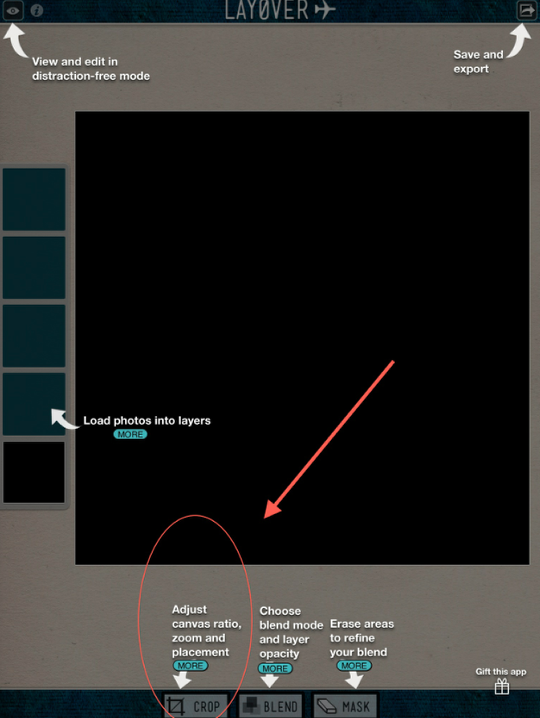
Back to the “Home” tutorial screen…next up is the “Crop” function. Go ahead, click on “More”!
Step 5
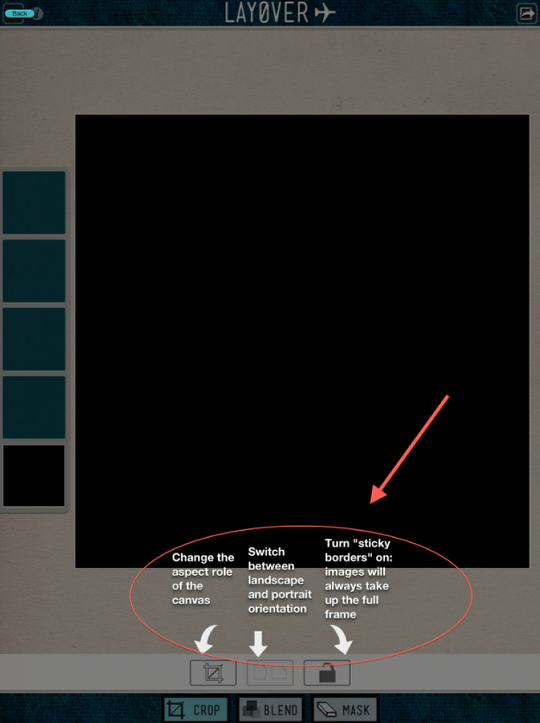
As you can see from this screen, the first icon on the left will change the base image’s aspect ratio. You can also use this to move around images in each layer as well as change image size. The center icon switch between landscape and portrait while the last icon turns on “sticky borders”.
Step 6
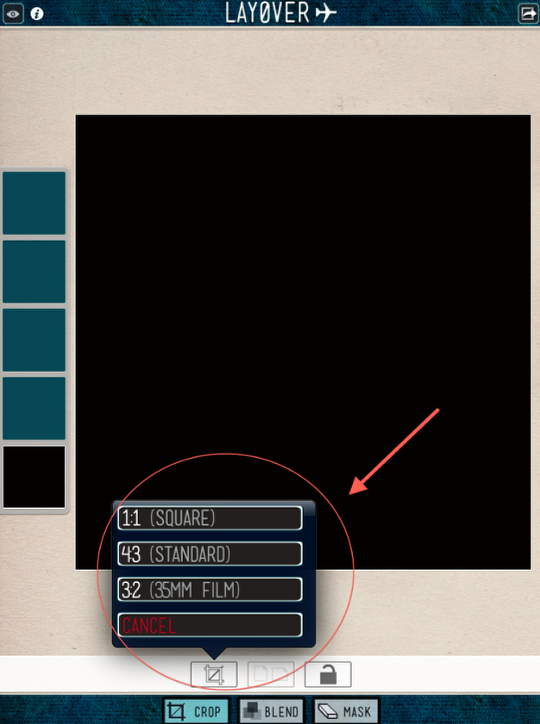
This isn’t in Layover’s tutorial, but I thought it would be helpful to show you aspect ratios available for your use. Default is 1:1.
Step 7
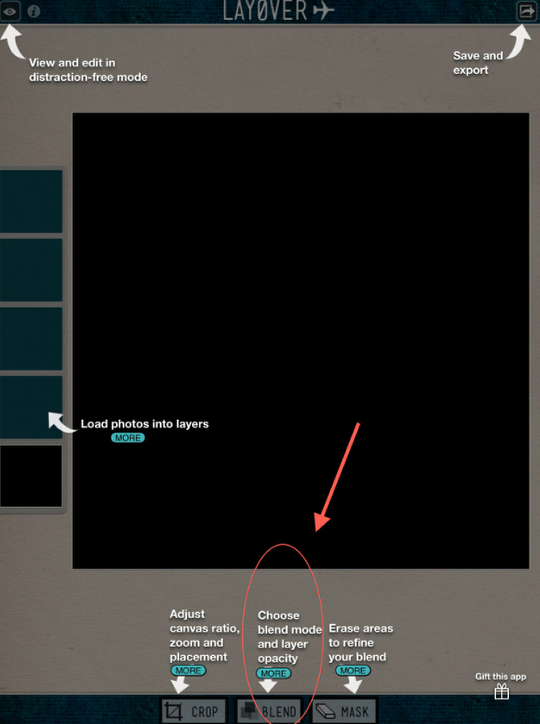
Next up on the tutorial screen is “Blend”. Let’s see what comes up when you click on “More”!
Step 8
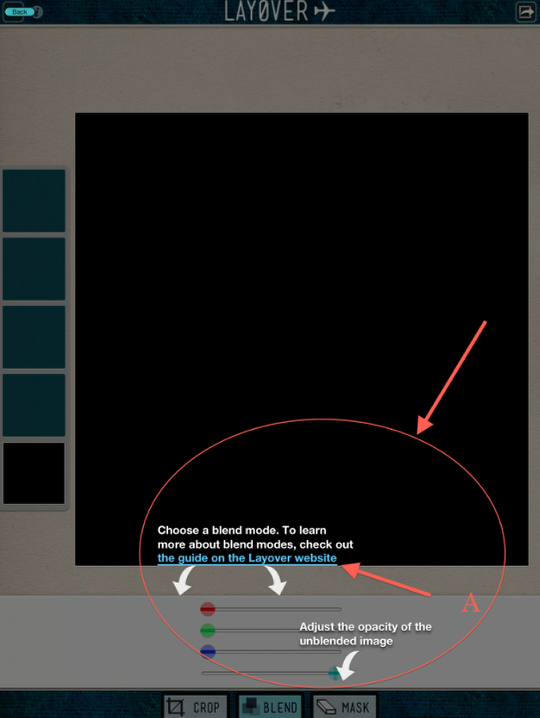
Okay…now I will have to say that I didn’t find this screen very helpful…at least at first. What this shows you is the slider bars you can use to change the color and opacity of the bottom-blending layer. Layover offers 15 different blend effects…so I’m thinking…where are those!? Well…just click on the link “the guide on the Layover website”!
Step 9
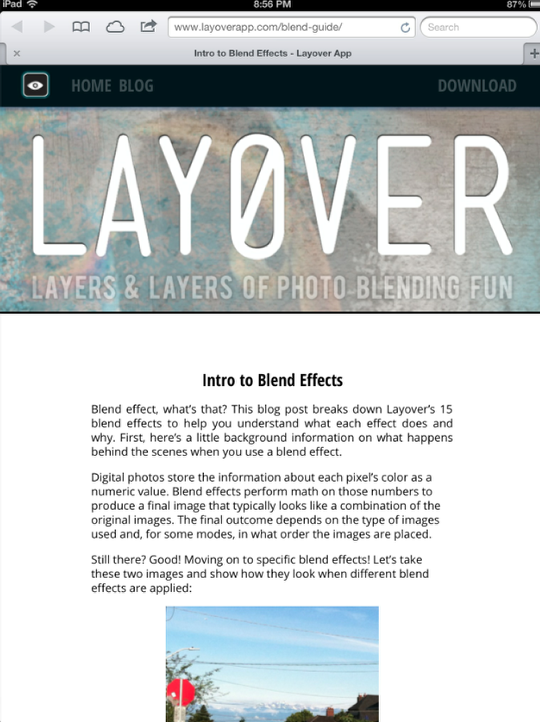
Here it is…a great little “Intro to Blend Effects”! Layover goes through each of its 15 effects, tells you what each effect will do to you image AND gives example images. Don’t blow this off even if you’re a blending pro…always helps to have a refresher. If you’re a beginner…do spend the time to read over this!
Step 10
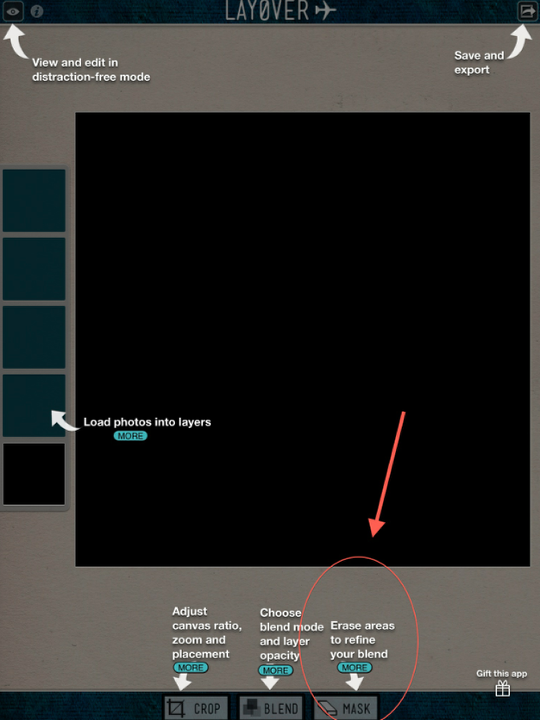
Last up in their tutorial is “Mask”. Last but certainly not least in importance!! Let’s see what comes up here!
Step 11
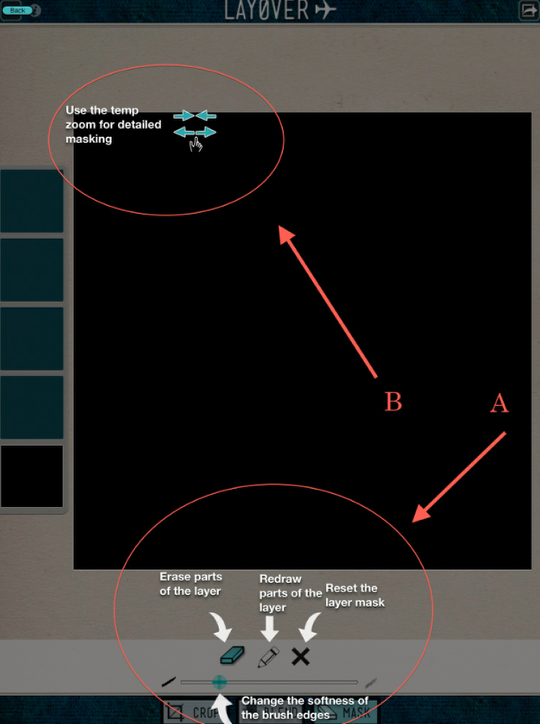
In “Mask” mode, you can do the usual things you’ve come to expect…erase, redraw, reset parts of the layer. You can also change the softness of the brush, however you can’t change the size of the brush. You can use the temp zoom control (B) to zoom in and out of you image as you mask.
And there you are…a quick overview of this versatile app! Just enough to get you started, interested, and not bored!! In the next tutorial, I’ll show you how I used 4 images and a blending layer to put all of this to use. I hope you will join me then!!
As always, I do appreciate your comments and questions. Please don’t be shy!

11 Comments
Anne
Thanks David! Looking forward to part two.
Christian
Photoforge2 😉
tanci
You’ve already helped me understand it better, though I’ve used it many times.
Thanks!
David
And thank you, Anne! I just submitted part two this afternoon so hopefully it will be up soon!
Dilshad
Great!! Very simple to follow and not bored at all! Thank you!
David
Christian ~ you’re absolutely right! I had forgotten that Photoforge2 does offer layering. While I have this app in my “tool box” I don’t use it often so I had forgotten about this fact. What is your experience in using layers in this app? How does it compare to the others? I’ll need to play around with this more!! Thanks for bringing it to our attention as I didn’t mean to overlook it. So many apps….so little time!
David
Tanci ~ So glad I was of help! Hopefully my second tutorial on Layover will also be helpful to you!
David
Dilshad ~ I’m so glad I didn’t bore you! Thanks for your input…I do appreciate it!!
RegiB
Thanks for working so hard to share your knowledge of iphoneography and editing apps. I really appreciate adding more columnists and still doing the interviews. Keep up all the hard work!!!
Joanne Carter
Thank you so much for your compliment, all gratefully received 😉 So pleased to hear that you’re loving what we do, that’s what makes it all so worthwhile.
David
And I second Joanne’s sentiments…thank you!!!